Table of Contents
Advertisement
Quick Links
Advertisement
Table of Contents

Related Manuals for Thecus VisoGuard V2510


Summary of Contents for Thecus VisoGuard V2510
- Page 1 Thecus VisoGuard V2510/V4510/V4510U/V5510 V6810/V8810U/V16810U User’s Manual...
-
Page 2: About This Manual
About This Manual All information in this manual has been carefully verified to ensure its correctness. In case of an error, please provide us with your feedback. Thecus Technology Corporation reserves the right to modify the contents of this manual without notice. -
Page 3: Safety Warnings
Do NOT expose Thecus VisoGuard to dampness, dust, or corrosive liquids. Do NOT place Thecus VisoGuard on any uneven surfaces. DO NOT place Thecus VisoGuard in direct sunlight or expose it to other heat sources. DO NOT use chemicals or aerosols to clean Thecus VisoGuard. Unplug the power cord and all connected cables before cleaning. -
Page 4: Table Of Contents
Before You Begin ................. 21 Cable Connections ................21 Chapter 3: First Time Setup ............24 Overview ..................... 24 Thecus Setup Wizard ................24 LCD Operation (V4510U/V5510) ............26 OLED Operation(V4510/V6810/V8810U/V16810U)......28 USB Copy..................... 28 Typical Setup Procedure ..............29 Chapter 4: System Administration .......... - Page 5 Local Group Configuration.............. 63 User and Group Backup ..............65 Network Service .................. 65 Samba / CIFS ................65 FTP ..................... 66 SSH .................... 67 DDNS..................68 UPnP Port Management ..............68 Application Server ................70 Module Installation ............... 70 External Devices..................
-
Page 6: Chapter 1: Introduction
Product Highlights File Server First and foremost, the Thecus VisoGuard allows you to store and share files over an IP network. With a Network Attached Storage (NVR) device, you can centralize your files and share them easily over your network. With the easy-to-use web-based interface, users on your network can access these files in a snap. -
Page 7: Package Contents
Package Contents V8810U/V16810U The Thecus VisoGuard should contain the following common items: System Unit x1 QIG (Quick Installation Guide) x1 CD-Title Ethernet Cable x1 Accessory bag x1 HDD Compatibility list Card x1 Multiple Languages Warranty Card x1 Power cord x2... -
Page 8: Front Panel
Front Panel V8810U: Front Panel Item Description 1.Power Button • Power on/off V8810U 2.Power LED • Solid green: System is power on. 3.System error LED • Solid RED: System error. 4.Mute button • Mute the system fan alarm. 5.USB Port •... - Page 9 V16810U: The Thecus V16810U front panel has the device’s controls, indicators, and hard disk trays: Front Panel Item Description 1.Power Button • Power on/off V16810U 2.Power LED • Solid green: System is power on. 3.System error LED • Solid RED: System error.
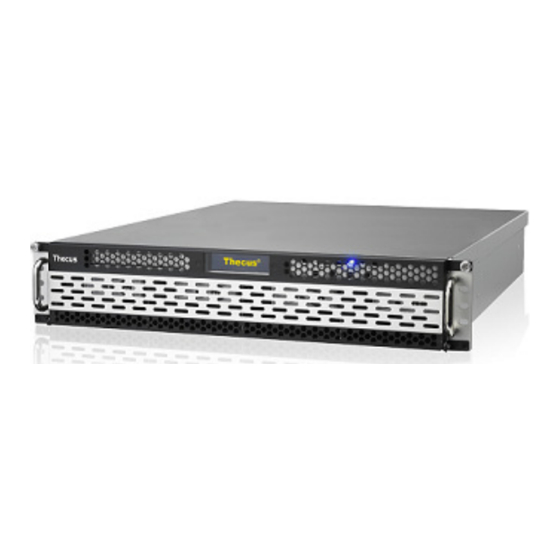
- Page 10 V2510: The Thecus V2510’s front panel has the device’s controls, indicators, and hard disk trays: Front Panel Item Description 1. Power Button • Powers the V2510 on/off. 2. USB Port • USB 3.0 port for compatible USB devices, such as digital cameras, USB disks, and USB printers.
- Page 11 V4510: The Thecus V4510 front panel has the device’s controls, indicators, and hard disk trays: Front Panel Item Description V4510 1.Power Button • Power on/off 2.OLED • Displays current system status and messages • OLED screen saver will be enabled after screen is left idle for more than 3 mins •...
- Page 12 V4510U: The Thecus V4510U front panel has the device’s controls, indicators, and hard disk trays: Front Panel Item Description 1. LCD Display • Displays the current system status and warning messages. • Displays hostname, WAN/LAN1/LAN2 IP addresses, RAID status, and current time.
- Page 13 V5510: The Thecus V5510 front panel has the device’s controls, indicators, and hard disk trays: Front Panel Item Description 1.System LED • Blinking orange: System is being upgraded or ;is starting up; data currently inaccessible 2.WAN/LAN1 LED • Solid green: Network link •...
- Page 14 V6810: The Thecus V6810’s front panel has the device’s controls, indicators, and hard disk trays: Front Panel Item Description 1. Power Button Power on/off V6810 • 2. USB Port USB 2.0 port for compatible USB devices, such as digital •...
-
Page 15: Rear Panel
Rear Panel V8810U Back Panel Item Description 1.Power Connector • Connect the included power cords to these connectors 2.Serial Port • This port is for external UPS device 3.eSATA Port • eSATA port for high-speed storage expansion 4.USB Port • USB 2.0 port for compatible USB devices, such as USB disks, and USB printers 5.USB Port •... - Page 16 2.Serial Port • This port is for external UPS device 3.eSATA Port • eSATA port for high-speed storage expansion 4.USB Port • USB 2.0 port for compatible USB devices, such as USB disks, and USB printers 5.USB Port • USB 3.0 port for compatible USB devices. 6.WAN/LAN1 Port •...
- Page 17 V4510: The V4510 rear panel features ports and connectors. Back Panel Item Description Power For connect the power adaptor • Connector WAN/LAN1 WAN/LAN1 port for connecting to an Ethernet network through a • Port switch or router LAN2 Port LAN2 port for connecting to an Ethernet network through a switch •...
- Page 18 V4510U: The rear panel of the V4510U with a single power connector: Back Panel Item Description 1.Power Connector • Connect the included power cords to these connectors 2. WAN/LAN1 Port • WAN/LAN1 port for connecting to an Ethernet network through a switch or router 3.
- Page 19 V5510: The V5510 rear panel features ports and connectors. Back Panel Item Description 1.Power Connector • Connect the included power cords to these connectors 2. WAN/LAN1 Port • WAN/LAN1 port for connecting to an Ethernet network through a switch or router 3.
- Page 20 V6810: The V6810 rear panel features ports and connectors. Back Panel Item Description 1.Power Connector • Connect the included power cords to these connectors 2.Serial Port • This port is for external UPS device 3.eSATA Port • eSATA port for high-speed storage expansion 4.USB Port •...
-
Page 21: Overview
Chapter 2: Hardware Installation Overview Your Thecus VisoGuard is designed for easy installation. To help you get started, the following chapter will help you quickly get your Thecus VisoGuard up and running. Please read it carefully to prevent damaging your unit during installation. - Page 22 Plug the other end of the cord into a surge protector socket. V8810U/V16810U power socket ▲ V6810 power socket ▲ V2510 power socket V4510 power socket ▲ ▲ V4510U power socket 3. Press the power button on the Front Panel to boot up the Thecus VisoGuard. V8810U/V16810U button ▲...
- Page 23 V2510 power button V4510 power button V6810 power button ▲ ▲ V4510U power button ▲...
-
Page 24: Chapter 3: First Time Setup
Once the hardware is installed, physically connected to your network, and powered on, you can configure the Thecus VisoGuard so that it is accessible to your network users. There are two ways to set up your Thecus VisoGuard: using the Thecus Setup Wizard or the LCD display. - Page 25 6. Name your Thecus VisoGuard and configure the network IP address. If your switch or router is configured as a DHCP Server, configuring the Thecus VisoGuard to automatically obtain an IP address is recommended. You may also use a static IP address and enter the DNS Server address manually.
-
Page 26: Lcd Operation (V4510U/V5510)
The Thecus Setup Wizard is designed for installation on systems running Windows NOTE XP/2000/vista/7 or Mac OSX or later. Users with other operating systems will need to install the Thecus Setup Wizard on a host machine with one of these operating systems before using the unit. LCD Operation... -
Page 27: Display Mode
USB Copy The USB Copy function enables you to copy files stored on USB devices such as USB disks and digital cameras to the Thecus VisoGuard by press button. To use USB copy, follow the steps below: 1. Plug your USB device into an available USB port on the Front end. -
Page 28: Oled Operation(V4510/V6810/V8810U/V16810U)
USB Copy The USB Copy function enables you to copy files stored on USB devices such as USB disks and digital cameras to the Thecus VisoGuard with a press of a button. To use USB copy, follow the steps below:... -
Page 29: Typical Setup Procedure
B B B B Step 3: Create Local Users or Setup Authentication Once the RAID is ready, you can begin to create local users for Thecus VisoGuard. For more on managing users, go to Chapter 4: User and Group Authentication. - Page 30 SMB/CIFS File Transfer Protocol (FTP)
-
Page 31: Chapter 4: System Administration
1. Type the Thecus VisoGuard IP address into your browser. (Default IP address is http://192.168.1.100) Your computer’s network IP address must be on the same subnet as the Thecus NOTE IP storage. If the Thecus IP storage has default IP address of 192.168.1.100, your managing PC IP address must be 192.168.1.x, where x is a number... -
Page 32: My Favorite
Following by disclaim page, you will see the Web Administration Interface. From here, you can configure and monitor virtually every aspect of the Thecus VisoGuard from anywhere on the network. My Favorite The user interface with “My Favorite” shortcut is allowed user to designate often used items and have them display on the main screen area. -
Page 33: Menu Bar
Menu Bar The Menu Bar is where you will find all of the information screens and system settings of Thecus VisoGuard. The various settings are placed in the following groups on the menu bar: Menu Bar Item Description System Information Current system status of the Thecus VisoGuard. -
Page 34: Logout
Display system temperature, click to go to Temperature System Status page as shot cut. Logout Click to logout Web Administration Interface. Language Selection The Thecus VisoGuard supports multiple Languages, including: English • Japanese • Traditional Chinese •... -
Page 35: System Information
Information provides viewing on current Product info, System Status, Service Status and Logs. The menu bar allows you to see various aspects of the Thecus VisoGuard. From here, you can discover the status of the Thecus VisoGuard, and also other details. -
Page 36: System Management
Re-loading logs. System Management The System Management menu gives you a wealth of settings that you can use to configure your Thecus VisoGuard system administration functions. You can set up system time, system notifications, and even upgrade firmware from this menu. -
Page 37: Time: Setting System Time
Select YES to allow Thecus VisoGuard to synchronize with an NTP Server server of your choice. Press Apply to change. If an NTP server is selected, please make sure your Thecus IP storage has been WARNING setup to access the NTP server. -
Page 38: Firmware Upgrade
• The beeper only beeps if it is enabled in the System Notification menu. NOTE • Check Thecus website for the latest firmware release and release notes. • Downgrading firmware is not permitted. Do not turns off the system during the firmware upgrade process. -
Page 39: Config Mgmt
The system configuration you have backup can be only restore in same firmware version. And the backup details have excluded user/group accounts. Factory Default From the menu, choose the Factory Default item and the Reset to Factory Default screen appears. Press Apply to reset Thecus VisoGuard to factory default settings. -
Page 40: Reboot & Shutdown
Resetting to factory defaults will not erase the data stored in the hard disks, but WARNING WILL revert all the settings to the factory default values. Reboot & Shutdown From the menu, choose Reboot & Shutdown item, and the Shutdown/Reboot System screen appears. - Page 41 Once the system has rebooted, you will be returned to the File System Check prompt. There you will see the available RAID volumes to run the file system check. Check the desired RAID volumes and click Next to proceed with the file system check.
- Page 42 The system must be rebooted before Thecus IP storage can function NOTE normally after file system check complete.
-
Page 43: System Network
The available system network ports are coming from embedded of system and additionally added from reserved PCI-e slot with associated compatible list. Therefore, the screen shows above is example from Thecus N16000 with 3 GbE NIC on board and installed additional Intel PRO/1000 PT quad port NIC, it makes total 7 NIC ports for the system. -
Page 44: Dhcp/Radvd
• A correct DNS setting is vital to networks services, such as SMTP and NTP. Most Fast Ethernet (10/100) Switches/Routers do not support Jumbo Frame and you will not WARNING be able to connect to your Thecus NAS after Jumbo Frame is turned on. DHCP/RADVD From the System Network menu, choose DHCP/RADVD, and the DHCP/RADVD Configuration screen appears. -
Page 45: Linking Aggregation
The IP address of associate NIC should not be in the range of the Start IP WARNING address and End IP address (IPv4). Linking Aggregation The Thecus VisoGuard supports link aggregation from either on board network port or additional NIC. Simple click on “+” as screen shot indicate below. - Page 46 The associated screen shot will appear after “+” clicked. Select from available network port then move over to selected box. Click “Link” to confirm the selection. Then related screen will appear for more setting required to complete link aggregation configuration. Link1 Configuration Status Specific the network ports been used with associate link aggregation.
-
Page 47: Storage Management
Blank lines indicate that hard disk is not currently installed in that particular disk slot. • The screen shot below just example from Thecus NVR. The disk slots can NOTE from 2,4,8,12 to 16 depend on the model of Thecus NVR. - Page 48 Disks Information Item Description Disk No. Indicates disk location. Capacity Shows the SATA hard disk capacity. Model Displays the SATA hard disk model name. Firmware Shows the SATA hard disk firmware version. Bad Block scan Yes to start scan Bad Block. S.M.A.R.T.
- Page 49 Item Description Tray Number Tray the hard disk is installed in. Model Model name of the installed hard disk. Power ON Hours Count of hours in power-on state. The raw value of this attribute shows total count of hours (or minutes, or seconds, depending on manufacturer) in power-on state.
-
Page 50: Raid Information
From the Storage menu, choose the RAID item and the RAID Information screen appears. This screen lists the RAID volumes currently residing on the Thecus VisoGuard. From this screen, you can get information about the status of your RAID volumes, as well as the capacities allocated for data. - Page 51 Using Create RAID, you can select stripe size, choose which disks are RAID disks or the Spare Disk. . RAID Configurations Item Description Disk No. Number assigned to the installed hard disks. Capacity (MB) Capacity of the installed hard disks. Model Model number of the installed hard disks.
- Page 52 Thecus VisoGuard Series only supports single RAID NOTE sysetm. 3. Specify a RAID ID. 4. Quick RAID — Enabled the quick RAID setting is going to enhance RAID creation time. We recommend is “Quick RAID” setting is going to be used, only if hard disk NOTE is brand new or it has no existed partitions contained.
- Page 53 8. Press “Yes” for RAID volume creation preparation. Then click “Finish” to start up with RAID volume building. Building a RAID volume may take time, depending on the size of hard drives NOTE and RAID mode. In general, while the RAID volume building process is up to “RAID Building”...
- Page 54 RAID Level You can set the storage volume as JBOD, RAID 0, RAID 1, RAID 5, RAID 6, RAID 10, RAID 50 or RAID 60 (depend on model). Level JBOD RAID 0 RAID 1 RAID 5 RAID 6 RAID 10 RAID 50 RAID 60 Model...
- Page 55 Remove RAID Click to remove the RAID volume. All user data has been created in selected RAID volume will be removed. To remove a RAID volume, follow the steps below: 1. On the RAID List screen, select the RAID volume by clicking on its radio button, and click RAID Information to open the RAID Configuration screen.
-
Page 56: Share Folder
Share Folder From the Storage menu, choose Share Folder, and the Folder screen appears. This screen allows you to create and configure folders on the Thecus VisoGuard volume. Adding Folders On the Folder screen, press the Add button and the Add Folder screen appears. - Page 57 Add Folder Item Description RAID ID RAID volume where the new folder will reside. Folder Name Enter the name of the folder. Public Admit or deny public access to this folder. If Yes is selected, then users do not need to have access permission to write to this folder.
-
Page 58: Folder And Sub-Folders Access Control List (Acl)
Modify Folder Item Description RAID ID RAID volume where the folder will reside. Folder Name Enter the name of the folder. Public Admit or deny public access to this folder. Remove Folders To remove a folder, press the Remove button from the specified folder row. The system will confirm folder deletion. - Page 59 ACL setting Item Description Deny Denies access to users or groups who are displayed in this column. Read Only Provides Read Only access to users or groups who are displayed in this column. Writable Provides Write access to users or groups who are displayed in this column.
-
Page 60: User And Group Authentication
User and Group Authentication The Thecus VisoGuard has built-in user database that allows administrators to manage user access using different group policies. From the User and Group Authentication menu, you can create, modify, and delete users, and assign them... -
Page 61: Local User Configuration
Local User Configuration From the Accounts menu, choose the User item, and the Local User Configuration screen appears. This screen allows you to Add, Edit, and Remove local users. Local User Configuration Item Description Press the Add button to add a user to the list of local users. Edit Press the Edit button to modify a local user. - Page 62 All users are automatically assigned to the ‘users’ group. NOTE Edit Users 1. Select an existing user from the Local User Configuration screen. 2. Click on the Edit button, and Local User Setting screen appears. 3. From here, you can enter a new password and re-enter to confirm, or use the <<...
-
Page 63: Local Group Configuration
Local Group Configuration From the Accounts menu, choose the Group item, and the Local Group Configuration screen appears. This screen allows you to Add, Edit, and Remove local groups. Local Group Configuration Item Description Press the Add button to add a user to the list of local groups. Edit Press the Edit button to modify a selected group from the system. - Page 64 5. Select users to be in this group from the Users List by adding them to the Members List using the << button. 6. Click the Apply button to save your changes. Edit Groups 1. On the Local Group Configuration screen, select a group name from the list.
-
Page 65: User And Group Backup
Use the Network Service menu to make network service support settings. Samba / CIFS There are options is currently allow Admin to Enable/Disable to operate Thecus VisoGuard associated with Samba / CIFS protocol. With the option changed, it will need to reboot system to activate. -
Page 66: Ftp
The user account and password is needed from system to access under SMB/CIFS protocol. On the other hand, no more anonymous login is allowed. Thecus VisoGuard can act as a FTP server, enabling users to download and upload files with their favorite FTP programs. From the System Network menu, choose the FTP item, and the FTP screen appears. -
Page 67: Ssh
You may set the maximum bandwidth allocated to file downloads. Selections include Unlimited, 1 ~ 32 MB/s. To access the share folder on Thecus VisoGuard, use the appropriate user login and password set up on the Users page. Access control to each share folder is set up on the ACL page (Storage Management >... -
Page 68: Ddns
DDNS To set up a server on the Internet and enable the users to connect to it easily, a fixed and easy-to remember host name is often required. However, if the ISP provides only dynamic IP address, the IP address of the server will change from time to time and is difficult to recall. - Page 69 After the router has enabled “UPnP Service” then you will have information come from associated router to UPnP port management screen as below. And click “Add Rule” to add more port mapping from Internet to access desired services or press “Refresh” to get most updated list. A description for each item as following: UPnP Port Management Item...
-
Page 70: Application Server
Application Server The Thecus VisoGuard supports build-in application such as iTunes server. The Thecus VisoGuard provides activating the iTunes Server on the device. You will be able to play music files on this device with your iTunes client software directly. The following section shows you how. -
Page 71: Chapter 5: Tips And Tricks
Chapter 5: Tips and Tricks USB and eSATA Storage Expansion The Thecus VisoGuard supports external USB hard disks through its USB ports. Once a USB hard disk has successfully mounted, the entire volume will be linked automatically to the default USB HDD folder. The Thecus VisoGuard supports USB external storage devices. -
Page 72: Remote Administration
Before attaching an eSATA or USB disk drive to Thecus VisoGuard, you have to partition and format it on a desktop computer or a notebook first. The attached device will be located at \\192.168.1.100\usbhdd\sd(x)1 where 192.168.1.100 means the IP address of Thecus VisoGuard and sd(x)1 stands for the first partition on the eSATA or USB disk drive. -
Page 73: Firewall Software Configuration
5. The LED blinks green when the HDD is accessed. RAID Auto-Rebuild When using RAID 1, 5, 6,10, 50 or 60 on Thecus VisoGuard, you can use the auto-rebuild function when an error is detected. 1. When a hard disk fails the system beeps and/or an email notification is sent... -
Page 74: Chapter 6: Troubleshooting
If you forget your network IP address and have no physical access to the system, you can find out the IP address by either looking directly onto Thecus VisoGuard OLED panel, or by using the setup wizard to retrieve the IP of your Thecus VisoGuard. -
Page 75: Problems With Time And Date Settings
4. Set the Date, Time, and Time Zone. 5. Click Apply. In addition, if Thecus VisoGuard is able to access the Internet and you want to keep the NTP Server clock.isc.org by default, please make sure the DNS Server is correctly entered, thereby allowing the NTP Server name to correctly resolve. -
Page 76: Appendix B: Raid Basics
RAID volume can regenerate data from the data and parity stored on its other hard disk drives. RAID Levels The Thecus VisoGuard supports standard RAID levels 0, 1, 5, 6, 10, and JBOD. 5 0 , 6 0 You choose a RAID level when you create a system volume. The factors for... - Page 77 This is excellent for complete data security. RAID 5 RAID 5 offers data security and it is best suited for networks that perform many small I/O transactions at the same time, as well as applications that require data security such as office automation and online customer service. Use it also for applications with high read requests but low write requests.
-
Page 78: Stripe Size
The stripes can vary in size. Disk Usage When all disks are of the same size, and used in RAID, Thecus VisoGuard disk usage percentage is listed below: RAID Level Percentage Used... -
Page 79: Appendix C: Licensing Information
Source Code Availability Thecus Technology Corp. has exposed the full source code of the GPL licensed software. For more information on how you can obtain our source code, please visit our web site, http://www.thecus.com. -
Page 80: Cgic License Terms
CGIC License Terms Basic License CGIC, copyright 1996, 1997, 1998, 1999, 2000, 2001, 2002, 2003, 2004 by Thomas Boutell and Boutell.Com, Inc. Permission is granted to use CGIC in any application, commercial or noncommercial, at no cost. HOWEVER, this copyright paragraph must appear on a "credits"... - Page 81 modified by someone else and passed on, we want its recipients to know that what they have is not the original, so that any problems introduced by others will not reflect on the original authors' reputations. Finally, any free program is threatened constantly by software patents. We wish to avoid the danger that redistributors of a free program will individually obtain patent licenses, in effect making the program proprietary.
- Page 82 copyright notice and a notice that there is no warranty (or else, saying that you provide a warranty) and that users may redistribute the program under these conditions, and telling the user how to view a copy of this License. (Exception: if the Program itself is interactive but does not normally print such an announcement, your work based on the Program is not required to print an announcement.)
- Page 83 though third parties are not compelled to copy the source along with the object code. 4. You may not copy, modify, sublicense, or distribute the Program except as expressly provided under this License. Any attempt otherwise to copy, modify, sublicense or distribute the Program is void, and will automatically terminate your rights under this License.
- Page 84 permitted only in or among countries not thus excluded. In such case, this License incorporates the limitation as if written in the body of this License. 9. The Free Software Foundation may publish revised and/or new versions of the General Public License from time to time. Such new versions will be similar in spirit to the present version, but may differ in detail to address new problems or concerns.
Need help?
Do you have a question about the VisoGuard V2510 and is the answer not in the manual?
Questions and answers