Kyocera FS FS-9530DN Operation Manual
Kyocera operation guide printer fs-9130dn, fs-9530dn
Hide thumbs
Also See for FS FS-9530DN:
- Service manual (274 pages) ,
- Advanced operation manual (172 pages) ,
- Operation manual (76 pages)
Table of Contents
Advertisement
Advertisement
Table of Contents

Related Manuals for Kyocera FS FS-9530DN


Summary of Contents for Kyocera FS FS-9530DN
- Page 1 FS-9130DN FS-9530DN Operation Guide...
-
Page 3: Table Of Contents
Contents Machine Parts...1-1 Components at the Front of the Printer ...1-2 Components at the Left and the Rear of the Printer ...1-3 Components at the Right of the Printer ...1-4 Printing Operation...2-1 Loading Printer Driver ...2-2 Printing from Application Software ...2-3 Maintenance ...3-1... - Page 4 OPERATION GUIDE...
-
Page 5: Legal And Safety Information
(contents of its read-only memory). This guide, any copyrightable subject matter sold or provided with or in connection with the sale of the page printer, are protected by copyright. All rights are reserved. Copying or other reproduction of all or part of this guide, any copyrightable subject matter without the prior written consent of Kyocera Mita Corporation is prohibited. - Page 6 This product uses PeerlessPrintXL to provide the HP LaserJet compatible PCL 6 language emulation. PeerlessPrintXL is a trademark of Peerless Systems Corporation, 2381 Rosecrans Ave. El Segundo, CA 90245, U.S.A. This product was developed using the Tornado™ Real Time Operating System and Tools from Wind River Systems.
-
Page 7: License Agreements
License Agreements IBM Program License Agreement OPERATION GUIDE THE DEVICE YOU HAVE PURCHASED CONTAINS ONE OR MORE SOFTWARE PROGRAMS (“PROGRAMS”) WHICH BELONG TO INTERNATIONAL BUSINESS MACHINES CORPORATION (“IBM”). THIS DOCUMENT DEFINES THE TERMS AND CONDITIONS UNDER WHICH THE SOFTWARE IS BEING LICENSED TO YOU BY IBM. IF YOU DO NOT AGREE WITH THE TERMS AND CONDITIONS OF THIS LICENSE, THEN WITHIN 14 DAYS AFTER YOUR ACQUISITION OF THE DEVICE YOU MAY RETURN THE DEVICE FOR A FULL REFUND. - Page 8 Some jurisdictions do not allow the exclusion of implied warranties, so the above exclusion may not apply to you. 3. Limitation of Remedies IBM's entire liability under this license is the following; For any claim (including fundamental breach), in any form, related in any way to this license, IBM's liability will be for actual damages only and will be limited to the greater of: the equivalent of U.S.
-
Page 9: Typeface Trademark Acknowledgement
Typeface Trademark Acknowledgement Monotype Imaging License Agreement OPERATION GUIDE All resident fonts in this printer are licensed from Monotype Imaging Inc. Helvetica, Palatino and Times are registered trademarks of Linotype-Hell AG. ITC Avant Garde Gothic, ITC Bookman, ITC ZapfChancery and ITC Zapf Dingbats are registered trademarks of International Typeface Corporation. -
Page 10: Compliance And Conformity
Compliance and Conformity FCC Statement (for users in the United States) viii THE PARTIES AGREE THAT ALL OTHER WARRANTIES, EXPRESSED OR IMPLIED, INCLUDING WARRANTIES OF FITNESS FOR A PARTICULAR PURPOSE AND MERCHANTABILITY, ARE EXCLUDED. Your exclusive remedy and the sole liability of Monotype Imaging in connection with the Software and Typefaces is repair or replacement of defective parts, upon their return to Monotype Imaging. -
Page 11: Precautions For Use
Precautions for Use OPERATION GUIDE guarantee that interference will not occur in a particular installation. If this equipment does cause harmful interference to radio or television reception, which can be determined by turning the equipment off and on, the user is encouraged to try to correct the interference by one or more of the following measures: •... -
Page 12: Safety Information
This printer is certified in the U.S. to conform to the requirements of DHHS 21 CFR Subchapter for Class I (1) laser products, and elsewhere is certified as a Class I laser product conforming to the requirements of IEC 825. -
Page 13: Caution Labels
Be sufficiently careful to avoid fire or electric shock when removing a paper jam or when replacing toner. NOTE: Do not remove these labels. Label inside the printer (Laser radiation warning) Moving parts inside. May cause personal injury. Do not touch moving parts. -
Page 14: Cdrh Regulations
To minimize the concentration of ozone gas to less than 0.1ppm, we recommend you not to install the printer in a confined area where ventilation is blocked. Model name: Page Printer FS-9130DN/FS-9530DN Trade name: Kyocera Mita Responsible party: Kyocera Mita America, Inc. -
Page 15: Ce Marking Directive
Manufacturer's address: 2-28, 1-Chome, Tamatsukuri, Chuo-ku, Osaka, 540-8585, Japan Declares that the product Product name: Page Printer Model number: FS-9130DN/FS-9530DN (as tested with enhancement optional unit; Dual Paper Feeder PF-700, Large Capacity Paper Feeder PF-750, Document Finisher DF-710/DF-730, Booklet Unit BF-710, Mail... -
Page 16: Declaration Of Conformity (Australia)
Description of devices: This Page Printer Model FS-9530DN is the 51ppm (FS-9130DN is the 40ppm); A4 size and utilized plain paper; dry toner; etc. The printer can be equipped with several enhancement optional unit as a dual paper feeder as PF-700, large capacity paper feeder as PF-750, DF- 710/DF-730 as document finisher, booklet unit as BF-710m mail bin as MT-710, and punch unit as PH-5A. -
Page 17: Energy Saving Control Function
Sleep Mode where printer function remains in a waiting state but power consumption is still reduced to a minimum when there is no activity with the printer within a set amount of time. -
Page 18: Energy Star
® Energy Star (E ) Program NERGY We have determined as a participating company in the International Energy Star Program that this product is compliant with the standards laid out in the International Energy Star Program. OPERATION GUIDE... - Page 19 Please read this Operation Guide before using the machine. Keep it close to the machine for easy reference. OPERATION GUIDE The sections of this guide and parts of the machine marked with symbols are safety warnings meant to protect the user, other individuals and surrounding objects, and ensure correct and safe usage of the machine.
- Page 20 Symbols xviii The following symbols indicate that the related section includes safety warnings. Specific points of attention are indicated inside the symbol. [General warning] [Warning of danger of electrical shock] [Warning of high temperature] The following symbols indicate that the related section includes information on prohibited actions.
-
Page 21: Installation Precautions
Rear: 100 mm (12 inches) (4 inches) Always use the caster stoppers to stabilize the printer once it is in place to keep it from moving and/or falling over and causing injury. Adverse environmental conditions may affect the safe operation and performance of the machine. -
Page 22: Power Supply/Grounding The Machine
During printing, some ozone is released, but the amount does not cause any ill effect to one's health. If, however, the printer is used over a long period of time in a poorly ventilated room or when printing an extremely large number of copies, the smell may become unpleasant. -
Page 23: Handling Of Plastic Bags
Handling of Plastic Bags WARNING: Keep the plastic bags that are used with the machine away from children. The plastic may cling to their nose and mouth causing suffocation. OPERATION GUIDE... -
Page 24: Precautions For Use
Precautions for Use Cautions when Using the Machine WARNING: Do not place metallic objects or containers with water (flower vases, flower pots, cups, etc.) on or near the machine. This situation presents a danger of fire or electrical shock should they fall inside. - Page 25 When lifting or moving the printer, pull up the 4 handles on both sides of the printer, then ALWAYS carry the printer by the designated 4 handles with at least 4 people, one person to a handle.
-
Page 26: Cautions When Handling Consumables
Other Precautions Cautions when Handling Consumables xxiv Do not place heavy objects on the machine or cause other damage to the machine. Do not open the upper front cover, turn off the power switch, or pull out the power plug during printing. When lifting or moving the machine, contact your service representative. - Page 27 • If toner does happen to get on your skin, wash with soap and water. Do not attempt to force open or destroy the Toner Container. Other Precautions After use, always dispose of the Toner Container in accordance with Federal, State and Local rules and regulations. Store all consumables in a cool, dark location.
- Page 28 xxvi OPERATION GUIDE...
- Page 29 This chapter explains how to replace the toner container, waste toner box, and how to care for your printer. 4 Troubleshooting This chapter explains how to handle printer problems that may occur, such as paper jams. 5 Specifications OPERATION GUIDE...
- Page 30 Conventions Convention Italic Typeface Courier Typeface Bracket Bold Text Typeface Bold Typeface Notes Important Caution Warning xxvi This manual uses the following conventions: Description Used to emphasize a key word, phrase or references to additional information. Used to denote messages or names displayed on the operation panel.
-
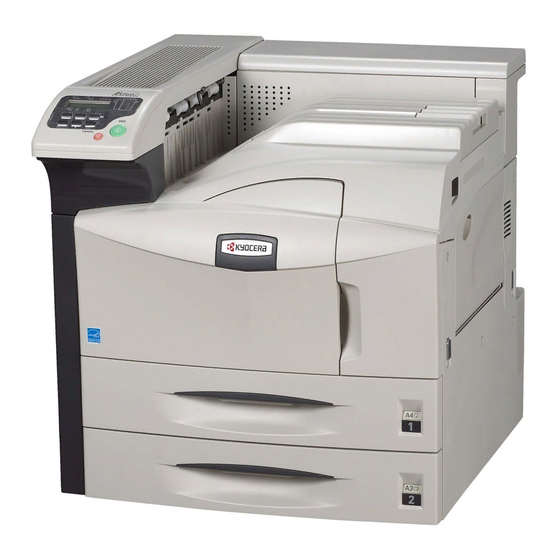
Page 31: Components At The Front Of The Printer
This chapter contains explanations on the following topics: • Components at the Front of the Printer ... 1-2 • Components at the Left and the Rear of the Printer... 1-3 • Components at the Right of the Printer ... 1-4... -
Page 32: Components At The Front Of The Printer
9 Main Switch 10 Top Tray 11 Toner Container 12 Toner Container Release Lever 13 Waste Toner Box 14 Cleaning Brush IMPORTANT: After turning the printer off, please wait at least five seconds before turning it on again. OPERATION GUIDE... -
Page 33: Components At The Left And The Rear Of The Printer
Components at the Left and the Rear of the Printer OPERATION GUIDE 15 Power Cord Connector 16 Option Unit Connector 17 Handles for Transport 18 Left Cover 2 19 Lock Lever 20 Left Cover 1... -
Page 34: Components At The Right Of The Printer
Components at the Right of the Printer 21 Memory Card Slot 22 Option Interface Slot (OPT) 23 Option Memory Slot Cover 24 USB Memory Slot (A1) 25 Parallel Interface Connector 26 Option Hard Disk Unit Slot (HDD) 27 Network Interface Connector... -
Page 35: Printing Operation
OPERATION GUIDE 2 Printing Operation This chapter contains explanations on the following topics: • Loading Printer Driver ... 2-2 • Printing from Application Software ... 2-3... -
Page 36: Loading Printer Driver
NOTE: If the Welcome to the Found New Hardware Wizard dialog box displays, select Cancel. Insert the CD-ROM supplied with the printer into the optical drive of the PC. The installation program launches. NOTE: If the installation program fails to launch, use Windows Explorer to access the CD-ROM and select Setup.exe. -
Page 37: Printing From Application Software
From the application File menu, select Print. The Print dialog box displays. Click the drop down list of printer names. All the printers installed in Windows are listed. Click the name of the machine. Use Number of copies to enter the number of prints required. Up to 999 copies can be entered. - Page 38 Printing Operation OPERATION GUIDE...
-
Page 39: Maintenance
OPERATION GUIDE 3 Maintenance This chapter contains explanations on the following topics: • General Information... 3-2 • Toner Container Replacement... 3-3 • Cleaning the Printer... 3-11... -
Page 40: General Information
General Information This chapter describes basic maintenance tasks you can perform on the printer. You can replace the following component according to the printer's display: • Toner Container • Waste Toner Box Also, the internal parts need periodic cleaning. OPERATION GUIDE... -
Page 41: Understanding Messages Requesting Toner Container Replacement
Understanding Messages Requesting Toner Container Replacement OPERATION GUIDE The toner container in the printer should be replaced as soon as the message display shows Toner low or soon after. If you continue to use the printer, eventually the toner supply will be exhausted at which point the printer will stop printing and the Replace toner Clean printer message will be shown instructing you to install a new toner kit. -
Page 42: Replenishing Toner
This section explains how to replace the toner container. When replacing the toner container, always replace the waste toner box at the same time. If this box is full, the printer may be damaged or contaminated by the waste toner that may spill over the box. - Page 43 OPERATION GUIDE Grasp the handle on the toner container, push the lock lever up again and gently lift the toner container. Seal up the old toner container with the supplied plastic bag and dispose of it. Lightly tap the new toner on the top 5 to 6 times.
- Page 44 Grasp the handle on the toner container and insert the toner container along the rail of the printer. When inserting, be sure that the gear side of the toner container faces the printer. Leave the front cover open to allow insertion of the waste toner box. Gear Side...
-
Page 45: Replacing The Waste Toner Box
Replacing the Waste Toner Box OPERATION GUIDE Hold the toner container using both hands and fully insert it into the printer. Close the front cover. When replacing the toner container, the used waste toner box in the printer should also be replaced with the new one from the new toner kit. The printer will not operate without replacing the waste toner box. - Page 46 Peel sticker A off the waste toner box. Turn around the waste toner box. Stick sticker A over the opening at the back. Peel off the backing paper to gain access to sticker B. OPERATION GUIDE...
- Page 47 OPERATION GUIDE Peel sticker B off the waste toner box. Stick sticker B down over top of sticker A at the back. Seal up the old waste toner box with the supplied plastic bag and dispose of it.
- Page 48 Maintenance Fit the new waste toner box to the printer. Close the front cover. 3-10 OPERATION GUIDE...
-
Page 49: Cleaning The Printer
When replacing the toner container, also clean the filters. Open the MP tray. Remove the filters from the printer. Press in the tabs on the top filter while removing it. Press in the tab on the right filter while removing it. - Page 50 3-12 Clean the filters using a vacuum cleaner or a dry cloth. Do not wash the filters nor use the cleaning brush supplied with the machine. After cleaning, replace the filters in their original positions. After cleaning the filters, proceed to next section. OPERATION GUIDE...
-
Page 51: The Inside Of The Printer
To avoid print quality problems, the interior of the printer must be cleaned. Open the front cover all the way. Remove the blue colored cleaning brush. Pull up the lock lever on the left side of the printer, and open the left cover 3-13... - Page 52 Clean the separator by moving the cleaning brush from left to right along with the separator. NOTE: When removing jammed paper, be careful not to touch the printer drum. This can cause printer malfunction. While rotating the transfer roller with the gear on its left, move the cleaning brush back and forth along the transfer roller to remove soiling as shown.
-
Page 53: Troubleshooting
OPERATION GUIDE 4 Troubleshooting This chapter explains how to handle printer problems that may occur. If a problem cannot be corrected, contact your service representative. This chapter explains the following topics: • General Guideline ... 4-2 • Print Quality Problems... 4-4 •... -
Page 54: General Guideline
Clean the filters. Refer to Print Quality Problems on page 4-4. Refer to Correcting a Paper Jam on page 4-14. Turn off the printer’s power, plug in the power cord securely, and try turning on the printer’s power again. Connect both ends of the interface cable securely. - Page 55 • Turn the printer power off and wait for several seconds. Then, turn on the printer. • Reboot the computer which sends the print jobs to the printer.
-
Page 56: Print Quality Problems
The printer reverts to Ready. Clean the separator. Open the printer left cover 1 and clean the separator with a cleaning brush. Refer to Toner Container Replacement on page 3-3. Clean the charger. - Page 57 • Make sure the paper type setting is correct. Refresh drum. Refer to the following procedures in the operation panel and try cleaning the drum surface using the printer's built- in cleaning system. 1 Press [MENU], and then press Others >.
- Page 58 Characters out of position Corrective Action Check the paper ramp. Open the printer left cover and check for toner on the paper ramp. Clean the paper ramp using a soft, dry, lint- free cloth. Refer to Toner Container Replacement on page 3-3.
-
Page 59: Indicators And Messages
An error occurs that you can clear by yourself. The printer is on-line. The printer is ready to print. READY The printer is off-line. The printer stores but does not print received data. Also indicates when printing is automatically stopped due to occurrence of an error. Flashing Data transfer is taking place. - Page 60 Close finisher cover Close the printer front cover. Close front cover Close the printer left cover. If left cover of the option paper feeder is open, 2 or 3 Close is displayed. left cover 1(2,3) Close the mailbox cover. Close mailbox cover Duplex printing cannot be performed due to paper size or type.
- Page 61 The folding tray has become full. You must remove all printed pages from the Folding tray folding tray. When the printer senses that the folding tray is empty again, it will paper full continue printing into the folding tray.
- Page 62 The top tray has become full (approx. 500 pages). You must remove all printed Top tray pages from the top tray. When the printer senses that the top tray is empty again, paper full it will continue printing into the top tray.
-
Page 63: Error Messages
If Auto Continue is set to On, printing will be automatically resumed after a preset period of time. This message appears when the printer is in the ready state and the memory card Format error is not formatted, and therefore cannot be read or written. - Page 64 If you continue reading the memory card, insert the same memory Insert again card into the slot again. The printer again reads it from the beginning of the data. NOTE: to ensure correct reading of the memory card.
- Page 65 Message The data transferred to the printer was too complex to print on a page. Press Print overrun [GO] to resume printing. (The page may break in some pages.) Press GO You can abandon printing by [CANCEL]. NOTE: maintain optimum use of memory during printing, display >Page Protect from the operation panel, and re-select Auto.
-
Page 66: Correcting A Paper Jam
The jam can be corrected by removing the paper. The printer goes off-line when the Paper jam message is displayed. When a paper jam occurs, a paper jam message and the paper jam location are indicated on the message display. - Page 67 (PF-700, PF-750) Paper is jammed at the mailbox. When the jammed paper has been removed, open and close the printer’s front cover. Then the printer automatically warms up, goes on-line, and continues printing. Depending on the point at which the jam occurred, the printer may or may not print the jammed page.
-
Page 68: Paper Cassette
The following procedure also applies to the optional paper feeder. Pull out the paper cassette. Paper Cassette Remove the jammed paper while taking care not to tear it. If the paper has been torn, remove all the scraps from the inside the printer. Close the paper cassette. OPERATION GUIDE... - Page 69 MP Tray Inside the MP transport OPERATION GUIDE Paper is jammed at the MP tray. Remove the jammed paper using the procedure given below. Remove the paper jammed at the MP tray. If the jammed paper remains at the MP tray, pull up the lever and remove the jammed paper.
- Page 70 4-18 Remove the jammed paper. Push the lever (gray colored) to raise the duplex unit and remove the jammed paper. Open the front cover. OPERATION GUIDE...
- Page 71 Open left cover 1 to remove paper jammed in the MP transport tray. NOTE: When removing jammed paper, be careful not to touch the printer drum. This can cause printer malfunction. Pull out the MP transport tray as far as it will go.
- Page 72 4-20 Open the MP transport tray cover and remove any jammed paper. If the paper has been torn, remove the jammed paper. Replace the MP transport tray in its original position, then close the front cover. OPERATION GUIDE...
-
Page 73: Jam In Left Cover
CAUTION: Take care not to leave any small pieces of paper in the printer when removing paper jams as this may result in fire. Pull up the lock lever and open left cover 1. - Page 74 Left Cover 2 4-22 If there is jammed paper in the output section, remove it. Close left cover 1. Open left cover 2. OPERATION GUIDE...
-
Page 75: Document Finisher
Document Finisher OPERATION GUIDE Remove the jammed paper. Close left cover 2. Paper is jammed at the option document finisher. Remove jammed paper referring to the DF-710 Operation Guide or DF-730 Operation Guide. 4-23... - Page 76 Troubleshooting 4-24 OPERATION GUIDE...
-
Page 77: Specifications
Item Printing method Printing speed Duplex speed Resolution First print (A4 or Letter size, depending on input data. From start of feed to end of output.) Warm-up time (23°C, 120 or 230 V) -Power on -Low power -Sleep Controller Main memory Operating Systems Interface -Standard... - Page 78 Item Memory card slot Self test Maximum duty cycle Drum Paper sizes -Cassette -MP Tray Media types -Cassette -MP Tray Media weights -Cassette -MP Tray -Duplex mode Capacity of output tray Ambient conditions Power requirements Description FS-9130DN 1: Memory card (CF) Performed at power-up 200,000 pages/month Amorphous silicon drum...
- Page 79 Item Power consumption Operating noise (in accordance with EN ISO 7779 [Bystander Position, sound pressure level at the front, and simplex printing]) Dimensions (W) × (D) × (H) Weight OPERATION GUIDE Description FS-9130DN Maximum: 900 W (U.S.A./ Canada), 800 W (European countries) During printing: 780 W or less (U.S.A./Canada), 710 W or less...
- Page 80 Specifications OPERATION GUIDE...
- Page 84 Rev. 1.3 2007.7 302G156012...
Need help?
Do you have a question about the FS FS-9530DN and is the answer not in the manual?
Questions and answers