Advertisement
ARWH Series
Smart Series
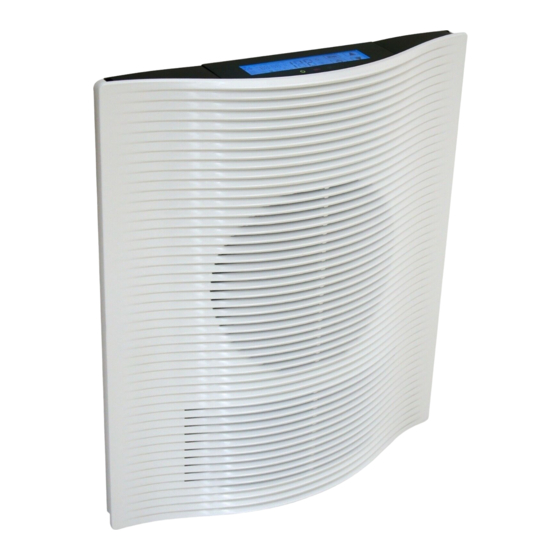
Architectural Wall Heater
Installation, Operation & Maintenance Instructions
Table 1. Specifications
MODEL
VOLTS
ARWH1802
120
ARWH4808
208
ARWH4804
240
ARWH4807
277
NOTE: The model numbers shown are Northern White color. Add suffix to the model number for the following colors:
AL = Aluminum, BZ = Bronze, W = Navajo White.
WHEN USING ELECTRIC APPLIANCES, BASIC PRECAU-
TIONS SHOULD ALWAYS BE FOLLOWED TO REDUCE THE
RISK OF FIRE, ELECTRIC SHOCK, AND INJURY TO PER-
SONS, INCLUDING THE FOLLOWING:
1. Read all instructions before installing or using this heater.
2. This heater is hot when in use. To avoid burns, do not let
bare skin touch hot surfaces. Keep combustible materials,
such as furniture, pillows, bedding, papers, clothes, etc. and
curtains at least 3 feet (0.9 m) from the front of the heater.
3. Extreme caution is necessary when any heater is used by or
near children or invalids and whenever the heater is left
operating and unattended.
4. Do not operate any heater after it malfunctions. Disconnect
power at service panel and have heater inspected by a rep-
utable electrician before using.
5. Do not use outdoors.
6. To disconnect heater, turn controls to OFF, and turn OFF
power to heater circuit at main disconnect panel.
7. Do not insert or allow foreign objects to enter any ventilation
or exhaust opening as this may cause an electric shock, fire,
or damage to the heater.
8. To prevent a possible fire, do not block air intake or exhaust
in any manner.
9. A heater has hot and arcing or sparking parts inside. Do not
use it in areas where gasoline, paint, or flammable liquids
are used or stored.
ECR 39603
PHASE
1
540-1800
1
1440-4800
1
1440-4800
1
1440-4800
IMPORTANT INSTRUCTIONS
WARNING
SAVE THESE INSTRUCTIONS
WATTS
AMPS
15
23.1
20.0
17.3
!
10. Use this heater only as described in this manual. Any other
use not recommended by the manufacturer may cause fire,
electric shock, or injury to persons.
11. This heater is provided with a red alarm light that will illumi-
nate only if the heater has turned off as a result of over-
heating. Should the sensor register an overheat condition,
the heater will stop generating heat and the fan will turn off.
The red alarm light will turn ON, and ALL BUTTONS WILL
BE DISABLED. Once the heater is safe for resetting, the red
alarm light will blink/flash.
HEATER WITH THE ALARM LIGHT ILLUMINATED. See
TO RESET THERMAL LIMIT CONTROL in OPERATING
INSTRUCTIONS section.
12. This heater is intended for comfort heating applications and
not intended for use in special environments. Do not use in
damp or wet locations such as marine or greenhouse or in
areas where corrosive or chemical agents are present.
13. When installing, see INSTALLATION INSTRUCTIONS for
additional warnings and precautions.
14. For safe and efficient operation, and to extend the life of your
heater, keep your heater clean - See MAINTENANCE
INSTRUCTIONS.
11/12
MIN. SUPPLY
WIRE GAUGE
12
10
10
12
DO NOT OPERATE THE
5200-11074-001
Advertisement
Table of Contents

Summary of Contents for Marley ARWH1802
-
Page 1: Important Instructions
Smart Series Architectural Wall Heater Installation, Operation & Maintenance Instructions Table 1. Specifications MIN. SUPPLY MODEL VOLTS PHASE WATTS AMPS WIRE GAUGE ARWH1802 540-1800 ARWH4808 1440-4800 23.1 ARWH4804 1440-4800 20.0 ARWH4807 1440-4800 17.3 NOTE: The model numbers shown are Northern White color. Add suffix to the model number for the following colors: AL = Aluminum, BZ = Bronze, W = Navajo White. -
Page 2: Installation Instructions
INSTALLATION Cable Ground screw Power supply cable clamp Lead wires (Blue) INSTRUCTIONS Disconnect switch bracket with switch and leads (No disconnect switch on 208V models) To prevent a possible fire, injury to persons or damage to the 12” Min. heater, adhere to the following: (305 mm) Back Box 1. - Page 3 7. Insert power supply cable through cable clamp, allowing at Installation of Recessed Back Box in least 6" (152 mm) of leads to extend inside the back box. Existing Construction Connect the blue lead wires of disconnect switch to the sup- 1.
-
Page 4: Operation Instructions
Building Management Systems (BMS) Control Notches Shelf To utilize the BMS capabilities of this unit, remove the red jumper wire between terminals A and B on the control terminal board ( see figure 3, wiring diagram). Connect two wires from a dry contact (no voltage) in the BMS system to terminals A and B. - Page 5 Fan Speed Day Indicator Time Time Centigrade / Fahrenheit Temperature Indicator Periods Indicator Mode Button Up Button Heat Control Indicator Night Light Power Button Building Management Indicator Down Button Lockout Automatic Mode System indicator Hold Mode Indicator Indicator Indicator Figure 8 - Control Panel Layout AUTO icon and time.
-
Page 6: Maintenance Instructions
MAINTENANCE Error Codes In the event of overheating or other malfunction the heater will INSTRUCTIONS display one of the error codes below: E1 is displayed if the regulating thermistor is It is important to keep this heater clean. Your heater will give you OPEN. -
Page 7: Repair Parts
REPAIR PARTS Repair Parts List Part Number Description ARWH4804 ARWH4808 ARWH4807 ARWH1802 Grille 2501-11019-VAR* 2501-11019-VAR* 2501-11019-VAR* 2501-11019-VAR* Motor 3900-11026-000 3900-11026-000 3900-11026-001 3900-11026-002 Element 302012810 1802-2075-801 302012811 302012828 Fan Blade 490030103 490030103 490030103 490030103 Right Bezel 1219-11009-001 1219-11009-001 1219-11009-001 1219-11009-001 Left Bezel... -
Page 8: Limited Warranty
Marley Engineered Products Service Center. Within the limitations of this warranty, inoperative units should be returned to the nearest Marley authorized service center or the Marley Engineered Products Service Center, and we will repair or replace, at our option, at no charge to you with return freight paid by Marley. It is agreed that such repair or replacement is the exclusive remedy available from Marley Engineered Products.


Need help?
Do you have a question about the ARWH1802 and is the answer not in the manual?
Questions and answers