Table of Contents

Related Manuals for Aria Child Asana 35

Summary of Contents for Aria Child Asana 35
- Page 1 Asana 35 AP / Asana 35 Infant Car Seat User Guide Read all instructions before use. If these instructions are not followed, the safety of a child may be severely endangered. Keep instructions for future use. www.GBchildusa.com...
-
Page 2: Table Of Contents
Index Registering Your Child Restraint ......... 4 For Recall Information ............. 5 Certification ..............5 If You Need Assistance or Have Questions ....5 Warnings and Important Information ....... 6-12 Child Height and Weight Limits ........13 Base Features ..............14-15 Carrier Features ............. - Page 3 Index Carrier Installation WITHOUT the Base Using the Lap/Shoulder Belt .......46-47 Carrier Installation WITHOUT the Base Using the Lap Belt ..........48-49 Checking the Recline ..........50-51 Adjusting the Recline ..........52 Checking the Recline with the Base ....53-54 Placing Your Child in the Carrier ......55-57 Changing the Buckle Strap Position .....58-59 Changing the Waist Strap Position .......60-65 Using the Infant Body Support ........
-
Page 4: Registering Your Child Restraint
Telephone number E-mail address CHILD RESTRAINT REGISTRATION CARD Model Number xxxxx-xxxx Model Name Asana 35 Infant Car Seat Manufacture Date xxxx/xx/xx Child restraints could be recalled for safety reasons. You must register this restraint to be reached in a recall. -
Page 5: For Recall Information
If You Need Assistance or Have Questions If you have any questions regarding installation of your child restraint, please contact us at: Aria Child Inc. 530 Harrison Ave. Boston, MA 02118 1-844-543-2020 www.GBchildusa.com For helpful information regarding child restraints : www.NHTSA.gov... -
Page 6: Warnings And Important Information
Warnings and Important Information WARNING MISE EN GAR DO NOT place rear-facing child seat on front seat with air bag. DEATH OR ADVERTENC SERIOUS INJURY can occur. The back seat is the safest place for children 12 and under. WHEN USED IN YOUR VEHICLE •... - Page 7 WARNING MISE EN GARDE • USE ONLY WITH children who weigh between 4 - 35 lbs (1.8 - 15.9 kg) and whose height is 32 inches (81 cm) or less. ADVERTENCIA Child’s head MUST be 1” (2.5 cm) or more below the top of the seat.
- Page 8 WARNING MISE EN GARDE • NEVER LEAVE CHILD UNATTENDED in or around the vehicle. Vehicle backovers can happen in any type of vehicle. Vehicles ADVERTENCIA have blind spots, the areas around the vehicle that you can not see from the driving position. Always check around the vehicle before moving your vehicle.
- Page 9 WARNING MISE EN GARDE • NEVER place two LATCH connectors on one vehicle LATCH anchor. ADVERTENCIA • AFTER INSTALLING CARRIER WITHOUT BASE INTO THE VEHICLE, check the RED level line on the side of seat to make sure that it is level with the ground. •...
- Page 10 WARNING MISE EN GARDE WHEN USED IN A VEHICLE ADVERTENCIA • NEVER leave child unattended. • SUFFOCATION HAZARD: Infant carrier can roll over on soft surfaces and suffocate child. NEVER place carrier on beds, sofas or other soft surfaces. • STRANGULATION HAZARD: Child can strangle in loose WARNING ADVERTENCIA restraint straps.
-
Page 11: Important Information
MISE EN GARDE IMPORTANT INFORMATION ADVERTENCIA • WHEN USING THE GB ASANA 35 AP or ASANA 35 child restraint, only use with GB strollers that allow the use with a child restraint. Refer to your stroller USER GUIDE for stroller attachment instructions. - Page 12 WARNING MISE EN GARDE • THE CHILD RESTRAINT is certified for use in an aircraft when installing the carrier without base. ADVERTENCIA • THE CHILD RESTRAINT MAY BECOME VERY HOT IF LEFT IN THE SUN OR HOT AREAS. Always make sure to check the temperature of any metal or plastic parts before placing your child in the child restraint.
-
Page 13: Child Height And Weight Limits
Child Height and Weight Limits The American Academy of Pediatrics recommends children should ride rear-facing for as long as possible up to 2 years in age, or until they reach maximum height and weight for their seat. Do not use this child restraint beyond the expiration date or if the child exceeds the limits of this seat. -
Page 14: Base Features
Base Features These base features are on the Asana 35 and the Asana 35 AP models: 1. Recline foot adjustment button 2. Recline foot These base features are only on the Asana 35 AP model: 3. FirmFit load leg 4. FirmFit load leg adjustment buttons... - Page 15 6. Recline indicator 11. Child restraint attachment bar 7. LATCH storage pocket 12. FirmFit arm 8. LATCH connector 13. FirmFit arm release button 9. LATCH release button 14. FirmFit arm lock indicator 10. Belt path 15. User Guide storage compartment...
-
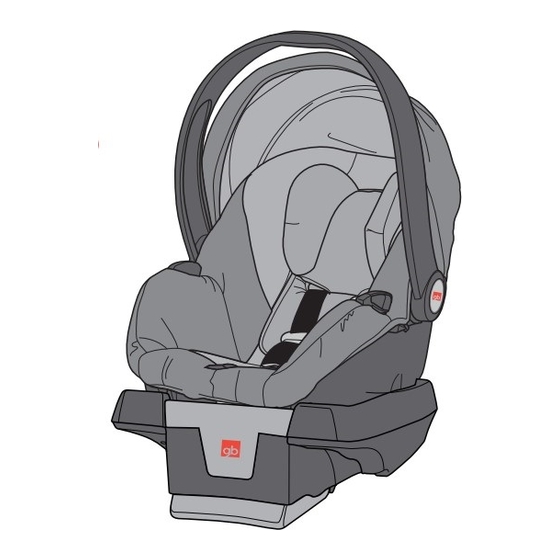
Page 16: Carrier Features
Carrier Features 1. Lap belt guides 9. Harness buckle 2. Base attachment hooks 10. Harness buckle strap 3. Seat pad 11. Headrest adjustment / Harness 4. Handle adjustment button 5. Canopy 12. Harness adjustment strap 6. Headrest 13. Low birth weight 7. - Page 17 14. Stroller attachment 18. Waist strap slots buttons 19. Waist strap 15. Handle adjustment 20. Harness buckle strap retainer button 21. Harness splitter plate 16. Carrier release handle 17. Harness strap...
- Page 18 Handle WARNING MISE EN GARDE ALWAYS make sure the handle is securely locked in the upright carrying position (A) before carrying. ADVERTENCIA ANY locked position can be used in vehicle. There are 4 positions: - Carrying position (A), - Middle positions (B - C), - Stationary position (D).
- Page 19 Canopy To attach canopy, insert the canopy bow into the canopy mounts on both sides of the seat until they click into place. CLICK! Fasten the hook and loop patches on the canopy to the seat pad as shown. Repeat on other side of seat. To remove, press tab on canopy bow and pull out.
-
Page 20: Firmfit Load Leg
FirmFit Load Leg (only on Asana 35 AP model) WARNING MISE EN GARDE The load leg helps minimize crash forces on a baby in a frontal crash. It ADVERTENCIA allows the child restraint’s safety system to absorb crash energy efficiently and to transfer forces more effectively by directing them to the vehicle floor. - Page 21 WARNING MISE EN GARDE NEVER place load leg on an uneven floor ADVERTENCIA in the rear of the vehicle, it must always be placed flat on the vehicle floor. NEVER use the leg to recline the seat. The foot on the base is intended to recline the seat.
- Page 22 FirmFit Load Leg (cont.) Turn the base over as shown. Pull the load leg out as shown. You should hear a CLICK when the leg has been rotated into the in-use position. CLICK! Turn base over and place base on the seat as shown then follow the next steps to extend the leg to the vehicle floor.
- Page 23 Pull on the lower portion of the leg until it locks into position and lies flat on the floor. If it does not rest flat on the floor, CLICK! you have two other options: 1) In vehicles that have a short seat to floor height, press the button and return the lower portion of the leg to its stored location.
- Page 24 FirmFit Load Leg (cont.) To store load leg, when you are not using it, push the button on the lower portion of the load leg and slide the lower portion back up until it locks into place. CLICK! Squeeze and hold the black button on the upper portion of the leg while sliding the leg back up until the leg is at its shortest length.
- Page 25 Although we recommend using the load leg when you are using your base, if you should need to remove it if it does not fit in your vehicle, follow these steps: To remove load leg, open the user guide storage compartment and push the button inside the compartment while pulling the leg out of the front of...
-
Page 26: Latch Locations
LATCH locations LATCH stands for Lower Anchors and Tethers for Children. It makes installation easier without using the vehicle’s seat belts. LATCH is a way to secure your child restraint to your vehicle by using the LATCH connectors on your child restraint base. -
Page 27: Vehicle Installation Locations
Vehicle Installation Locations WARNING MISE EN GARDE Failure to place the child restraint in a correct seating position increases the risk of serious injury or death. ADVERTENCIA DO NOT place rear-facing child seat on front seat with air bag. DEATH OR SERIOUS INJURY can occur. The back seat is the safest place for children 12 and under. -
Page 28: Unsafe Vehicle Seat Belt Types
Vehicle Belt Types UNSAFE If you have any of these types of vehicle belt systems listed, NEVER use any of these to install your child restraint in the vehicle. These vehicle belt systems are UNSAFE to use to install your child restraint in the vehicle. If available, LATCH can be used IN PLACE OF these vehicle belt types. - Page 29 Non-Locking Lap Belts with Emergency Locking Retractor (ELR) The lap belt is always loose until it locks in a sudden stop or crash. Lap/Shoulder Belts with 2 Retractors (including inflatable seat belts) Belts are attached to retractors at the ends of the lap and shoulder belt and attached to one latch plate.
-
Page 30: Safe Vehicle Seat Belt Types
SAFE Vehicle Seat Belt Types If you have any of these types of vehicle belt systems listed, SAFE these are to use to install your child restraint in the vehicle. Review vehicle owner’s manual for specific instructions on child restraint installation. LATCH can be used IN PLACE OF these vehicle belt types. - Page 31 Lap/Shoulder Belt with Locking Latch Plate The lap portion of this belt does not loosen once the belt is buckled. The vehicle belt is tightened by pulling up hard on shoulder belt and feeding the webbing into the retractor. Lap/Shoulder Belt with Sliding Latch Plate with Locking Retractor The latch plate slides freely along the lap/shoulder belt.
-
Page 32: Base Installation With Latch
Base Installation with LATCH BEFORE installing base, make sure vehicle is on level ground. Place base on an approved LATCH vehicle seating location. BEFORE installing the base, if you are using the load leg, you will need to unfold the leg, install the base, then extend the load leg. - Page 33 Route the LATCH belt through the belt path openings on both sides of base. Make sure not to twist the belt and make sure it lies flat. Squeeze the button on the FirmFit arm and lift it up as shown.
- Page 34 Base Installation with LATCH Push the LATCH connectors onto CLICK! the vehicle lower anchor points on both sides of the base until you hear them CLICK onto the anchor points. CLICK! CHECK to make sure they are securely attached by pulling on them.
- Page 35 Close the FirmFit arm until it locks into place and you see GREEN in the indicator window on the base. CHECK to make sure base is secure by holding both sides of the base near the LATCH strap and moving it CLICK! from side to side and front and back.
- Page 36 Base Installation with LATCH ( cont. ) Attach the carrier into the base until you hear a click. Finish the load leg installation from pages 20-23. WARNING Lift up on the handle of the ADVERTENCIA carrier to make sure that it is CLICK! securely attached in the base.
- Page 37 To remove base, open the Firm Fit arm, then push button on LATCH connectors then unhook from the anchor point. You may need to loosen the tension on the LATCH connector by loosening the LATCH adjustment strap. Repeat steps as shown on the other side of the base.
-
Page 38: With Lap/Shoulder Belt
Base Installation with Lap/Shoulder Belt BEFORE installing base, make sure vehicle is on level ground. Place base on an approved vehicle seating location. BEFORE installing the base, if you are using the load leg, you will need to unfold the leg, install the base, LATCH strap MUST then extend the load leg. - Page 39 Route the lap/shoulder belt through the belt path openings on both sides of base and under the FirmFit arm. Make sure not to twist the belts and make sure they lie flat. Fasten the buckle until it clicks into CLICK! place.
- Page 40 Base Installation with Lap/Shoulder Belt ( cont.) CHECK the recline indicator to make sure the base is correctly reclined. If it is not correctly reclined, unlock the FirmFit arm, unbuckle lap/shoulder belt, and adjust the foot on the base then re-install base. CHECK that the base is correctly reclined.
- Page 41 To remove the carrier from the base, squeeze the red release handle at the back of the carrier. Lift carrier away from the base. To remove the base from vehicle, squeeze the button on the FirmFit arm and lift it up (see Step 2 and 3 on page 38) then unbuckle the vehicle belt.
-
Page 42: With Lap Belt
Base Installation with Lap Belt BEFORE installing base, make sure vehicle is on level ground. Place base on an approved vehicle seating location. BEFORE installing the base, if you are using the load leg, you LATCH strap MUST will need to unfold the leg, install pass under the base the base, then extend the load leg. - Page 43 Route the lap belt through the belt path openings on both sides of base and under the FirmFit arm. Make sure not to twist the belt and make sure it lies flat. Fasten the buckle until it clicks into place. CLICK! Pull the lap belt to remove all the slack and to get the base snug against the...
- Page 44 Base Installation with Lap Belt (cont.) CHECK the recline indicator to make sure the base is correctly reclined. If it is not correctly reclined, unlock the FirmFit arm, unbuckle lap belt, and adjust the foot on the base then re-install base. CHECK that the base is correctly reclined.
- Page 45 To remove the carrier from the base, squeeze the red release handle at the back of the carrier. Lift carrier away from the base. To remove the base from vehicle, squeeze the button on the FirmFit arm and lift it up (see Step 2 and 3 on page 42) then unbuckle the vehicle belt.
-
Page 46: Carrier Installation Without The Base Using The Lap/Shoulder Belt
Carrier Installation WITHOUT the Base Using the Lap/Shoulder Belt BEFORE installing carrier, make sure vehicle is on level ground. Place carrier on an approved vehicle seat location in a rear-facing position. Route the lap belt portion of the vehicle belt through the lap belt guides on both sides of carrier. Make sure not to twist the belt and make sure it lies flat. - Page 47 Push down in center of carrier and pull the shoulder belt portion of the vehicle belt to tighten carrier against the vehicle seat. CHECK to make sure carrier is secure by holding both sides near the lap belt guides and moving it from side to side and front and back. The lap belt should not loosen and the carrier should not move easily.
-
Page 48: Carrier Installation Without The Base Using The Lap Belt
Carrier Installation WITHOUT the Base Using the Lap Belt BEFORE installing carrier, make sure vehicle is on level ground. Place carrier on an approved vehicle seat location in a rear-facing position. Route the lap belt through the lap belt guides on both sides of carrier. - Page 49 Push down in center of carrier to tighten carrier against the vehicle seat while pulling on the free end of the vehicle belt. Once tightened, tuck the free end of the strap near the vehicle seat crease. CHECK to make sure carrier is secure by holding both sides near the lap belt guides and moving it from side to side and front and back.
-
Page 50: Checking The Recline
Checking the Recline WARNING MISE EN GARDE Improper recline of your child restraint or base could cause serious injury or death. ADVERTENCIA If the child restraint is too upright, an infant’s head could drop forward and cause suffocation or breathing problems. If the child restraint is too reclined, a sudden stop or vehicle crash could cause injury to a child’s neck or shoulders. - Page 51 When using the carrier WITHOUT the base, ALWAYS CHECK the line MUST be red level line on the carrier each level with the ground when installed in vehicle and every time you use your child WITHOUT the base. restraint to make sure it is level with the ground.
-
Page 52: Adjusting The Recline
Adjusting the Recline The base has 4 recline adjustment positions for the foot. To lower the foot, push the button and the foot will spring down into one of the 4 positions until it locks into place. To raise the foot, push the button and push foot up into base until it locks into desired position. -
Page 53: Checking The Recline With The Base
Checking the Recline with the Base When using the carrier and the base together: 1) Make sure vehicle is on level ground. 2) Only use the recline indicator on the base to make sure the seat and base are correctly reclined. 3) Recline base until you see only green or only blue. - Page 54 Checking the Recline with the Base (cont.) When using the carrier with the base, if the foot is in the raised position and the indicator still shows red or blue and green at the same time you may need to place a tightly rolled towel under the foot end of the base in order to get the seat to become properly...
-
Page 55: Placing Your Child In The Carrier
Placing Your Child in the Carrier WARNING MISE EN GARDE Improper placement of the harness straps and buckle strap increases the risk of serious injury or death in a sudden stop or ADVERTENCIA vehicle crash. Depending on whether you have a smaller or larger size child, you will need to adjust the headrest, infant body support, buckle strap and waist strap locations. - Page 56 Placing Your Child in the Carrier (cont.) Position the harness straps around the childs’ arms and the buckle strap between the child’s legs, then fasten the chest clip and the buckle. CLICK! Pull all slack out of the harness system, starting with the webbing around the child’s legs and moving up toward their shoulders.
- Page 57 Pull the adjustment strap so that the FirmFit harness system slides down. The harness height should be at or just below the child’s shoulders. CHECK the child’s head MUST BE 1” (2.5 cm) or more below the top of the seat as shown.
-
Page 58: Changing The Buckle Strap Position
Changing the Buckle Strap Position Turn the carrier over and push the metal retainer through the slot and pull buckle strap out of the front of the seat and through the seat pad. Depending on the size of your child you will need to use the slot closest to but not under your child: For Larger Babies: Use front or... - Page 59 Push metal retainer through the slot that fits closest to your child but not under your child. The metal retainer MUST go through the same set of slots in the seat pad and the carrier shell. Pull up on the buckle strap from the front of the seat to make sure the strap is secured on the bottom of the seat and not on the bottom of...
-
Page 60: Changing The Waist Strap Position
Changing the Waist Strap Position For Smaller Babies: In order to change waist strap positions, you will need to follow these steps. 1) Loosen the harness straps by pushing in on the harness adjustment button and pulling the straps forward. 2) Push the buckle strap through the seat pad. - Page 61 To use for smaller child, push Bottom view of seat the retainer through to the bottom of the seat through the inner slots then up through the outer slots. Retainer must lie flat against top of seat. MAKE SURE harness straps are not twisted or that the harness adjustment strap does not get caught between the...
- Page 62 Changing the Waist Strap Position (cont.) For Larger Babies: There are 2 configurations for waist straps (p.62-64). Configuration 1: In order to change waist strap positions, you will need to follow these steps. 1) Loosen the harness straps by pushing in on the harness adjustment button and pulling the straps forward.
- Page 63 To use for larger child, push Bottom view of seat the retainer through to the bottom of the seat through the middle slots then up through the outer slots. Retainer must lie flat against top of seat. MAKE SURE harness straps are not twisted or that the harness adjustment strap does not get caught between the...
- Page 64 Changing the Waist Strap Position (cont.) For Larger Babies: Configuration 2: In order to change waist strap positions, you will need to follow these steps. 1) Loosen the harness straps by pushing in on the harness adjustment button and pulling the straps forward. 2) Push the buckle strap through the seat pad.
- Page 65 To use for larger child, push Bottom view of seat the retainer through to the bottom of the seat through the outer slots then up through the middle slots. Retainer must lie flat against top of seat. MAKE SURE harness straps are not twisted or that the harness adjustment strap does not get caught between the...
-
Page 66: Using The Infant Body Support
Using the Infant Body Support WARNING MISE EN GARDE To prevent ejection or serious injury: ADVERTENCIA • For low birth-weight infant, you must always use the infant body support. The infant body support must be used for infants who weigh less than 6 lbs (2.7 kg). -
Page 67: Securing Your Child In The Carrier
Securing Your Child in the Carrier WARNING MISE EN GARDE Improper placement of the harness straps and buckle strap increases the risk of serious injury or death in a sudden stop or ADVERTENCIA vehicle crash. Rotate handle out of the way. Push the harness adjuster button then pull the harness straps toward you. - Page 68 Securing Your Child in the Carrier (Cont.) Place your child in the carrier with their bottom pushed back and their back flat against the seat. Place the harness straps around your child. Insert the buckle tongues into the buckle as shown. MAKE sure you hear each buckle tongue click into place.
- Page 69 Slowly pull harness adjuster strap to make the shoulder straps snug around the child’s shoulders. BE CAREFUL not to allow the chest clip to slide up into their neck when tightening. CHECK to make sure harness is AT or JUST BELOW the child’s shoulders.
-
Page 70: Latch Storage
LATCH Storage Insert LATCH connectors into the LATCH storage pockets on the base as shown. DO NOT store the LATCH on top of the base. -
Page 71: Instruction Manual Storage
Instruction Manual Storage Open the door on the base and insert the manual into the instruction manual compartment. -
Page 72: Care And Maintenance
Care and Maintenance Cleaning the Seat Pad / Infant Body Support: Refer to the care tag on your seat pad or infant body support for washing instructions. NEVER use carrier without the seat pad attached. Cleaning the Harness and Shell: Wipe clean with damp cloth. - Page 73 Cleaning the Buckle Food, drink or other debris may collect inside the harness buckle which can affect proper function. Wash in warm water until clean. When inserting the buckle tongues, be sure you can hear an audible click to make sure the buckle is working properly.
- Page 74 Notes...
- Page 75 Notes...
-
Page 76: Warranty Information And Replacement Parts
Warranty Information and Replacement Parts For information about warranty and replacement parts, please contact: Aria Child Inc. 530 Harrison Ave Boston, MA 02118 or call 1-844-543-2020 or visit www.GBchildusa.com IM0018A 10/14...
Need help?
Do you have a question about the Asana 35 and is the answer not in the manual?
Questions and answers