Table of Contents
Advertisement
Advertisement
Table of Contents

Related Manuals for Konica Minolta IV


Summary of Contents for Konica Minolta IV
- Page 1 INSTRUCTION MANUAL...
-
Page 2: Color Examples
Tone-curve corrections By selecting individual color channels on the tone curve, adjustments to the overall color of an image can be made. In this example, the image is too yellow. By moving the blue curve up, the image looks more neutral. For more on tone curve corrections, see page 60. -
Page 3: Before You Begin
BEFORE YOU BEGIN Thank you for purchasing this Konica Minolta product. Please take the time to read through this instruction manual so you can enjoy all the features of your new scanner. Check the packing list before using this product. If any items are missing, immediately contact your dealer. -
Page 4: For Proper And Safe Use
The continued use of a damaged product or part may cause injuries or fire. • Take the product to a Konica Minolta service facility when repairs are required. CAUTION • Damage or injury through fire or electric shock may result if the product is used or... - Page 5 Conformité Européenne. FCC Compliance Statement Declaration on Conformity Responsible Party: Konica Minolta Photo Imaging U.S.A. Inc. Address: 725 Darlington Avenue, Mahwah, NJ 07430 This device complies with Part 15 of the FCC Rules. Operation is subject to the following two conditions: (1) This device may not cause harmful interference, and (2) this device must accept any interference received, including interference that may cause undesired operation.
-
Page 6: Table Of Contents
Additional system requirements ...11 Adobe Photoshop Elements ...11 Windows ...12 Macintosh ...14 Scanner setup ...16 Before connecting the scanner to a computer ...16 Connecting the USB cable ...16 Connecting the AC adapter...17 Turning on the scanner ...17 Disconnecting the scanner ...17 Loading the film holders...18... - Page 7 An introduction to color ...41 Comparing pre and post-correction images ...42 Undoing and redoing image corrections...42 Quitting the DiMAGE Scan Utility ...43 Advanced scanning ...44 Setting scanner preferences...44 Exposure control tab...46 Saving exposure settings...47 Loading exposure settings...47 More index scan functions ...48 Reverse frame order ...48...
- Page 8 Image Data Sheet...98 Color examples ...99 Konica Minolta is a trademark of Konica Minolta Holdings, Inc. DiMAGE is a trademark of Konica Minolta Camera, Inc. Microsoft, Windows, Windows 98, Windows Me, Windows 2000 Professional, and Windows XP are registered trademarks of the Microsoft Corporation. Macintosh, Apple, and Power Macintosh are registered trademarks of Apple Computer, Inc.
-
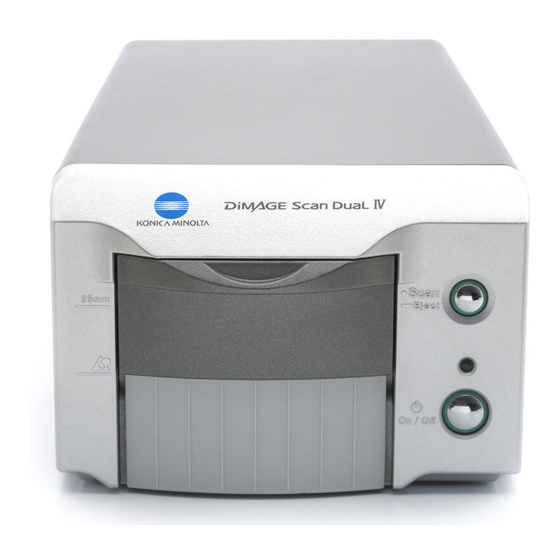
Page 9: Names Of Parts
Remove or disable these programs before installing the DiMAGE Scan Utility. Reinstall or enable the software when the installation is complete. Do NOT connect the scanner to a computer before installing the DiMAGE Scan Utility software. Indicator lamp... -
Page 10: Dimage Scan System Requirements
DiMAGE Scan system requirements The computer and the operating system must be guarantied by the manufacturer to support USB interface. To use the scanner, your computer system must meet the following requirements: Pentium 166 Mhz or later processor. Pentium III or later recommended. -
Page 11: Additional System Requirements
OS must be more than 128 MB. With the image-processing application open, check the amount of unused memory before launching the the scanner utility. If the block of memory is less than 128 MB, close all other open applications. -
Page 12: Windows
Turn on the computer to start up the Windows operating system. Windows XP and 2000 users should logon as an administrator. Insert the DiMAGE Scan Utility CD-ROM into the CD-ROM drive. The DiMAGE Scan Dual IV setup screen will open. Click the “Starting up the DiMAGE Scan Dual4 installer”... - Page 13 Print out a copy of the Read Me file for reference. The scanner software can be launched directly from most image-processing applications. Although the TWAIN driver cannot be seen, it allows the utility to be launched from an image-processing application using the import option as well as allowing the computer and scanner to communicate.
-
Page 14: Macintosh
Macintosh Turn on the computer to start the Mac OS. Insert the DiMAGE Scan Utility CD-ROM into the CD-ROM drive. The Dimage Scan Utility CD-ROM icon appears on the desktop. Double-click on the icon; the driver, manual, and acrobat reader folders are displayed. - Page 15 Any software that is running must be closed before the DiMAGE Scan Utility can be installed. Click the continue button to shut down any active applications and continue the installation routine. The cancel option will end the installation routine. A screen confirming the successful installation of the software will appear.
-
Page 16: Scanner Setup
See pages 9 through 15 for the installation procedure. The scanner should be placed on a level surface free from vibrations. It should be located away from direct sunlight and in a clean, dry, well-ventilated area. Never connect the scanner cable while data is being transferred between the computer and peripheral devices. -
Page 17: Connecting The Ac Adapter
Disconnecting the scanner Never disconnect the scanner when the indicator lamp is blinking. Quit the DiMAGE Scan Utility. Confirm that the scanner indicator lamp is not blinking. Turn the scanner off and then disconnect the cable. Power switch... -
Page 18: Loading The Film Holders
LOADING THE FILM HOLDERS Handling film To achieve the best possible reproduction from the scanner, the film and film holder should be free from dust and dirt. Always work with processed film in a clean, dust- free environment. Handle film by the edges or mount to prevent fingerprints and dirt marring the image area. -
Page 19: Loading Mounted Slides
Launch the DiMAGE Scan Utility before inserting the film holder. Do not insert the film holder into the scanner while the utility software is launching or the scanner is initializing; the indicator lamp blinks during this period. -
Page 20: Using The Aps Adapter Ad-10 (Sold Separately)
21. When using the APS adapter, if the scanner makes a strange sound or the film- advance warning appears, eject the APS adapter immediately (p. 21) and do not reinsert it. -
Page 21: Ejecting A Film Holder
Click the eject button in the DiMAGE Scan Utility window or press and hold the Quick Scan / eject button on the scanner to remove the holder; the scanner automatically ejects the holder to its initial insertion position. Do not touch or hinder the holder while it is moving. -
Page 22: Dimage Scan Launcher
Batch Scan Utility - page 76 The launcher can be used to directly open an image-processing application with which the scanner will be used. To specify the application, click the view button (1); the open dialog box will be displayed. Locate and click on the application to highlight it. -
Page 23: Easy Scan Utility
• sRGB output color space when color matching is on. (p. 80) • Autoexposure with all films except black and white slides. Launching the Easy Scan Utility Do not launch the utility with a film holder in the scanner. The scanner door must be closed. Windows... -
Page 24: Using The Easy Scan Utility
To exit the Easy Scan Utility at any point, click the quit button in the bottom left corner of the window. The film holder will be ejected automatically. Scanner Notes (Macintosh) To cancel an index scan, prescan, or final scan once it has started, click and hold the mouse on the cancel button in the progress dialog box or press and hold the command and period (.) keys until the cancel button appears to depress. - Page 25 When the index scan is complete, thumbnails of all the images in the holder are displayed. Click the image to be scanned. The border is highlighted to indicate selection. Only one image can be selected. When using an optional APS adapter, the thumbnail frame numbers correspond to the film frame numbers.
- Page 26 After making adjustments to the image, click the next button. When using a USB storage device on the same bus as the scanner, save the data on the computer’s hard disk first before transferring it to the storage device. Saving the scanned data directly to the device may corrupt the image data.
- Page 27 The replace-film button ejects the holder so the film can be changed. The continue button allows other images in the film holder to be scanned. Turn off the scanner and close the front door when not in use.
-
Page 28: Basic Scanning
BASIC SCANNING Launching the DiMAGE Scan Utility Do not launch the utility with a film holder in the scanner and confirm the front door is closed. The utility can also be launched from an image-processing application. See the Windows and Macintosh installation section. -
Page 29: Scanner Setup
Scanner setup Before making a scan, the film format and type must be specified. Film type can be selected between color and black and white, positive and negative film. Film for prints is negative film. Slide film is positive film. APS has an additional film-type option, auto detect. -
Page 30: Making An Index Scan
Making an index scan With a loaded film holder in the scanner, click the index-scan button in the main window to start the scan. All the frames in the film holder will be scanned. The frame number of the index scan corresponds to the frame number in the film holder. -
Page 31: Flip And Rotate Images
Flip and rotate images The orientation of the index thumbnails and prescan images can be changed with the flip and rotate buttons on the tool bar. Rotate - the rotate-right button rotates the thumbnail 90° clockwise and the rotate-left button rotates the image 90°... -
Page 32: Main Window And Prescan Tab
Main window and prescan tab Film format Index scan button (p. 30) Prescan button Scan button (p. 34) Eject button Fit-to-window button (p. 31) Flip-vertically button (p. 31) Flip-horizontally button (p. 31) Scan-setting window (p. 34, 54) Rotate-right button (p. 31) Rotate-left button (p. -
Page 33: Grab Tool
Grab tool When an image is larger than the display area, the grab tool can be used to scroll the image. Click the grab button on the tool bar. Click and drag on the image to scroll. This tool cannot be used with the fit-to-window function (p. -
Page 34: Making The Final Scan
Making the final scan Before making the final scan, the input and output parameters must be specified. While it’s possible to input the scan settings yourself, DiMAGE Scan Utility gives you an easier choice - the Job function. This function automatically loads the scan settings based on the final use of the image. - Page 35 Click a Job file name to select it. The Job names can be sorted chronologically or alphabetically by clicking the name or date radio buttons at the bottom of the dialog box. The scan settings of the selected Job file are displayed on the right side of the window.
-
Page 36: Basic Image Processing
BASIC IMAGE PROCESSING Main window and image-correction tab This section contains details on the basic image-processing tools. For descriptions of the advanced tools, see pages 58 though 73. The prescan image or a selected index image can be displayed in the image correction window by simple clicking the tab. If the image has not been prescanned, a prescan will be made automatically. -
Page 37: Pixel Polish
To make custom corrections, click the Pixel Polish tab. If a prescan has not been made, the scanner will make one automatically. Click the custom radio button. Click on the descriptions in the list boxes which best describes the image. To deselect a description, click on it again (Windows) or press the command key and click on it (Macintosh). -
Page 38: Auto Dust Brush
Auto Dust Brush The Auto Dust Brush reduces the visibility of fine dust particles on the film surface that cannot be removed with a brush or blower; all visible dust should be removed from the film, see handling film on page 18. -
Page 39: Variation Palette
Variation palette The variation palette allows an image to be corrected by comparing it to other slightly corrected images surrounding it. This is an easy method to correct images for individuals who are inexperienced in image processing or photofinishing. Click the variation button to display the palette. Click the arrow next to the variation list box (1) to select the image quality to be corrected: color balance, brightness and contrast, or saturation. -
Page 40: Brightness, Contrast, And Color-Balance Palette
Brightness, contrast, and color balance palette Click the brightness, contrast, color-balance button to display the palette. Is this picture too light? Adjusting brightness and contrast can be more difficult than it looks. The image on the right looks too bright, especially the mountains in the background. -
Page 41: An Introduction To Color
An introduction to color In photography, red, green, and blue are the primary colors. The secondary colors, cyan, magenta, and yellow, are made from combining the primary colors: cyan = blue + green, magenta = blue + red, and yellow = red + green. The primary and secondary colors are grouped in complementary pairs: red and cyan, green and magenta, and blue and... -
Page 42: Comparing Pre And Post-Correction Images
Comparing pre and post-correction images Clicking the comparison display button divides the image display area in two. The original image is on the left and the corrected image is on the right. To display the corrected image only, click the comparison display button again. Original image Changes made with the magnifying tool, grab tool, or scroll bars on one image will be applies to the other. -
Page 43: Quitting The Dimage Scan Utility
Quitting the DiMAGE Scan Utility To close the DiMAGE Scan Utility, simply click the close button in the top right corner of the main window. -
Page 44: Advanced Scanning
35mm Film Holder, the scanner only focuses on the first frame. Close-utility-after-scanning check box: this option closes the DiMAGE Scan Utility after the final scan when using the scanner with an image-processing application. Activate this function when individual images will be scanned and then processed or retouched in another application. - Page 45 Color-depth list box: this option specifies the color depth of the scanned image between 8 bit, 16 bit, and 16-bit linear for each RGB channel. Because 16-bit linear color depth does not make any gamma corrections, the scan of a negative will produce a negative image.
-
Page 46: Exposure Control Tab
Simply click the exposure-control tab to display the selected image. If a prescan has not been made, the scanner will make one automatically. If any changes are made to exposure, the image-correction tab will turn red (Windows) or an asterisk will be displayed on the tab (Macintosh). -
Page 47: Saving Exposure Settings
When using autoexposure, adjustments are made in reference to the exposure determined by the AE system. To calibrate the scanner in reference to a standard exposure, turn the autoexposure functions off in the preference window (p. 44); set exposure control for negatives to manual or uncheck the auto-expose-for- slides check box. -
Page 48: More Index Scan Functions
More index scan functions Reverse-frame-order button Save index-image button (p. 49) Save index-file button (p. 49) Load index-file button (p. 49) Load image-correction Job button (p. 73) Reverse frame order Some cameras reverse-wind the film so the last frame is exposed at the beginning of the roll. -
Page 49: Saving The Index Thumbnails
The index thumbnails can be saved as an index file. The index file can be loaded into the scanner so that the index scan does not need to be made again. The index image file format is unique to this software. All the frames in the film holder, including empty frames, must be scanned before the index file can be saved. -
Page 50: More Prescan Functions
AE lock button (p. 53) Scanner Notes The DiMAGE Scan autofocus system uses the CCD sensor to focus the scanner. When the autofocus-at-scan option is selected in the preferences window, the autofocus system uses the center of image to determine focus. This normally results in an excellent scan when the film plane is flat. -
Page 51: Manual Focus
Manual focus The scanner can be focused manually using the focus meter. For best results, select an area within the image with contrast or detail. The manual focus functions cannot focus on a low-contrast image such as a cloudless or overcast sky. -
Page 52: Manual Cropping
Manual cropping Cropping is a method of recomposing the image by eliminating unnecessary space around the subject. Many images are improved by cutting out distracting elements in the background. Clicking the auto-cropping button to display the cropping frame marquee. To enlarge or reduce the cropping frame, place the mouse pointer over the corners or sides of the cropping frame;... -
Page 53: Autoexposure
AE lock The AE lock function sets the scanner exposure based on the exposure determined for a specific prescan with or without the use of AE area selection. This exposure can be applied to scans of different images. This function is useful when scanning a series of high and low-key images that have consistent exposures. -
Page 54: Inputting Scan Settings Manually
Inputting scan settings manually Settings for the final scan can be made in the index scan or prescan windows. Input-resolution list box: values can be selected among the drop-down list or be entered into the box directly. The input-resolution range is from 200 dpi to the maximum resolution of 3200 dpi. -
Page 55: About Resolution And Output Size
When the input size and output size are unlocked, the input resolution and output size vary according to the entered magnification value. When the output size is locked, the input resolution and input size vary according to the entered magnification value. When the input size is locked, the input resolution and output size vary according to the entered magnification. -
Page 56: Scan Setting Examples
Scan setting examples Example 1: setting the scanner output by pixels. This example creates an image with the pixel dimension of 640 X 480 to be displayed on a monitor. Select pixel from the unit list box. The output-resolution and input-size boxes are deselected. -
Page 57: Saving Scan Settings As A Job
Saving scan settings as a Job Frequently used scan settings can be saved. With the settings to be saved in the scan setting window, click the save Job button. The Job-registry dialog box will open. Select the category in which to save the settings from the drop-down menu. -
Page 58: Advanced Image Processing
ADVANCED IMAGE PROCESSING More image-processing tools This section covers the advanced image-processing tools in the DiMAGE Scan Utility as well as functions to view and save image corrections. The basic image-processing section on pages 36 through 43 should be read before continuing. Selective-color button (p. -
Page 59: Digital Grain Dissolver
Digital Grain Dissolver Digital GEM reduces the effect of film grain. Grain is a sandy texture that can sometimes be seen in smooth uniform areas of the image such as the sky. Grain is more pronounced in fast film. The results vary with the film. Scanning time increases. Select image processed. -
Page 60: Tone Curve / Histogram Palette
Tone curve and histogram palette Click the tone-curve/histogram button to display the palette. Auto-setting button (p. 65) Input shadow, gamma, and highlight sliders (p. 64) Output shadow and highlight sliders (p. 64) Using tone curves Click the arrow next to the channel box to select the channel from the drop-down menu. -
Page 61: Drawing Tone Curves By Freehand
Drawing tone curves by freehand Click the freehand-curve button (1). The mouse pointer changes to the pencil tool when placed on the tone curve. Click and drag the pointer to draw a new curve. Extreme image manipulations are possible with the freehand curve tool. To smooth a rough freehand curve, click the smooth-curve button (2). -
Page 62: A Short Guide To Tone-Curve Corrections
A short guide to tone curve corrections Image processing is a highly specialized and difficult field that takes years of practice to master. This basic guide to using tone curves covers a few simple procedures to improve your pictures. For more about digital-image processing, consult your local book dealer about self-help guides on this subject. - Page 63 Correcting color By selecting individual color channels on the tone curve, adjustments to the overall color of an image can be made. This can be used to eliminate unnatural color casts or add warmth to a picture. Increasing image contrast The contrast of an image can be changed.
-
Page 64: Histogram Corrections
Histogram corrections The histogram indicates the distribution of pixels with specific brightness or color values in the image. Using the histogram can maximize the output of the image data. Changes made with the histogram are also displayed on the tone curve. Input shadow slider Input highlight slider Input gamma slider... -
Page 65: Tone-Curve / Histogram Auto Setting
The input shadow slider sets the black level. As the slider is moved to the right, an apparent increase in contrast can be seen in the displayed image. All pixels to the left of the slider are set to 0 and any image detail they may contain will be lost. The black and white output levels can be adjusted. -
Page 66: A Short Guide To Histogram Corrections
By moving the highlight slider to the left to set the white point to where the pixel distribution ends, the whites become more brilliant and the contrast increases. Konica Minolta History On February 20th, 1962, John Glenn became the first American to orbit the Earth. - Page 67 This image is flat. The pixel distribution in the histogram reflects the low-contrast scene. The lack of any strong shadows or dark tones is indicated by the absence of pixels on the left of the histogram. Most of the detail is concentrated in a narrow range in the mid-tones.
-
Page 68: White, Black, And Gray-Point Corrections
White, gray, and black point corrections On the tone curve / histogram palette, corrections can be made by specifying a white, black, and gray point within the image. Locating an appropriate neutral area within the image is critical to correctly calibrate the software. When the dropper tool is selected, the RGB display is active and can be used to evaluate the image area. -
Page 69: Setting The White And Black-Point Values
Setting the white and black-point values The white and black-point values are set to 255 and 0 for each RGB level. Changing these values allow the calibration of an image with no true white or black. Double-click on either the white-point or black-point button to activate the point-value-setting dialog box. -
Page 70: Hue, Saturation, And Lightness Palette
Hue, saturation, and lightness palette This palette adjusts the image in reference to the HSB color model. These controls can be used to manipulate the color image rather than producing a realistic representation. The HSB color model defines color based upon human perception rather than photographic processes. -
Page 71: Selective-Color Palette
Selective-color palette Selective-color correction is an advanced technique to refine the colors in the image. A cyan, magenta, yellow, and black channel can be used to adjust the six separate color groups in the image: red, green, blue, cyan, magenta, and yellow. The black- level slider controls the brightness of the selected color group.This type of correction is effective in changing a specific color without influencing any of the other colors in the image. -
Page 72: Unsharp Mask
Unsharp mask The unsharp mask sharpens edges in the image without affecting overall image contrast. This mask can be used with soft or slightly out-of-focus images. The effect of the unsharp mask is very subtle, but makes a significant improvement to the overall appearance of the image. -
Page 73: Saving Image Corrections
Saving image corrections All corrections applied to an image can be saved as an image-correction Job. The Job can be loaded into the utility at any time and applied to different images. This is a time- saving function when a large number of images need too be processed with the same correction settings. -
Page 74: Custom Wizard
CUSTOM WIZARD The Custom Wizard is an automated scanning routine. Screens vary with scanner model. Insert a film holder into the scanner. Click the Custom Wizard button. On the Custom-Wizard-setting dialog box, select New from the Custom Wizard settings. Click the next button. - Page 75 Make any adjustments to the scanner exposure. Previously saved settings can be loaded. See page 46 for more information. Click the next button to continue. Select specific image processing. Pixel Polish cannot be used with black and white film. Click the next button to continue.
-
Page 76: Batch Scan Utility
(p. 59). The parameters of this functions can be changed with the Batch Scan setup dialog box, see page 78. ATCH SCAN UTILITY To set up the batch scan, click Batch Scan Settings button launcher window. Confirm the scanner front door is closed and there is holder inserted as the scanner will initialize. - Page 77 Quick Scan button is pressed the scanner initializes and then the message to insert the holder is displayed. To scan subsequent holders, simply insert the holder and press the Quick Scan button.
-
Page 78: Advanced Batch Scan Setup
To change the advanced settings, click the Batch Scan setup button to open the setup dialog box. To change scanner preferences. For more on the preferences dialog box, see page 44. For information on color matching, see page 80. - Page 79 To control the scanner exposure. See page 46 on how to make and save exposure settings. To set the parameters for Auto Dust Brush (p. 38), Pixel Polish (p. 37), and Digital Grain Dissolver (p. 59) image processing. To apply image processing to the scanned images.
-
Page 80: Color Matching
COLOR MATCHING Each output device (monitor or printer) defines color and contrast differently. To ensure the reproduction of the image on the monitor matches the reproduction of the image from the printer, the color space for both devices must be defined. Color matching is activated in the preferences box. -
Page 81: Output Color Spaces
Output color spaces The choice of output color space depends on how the image will be reproduced. For most personal use where the image is displayed on a monitor or printed with a small printer, sRGB color space is adequate. Other color spaces have been included for professional and technical applications. -
Page 82: Setting The Monitor Icc Profile
Click OK in the preferences window to set the ICC profile. Monitor ICC profiles are located in the same folder as the scanner color profiles, see below. When using Mac OS X, the monitor profiles are in the following location: [Library] ->... -
Page 83: Color Matching Recommendations
Mac OS 8/9 System ColorSync profile Mac OS X Users Color matching recommendations The following are recommendations for output color space and monitor ICC-profile settings with image-processing applications. Some applications, such as Adobe Photoshop 5 or later, have a monitor correction display function which automatically corrects the monitor display to a specific color space. -
Page 84: Auto Dust Brush Plug-In
AUTO DUST BRUSH PLUG-IN Before installing the plug-in Install the scanner utility software and then open one of the applications with the scanner unit attached to the computer and scan an image. This procedure allows the Auto Dust Brush plug-in to be used. - Page 85 Click the yes button to accept the agreement and continue. Read the entire agreement carefully before continuing. If you do not agree to the terms of the license agreement, click the no button to exit the setup program. To install the plug-in in the displayed destination folder, click Next.
-
Page 86: Installation - Macintosh
This will allow the plug-in to be used in that application. To use the plug-in, see page If the plug-in was not installed with the scanner software, repeat the installation procedure on page 14. In the custom install screen, only select the Auto Dust Brush plug-in for installation. -
Page 87: Using The Auto Dust Brush Plug-In
Using the Auto Dust Brush plug-in Open image application with the Auto Dust Brush plug-in. Only RGB and grayscale images processed. Using the area marquee, select the area within the image to be retouched. area selected, the Auto Dust Brush is applied to the entire image. - Page 88 Film type: the type of film scanned must be specified. Dust on positive or slide film is shown as dark spots. On negative or print film, the dust is seen as white spots. Processing level: the degree of processing can be specified. Dust threshold size: the processing can be limited to a certain size of image artifacts caused by dust.
-
Page 89: Appendix
APPENDIX Glossary of common terms Contrast adjusts the relationship between the light and dark areas of the image. Increasing the contrast will make the highlights Contrast brighter and the shadows darker. Increasing the contrast can also increase the apparent sharpness of the image. Film uses tiny silver-halide crystals to record light. -
Page 90: Uninstalling The Dimage Scan Software
Uninstalling the DiMAGE Scan Software When using Windows, select Remove DiMAGE Scan Dual4 from the Minolta DiMAGE Scan folder in the program option of the start menu. Simply follow the instructions in the windows to complete the operation. To uninstall the DiMAGE Scan software from a Macintosh computer, place the DiMAGE Scan CD-ROM in the CD-ROM drive repeat the installation procedure, but... -
Page 91: Installed File And Folders
Installed files and folders The following files and folders are installed in the computer system at the same time as the DiMAGE Scan Utility application software. For the location and names of the installed scanner profiles, see page 82. Windows Twain.dll Twain32.dll... -
Page 92: Job File List
Job file list Jobs can be used to make scan settings based on the final use of the image. See making-the-final-scan section on page 34. The following charts list the parameters of the scanner’s Job files: PPENDIX... - Page 93 35mm...
-
Page 94: Troubleshooting
TROUBLESHOOTING This section covers minor problems with scanner operation. For major problems or damage, or if a problem continues to reoccur frequently, contact your dealer or a konica Minolta service facility. SYMPTOM or MESSAGE When starting up the utility software, could-not-confirm-scanner-connection message appears. -
Page 95: Checking Software Installation - Windows
3.Restart the computer. Confirm the driver is in the proper location using the instructions at the top of the page. When the scanner is initially connected to a computer with a Windows 98, 98SE, or 2000 Professional operating system, the found-new-hardware wizard will appear briefly. -
Page 96: Technical Specifications
Slide Mount Holder, Color positive film, no autoexposure, no image correction, 3200dpi 8-bit scan. Windows: Pentium IV 3.2 GHz, Windows XP Professional, 1.0GB RAM, 86GB hard disk space, built-in USB 2.0 port, Adobe Photoshop ver. 7.0.1. Macintosh: PowerPC G5 1.8 GHz, Mac OS X 10.3.1, 512MB RAM, 16GB hard disk space, Apple... -
Page 97: Technical Support
Please contact your dealer for information regarding installation, USB interface recommendations, or application compatibility. If your dealer is unable to help you, contact an authorized Konica Minolta service facility. Please have the following information ready when calling Konica Minolta technical support: 1. -
Page 98: Image Data Sheet
Pixel Polish: Green: Input size (H): Output size (H): ICC profile: Color depth: Konica Minolta Date: Processing: R/ G/ B/ C/ M/ Y/ R/ G/ B/ C/ M/ Y/ R/ G/ B/ C/ M/ Y/ R/ G/ B/ C/ M/ Y/... -
Page 99: Color Examples
Hue corrections Original color space New color space Two color spaces are displayed at the bottom of the palette. The top bar indicates the color space of the original image. The bottom bar displays the relative shift to the Original color space. - Page 100 © 2003 Konica Minolta Camera, Inc. under the Berne Convention and the Universal Copyright Convention. 9222-2891-11 AV-A312 Printed in Taiwan...
Need help?
Do you have a question about the IV and is the answer not in the manual?
Questions and answers