
Related Manuals for Burmester Surround Processor 007


Summary of Contents for Burmester Surround Processor 007
- Page 1 OPERATING INSTRUCTIONS SURROUND PROCESSOR HIGH END MADE IN GERMANY BURMESTER AUDIOSYSTEME GMBH • KOLONNENSTR. 30G • 10829 BERLIN TEL 030/78 79 68 - 0 • FAX 030/78 79 68 - 68 • www.burmester.de...
- Page 3 Dear Audiophile, Thank you for choosing this Burmester audio component. We sincerely appreciate your trust in us. You have purchased a unit which excells in musical fidelity and combines uncompromising manufacturing quality with technical innovation and the highest degree of operating flexibility.
-
Page 4: Table Of Contents
C O N T E N T S START-UP Unpacking the units Setting up Commencing operation Precautions Technical Data Licence notice VIEWS OF UNITS Front view Rear view CONTROLS AND FUNCTIONS Control elements of power supply unit Control elements of surround processor The display CONNECTIONS Connections of power supply unit... - Page 5 C O N T E N T S THE SETUP MENU Overview and brief description of menu items Loudspeaker level Level LFE Dynamic range Surround mode of inputs Display Off mode Dolby Digital Dual mode DTS Neo mode Dolby Pro Logic II mode Dolby Pro Logic II Panorama Dolby Pro Logic II Center Width Dolby Pro Logic II Dimension...
-
Page 7: Unpacking The Units
UNPACKING THE UNITS Please make sure that all items are enclosed. Should any of the contents be missing, please contact your dealer. Contents The shipping carton contains: • 2 packaging containers (surround processor and power supply unit) • 1 base plate •... -
Page 8: Commencing Operation
Interconnects We custom-make balanced and unbalanced interconnect cables of any length to ensure highest-quality signal paths for the surround processor 007. The impedance of our cables is ideally matched to all Burmester components. For optimum power supply we recommend our triple-shielded power cord BURMESTER POWER. -
Page 9: Technical Data
TECHNICAL DATA Basic unit Dimensions (WxHxD): 450x160x340 mm (incl. base plate) Weight: ca. 28kg (incl. base plate) Power supply unit Dimensions (WxHxD): 482x95x340 mm Weight: ca. 10kg Power consumption: ON: max. 60W STBY: 4W Fuses: 200/240V 1x1A/ time-lag , 2x50mA/ time-lag 110/127V 2x1,6A/ time-lag , 2x100mA/ time-lag PLEASE NOTE: The dimensions do not include the space needed for the plugs of interconnect cables. -
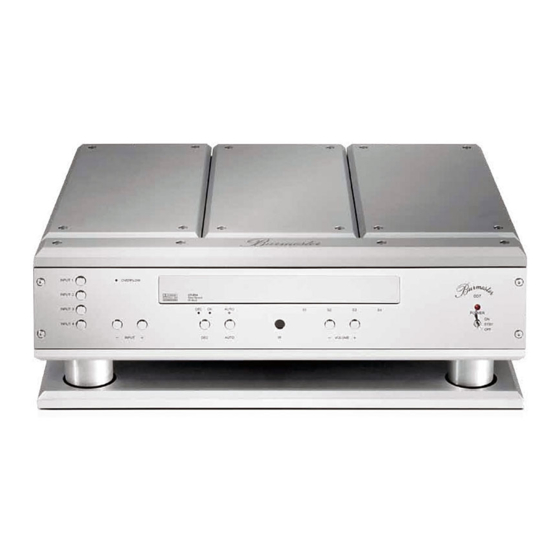
Page 10: Front View
FRONT VIEW SURROUND PROCESSOR Buttons for direct input selection (10) DECODE LED LED for overload indication (11) DECODE button Input indicator (12) DECODE OK LED Decode indicator (13) AUTO DECODE button LEDs for selected SETUPs (14) AUTO DECODE LED Volume indicator (15) IR receiver Unit base... -
Page 11: Rear View
REAR VIEW SURROUND PROCESSOR (19) BURLINK interface (28) POWER SUPPLY connection (20) RECEIVE / TRANSMIT LEDs for BURLINK (29) Digital audio inputs TOSLINK (LWL) (21) Digital audio inputs RCA (75Ω Ω Ω Ω ) (30) Digital audio output TOSLINK (LWL) (22) Digital audio output RCA (75Ω... -
Page 12: Control Elements Of Power Supply Unit
CONTROL ELEMENTS OF POWER SUPPLY UNIT The power supply of the surround processor is housed in an external unit which also contains the connections for the video components. Power supply The power switch (43) above the MAINS socket (42) on the rear of the power supply unit turns on electricity both to the power supply unit as well as the surround processor. -
Page 13: The Display
AUTO By pressing AUTO (13) the automatic decoding of the incoming audio signals is activated. This is indicated by the AUTO DECODE LED (14) on the front of the surround processor. The received audio signals are automatically decoded depending on the surround mode- preset of the selected input. -
Page 14: Connections Of Power Supply Unit
OUTPUT jacks (50). REMOTE OUTPUT Using the REMOTE OUTPUT 1 and 2 jacks (39), BURMESTER power amps can be turned on and off with the power switch (17). The surround processor needs to be connected with the power amps’ REMOTE INPUT jacks. The necessary remote cable is part of the delivery... -
Page 15: Connections Of Surround Processor
Connecting with unbalanced power amp or active loudspeaker inputs is possible when using special adaptor plugs. Please check with your authorized Burmester dealer. The outputs (32) are designated for the front channels (left and right). -
Page 16: Remote Control
The remote control (included) is divided into two function units. The upper keypad (52) activates other BURMESTER components such as preamplifiers, FM tuners, CD players, DVD players. Please refer to the owner’s manual of those components for the individual functions of these keys. -
Page 17: Remote Control
REMOTE CONTROL... -
Page 18: Loudspeaker Systems And Set-Up
LOUDSPEAKER SYSTEMS AND SET-UP The surround processor 007 provides the option to connect up to 8 loudspeakers. The smallest configuration involves two loudspeakers: front left , front right - this configuration is only appropriate for STEREO reproduction. The smallest configuration for reproduction of surround coded audio signals involves three loudspeakers: front left, front right , center. - Page 19 LOUDSPEAKER SET-UP 2.0/2.1 set-up 3.0/3.1 set-up typical 5.0/5.1 set-up alternative 5.0/5.1 set-up 6.0/6.1 set-up 7.0/7.1 set-up...
-
Page 20: Configuration Menus
CONFIGURATION MENUS The CONFIGURATION MENUS allow you to adjust the surround processor to your system’s needs and your personal preferences. Each CONFIGURATION MENU is divided into menu items. The different menu items can be adjusted individually and in any order. There are four SETUPs for the configuration of the unit. -
Page 21: Activation Of Menus
CONFIGURATION MENUS Activating Menus In order to enter the CONFIGURATION MENUS, press the key MENU (53) . The display will show QUICK MENU Using the keys NEXT (55) and PREV (56), choose the desired menu. By pressing the key MENU (53) you will reach the menu item selection level of the desired menu. CONFIGURATION MENUS Navigating within Menus Once you have activated a menu, the display will show the first menu item. -
Page 22: The Global Menu
THE GLOBAL MENU Contents Overview MENU ITEM BRIEF DESCRIPTION Entering current number of speakers and Speaker their size Entering distance of each speaker from Distance listening position Entering which rear speaker should 5.1 SurroundOut reproduce surround channels Assigning names, and assigning audio input jacks and video input jacks to inputs Adjusting input sensitivity of the analog AnaIn... -
Page 23: Loudspeaker Configuration
THE GLOBAL MENU Speaker configuration In this menu item, you set the speakers of your system and their size. Setting the loudspeaker configuration is urgently necessary in order to utilize the full capacity of the unit. Information on factory presets can be found in APPENDIX A. There are the following loudspeaker groups: - subwoofer - front (left/right) - center... -
Page 24: Loudspeaker Distance
THE GLOBAL MENU Speaker distance In order to produce ideal sound characteristics, it is important that the sound waves of all speakers reach the listening position at the same time. Since the distance of each speaker from the listening position usually differs, the setting speaker distance (distance) offers the possibility to delay the sound radiation of the closer speakers. -
Page 25: Surround Output
THE GLOBAL MENU 5.1 Surround Out When 5 channel reproduction is available, the surround channels are usually reproduced by the rear speakers. If the system also contains extended speakers, you can choose which speakers should reproduce the surround signals. There are three possible settings: REAR : The signals of the surround channels are only reproduced by the rear speakers. -
Page 26: Configurating The Inputs
THE GLOBAL MENU Configurating the inputs The surround processor can manage upto 15 logical inputs. Each logical input can be assigned a name, an audio input on the rear of the surround processor, and a video input on the rear of the power supply unit. -
Page 27: Input Sensitivity Of Analog Inputs
THE GLOBAL MENU Input sensitivity of the analog inputs This menu item is used to set the input sensitivity of the analog inputs and to activate or deactivate the automatic sensitivity control. The analog inputs are located on the rear of the surround processor. They are marked INPUT 7 to INPUT 9. -
Page 28: Pin Selection Of Xlr Outputs
THE GLOBAL MENU Pin assignment of the XLR outputs Not all audio components with XLR jacks have the same pin assignment as BURMESTER components. In this menu item you can attune the pin assignment of the XLR output jacks to the connected power amps or active speakers. -
Page 29: Saving Settings Of The Global Menu
THE GLOBAL MENU Saving Any changes made within the GLOBAL MENU are automatically saved in temporary storage after exiting the the menu, and remain intact until shutting off the unit. If you want to keep the chosen settings after shutting down, you need to save them using the SAVE function. Activate the GLOBAL MENU and select the menu item Save. -
Page 30: The Setup Menu
THE SETUP MENU Overview MENU ITEMS BRIEF DESCRIPTION Volume equalization of all speakers with Level reference to listening position Level LFE Volume of low bass range Setting dynamic range of sound Dynamic Range reproduction SrndMode Assigning surround to inputs Determines if display remains lit or dark Display Off Mode after operating unit Selecting channel during reproduction of... -
Page 31: Loudspeaker Level
THE SETUP MENU Speaker level In order to determine the optimal volume relationship of the connected loudspeakers, you should sit in your listening spot. The goal is to adjust the playback volume of all speakers in such a way that the signal of all speakers is heard equally loud at the chosen listening position. -
Page 32: Dynamic Range
THE SETUP MENU Dynamic Range Dynamic range describes the volume relationship among the soft and loud passages of sound reproduction. There are three possible settings: LARGE: With a large dynamic range, soft passages (whispering) are considerably softer than the middle playback volume, and the loud passges (explosions) are very loud. -
Page 33: Surround Mode Of Inputs
THE SETUP MENU Surround mode of the inputs Decoding the incoming signals depends on the setting of the surround mode. A surround mode is assigned to each logical input. There are four possible settings: STEREO : All incoming signals are mixed down to the front channels (2channel downmix). -
Page 34: Dolby Digital Dual Mode
THE SETUP MENU Dolby Digital Dual Mono Mode Dolby digital sources can supply double mono signals, where both channels contain different information, i.e. in different languages (two-channel sound). Using the setting of the Dolby Digital Dual Mode you can select how these are reproduced. There are four possible settings: STEREO : left channel in left front speaker, right channel in right front speaker... -
Page 35: Dolby Pro Logic Ii Panorama
Dolby Pro Logic is a procedure for multi-channel reproduction of stereo signals and surround encoded two-channel signals. You can select here, how playback is to occur. There are three possible settings: MUSIC : Select the setting MUSIC for music playback with stereo signals as well as surround encoded two-channel signals. -
Page 36: Saving Settings Of The Setup Menu
With this mode you can shift the center output signal incrementally to the two front channels. There are eight possible settings: Setting 0 : The center output signal remains unchanged. Setting 7 : The center output signal is completely transfered to the front channels - the center speaker reproduces no signal. - Page 37 THE SETUP MENU Saving Any changes made within an existing SETUP are automatically saved in temporary storage after exiting the the SETUP menu, and remain intact until shutting off the unit. If you want to keep the selected settings after shutting down, you need to save them using the SAVE function. Activate the SETUP MENU and select the menu item Save.
-
Page 38: The Quick Menu
THE QUICK MENU Overview MENU ITEM BRIEF DESCRIPTION Level LFE: Volume equalization of the subwoofer Setting dynamic range of sound Dynamic Range: reproduction Selecting channel during reproduction of Dolby D Dual Mono Mode: double mono signals (two-channel) DTS NeoMode: Setting playback mode for stereo signals Setting playback mode for stereo signals Dolby PLII Mode: and encoded two-channel signals... -
Page 39: Setup Menu
TUN / INP.8 / OFF INPUT 6: name / audio / video TAPE / INP.9 / OFF Ana In Ana 1 bis Ana 3: Auto / Level YES / 50 XLR Pinout BURMESTER Initial Volume SETUP MENU MENU ITEM SELECTION DEFAULTS Level... - Page 40 APPENDIX B Input names DVD1 DVD2 DVD3 VCR1 VCR2 VCR3 DVB1 DVB2 DVB3 TUN1 TUN2 TUN3 TAPE DAT1 DAT2 DAT3 PHO1 PHO2 PHO3 AUX1 AUX2 AUX3...
- Page 41 APPENDIX C Facts about Surround GENERAL The technical advances of the last few years have resulted in a marked enhancement in the music playback sector, especially regarding clarity, precision and performance of the products. However, normal stereo systems reach their natural limits during playback of atmospherical and surround sound.
Need help?
Do you have a question about the Surround Processor 007 and is the answer not in the manual?
Questions and answers