
Subscribe to Our Youtube Channel
Related Manuals for Nilfisk-ALTO SCRUBTEC 545B


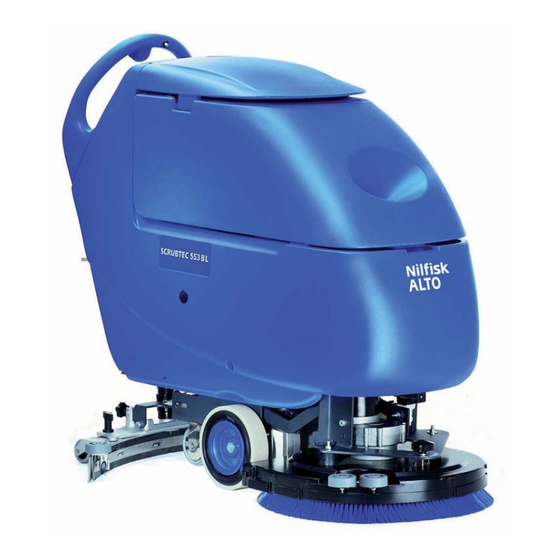
Summary of Contents for Nilfisk-ALTO SCRUBTEC 545B
- Page 1 SCRUBTEC 545B / 545BL / 553B / 553BL / BOOST 5 / 653B / 653BL / 651BCL / 661BL / 545E / 553E / 653E ENGLISH SERVICE MANUAL 9097062000(2)2009-06...
-
Page 3: Table Of Contents
MACHINE DIMENSIONS ................................11 MAINTENANCE ................................17 SCHEDULED MAINTENANCE TABLE (SCRUBTEC 545B, 545BL, 553B, 553BL, BOOST 5, 653B, 653BL, 651BCL, 661BL) .. 17 SCHEDULED MAINTENANCE TABLE (SCRUBTEC 545E, 553E, 653E) ..................17 MACHINE NOMENCLATURE (SCRUBTEC 545B, 545BL, 553B, 553BL, BOOST 5) ..............18 MACHINE NOMENCLATURE (SCRUBTEC 653B, 653BL, 651BCL, 661BL) ................ - Page 4 ELECTRICAL SYSTEM ..............................77 MACHINE WORKING HOUR CHECK (SCRUBTEC 545B, 545BL, 553B, 553BL, BOOST 5, 653B, 653BL, 651BCL, 661BL, equipped with optional hour counter) ..77 MACHINE WORKING HOUR CHECK (SCRUBTEC 545E, 553E, 653E, equipped with optional hour counter) ......77 POWER SUPPLY CABLE CHECK (SCRUBTEC 545E, 553E, 653E) ...................
-
Page 5: General Information
The following manuals are available at Nilfisk-Advance Literature Service Department: SCRUBTEC 545B, 545BL, 553B, 553BL, BOOST 5: User Manual - Form Number 9097054000 SCRUBTEC 545B, 545BL, 553B, 553BL, BOOST 5: Spare Parts List - Form number 9097055000 SCRUBTEC 653B, 653BL, 651BCL, 661BL: User Manual - Form Number 9097058000... -
Page 6: Safety
Do not operate the machine near toxic, dangerous, flammable and/or explosive powders, liquids or vapours: This machine is not suitable for collecting dangerous powders. DANGER! (SCRUBTEC 545B, 545BL, 553B, 553BL, BOOST 5, 653B, 653BL, 651BCL, 661BL) – Before performing any cleaning, maintenance, repair or replacement procedure disconnect the battery connector and remove the ignition key. - Page 7 The machine must be disposed of properly, because of the presence of toxic-harmful materials (batteries, etc.), which are subject to standards that require disposal in special centres (see the User Manual). SCRUBTEC 545B / 545BL / 553B / 553BL / BOOST 5 9097062000(2)2009-06...
- Page 8 ENGLISH SERVICE MANUAL GENERAL INFORMATION WARNING! (SCRUBTEC 545B, 545BL, 553B, 553BL, BOOST 5, 653B, 653BL, 651BCL, 661BL) – Do not pull or carry the machine by the battery charger cable and never use the battery charger cable as a handle. Do not close a door on the battery charger cable, or pull the battery charger cable around sharp edges or corners.
-
Page 9: Technical Data (Scrubtec 545B, 545Bl, 553B, 553Bl, Boost 5)
Each wheel print checked on cement • Result expressed as maximum value for both front and rear wheels SCRUBTEC 545B / 545BL / 553B / 553BL / BOOST 5 9097062000(2)2009-06 653B / 653BL / 651BCL / 661BL / 545E / 553E / 653E... -
Page 10: Technical Data (Scrubtec 653B, 653Bl, 651Bcl, 661Bl)
Each wheel print checked on cement • Result expressed as maximum value for both front and rear wheels SCRUBTEC 545B / 545BL / 553B / 553BL / BOOST 5 9097062000(2)2009-06 653B / 653BL / 651BCL / 661BL / 545E / 553E / 653E... - Page 11 Brush motor power 400 W Cylindrical brush speed 570 rpm Cylindrical brush pressure 26.5 kg SCRUBTEC 545B / 545BL / 553B / 553BL / BOOST 5 9097062000(2)2009-06 653B / 653BL / 651BCL / 661BL / 545E / 553E / 653E...
-
Page 12: Technical Data (Scrubtec 545E, 553E, 653E)
Each wheel print checked on cement • Result expressed as maximum value for both front and rear wheels SCRUBTEC 545B / 545BL / 553B / 553BL / BOOST 5 9097062000(2)2009-06 653B / 653BL / 651BCL / 661BL / 545E / 553E / 653E... -
Page 13: Machine Dimensions
MAINTENANCE DIMENSIONS SCRUBTEC 545B 1.190 mm 760 mm DIMENSIONS SCRUBTEC 545BL 1.190 mm 760 mm SCRUBTEC 545B / 545BL / 553B / 553BL / BOOST 5 9097062000(2)2009-06 653B / 653BL / 651BCL / 661BL / 545E / 553E / 653E... - Page 14 MAINTENANCE DIMENSIONS SCRUBTEC 553B 1.228 mm 760 mm DIMENSIONS SCRUBTEC 553BL 1.228 mm 760 mm SCRUBTEC 545B / 545BL / 553B / 553BL / BOOST 5 9097062000(2)2009-06 653B / 653BL / 651BCL / 661BL / 545E / 553E / 653E...
- Page 15 DIMENSIONS SCRUBTEC BOOST 5 1.228 mm 760 mm DIMENSIONS SCRUBTEC 653B 1.323 mm 760 mm SCRUBTEC 545B / 545BL / 553B / 553BL / BOOST 5 9097062000(2)2009-06 653B / 653BL / 651BCL / 661BL / 545E / 553E / 653E...
- Page 16 MAINTENANCE DIMENSIONS SCRUBTEC 653BL 1.323 mm 760 mm DIMENSIONS SCRUBTEC 651BCL 1.253 mm 760 mm SCRUBTEC 545B / 545BL / 553B / 553BL / BOOST 5 9097062000(2)2009-06 653B / 653BL / 651BCL / 661BL / 545E / 553E / 653E...
- Page 17 MAINTENANCE DIMENSIONS SCRUBTEC 661BL 1.311 mm 810 mm DIMENSIONS SCRUBTEC 545E 1.190 mm 760 mm SCRUBTEC 545B / 545BL / 553B / 553BL / BOOST 5 9097062000(2)2009-06 653B / 653BL / 651BCL / 661BL / 545E / 553E / 653E...
- Page 18 MAINTENANCE DIMENSIONS SCRUBTEC 553E 1.190 mm 760 mm DIMENSIONS SCRUBTEC 653E 1.323 mm 760 mm SCRUBTEC 545B / 545BL / 553B / 553BL / BOOST 5 9097062000(2)2009-06 653B / 653BL / 651BCL / 661BL / 545E / 553E / 653E...
-
Page 19: Maintenance
The following tables provide the scheduled maintenance. The intervals shown may vary according to particular working conditions, which are to be defined by the person in charge of the maintenance. For instructions on maintenance procedures, see the following paragraphs. SCHEDULED MAINTENANCE TABLE (SCRUBTEC 545B, 545BL, 553B, 553BL, BOOST 5, 653B, 653BL, 651BCL, 661BL) Daily, after using... -
Page 20: Machine Nomenclature (Scrubtec 545B, 545Bl, 553B, 553Bl, Boost 5)
Detergent tank handle (**) Detergent feed hose (**) Detergent pump (**) Detergent tank - pump connecting hose (**) SCRUBTEC 545B / 545BL / 553B / 553BL / BOOST 5 9097062000(2)2009-06 653B / 653BL / 651BCL / 661BL / 545E / 553E / 653E... - Page 21 SERVICE MANUAL ENGLISH MAINTENANCE MACHINE NOMENCLATURE (SCRUBTEC 545B, 545BL, 553B, 553BL, BOOST 5) (Continues) P100101 SCRUBTEC 545B / 545BL / 553B / 553BL / BOOST 5 9097062000(2)2009-06 653B / 653BL / 651BCL / 661BL / 545E / 553E / 653E...
- Page 22 72 74 73 76 75 79 80 SCRUBTEC 545B - 553B SCRUBTEC 545BL - 553BL - BOOST 5 P100102 P100103 P100104 SCRUBTEC 545B / 545BL / 553B / 553BL / BOOST 5 9097062000(2)2009-06 653B / 653BL / 651BCL / 661BL / 545E / 553E / 653E...
-
Page 23: Machine Nomenclature (Scrubtec 653B, 653Bl, 651Bcl, 661Bl)
Detergent tank handle (**) Detergent feed hose (**) Detergent pump (**) Detergent tank - pump connecting hose (**) SCRUBTEC 545B / 545BL / 553B / 553BL / BOOST 5 9097062000(2)2009-06 653B / 653BL / 651BCL / 661BL / 545E / 553E / 653E... - Page 24 ENGLISH SERVICE MANUAL MAINTENANCE MACHINE NOMENCLATURE (SCRUBTEC 653B, 653BL, 651BCL, 661BL) (Continues) 11 11c P100115 SCRUBTEC 545B / 545BL / 553B / 553BL / BOOST 5 9097062000(2)2009-06 653B / 653BL / 651BCL / 661BL / 545E / 553E / 653E...
- Page 25 72 74 73 76 75 79 80 SCRUBTEC 653B SCRUBTEC 653BL - 653BCL - 661BL P100116 P100117 P100104 SCRUBTEC 545B / 545BL / 553B / 553BL / BOOST 5 9097062000(2)2009-06 653B / 653BL / 651BCL / 661BL / 545E / 553E / 653E...
-
Page 26: Machine Nomenclature (Scrubtec 545E, 553E)
Washing water flow control switches 82a. Flow increase switch 82b. Flow decrease switch 82c. Solution flow indicator SCRUBTEC 545B / 545BL / 553B / 553BL / BOOST 5 9097062000(2)2009-06 653B / 653BL / 651BCL / 661BL / 545E / 553E / 653E... - Page 27 MAINTENANCE MACHINE NOMENCLATURE (SCRUBTEC 545E, 553E) (Continues) 19 14 55 26 15 25 27 S100145 SCRUBTEC 545B / 545BL / 553B / 553BL / BOOST 5 9097062000(2)2009-06 653B / 653BL / 651BCL / 661BL / 545E / 553E / 653E...
-
Page 28: Machine Nomenclature (Scrubtec 653E)
Washing water flow control switches 82a. Flow increase switch 82b. Flow decrease switch 82c. Washing water flow indicator SCRUBTEC 545B / 545BL / 553B / 553BL / BOOST 5 9097062000(2)2009-06 653B / 653BL / 651BCL / 661BL / 545E / 553E / 653E... - Page 29 MAINTENANCE MACHINE NOMENCLATURE (SCRUBTEC 653E) (Continues) 19 14 55 26 15 25 27 26 S100146 SCRUBTEC 545B / 545BL / 553B / 553BL / BOOST 5 9097062000(2)2009-06 653B / 653BL / 651BCL / 661BL / 545E / 553E / 653E...
-
Page 30: Solution/Clean Water Supply System
Start the machine (as shown in the User Manual) and keep it running until the solution/clean water tank is completely empty. Clean the solution filter (see the following procedure). SOLUTION FILTER CLEANING (SCRUBTEC 545B, 545BL, 553B, 553BL, BOOST 5, 545E, 553E) Drive the machine on a level floor. -
Page 31: Solution Filter Cleaning (Scrubtec 653B, 653Bl, 651Bcl, 661Bl, 653E)
The filter strainer (E) must be correctly positioned on the housing (G) of the support (F). Open the tap (A). P100118 SCRUBTEC 545B / 545BL / 553B / 553BL / BOOST 5 9097062000(2)2009-06 653B / 653BL / 651BCL / 661BL / 545E / 553E / 653E... -
Page 32: Solenoid Valve Disassembly/Assembly (Scrubtec 545B, 545Bl, 553B, 553Bl, Boost 5, 545E, 553E)
Slightly lift the solenoid valve (D), disconnect the union (F) and recover the gasket. Recover the solenoid valve (D). Assembly Assemble in the reverse order of disassembly. S301522 SCRUBTEC 545B / 545BL / 553B / 553BL / BOOST 5 9097062000(2)2009-06 653B / 653BL / 651BCL / 661BL / 545E / 553E / 653E... -
Page 33: Solenoid Valve Disassembly/Assembly (Scrubtec 653B, 653Bl, 651Bcl, 661Bl, 653E)
Remove the solenoid valve (E) with the hoses (B). If necessary separate the hoses (B) from the solenoid valve and disconnect it from the union (I). Assembly Assemble in the reverse order of disassembly. S301523A SCRUBTEC 545B / 545BL / 553B / 553BL / BOOST 5 9097062000(2)2009-06 653B / 653BL / 651BCL / 661BL / 545E / 553E / 653E... -
Page 34: Troubleshooting
There is dirt or calcium deposit on the solenoid valve gasket (clean). The solenoid valve is broken (replace). SCRUBTEC 545B / 545BL / 553B / 553BL / BOOST 5 9097062000(2)2009-06 653B / 653BL / 651BCL / 661BL / 545E / 553E / 653E... -
Page 35: Chemical Mixing System
There is water in the detergent tank. Possible causes: The one-way valve is broken (replace). S301568A SCRUBTEC 545B / 545BL / 553B / 553BL / BOOST 5 9097062000(2)2009-06 653B / 653BL / 651BCL / 661BL / 545E / 553E / 653E... -
Page 36: Brushing System
Empty and wash the debris container (A), and then install it by engaging it on the inside fasteners. S000000 SCRUBTEC 545B / 545BL / 553B / 553BL / BOOST 5 9097062000(2)2009-06 653B / 653BL / 651BCL / 661BL / 545E / 553E / 653E... -
Page 37: Brush/Pad-Holder Deck Or Cylindrical Brush Deck Disassembly/Assembly (Scrubtec 545B, 545Bl, 553B, 553Bl, Boost 5)
Remove the screws (C), then remove the brush/pad-holder deck (H). Assembly Assemble in the reverse order of disassembly. S301530A SCRUBTEC 545B / 545BL / 553B / 553BL / BOOST 5 9097062000(2)2009-06 653B / 653BL / 651BCL / 661BL / 545E / 553E / 653E... -
Page 38: Brush/Pad-Holder Deck Or Cylindrical Brush Deck Disassembly/Assembly (Scrubtec 653B, 653Bl, 651Bcl, 661Bl)
When the machine is equipped with the cylindrical brush deck (18c), the gas spring (A) must not be installed. NOTE Figure showing 653B with one brush S301531A SCRUBTEC 545B / 545BL / 553B / 553BL / BOOST 5 9097062000(2)2009-06 653B / 653BL / 651BCL / 661BL / 545E / 553E / 653E... -
Page 39: Brush/Pad-Holder Deck Disassembly/Assembly (Scrubtec 545E, 553E, 653E)
When the maintenance/repair procedure is completed, the tank (40) must always be locked with the plate (61). NOTE Figure showing SCRUBTEC 545E. SCRUBTEC 545B / 545BL / 553B / 553BL / BOOST 5 9097062000(2)2009-06 653B / 653BL / 651BCL / 661BL / 545E / 553E / 653E... - Page 40 ENGLISH SERVICE MANUAL BRUSHING SYSTEM BRUSH/PAD-HOLDER DECK DISASSEMBLY/ASSEMBLY (SCRUBTEC 545E, 553E, 653E) (Continues) P100151 SCRUBTEC 545B / 545BL / 553B / 553BL / BOOST 5 9097062000(2)2009-06 653B / 653BL / 651BCL / 661BL / 545E / 553E / 653E...
-
Page 41: Brush Motor Electrical Input Check (Scrubtec 545B, 545Bl, 553B, 553Bl, Boost 5)
Turn on the brush/pad-holder by pressing the switch (71) and check that the motor electrical input is 3 - 4 A at 24 V (for SCRUBTEC 545B, 545BL, 553B, 553BL) and is 10 - 11 A at 24 V (for SCRUBTEC BOOST 5). Turn off the brush/pad-holder by pressing the switch (71). -
Page 42: Brush Motor Electrical Input Check (Scrubtec 653B, 653Bl)
If the above-mentioned procedures do not lead to a correct electrical input, the motor must be replaced (see the procedure in the relevant paragraph). Reset Perform steps 3 to 7 in the reverse order. S301534 SCRUBTEC 545B / 545BL / 553B / 553BL / BOOST 5 9097062000(2)2009-06 653B / 653BL / 651BCL / 661BL / 545E / 553E / 653E... -
Page 43: Brush Motor Electrical Input Check (Scrubtec 651Bcl)
If the above-mentioned procedures do not lead to a correct electrical input, the motor must be replaced (see the procedure in the relevant paragraph). Reset Perform steps 1 and 2 in the reverse order. S301535 SCRUBTEC 545B / 545BL / 553B / 553BL / BOOST 5 9097062000(2)2009-06 653B / 653BL / 651BCL / 661BL / 545E / 553E / 653E... -
Page 44: Brush Motor Electrical Input Check (Scrubtec 661Bl)
Perform steps 1 and 2 in the reverse order. S301536 BRUSH MOTOR ELECTRICAL INPUT CHECK (SCRUBTEC 545E, 553E, 653E) SCRUBTEC 545B / 545BL / 553B / 553BL / BOOST 5 9097062000(2)2009-06 653B / 653BL / 651BCL / 661BL / 545E / 553E / 653E... -
Page 45: Brush Motor Electrical Input Check (Scrubtec 545E, 553E, 653E)
If the above-mentioned procedures do not lead to a correct electrical input, the motor must be replaced (see the procedure in the relevant paragraph). Reset Perform steps 3 to 7 in the reverse order. SCRUBTEC 545B / 545BL / 553B / 553BL / BOOST 5 9097062000(2)2009-06 653B / 653BL / 651BCL / 661BL / 545E / 553E / 653E... - Page 46 SERVICE MANUAL BRUSHING SYSTEM BRUSH MOTOR ELECTRICAL INPUT CHECK (SCRUBTEC 545E, 553E, 653E) (Continues) P100152 SCRUBTEC 545B / 545BL / 553B / 553BL / BOOST 5 9097062000(2)2009-06 653B / 653BL / 651BCL / 661BL / 545E / 553E / 653E...
-
Page 47: Brush Motor Carbon Brush Check/Replacement (Scrubtec 545B, 545Bl, 553B, 553Bl)
When connecting the terminals (O), take care of their insulation from the surrounding parts of the frame. S301539 SCRUBTEC 545B / 545BL / 553B / 553BL / BOOST 5 9097062000(2)2009-06 653B / 653BL / 651BCL / 661BL / 545E / 553E / 653E... -
Page 48: Brush Motor Carbon Brush Check/Replacement (Scrubtec 653B, 653Bl)
When connecting the terminals (O), take care of their insulation from the surrounding parts of the frame. S301541 SCRUBTEC 545B / 545BL / 553B / 553BL / BOOST 5 9097062000(2)2009-06 653B / 653BL / 651BCL / 661BL / 545E / 553E / 653E... -
Page 49: Brush Motor Carbon Brush Check/Replacement (Scrubtec 651Bcl)
Replace the carbon brushes as an assembly. Reset Assemble in the reverse order of disassembly. S301542 SCRUBTEC 545B / 545BL / 553B / 553BL / BOOST 5 9097062000(2)2009-06 653B / 653BL / 651BCL / 661BL / 545E / 553E / 653E... -
Page 50: Brush Motor Carbon Brush Check/Replacement (Scrubtec 661Bl)
Replace the carbon brushes as an assembly. Reset Assemble in the reverse order of disassembly. S301543 SCRUBTEC 545B / 545BL / 553B / 553BL / BOOST 5 9097062000(2)2009-06 653B / 653BL / 651BCL / 661BL / 545E / 553E / 653E... -
Page 51: Brush Motor Disassembly/Assembly (Scrubtec 545B, 545Bl, 553B, 553Bl, 653B, 653Bl)
If necessary, remove the water distribution union (E) and flange (F) from the reduction unit. Assembly Assemble in the reverse order of disassembly. S301544 SCRUBTEC 545B / 545BL / 553B / 553BL / BOOST 5 9097062000(2)2009-06 653B / 653BL / 651BCL / 661BL / 545E / 553E / 653E... -
Page 52: Boost Deck Motor Disassembly/Assembly (Scrubtec Boost 5)
Tighten the screws (F) and the screw (C) at 10,32 lbf·ft (14 N·m; 1,42 kgf·m). • Tighten the nuts (A) at 8 lbf·ft (10,8 N·m; 1,10 kgf·m). SCRUBTEC 545B / 545BL / 553B / 553BL / BOOST 5 9097062000(2)2009-06 653B / 653BL / 651BCL / 661BL / 545E / 553E / 653E... -
Page 53: Boost Deck Vibration-Dampers Disassembly/Replacement (Scrubtec Boost 5)
• Tighten the nuts (E) at 8 lbf·ft (10,8 N·m; 1,10 kgf·m). SCRUBTEC 545B / 545BL / 553B / 553BL / BOOST 5 9097062000(2)2009-06 653B / 653BL / 651BCL / 661BL / 545E / 553E / 653E... -
Page 54: Brush Motor Disassembly/Assembly (Scrubtec 651Bcl)
Install the belt (E) and tension it properly (see the procedure in the relevant paragraph). S301545 SCRUBTEC 545B / 545BL / 553B / 553BL / BOOST 5 9097062000(2)2009-06 653B / 653BL / 651BCL / 661BL / 545E / 553E / 653E... -
Page 55: Brush Motor Disassembly/Assembly (Scrubtec 661Bl)
Remove the reduction unit (D). Recover the key (E). Assembly Assemble in the reverse order of disassembly. S301546 SCRUBTEC 545B / 545BL / 553B / 553BL / BOOST 5 9097062000(2)2009-06 653B / 653BL / 651BCL / 661BL / 545E / 553E / 653E... -
Page 56: Brush Motor Disassembly/Assembly (Scrubtec 545E, 553E, 653E)
If necessary, remove the motor wiring harness (G). Assembly Assemble in the reverse order of disassembly. NOTE Figure showing 653E S301547 SCRUBTEC 545B / 545BL / 553B / 553BL / BOOST 5 9097062000(2)2009-06 653B / 653BL / 651BCL / 661BL / 545E / 553E / 653E... -
Page 57: Check/Replacement/Adjustment Of Driving Belts Between Motors And Cylindrical Brushes (Scrubtec 651Bcl)
Loosen the nut (D) and adjust the position of the pulley (E). When tensioning procedure has been performed, tighten the nut (D). Repeat step 8. Reset Perform steps 3 and 4 in the reverse order. SCRUBTEC 545B / 545BL / 553B / 553BL / BOOST 5 9097062000(2)2009-06 653B / 653BL / 651BCL / 661BL / 545E / 553E / 653E... - Page 58 BRUSHING SYSTEM CHECK/REPLACEMENT/ADJUSTMENT OF DRIVING BELTS BETWEEN MOTORS AND CYLINDRICAL BRUSHES (SCRUBTEC 651BCL) (Continues) S301548 SCRUBTEC 545B / 545BL / 553B / 553BL / BOOST 5 9097062000(2)2009-06 653B / 653BL / 651BCL / 661BL / 545E / 553E / 653E...
-
Page 59: Troubleshooting
Bulky debris or cords around the brushes or between the brushes and its flange (remove and clean the brushes). The motor is faulty (repair or replace). The wiring harness is damaged (repair). SCRUBTEC 545B / 545BL / 553B / 553BL / BOOST 5 9097062000(2)2009-06 653B / 653BL / 651BCL / 661BL / 545E / 553E / 653E... -
Page 60: Recovery Water System
Drive the machine to the appointed recovery water disposal area. SCRUBTEC 545B, 545BL, 553B, 553BL, BOOST 5, 653B, 653BL, 651BCL, 661BL). Turn the ignition key (80) to “0”. (SCRUBTEC 545E, 553E, 653E). Disconnect the power supply cable (59) from the electrical mains. -
Page 61: Squeegee Cleaning/Check/Replacement And Squeegee Blade Replacement (All Models)
Disassembly and cleaning Drive the machine on a level floor. SCRUBTEC 545B, 545BL, 553B, 553BL, BOOST 5, 653B, 653BL, 651BCL, 661BL). Turn the ignition key (80) to “0”. (SCRUBTEC 545E, 553E, 653E). Disconnect the power supply cable (59) from the electrical mains. - Page 62 SERVICE MANUAL RECOVERY WATER SYSTEM SQUEEGEE CLEANING/CHECK/REPLACEMENT AND SQUEEGEE BLADE REPLACEMENT (All models) (Continues) S301552 SCRUBTEC 545B / 545BL / 553B / 553BL / BOOST 5 9097062000(2)2009-06 653B / 653BL / 651BCL / 661BL / 545E / 553E / 653E...
-
Page 63: Vacuum System Motor Filter Cleaning (All Models)
Drive the machine to the appointed recovery water disposal area. SCRUBTEC 545B, 545BL, 553B, 553BL, BOOST 5, 653B, 653BL, 651BCL, 661BL). Turn the ignition key (80) to “0”. (SCRUBTEC 545E, 553E, 653E). Disconnect the power supply cable (59) from the electrical mains. -
Page 64: Vacuum System Motor Electrical Input Check (Scrubtec 545B, 545Bl, 553B, 553Bl, Boost 5, 653B, 653Bl, 651Bcl, 661Bl)
ENGLISH SERVICE MANUAL RECOVERY WATER SYSTEM VACUUM SYSTEM MOTOR ELECTRICAL INPUT CHECK (SCRUBTEC 545B, 545BL, 553B, 553BL, BOOST 5, 653B, 653BL, 651BCL, 661BL) WARNING! This procedure must be performed by qualified personnel only. If the tank (21) contains recovery water: Drive the machine to the appointed recovery water disposal area. -
Page 65: Vacuum System Motor Electrical Input Check (Scrubtec 545E, 553E, 653E)
If the above-mentioned procedures do not lead to a correct electrical input, the motor must be replaced (see the procedure in the relevant paragraph). Reset Perform steps 3 to 7 in the reverse order. SCRUBTEC 545B / 545BL / 553B / 553BL / BOOST 5 9097062000(2)2009-06 653B / 653BL / 651BCL / 661BL / 545E / 553E / 653E... - Page 66 RECOVERY WATER SYSTEM VACUUM SYSTEM MOTOR ELECTRICAL INPUT CHECK (SCRUBTEC 545E, 553E, 653E) (Continues) S301554 SCRUBTEC 545B / 545BL / 553B / 553BL / BOOST 5 9097062000(2)2009-06 653B / 653BL / 651BCL / 661BL / 545E / 553E / 653E...
-
Page 67: Vacuum System Motor Carbon Brush Check/Replacement (All Models)
If necessary, replace the carbon brushes. Replace the carbon brushes as an assembly. Assemble in the reverse order of disassembly. S301555 SCRUBTEC 545B / 545BL / 553B / 553BL / BOOST 5 9097062000(2)2009-06 653B / 653BL / 651BCL / 661BL / 545E / 553E / 653E... -
Page 68: Vacuum System Motor Disassembly/Assembly (All Models)
Drive the machine to the appointed recovery water disposal area. • SCRUBTEC 545B, 545BL, 553B, 553BL, BOOST 5, 653B, 653BL, 651BCL, 661BL). Turn the ignition key (80) to “0”. • SCRUBTEC 545E, 553E, 653E). Disconnect the power supply cable (59) from the electrical mains. -
Page 69: Squeegee Spring Check/Replacement (All Models, With Aluminium Squeegee)
Check Drive the machine on a level floor. SCRUBTEC 545B, 545BL, 553B, 553BL, BOOST 5, 653B, 653BL, 651BCL, 661BL). Turn the ignition key (80) to “0”. (SCRUBTEC 545E, 553E, 653E). Disconnect the power supply cable (59) from the electrical mains. -
Page 70: Troubleshooting
The squeegee is not balanced (adjust it with the relevant handwheel). (For aluminium squeegee) The squeegee springs are not efficient (check/replace). SCRUBTEC 545B / 545BL / 553B / 553BL / BOOST 5 9097062000(2)2009-06 653B / 653BL / 651BCL / 661BL / 545E / 553E / 653E... -
Page 71: Drive System
Test the drive system and the maximum speed change. P100154 SCRUBTEC 545B / 545BL / 553B / 553BL / BOOST 5 9097062000(2)2009-06 653B / 653BL / 651BCL / 661BL / 545E / 553E / 653E... -
Page 72: Drive System Motor Electrical Input Check (Scrubtec 545Bl, 553Bl, Boost 5, 653Bl, 651Bcl, 661Bl)
If the above-mentioned procedures do not lead to a correct electrical input, the motor must be replaced (see the procedure in the relevant paragraph). Perform steps 4 and 5 in the reverse order. SCRUBTEC 545B / 545BL / 553B / 553BL / BOOST 5 9097062000(2)2009-06 653B / 653BL / 651BCL / 661BL / 545E / 553E / 653E... - Page 73 DRIVE SYSTEM MOTOR ELECTRICAL INPUT CHECK (SCRUBTEC 545BL, 553BL, BOOST 5, 653BL, 651BCL, 661BL) (Continues) S301562 SCRUBTEC 545B / 545BL / 553B / 553BL / BOOST 5 9097062000(2)2009-06 653B / 653BL / 651BCL / 661BL / 545E / 553E / 653E...
-
Page 74: Drive System Motor Carbon Brush Check And Replacement (Scrubtec 545Bl, 553Bl, Boost 5, 653Bl, 651Bcl, 661Bl)
If necessary, replace the carbon brushes. Replace the carbon brushes as an assembly. Assemble in the reverse order of disassembly. S301563A SCRUBTEC 545B / 545BL / 553B / 553BL / BOOST 5 9097062000(2)2009-06 653B / 653BL / 651BCL / 661BL / 545E / 553E / 653E... -
Page 75: Drive System Motor-Differential Disassembly/Assembly (Scrubtec 545Bl, 553Bl, Boost 5, 653Bl, 651Bcl, 661Bl)
If necessary, remove the spacers (I) and the retaining rings. Remove the motor-differential (J). Assembly Assemble in the reverse order of disassembly. P100155 SCRUBTEC 545B / 545BL / 553B / 553BL / BOOST 5 9097062000(2)2009-06 653B / 653BL / 651BCL / 661BL / 545E / 553E / 653E... -
Page 76: Troubleshooting
The drive system motor carbon brushes are worn (replace). The drive system motor is faulty (replace). SCRUBTEC 545B / 545BL / 553B / 553BL / BOOST 5 9097062000(2)2009-06 653B / 653BL / 651BCL / 661BL / 545E / 553E / 653E... -
Page 77: Drive System Electronic Board Diagnostic Table
Replace the drive system electronic board (B). Flashing of led (A) of the drive system electronic board (B). S301565 SCRUBTEC 545B / 545BL / 553B / 553BL / BOOST 5 9097062000(2)2009-06 653B / 653BL / 651BCL / 661BL / 545E / 553E / 653E... -
Page 78: Other Systems
Otherwise, drive the machine on a level floor. SCRUBTEC 545B, 545BL, 553B, 553BL, BOOST 5, 653B, 653BL, 651BCL, 661BL). Turn the ignition key (80) to “0”. (SCRUBTEC 545E, 553E, 653E). Disconnect the power supply cable (59) from the electrical mains. -
Page 79: Electrical System
ENGLISH ELECTRICAL SYSTEM ELECTRICAL SYSTEM MACHINE WORKING HOUR CHECK (SCRUBTEC 545B, 545BL, 553B, 553BL, BOOST 5, 653B, 653BL, 651BCL, 661BL, equipped with optional hour counter) Turn the ignition key (80) to “I”. Press the vacuum system switch (73) and read on the hour counter (79) the total number of working hours (scrubbing/drying) performed by the machine. -
Page 80: Battery Disassembly/Assembly (Scrubtec 545B, 545Bl; 553B, 553Bl, Boost 5, 653B, 653Bl, 651Bcl, 661Bl)
Set the machine according to the type of batteries installed (WET or GEL) as shown in the relevant paragraph. S301566 SCRUBTEC 545B / 545BL / 553B / 553BL / BOOST 5 9097062000(2)2009-06 653B / 653BL / 651BCL / 661BL / 545E / 553E / 653E... -
Page 81: Battery Type Setting (Wet Or Gel) (Scrubtec 545B, 553B, 653B)
Turn the battery charger selector (C) to WET position for lead batteries, or to GEL position for gel batteries. Install the window (B) and tighten the screws (A). P100105 SCRUBTEC 545B / 545BL / 553B / 553BL / BOOST 5 9097062000(2)2009-06 653B / 653BL / 651BCL / 661BL / 545E / 553E / 653E... -
Page 82: Battery Type Setting (Wet Or Gel) (Scrubtec 545Bl, 553Bl, Boost 5, 653Bl, 651Bcl, 661Bl)
Turn the battery charger selector (C) to WET position for lead batteries, or to GEL position for gel batteries. Install the window (B) and tighten the screws (A). P100105 SCRUBTEC 545B / 545BL / 553B / 553BL / BOOST 5 9097062000(2)2009-06 653B / 653BL / 651BCL / 661BL / 545E / 553E / 653E... -
Page 83: Fuse Check/Replacement (Scrubtec 545B, 545Bl, 553B, 553Bl, Boost 5, 653B, 653Bl, 651Bcl, 661Bl)
SERVICE MANUAL ENGLISH ELECTRICAL SYSTEM FUSE CHECK/REPLACEMENT (SCRUBTEC 545B, 545BL, 553B, 553BL, BOOST 5, 653B, 653BL, 651BCL, 661BL) Disconnect the battery connector (12). Move aside the recovery water drain hose (16). Remove the battery charger cable (I), if equipped, from the cable holder (J). -
Page 84: Fuse Check/Replacement (Scrubtec 545E, 553E, 653E)
Electronic board fuse FL1: (1 A) Perform steps 2 to 4 in the reverse order. P100114 SCRUBTEC 545B / 545BL / 553B / 553BL / BOOST 5 9097062000(2)2009-06 653B / 653BL / 651BCL / 661BL / 545E / 553E / 653E... -
Page 85: Brush Motor Electromagnetic Switch Disassembly/Assembly (Scrubtec 545B, 545Bl, 553B, 553Bl, Boost 5, 653B, 653Bl, 651Bcl, 661Bl)
Remove the screws (N) on the rear side of the electrical panel (L), then remove the electromagnetic switch (J). Assembly Assemble in the reverse order of disassembly. P100159 SCRUBTEC 545B / 545BL / 553B / 553BL / BOOST 5 9097062000(2)2009-06 653B / 653BL / 651BCL / 661BL / 545E / 553E / 653E... - Page 86 BRUSH MOTOR ELECTROMAGNETIC SWITCH DISASSEMBLY/ASSEMBLY (SCRUBTEC 545B, 545BL, 553B, 553BL, BOOST 5, 653B, 653BL, 651BCL, 661BL) (Continues) S301572 SCRUBTEC 545B / 545BL / 553B / 553BL / BOOST 5 9097062000(2)2009-06 653B / 653BL / 651BCL / 661BL / 545E / 553E / 653E...
-
Page 87: Drive System Electronic Board Disassembly/Assembly (Scrubtec 545Bl, 553Bl, Boost 5, 653Bl, 651Bcl, 661Bl)
Remove the screws (L) on the rear side of the electrical panel (J), then remove the drive system electronic board (H). Assembly Assemble in the reverse order of disassembly. P100158 SCRUBTEC 545B / 545BL / 553B / 553BL / BOOST 5 9097062000(2)2009-06 653B / 653BL / 651BCL / 661BL / 545E / 553E / 653E... - Page 88 DRIVE SYSTEM ELECTRONIC BOARD DISASSEMBLY/ASSEMBLY (SCRUBTEC 545BL, 553BL, BOOST 5, 653BL, 651BCL, 661BL) (Continues) S301574 SCRUBTEC 545B / 545BL / 553B / 553BL / BOOST 5 9097062000(2)2009-06 653B / 653BL / 651BCL / 661BL / 545E / 553E / 653E...
-
Page 89: Function Electronic Board Disassembly/Assembly (Scrubtec 545B, 545Bl, 553B, 553Bl, Boost 5, 653B, 653Bl, 651Bcl, 661Bl)
On the panel, remove the screws (G), then remove the function electronic board (H). Assembly Assemble in the reverse order of disassembly. P100157 SCRUBTEC 545B / 545BL / 553B / 553BL / BOOST 5 9097062000(2)2009-06 653B / 653BL / 651BCL / 661BL / 545E / 553E / 653E... -
Page 90: Water Flow Control Electronic Board Disassembly/Assembly (Scrubtec 545E, 553E, 653E)
Remove the screws (E), then remove the water flow control electronic board (D). Assembly Assemble in the reverse order of disassembly. P100156 SCRUBTEC 545B / 545BL / 553B / 553BL / BOOST 5 9097062000(2)2009-06 653B / 653BL / 651BCL / 661BL / 545E / 553E / 653E... -
Page 91: Troubleshooting
Charge the batteries. Red LED flashing. The batteries are discharged. If the problem persists, replace them. SCRUBTEC 545B / 545BL / 553B / 553BL / BOOST 5 9097062000(2)2009-06 653B / 653BL / 651BCL / 661BL / 545E / 553E / 653E... -
Page 92: Component Layout (Scrubtec 545B, 553B, 653B)
Detergent pump (optional) Detergent % potentiometer (optional) Brush/drive system enabling switch NOTE Figure showing 545B P100147 SCRUBTEC 545B / 545BL / 553B / 553BL / BOOST 5 9097062000(2)2009-06 653B / 653BL / 651BCL / 661BL / 545E / 553E / 653E... -
Page 93: Wiring Diagram (Scrubtec 545B, 553B, 653B)
Vacuum system motor Detergent pump (optional) Detergent % potentiometer (optional) Brush/drive system enabling switch P100127 SCRUBTEC 545B / 545BL / 553B / 553BL / BOOST 5 9097062000(2)2009-06 653B / 653BL / 651BCL / 661BL / 545E / 553E / 653E... -
Page 94: Component Layout (Scrubtec 545Bl, 553Bl, Boost 5, 653Bl, 651Bcl, 661Bl)
Maximum speed potentiometer Detergent % potentiometer (optional) Brush/drive system enabling switch Reverse gear switch P100148 SCRUBTEC 545B / 545BL / 553B / 553BL / BOOST 5 9097062000(2)2009-06 653B / 653BL / 651BCL / 661BL / 545E / 553E / 653E... - Page 95 ELECTRICAL SYSTEM COMPONENT LAYOUT (SCRUBTEC 545BL, 553BL, BOOST 5, 653BL, 651BCL, 661BL) (Continues) F5 F6 P100149 SCRUBTEC 545B / 545BL / 553B / 553BL / BOOST 5 9097062000(2)2009-06 653B / 653BL / 651BCL / 661BL / 545E / 553E / 653E...
-
Page 96: Wiring Diagram (Scrubtec 545Bl, 553Bl, Boost 5, 653Bl, 651Bcl, 661Bl)
Only for machines with cylindrical brush deck (**) Only for machines without on-board battery charger (**) P100128 SCRUBTEC 545B / 545BL / 553B / 553BL / BOOST 5 9097062000(2)2009-06 653B / 653BL / 651BCL / 661BL / 545E / 553E / 653E... -
Page 97: Component Layout (Scrubtec 545E, 553E, 653E)
Brush/pad-holder switch on the right of the handlebar Brush/pad-holder switch on the left of the handlebar NOTE Figure showing 653E P100150 SCRUBTEC 545B / 545BL / 553B / 553BL / BOOST 5 9097062000(2)2009-06 653B / 653BL / 651BCL / 661BL / 545E / 553E / 653E... -
Page 98: Wiring Diagram (Scrubtec 545E, 553E, 653E)
Brush/pad-holder switch on the right of the handlebar Brush/pad-holder switch on the left of the handlebar P100126 SCRUBTEC 545B / 545BL / 553B / 553BL / BOOST 5 9097062000(2)2009-06 653B / 653BL / 651BCL / 661BL / 545E / 553E / 653E... -
Page 99: Eb1 Electronic Board Connector Pins (Scrubtec 545B, 545Bl, 553B, 553Bl, Boost 5, 653B, 653Bl, 651Bcl, 661Bl)
Brush motor braking circuit 24V with brush function deactivated Drive system/brush enabling (panel) 24V with pressed paddle SCRUBTEC 545B / 545BL / 553B / 553BL / BOOST 5 9097062000(2)2009-06 653B / 653BL / 651BCL / 661BL / 545E / 553E / 653E... - Page 100 0-5V in accordance to the position of the potentiometer RV3.2 outlet Potentiometer solution flow adjusting 5V with key on “I” RV3.3 SCRUBTEC 545B / 545BL / 553B / 553BL / BOOST 5 9097062000(2)2009-06 653B / 653BL / 651BCL / 661BL / 545E / 553E / 653E...
- Page 102 1100 Haskins Road www.nilfisk-alto.dk Fax: (+81) 45 548 2541 E-mail: info@nilfisk-alto.se Bowling Green, OH 43402 www.nilfisk-alto.se Nilfisk-ALTO Food Division MALAYSIA Tel.: (+1) 419 352 7511 option 2 Division of Nilfisk-Advance A/S Nilfisk-Advance Sdn Bhd TAIWAN Fax: (+1) 419 373 4221 Blytækkervej 2,...
Need help?
Do you have a question about the SCRUBTEC 545B and is the answer not in the manual?
Questions and answers