Table of Contents
Advertisement
Quick Links
Service Handbook
COMMERCIAL GAS HIGH EFFICIENCY WATER HEATERS
FOR MODELS:
SUF 60120 THRU SUF 100250
SUF 119300 THRU SUF 119500
SERIES 200/201
500 Tennessee Waltz Parkway
Ashland City, TN 37015
INSTALLATION CONSIDERATIONS - PRE SERVICE CHECKS -
CONSTRUCTION - OPERATION & SERVICE - TROUBLESHOOTING
SERVICING SHOULD ONLY BE PERFORMED BY A QUALIFIED SERVICE TECHNICIAN
PRINTED IN THE U.S.A. 0914
329298-000
Advertisement
Table of Contents

Related Manuals for State Water Heaters 60120-100250


Summary of Contents for State Water Heaters 60120-100250
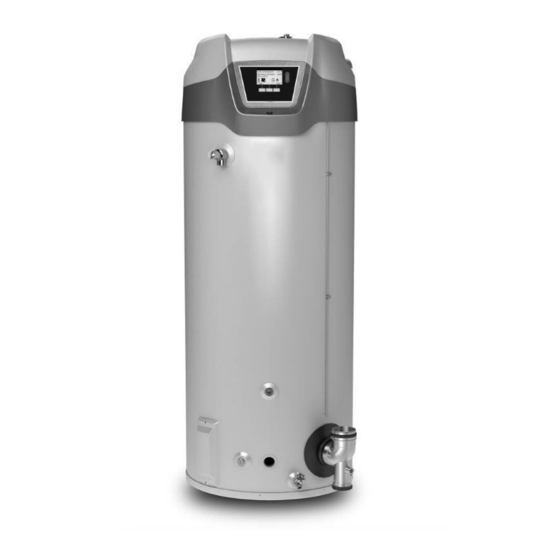
- Page 1 Service Handbook COMMERCIAL GAS HIGH EFFICIENCY WATER HEATERS FOR MODELS: SUF 60120 THRU SUF 100250 SUF 119300 THRU SUF 119500 SERIES 200/201 500 Tennessee Waltz Parkway Ashland City, TN 37015 INSTALLATION CONSIDERATIONS - PRE SERVICE CHECKS - CONSTRUCTION - OPERATION & SERVICE - TROUBLESHOOTING SERVICING SHOULD ONLY BE PERFORMED BY A QUALIFIED SERVICE TECHNICIAN PRINTED IN THE U.S.A.
-
Page 2: Table Of Contents
TABLE OF CONTENTS INTRODUCTION ..................2 VENTING ....................33 Qualifications ..................2 General Venting Information ............33 Service Warning ...................2 INTAKE AIR CONNECTION ..............34 ELECTRICAL CONNECTIONS – ALL MODELS ........35 Service Reminder .................2 Electrical Wiring ..................35 Tools Recommended ................2 Power Supply Connections ..............35 INSTALLATION CONSIDERATIONS ............3 Enable/ Disable Switch ...............36 Instruction Manual ................3... -
Page 3: Introduction
INTRODUCTION This Service Handbook covers the water heater Model and Series numbers listed on the front cover only. The instructions and illustrations contained in this service handbook will provide you with troubleshooting procedures to verify proper operation and diagnose and repair common service problems. QUALIFICATIONS QUALIFIED INSTALLER OR SERVICE AGENCY Installation and service of this water heater requires ability equivalent to that of a Qualified Agency (as defined... -
Page 4: Installation Considerations
INSTALLATION CONSIDERATIONS This section of the Service Handbook covers some of the critical installation requirements that, when overlooked, often result in operational problems, down time and needless parts replacement. Costs to correct installation errors are not covered under the limited warranty. Ensure all installation requirements and instructions contained in the Instruction Manual that came with the water heater have been followed prior to performing any service procedures. -
Page 5: Features And Components
FEATURES AND COMPONENTS COMBUSTION BLOWER & BURNER ASSEMBLY Low Gas Pressure Switch Gas Control Valve/ Combustion Blower Venturi Assembly Air Intake Assembly Blower Gasket Spark Igniter Ground Wire Spark Igniter Flame Sensor Spark Igniter Gasket Blower Adapter Burner Gasket Ignition Cable Burner Sight Glass Sight Glass Gasket... -
Page 6: Top View: Suf 60120 - 100250 Models
TOP VIEW: SUF 60120 - 100250 MODELS Junction Box Assembly Powered Anode (Short, SUF 100150-100250 Models Only) Burner/ Blower Assembly Ignition Control Powered Anode (Long) Blower Prover Switch (Label Color: Green) CCB Assembly Blocked Air Intake Switch (Label Color: Blue) Blocked Exhaust Switch (Label Color: Red) -
Page 7: Sequence Of Operation Flow Chart
SEQUENCE OF OPERATION FLOW CHART Sequence is shown with Enable/Disable Switch in the Enable position If tank temperature drops below Operating Set Point minus Differential setting a heating cycle is activated Control System performs diagnostic checks Normal State of all pressure switches and ECO are checked Control System Locks Out Blower Prover pressure switch verified open Displays Fault Msg... -
Page 8: Fault And Warning Codes
For higher elevations call the toll free support phone number shown on the back cover of this Service Handbook for technical assistance. GAS PRESSURE SPECIFICATIONS Natural Propane Natural Propane MODELS 60120-100250 60120-100250 119300/119400/119500 119300/119400/119500 Maximum Gas Supply 14.0" WC 14.0" WC 14.0" WC 14.0"... -
Page 9: Gas Supply Systems
GAS SUPPLY SYSTEMS Low pressure building gas supply systems are defined as those systems that cannot under any circumstances exceed 14” W.C. (1/2 PSI Gauge). These systems do not require additional pressure regulation. Measurements should be taken to insure that gas pressures are stable and fall within the requirements stated on the water heater rating plate. -
Page 10: Gas Pressure Test
5. When installing multiple water heaters in the same gas supply system it is recommended that individual positive lock-up gas pressure regulators be installed at each unit from the supply gas connection on the water heater. Service notes: • The manifold gas pressure is factory set and cannot be adjusted in the field. •... - Page 11 7. Record the supply gas pressure. 8. Use the Enable/Disable Switch located on the front of the water heater and put the unit in enabled mode. The settings on the water heater may need to be changed to cause the water heater to operate. Note the Operating Temperature Set Point so that the unit can be returned to this setting at the conclusion of this test procedure.
-
Page 12: Blower Operation Error
2. BLOWER OPERATION ERROR CAUSES: Blower Operation Error • The Blower Prover Pressure Switch was detected closed before blower operation. Fault occurred 2 mins ago Blower Prover Pressure Switch may have failed closed. Check/replace pressure switch. Call a service professional: Your Company Name Here (press [DOWN] for more..) CHANGE... -
Page 13: Pressure Switch Tests
PRESSURE SWITCH TESTS Complete pressure switch testing involves three procedures: • "Continuity Test During Standby" below. • "Continuity Test During Operation" on Page 13. • "Pressure Test During Operation" on Page 13 thru Page 15. CONTINUITY TEST DURING STANDBY This test is performed while the Combustion Blower is not running with the water heater turned off. This is a "normal state"... -
Page 14: Continuity Test During Operation
CONTINUITY TEST DURING OPERATION This test is performed while the Combustion Blower is running at high speed during the Pre-Purge operating state. The test is performed on all three pressure switches. Disconnect the two wires to each pressure switch - one at a time, check continuity and then reconnect the wires to that switch before testing the next switch. 1. -
Page 15: Pressure Switch Settings
• Blower Prover Switch - normally open contacts, close on a rise in pressure. • Blocked Air Intake Switch - normally closed contacts, open on a fall in pressure. • Blocked Exhaust Switch - normally closed contacts, open on a rise in pressure. Activation Pressures: Pressure Switch Settings Table below shows the activation pressures and tolerance for each of the three pressure switches. - Page 16 Blocked Air Intake: Note these are negative pressures; in a vacuum. If the pressure reading taken at the Blocked Air Intake Switch sensing tube does not reach or drop lower than the pressure shown in the above Table AND the switch contacts were opening during the "Continuity Test During Operation" shown on Page 13 - the switch is defective and must be replaced.
-
Page 17: Blower Prover Open
3. BLOWER PROVER OPEN CAUSES: Blower Prover Open • The control has detected an open Blower Prover Fault occurred 2 mins ago Pressure Switch during operation. The blower prover switch remains • Blower Prover Pressure Switch sensing tube open after the blower has been disconnected or kinked. -
Page 18: Ignition Failure
4. IGNITION FAILURE CAUSES: Ignition Failure • On an “Ignition Failure” error, either the burner is Fault occurred 2 mins ago not igniting or the burner is igniting, but the Flame Flame not detected. Clean flame rod. Sensor is not detecting ignition (flame). Check gas supply. - Page 19 • Reinsert connector on Flame Sensor and make sure the electrical connection is clean and tight. • Recycle unit again to start another ignition cycle. If the burner ignites but the flame sense rod still fails to detect flame, contact Commercial Technical Support. BURNER DOES NOT IGNITE Failure to ignite (no flame) usually means a gas supply or Gas Control Valve problem.
- Page 20 • Remove and reinsert the circuit board end of the Gas Control Valve connector. Make sure it is connected tightly and that the pins are clean. • Recycle unit again to start another ignition cycle. If you still do not see a brief blue flame through the sight glass at the moment the Gas Control Valve icon appears on the display, verify that 24 VDC is present on the connector pins 1 and 5.
-
Page 21: Blocked Air Intake
5. BLOCKED AIR INTAKE CAUSES: Blocked Air Intake • The Blocked Air Intake Switch has detected a Fault occurred 2 mins ago possible restriction in the air intake pipe. Restriction in air intake. Check intake pipe and termination for blockage. Call a service professional: Your Company Name Here (press [DOWN] for more..) -
Page 22: Blocked Exhaust
6. BLOCKED EXHAUST CAUSES: Blocked Exhaust • The Blocked Exhaust Switch has detected a possible restriction in the exhaust pipe. Fault occurred 2 mins ago Restriction in exhaust pipe. Check exhaust pipe and termination for blockage. Call a service professional: Your Company Name Here (press [DOWN] for more..) CHANGE... -
Page 23: Flame Sensor Error
7. FLAME SENSOR ERROR CAUSES: Flame Sensor (error) • The Flame Sensor has detected flame when the Fault occurred 1 mins ago Gas Control Valve is supposed to be off. Flame Sensor rod detected flame when gas valve should be off. Shut off gas until repaired. -
Page 24: Gas Control Valve Voltage Tests
SUPPLY GAS CONNECTION LOW GAS PRESSURE SWITCH 24 VAC SOLENOID & WIRE HARNESS GAS CONTROL VALVE ASSEMBLY: SUF 119300 - 119500 MODELS GAS CONTROL VALVE VOLTAGE TESTS 1. The animated Gas Control Valve Status Icon is displayed on the Control System UIM during these operating states. -
Page 25: Flame Sensor
FLAME SENSOR Ignition of the Burner is controlled electronically. The principle of operation for electronic ignition relies on flame sensing current to prove the fuel gas flowing to the Burner has been ignited. Flame sensing requires an adequate earth ground to the water heater's Burner, see "Electrical Connections" on Page 35. -
Page 26: Flame Sensing Current Test
FLAME SENSING CURRENT TEST During the heating cycle the flame sensing current is normally greater than 8.0 μA with a clean Flame Sensor. Over time the Flame Sensor can degrade and this will reduce flame sensing current. With heavier use, more heating cycles/greater load, this will occur more quickly. -
Page 27: No Water
8. NO WATER CAUSES: Alert: • The controller has not detected a voltage potential No Water of water in the tank. Alert occurred 2 mins ago No water detected by Powered • No water or low water in tank. Anode. •... - Page 28 CLEANING METHOD: If corrosion is present on the air side of the anode, use a wire brush to clean the outer nut and brass wire terminal tab. To clean the inner nut, remove the outer nut and the brass wire terminal tab. DO NOT REMOVE inner nut.
-
Page 29: Anode Shorted
9. ANODE SHORTED CAUSES: Alert: • The controller has detected a low resistance or Anode Shorted short to earth ground or the tank. Alert occurred 0 mins ago The Powered Anode is shorted to earth ground or the tank. Note: This is an alert. The unit will continue to heat water in (press [DOWN] for more..) CHANGE... -
Page 30: Temperature Probe Short (Upper Or Lower)
10. TEMPERATURE PROBE SHORT (UPPER OR LOWER) CAUSES: Upper Temp Probe (Short) • The Upper or Lower Temperature Probe appears Fault occurred 0 mins ago to be shorted (very low resistance). This fault code Upper Temperature Probe may be shorted. Check connector and often means the connector has been corroded by resistance of Probe. -
Page 31: Temperature Sensor Test
If the resistance of the Temperature Sensor is below 390 ohms the Control System will lock out and display Temp Probe Short on the UIM. If the resistance of the temperature sensor is above 56,000 ohms the Control System will lock out and display Temp Probe Open on the UIM. The electrical circuit breaker that serves the water heater must be turned off and on again to reset the Control System. - Page 32 Results/Actions • If the ohm meter shows continuity (closed circuit) between the two outside pins (red wires) the ECO switch has reset properly. If the Control System continues to lock out displaying Energy Cut Out (ECO) on the UIM with continuity through the ECO present call the toll free support phone number listed on the back cover of this manual for further assistance.
-
Page 33: Temperature Probe Open (Upper Or Lower)
11. TEMPERATURE PROBE OPEN (UPPER OR LOWER) CAUSES: Lower Temp Probe (Open) • The Upper or Lower Temperature Probe appears Fault occurred 0 mins ago to be open (very high resistance). This fault code Lower Temperature Probe may be often means the connector has been corroded by open. -
Page 34: Venting
VENTING This section of the Service Handbook is not a complete venting installation instruction. Refer to the Instruction Manual that came with the water heater; ensure the venting has been installed per all Instruction Manual requirements. Costs to correct installation errors are not covered under the limited warranty. GENERAL VENTING INFORMATION The water heaters covered in this Service Handbook are operationally equivalent to Category IV appliances and may be installed in either a Power Vent or Direct Vent configuration. -
Page 35: Intake Air Connection
INTAKE AIR CONNECTION The intake air connection has a screen and a hose barb installed at the factory, see Figure below. The intake air connection screen is installed to prevent debris from entering the Combustion Blower and/or Burner. This screen is left in place when the water heater is installed in a Power Vent configuration but must be removed before connecting the intake air piping on Direct Vent installations. -
Page 36: Electrical Connections - All Models
ELECTRICAL CONNECTIONS – ALL MODELS The water heaters covered in this Service Handbook require a 120 VAC, 1Ø (single phase), 60Hz, 15 amp power supply and must also be electrically grounded in accordance with local codes or, in the absence of local codes, with the National Electrical Code, ANSI/NFPA 70 or the Canadian Electrical Code, CSA C22.1. -
Page 37: Enable/ Disable Switch
5. Connect the ground wire from the power supply to the grounding lug inside the junction box. See Junction Box Assembly Figure below and "Wiring Diagrams" on Page 52 & Page 53. 6. Replace junction box cover when connections are complete. Note: Do not apply power to the water heater before installation is complete and the water heater is filled with water. -
Page 38: Installation Check List
INSTALLATION CHECK LIST The list below represents some of the most critical installation requirements that, when overlooked, often result in operational problems, down time and needless parts replacement. Before performing any troubleshooting procedures use the list below to check for installation errors. Costs to correct installation errors are not covered under the limited warranty. -
Page 39: Operation And Service
OPERATION AND SERVICE HOW IT WORKS This section of the Service Handbook will cover operation, common service procedures and water heater construction. The water heater covered in this Service Handbook has a helical shaped coil heat exchanger that is submerged in the storage tank. These water heaters use a top mounted down fired radial design Burner. - Page 40 Service Note: The 5 pin PWM signal plug MUST remain plugged in to the 5 pin socket on the blower assembly at all times (SUF 60120 - 100250 Models only). Disconnecting this plug will cause the Combustion Blower to stop. If the electronic speed control is functioning properly Combustion Blower speed should noticeably reduce during the Trial For Ignition operating state.
-
Page 41: Blower Speed Control - Suf 119300 Thru 119500
BLOWER SPEED CONTROL – SUF 119300 THRU 119500 The CCB monitors a feedback signal from a sensor that is installed on the blower. The CCB interprets the pulse signal from the sensor and then sends a signal to the variable frequency drive (VFD) which in turn transmits the proper frequency to the blower to produce the proper blower speed and input. -
Page 42: Variable Frequency Drive - Suf 119300 Thru 119500
VARIABLE FREQUENCY DRIVE – SUF 119300 THRU 119500 The SUF 119300 - 119500 models have a variable frequency drive (VFD) that controls the rpm of the blower motor. The VFD receives a signal from the central control board that instructs the VFD to transmit the proper frequency to the blower to produce the proper blower speed and proper input. -
Page 43: Burner Assembly
BURNER ASSEMBLY The Burner is a radial design burner with a steel fiber jacket on the outer surface and is part of a larger Burner Assembly. Figures below show side views of the complete Burner Assembly removed from the water heater with key components identified. -
Page 44: Combustion Blower And Burner Removal/ Installation Instructions
COMBUSTION BLOWER AND BURNER REMOVAL/ INSTALLATION INSTRUCTIONS Refer to the Combustion Blower & Burner Assembly, Heater Top View images in this Service Handbook and the Instruction Manual supplied with the heater for heater component locations. COMBUSTION BLOWER/ BURNER REMOVAL 1. Turn the water heater’s Enable/Disable switch to the “Disable” Position. 2. -
Page 45: Spark Igniter
SPARK IGNITER The water heaters covered in this Service Handbook use a Spark Igniter. The Spark Igniter has two rods: the sparking rod that has ceramic insulation and the grounding rod, see Figure below. During trial for ignition, the Control System powers a high voltage transformer (Ignition Control) from J6, and the Ignition Control supplies high voltage to the sparking rod via the ignition cable. - Page 46 Spark Igniter (1/8" Spark Igniter Spark Gap) (5/16" Gap from Burner) Flame Sensor (13/16" Gap from Burner at the tip of Sensor Rod) SUF 119300 - 119500 Models The Control System is programmed to start sparking a few seconds before the Gas Control Valve opens. See the "Sequence Of Operation Flow Chart"...
-
Page 47: Gas Orifice - Suf 119300 Thru 119500 Models
GAS ORIFICE - SUF 119300 THRU 119500 MODELS Refer to Orifice Chart below for correct gas orifice size. SUF 60120 thru 100250 Models and all Natural gas models do not use a gas orifice. w/LP Gas Orifice Without Orifice Gas Control Without Orifice Natural Gas Gas Control With Orifice Propane (LP) SUF 119300 - 119500 Models ORIFICE CHART - SUF 119300 THRU 119500 MODELS... -
Page 48: Ccb (Central Control Board)
CCB (CENTRAL CONTROL BOARD) The CCB is a printed circuit board mounted inside a protective plastic enclosure, see Figures below and on next page. The CCB circuit board is the main control. All instructions for ignition and temperature control originate from this circuit board. Diagnostic and operational messages are generated by the CCB and sent to the UIM, see "(UIM) User Interface Module Screen"... -
Page 49: Ccb Cover Removal And Replacement
CCB COVER REMOVAL AND REPLACEMENT The cover on the CCB enclosure must be removed for various service procedures outlined in this Service Handbook. Refer to the instructions below when removing and replacing the CCB cover. Wiring to and from the CCB and other water heater components enters the CCB enclosure on the bottom. Removing the enclosure cover is a simple procedure. -
Page 50: Ccb Circuit Board Layout
CCB CIRCUIT BOARD LAYOUT CCB (CENTRAL CONTROL BOARD) POWER BOARD ASSEMBLY Servicing should only be performed by a Qualified Service Technician... -
Page 51: Ccb Connection Identification
CCB CONNECTION IDENTIFICATION J1 Socket - High Voltage In PIN # DESCRIPTION Ground AUX NC AUX NO AUX Common Not Used AUX NO AUX Common Line Voltage Neutral J5 Socket - Blower Logic (VFD/ Blower) PIN # DESCRIPTION PWM Signal Not used Blower Speed Feedback Grounding... - Page 52 J14 Socket - Limit String PIN # DESCRIPTION Anode Grounding Flame Sensor Condensate Not Used Condensate Gas Pressure Switch Gas Pressure Switch Gas Control Valve Gas Control Valve 24V Return J15 Socket - Pressure Switches PIN # DESCRIPTION Blower Prover Pressure Switch / Blocked Air Intake Pressure Switch Blocked Air Intake Pressure Switch / Blocked Exhaust Pressure Switch Blower Prover Pressure Switch Blocked Exhaust Pressure Switch...
-
Page 53: Wiring Diagram - Suf 60120 Thru 100250
WIRING DIAGRAM – SUF 60120 THRU 100250 Servicing should only be performed by a Qualified Service Technician... -
Page 54: Wiring Diagram - Suf 119300 Thru 119500
WIRING DIAGRAM – SUF 119300 THRU 119500 Servicing should only be performed by a Qualified Service Technician... -
Page 55: Control Overview
CONTROL OVERVIEW Interaction with the water heater controller is through an UIM display called the User Interface Module (UIM). This screen is also referred to as the “desktop” or “desktop menu”. Up and down buttons and three operation buttons allow navigation through the control menus and to make adjustments to the water heater. - Page 56 COMMERCIAL GAS HIGH EFFICIENCY WATER HEATERS Visit the "Information Central" link of www.statewaterheaters.com for a listing of available Service Handbooks. For additional information contact: State Water Heaters 500 Tennessee Waltz Parkway Ashland City, TN 37015 1-800-527-1953 www.statewaterheaters.com ©2014 State Industries, Inc.
Need help?
Do you have a question about the 60120-100250 and is the answer not in the manual?
Questions and answers