Kodak 6800 User Manual
Kodak photo printer user guide 6800, 6805
Hide thumbs
Also See for 6800:
- Diagnostics manual (326 pages) ,
- User manual (64 pages) ,
- Quick start manual (1 page)

Related Manuals for Kodak 6800


Summary of Contents for Kodak 6800
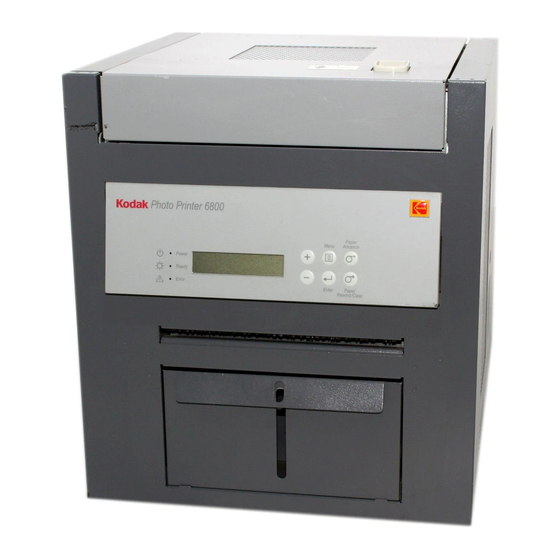
- Page 1 KODAK Photo Printer 6800/6805 User Guide for: KODAK Photo Printer 6800 (6 in.) KODAK Photo Printer 6805 (5 in.)
- Page 2 Eastman Kodak Company 343 State Street Rochester, New York 14650 © Eastman Kodak Company, 2004 Kodak is a trademark of Eastman Kodak Company. ENERGY STAR is a U.S. registered trademark. 6B8601...
- Page 3 1. Filter openings 2. Cover release 3. Upper cover 4. Operator panel 5. Print exit slot (print catcher not shown) 6. Trim tray 7. USB connector 8. Paper door 9. Data plate (location may vary) 10. Serial number/Bar code label (location may vary) 11.
- Page 4 Product Overview Internal View with Ribbon Installed Internal View with Ribbon Removed 1. Thermal head 2. Stripper plate 3. Cleaning roller, rear 4. Platen roller 5. Cleaning roller, front...
- Page 5 Operator Panel Kodak Photo Printer 6800 Power Ready Error Product Overview Paper Menu Advance Enter Paper Rewind/Clear...
-
Page 7: Table Of Contents
Table of Contents 1 Setting Up the Printer Package Contents ...1-1 Before You Begin ...1-2 Recommended Air Flow Clearances ...1-2 Removing the Packing Material ...1-3 Installing the Trim Tray...1-4 Installing the Print Catcher...1-4 Loading the Ribbon...1-5 Connecting the Cables ...1-7 Connecting the Power Cable...1-7 Connecting the USB Cable ...1-8 Turning On the Printer...1-8... - Page 8 Table of Contents 5 Maintaining the Printer Cleaning the Cabinet...5-1 Performing Routine Maintenance...5-1 Cleaning the Thermal Head and Stripper Plate ...5-2 Cleaning the Platen Roller ...5-3 Cleaning the Cleaning Rollers...5-3 6 Troubleshooting Resolving Potential Problems ...6-1 Resolving Operator Panel Error Messages...6-2 Clearing a Paper Jam...6-3 Method 1 ...6-3 Method 2 ...6-3...
-
Page 9: Setting Up The Printer
Printer KODAK Thermal Printer Cleaning Kit Trim Tray (not installed) Print Catcher (not installed) (4) 6800 Power Cable (1 US, 1 Europe, 1 Australia, 1 China) (2) 6805 Power Cable (1 Japan, 1 China) USB Cable (2) Paper Flange (2) Paper Flange Spacer - 6805 only... -
Page 10: Before You Begin
See Appendix A for details on the Photo Print Kit (sold separately). • KODAK Photo Printer 6800/6R Print Catcher to catch 6 x 8 in. finished prints. See Appendix A for details on the Print Catcher (sold separately). -
Page 11: Removing The Packing Material
Removing the Packing Material Tape 90˚ The printer is packaged with protective inserts that prevent damage during shipping. Remove these inserts before using the printer. Keep the packing inserts; reinstall them when repacking and transporting the printer. Remove the tape that holds the upper cover closed. Slide the cover release toward you, then open the upper cover carefully. -
Page 12: Installing The Trim Tray
The KODAK Photo Printer 6800/6R Print Catcher is available for purchase with the KODAK Photo Printer 6800 to catch 6 x 8 in. finished prints. See Appendix A for details on the Print Catcher (sold separately). -
Page 13: Loading The Ribbon
90˚ Wrapper For the KODAK Photo Printer 6800, have a KODAK Photo Print Kit 6800/4R or KODAK Photo Print Kit 6800/6R available. These kits contain the correct size ribbon for your printer. See Appendix A for details on the Photo Print Kits (sold separately). - Page 14 Setting Up the Printer Supply spool Bar code Notches Lugs Thumb wheel Label Take-up spool Push the bar code end of the supply spool into the spool holder on the right. Place the left side of the supply spool into the spool holder on the left. Rotate the thumb wheel until the lugs on the spool holder lock into the notches on the supply spool.
-
Page 15: Connecting The Cables
Connecting the Cables Connecting the Power Cable Close the upper cover by pressing on the center of the cover until it clicks in place. If you plan to install the printer driver software on your computer, you will need to install the software before you connect the cables. Installing the Printer Driver Software. -
Page 16: Connecting The Usb Cable
To turn off the printer, press the power switch to off ( ). For the KODAK Photo Printer 6800, have a KODAK Photo Print Kit 6800/4R or KODAK Photo Print Kit 6800/6R available. These kits contain the correct size paper for your printer. See Appendix A for details on the Photo Print Kits (sold separately). - Page 17 If you do not attach the paper flange properly, the paper roll will not fit into the printer. For the KODAK Photo Printer 6805, attach the paper spacers before attaching the paper flanges.
-
Page 18: Making A Test Print
• Use the 5" alignment marks when loading paper into the KODAK Photo Printer 6805. • Use the 6" alignment marks when loading paper into the KODAK Photo Printer 6800. Insert the paper under the pinch roller. Do not advance the paper past the red line or you may IMPORTANT: cause the paper to jam. -
Page 19: Online User Guide
Setting Up the Printer Online User Guide This User Guide and the Quick Setup Guide are also provided on the CD that came with your printer. The Guides are in PDF format; ADOBE ACROBAT Reader (also provided) is required to read them. Follow the on-screen directions to install ADOBE ACROBAT Reader if you do not already have it installed on your system. -
Page 21: Installing The Printer Driver Software
Driver Software Installing the Printer Driver A printer driver is software that allows the operating software to access the printer features. The WINDOWS 2000/XP 6800/6805 printer driver requires the following: Operating System WINDOWS 2000 Professional WINDOWS 2000 Server WINDOWS 2000 Advanced Server... -
Page 22: Customizing Printer Properties
Installing the Printer Driver Software Customizing Printer Properties Customizing Printing Preferences Uninstalling the Printer and Printer Driver The Printer Properties dialog box displays options for setting the printer properties. For your operating system, do the following: WINDOWS 2000 Select Start > Settings > Printers. Select Start >Printers and Faxes. Right-click the printer icon for your printer model. - Page 23 Installing the Printer Driver Software Select File > Server Properties. Select Drivers. Highlight the printer driver you want to remove and click Remove. Click Yes to delete the printer driver. Click Close.
-
Page 25: Calibrating The Printer
When a printer is properly calibrated, it generates the correct density for each given data value. Your KODAK Photo Printer is shipped with default factory calibration values. You should be able to set up your printer and begin printing right away without having to first calibrate the printer. - Page 26 Calibrating the Printer Select Easy Cal > Begin. The following dialog box appears. Click Proceed. The following dialog box appears.
- Page 27 Continue with Step 5. Click Locate Export Modules Folder. A file selection dialog box appears. Browse to C:/WINNT/Kodak/Plug-Ins (Printing) folder. NOTE: The exact path to the export module folder may differ depending on your operating system.
- Page 28 Calibrating the Printer Click Select Printer. The following dialog box appears. NOTE: The appearance of this dialog box may vary, depending on your printer setup and the media file you selected. From the Printer ID: list, select your printer ID. NOTE: Click Blink to Identify to locate a specific printer if you have more than one printer.
- Page 29 Check that the printer setup listed is the printer setup you want to use for calibration. • If the printer setup listed is the correct printer setup for your printer, go to Step 19. • If you want a different printer setup than what is listed, continue with Step 15.
- Page 30 Calibrating the Printer Check that the Printer and Printer Setup information are correct. • If the information is not correct and you have more than one media file, click Back and go to Step 15. • If the information is correct, click Next to send the default table to the printer.
- Page 31 Click OK to close the dialog box. Click Print. The information is processed and the calibration test print is printed on the specified printer. Processing may take several minutes. The following dialog box appears. Look at the test print and determine which cluster appears the most neutral (has the least amount of color).
-
Page 32: Uninstalling The Calibration Software
Please reinstall the software. You can remove the calibration software from your computer in two ways: • Select Start > Programs > KODAK Calibration Utility > Uninstall KODAK Calibration Utility and follow the directions to uninstall the software. - Page 33 Software” on page • Close the calibration software and try • Uninstall then reinstall the calibration • Check the KODAK web site for an updated • Close the calibration software. • Check that the printer cables are secure. • Check that the printer is turned on and the •...
- Page 34 Clear the paper jam. See Jam” on page Close the upper cover by pressing on the center of the cover until it clicks. Contact your KODAK representative for service. Have available: • the error code number • the printer model number and serial Contact your KODAK representative for service.
-
Page 35: Operating The Printer
Operating the Printer Making Prints Handling and Storing Prints Understanding the Operator Panel Lights Light Color Power Orange Ready Green Error You make prints using photo printing software applications. For application-specific printing information, see the user’s guide or online Help for the software application. -
Page 36: Using Setup Mode To Review Printer Settings
Use the operator panel to review printer settings in Setup mode. Printer settings are displayed here Kodak Photo Printer 6800 Power Ready Error 1. Press Menu to enter Setup Mode. 2. Press Menu repeatedly to scroll through the printer settings. -
Page 37: Maintaining The Printer
Vacuum the filter openings to remove dust. To maintain good print quality: Clean the stripper plate, platen roller, and cleaning rollers monthly, using the alcohol pads included in the KODAK Thermal Printer Cleaning Kit. Only clean the thermal head when necessary. Do not include the thermal head in your monthly cleaning process. -
Page 38: Cleaning The Thermal Head And Stripper Plate
90˚ Thermal head Stripper plate In the United States for health, safety, and environment information, call 585-722-5151. Customers outside the U.S. can contact their local KODAK Customer Service representative. CAUTION Fingerprints can damage the thermal head, which looks like a glass bar. -
Page 39: Cleaning The Platen Roller
Cleaning the Platen Roller Platen roller Cleaning the Cleaning Rollers Rear cleaning roller Front cleaning roller Remove an alcohol pad from its packaging. Wipe the rubber section of the platen roller with the pad. Rotate the roller to clean the entire surface. Allow the alcohol to dry completely (about five minutes) before you resume printing. - Page 40 Maintaining the Printer Close the upper cover by pressing on the center of the cover until it clicks in place. Allow the alcohol to dry completely (about five minutes) before you resume printing.
-
Page 41: Troubleshooting
Clean the thermal head. See Thermal Head and Stripper Plate” on page If the problem persists, the heating element may be damaged. Contact your KODAK representative for service. The cleaning rollers are dirty. Clean the cleaning rollers. See Cleaning Rollers” on page... -
Page 42: Resolving Operator Panel Error Messages
The printer has a problem with the temperature sensor. Refer to the following table to resolve errors reported on the operator panel. If the problem persists, contact your KODAK representative for service. Possible Solution Load the paper. See on page Load the ribbon. -
Page 43: Clearing A Paper Jam
Clearing a Paper Jam Method 1 Kodak Photo Printer 6800 Paper Menu Advance Power Ready Error Paper Enter Rewind/Clear Kodak Photo Printer 6800 Paper Menu Advance Power Ready Error Enter Paper Rewind/Clear Method 2 If the Paper Jam message is displayed on the operator panel, there are two methods that you can use to try to clear the paper jam. -
Page 44: Recovering From A Power Interruption
Troubleshooting Kodak Photo Printer 6800 Paper Menu Advance Power Ready Error Enter Paper Rewind/Clear Recovering from a Power Interruption Close the upper cover and turn on the printer. Press Paper Rewind to rewind the paper into the printer. If the Paper Jam message still appears on the operator panel, press Paper Rewind again. -
Page 45: Appendix A: Important Printer Information
90V to 132V / 48 Hz to 62 Hz 180V to 264V / 48 Hz to 62 Hz 320 watts maximum KODAK Photo Printer 6800: • 4 x 6 in. (102 x 152 mm) • 6 x 8 in. (152 x 203 mm) with border •... -
Page 46: Printer Supplies
3.5 x 5 in. (90 x 127 mm) - 11 seconds Each Photo Print Kit contains the correct media set (roll-feed paper and ribbon) for your printer model, either the KODAK Photo Printer 6800 or KODAK Photo Printer 6805. Photo Print Kits are sold separately. -
Page 47: Handling And Storing The Paper And Ribbon
The KODAK Photo Printer 6800/6805 comes with a print catcher that collects 3.5 x 5 in. and 4 x 6 in. finished prints. Use the KODAK Photo Printer 6800/6R Print Catcher to collect 6 x 8 in. finished prints. -
Page 48: Getting Help
Important Printer Information Getting Help Help with your printer is available from the following sources: • Troubleshooting section in this manual, Chapter 6. • Your KODAK Customer Service representative. -
Page 49: Appendix B: Safety And Regulatory Information
• Alcohol pads are used to clean the thermal head and other internal printer components. In the United States for health, safety, and environment information, call 585-722-5151. Customers outside the U.S. can contact their local KODAK Customer Service representative. -
Page 50: Safety Labels
Safety and Regulatory Information Safety Labels CAUTION HOT SURFACE To avoid burns, use caution when closing the cover. CAUTION HOT SURFACE The thermal head becomes extremely hot during normal operation. Do not touch it. P/N 2J5452 1641132183 CAUTION SHARP OBJECTS The metal edges of the printer may be sharp. -
Page 51: Regulatory And Safety Compliance
Regulatory and Safety Compliance Safety Radio Frequency Interference Safety and Regulatory Information Complies with UL 60950 Third Edition—CAN/CSA C22.2 No. 60950 Third Edition EN 60950:2000 IEC 60950 Fourth Edition NOTE: This equipment has been tested and found to comply with the limits for a Class A digital device, pursuant to part 15 of the FCC rules. -
Page 52: Noise Emission
Safety and Regulatory Information Noise Emission Disposal The operator-position noise emission value is 58 dB(A).* * Average value specified in accordance to JIS Z8731 This product contains a small amount of lead in the solder on the circuit boards. Disposal of this material may be regulated due to environmental considerations. -
Page 53: Index
3-1 paper, 1-8 print catcher, 1-4 printer driver, 2-1 ribbon, 1-5 trim tray, 1-4 KODAK Photo Print Kit, A-2 KODAK Photo Printer Print Catcher, A-3 KODAK Thermal Printer Cleaning Kit, A-3 labels, safety, B-2 loading paper, 1-8 ribbon, 1-5 maintenance... - Page 54 Index noise emission spec, B-4 online user guide, 1-11 operator panel error messages, 6-2 lights, 4-1 making a test print, 4-2 Paper Advance, loading paper, 1-10 printer settings, 4-2 Ready message, 4-2 setup mode, 4-2 ordering supplies, A-2 output tray See print catcher, 1-4 package contents, 1-1 packing material, removing, 1-3...
- Page 55 temperature paper and ribbon specifications, A-2 printer specifications, A-1 test print, making, 1-10 thermal head, cleaning, 5-2 transporting the printer, A-3 trim tray, 1-4 troubleshooting clearing paper jam, 6-3 error messages, operator panel, 6-2 potential problems, 6-1 power interruption, 6-4 uninstalling calibration software, 3-8 printer driver, 2-2...
Need help?
Do you have a question about the 6800 and is the answer not in the manual?
Questions and answers