Table of Contents
Advertisement
Advertisement
Table of Contents

Related Manuals for Kodak 6850


Summary of Contents for Kodak 6850
- Page 1 KODAK Photo Printer 6850 User Guide...
- Page 2 Eastman Kodak Company 343 State Street Rochester, New York 14650 © Eastman Kodak Company, 2005 Kodak is a trademark of Eastman Kodak Company. ENERGY STAR is a U.S. registered trademark. Part Number 4J0939_US...
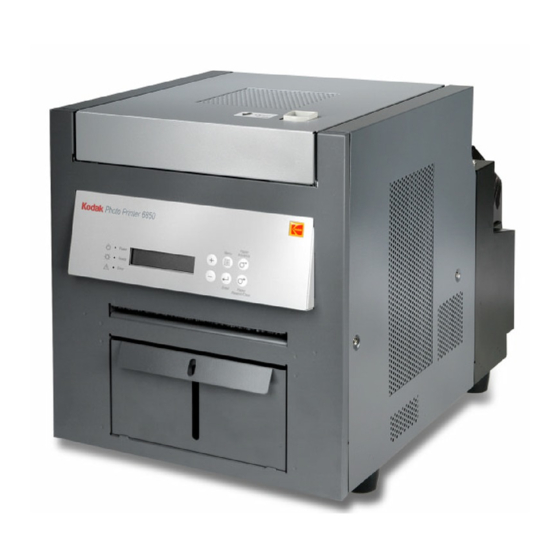
- Page 3 1. Filter openings 2. Cover release 3. Upper cover 4. Operator panel 5. Print exit slot (print catcher not shown) 6. Trim tray 7. USB connector 8. Paper door 9. Data plate (location may vary) 10. Serial number/Bar code label (location may vary) 11.
- Page 4 Product Overview Internal View with Ribbon Installed Internal View with Ribbon Removed 1. Thermal head 2. Stripper plate 3. Cleaning roller, rear 4. Platen roller 5. Cleaning roller, front May 4, 2005...
- Page 5 Operator Panel Kodak Photo Printer 6850 Power Ready Error May 4, 2005 Product Overview Paper Menu Advance Enter Paper Rewind/Clear...
-
Page 7: Table Of Contents
Uninstalling the Calibration Software...3-8 Resolving Calibration Error Messages ...3-8 4 Operating the Printer Making Prints...4-1 Handling and Storing Prints ...4-1 Understanding the Operator Panel Lights ...4-1 Using Setup Mode to Review Printer Settings ...4-2 Accessing the Printer Settings...4-2 May 4, 2005... - Page 8 Resolving Operator Panel Error Messages...6-2 Clearing a Paper Jam...6-3 Method 1 ...6-3 Method 2 ...6-3 Recovering from a Power Interruption...6-4 Appendix A: Important Printer Information System Requirements ...A-1 Printer Specifications ...A-1 Printer Supplies ...A-2 Paper and Ribbon ...A-2 Handling and Storing the Paper and Ribbon...A-2 Thermal Printer Cleaning Kit ...A-3...
-
Page 9: Setting Up The Printer
KODAK Thermal Printer Cleaning Kit Trim Tray (not installed) Print Catcher (not installed) (4) 6850 Power Cable (1 US, 1 Europe, 1 Australia, 1 China) USB Cable (2) Paper Flange User Guide and software CD, not pictured (in some countries, the User... -
Page 10: Before You Begin
Have the following items available before you begin your printer setup: • KODAK Photo Print Kit 6800/4R or KODAK Photo Print Kit 6800/6R which contains the correct paper and ribbon for the best print quality and print life from your printer. See Appendix A for details on the Photo Print Kit (sold separately). -
Page 11: Removing The Packing Material
May 4, 2005 The printer is packaged with protective inserts that prevent damage during shipping. Remove these inserts before using the printer. Keep the carton and packing inserts; reinstall them when repacking and transporting the printer. Remove the tape from the upper cover. -
Page 12: Installing The Trim Tray
Print catcher Remove the packing material. The trim tray collects paper trimmings that are generated when the printer cuts the prints. • Slide the trim tray into the printer as shown. CAUTION There are sharp cutter blades inside the printer. Do not insert hands or objects. -
Page 13: Loading The Ribbon
Wrapper May 4, 2005 Have a KODAK Photo Print Kit 6800/4R or KODAK Photo Print Kit 6800/6R available. These kits contain the correct size ribbon for your printer. See Appendix A for details on the Photo Print Kits (sold separately). - Page 14 Setting Up the Printer Supply spool Bar code Notches Lugs Thumb wheel Label Take-up spool Push the bar code end of the supply spool into the spool holder on the right. Place the left side of the supply spool into the spool holder on the left.
-
Page 15: Connecting The Cables
Close the upper cover by pressing on the center of the cover until it clicks in place. If you plan to install the printer driver software on your computer, you will need to install the software before you connect the cables. -
Page 16: Connecting The Usb Cable
Use the included USB cable. Check that the power switch is turned off ( ). Connect the USB cable to the USB connector on the back of the printer and to the USB connector on the computer. Press the power switch to on ( | ). -
Page 17: Loading The Paper
Black paper flange May 4, 2005 Have a KODAK Photo Print Kit 6800/4R or KODAK Photo Print Kit 6800/6R available. These kits contain the correct size paper for your printer. See Appendix A for details on the Photo Print Kits (sold separately). - Page 18 Carefully close the paper door. The operator panel displays the Paper Empty message. Press Paper Advance to load the paper into the printer. The printer advances the paper, then cuts and discharges about 24 in. (61 cm) of blank paper. This reduces the possibility of fingerprints or other damage to the prints.
-
Page 19: Making A Test Print
Rewind/Clear Online User Guide May 4, 2005 Make a test print to check that the printer is installed and set up correctly. Press Menu once until Test Print Mode appears. Press Enter to start printing the test print. Press Clear to return to Ready after the test print is printed. -
Page 21: Installing The Printer Driver Software
Installing the Printer Driver May 4, 2005 A printer driver is software that allows the operating software to access the printer features. The WINDOWS 2000/XP 6850 printer driver requires the following: Operating System WINDOWS 2003 Server WINDOWS 2000 Professional WINDOWS 2000 Server... -
Page 22: Customizing Printer Properties
Installing the Printer Driver Software Customizing Printer Properties Customizing Printing Preferences The Printer Properties dialog box displays options for setting the printer properties. For your operating system, do the following: WINDOWS 2000 Select Start > Settings > Printers. Select Start > Printers and Faxes. -
Page 23: Uninstalling The Printer And Printer Driver
Right-click the printer you want to remove and select Delete. Click Yes to delete the printer. Select File > Server Properties. Select Drivers. Highlight the printer driver you want to remove and click Remove. Click Yes to delete the printer driver. Click Close. WINDOWS XP •... -
Page 25: Calibrating The Printer
When a printer is properly calibrated, it generates the correct density for each given data value. Your KODAK Photo Printer is shipped with default factory calibration values. You should be able to set up your printer and begin printing right away without having to first calibrate the printer. - Page 26 Calibrating the Printer Select Start > Programs > KODAK Calibration Utility. The following dialog box appears. Select Easy Cal > Begin. The following dialog box appears. Click Proceed. The following dialog box appears. May 4, 2005...
- Page 27 May 4, 2005 Select your printer from the Printer Model list. • If the printer you want to calibrate is on the list, select it and go to Step 8. • If the printer you want to calibrate does not appear in the list, continue with Step 5.
- Page 28 From the Printer ID: list, select your printer ID. NOTE: Click Blink to Identify to locate a specific printer if you have more than one printer. The Ready light on the operator panel of the printer will blink five times.
- Page 29 May 4, 2005 Check that the printer setup listed is the printer setup you want to use for calibration. • If the printer setup listed is the correct printer setup for your printer, go to Step 19. • If you want a different printer setup than what is listed, continue with Step 15.
- Page 30 Click Printer Status to find out more information about your printer. The following dialog box appears. NOTE: Click Update if you want to update the information on the Printer Status dialog box. You may need to do this if your printer is accidentally shut off.
- Page 31 Enter the number of the most neutral cluster in the Cluster Number box (in a range from 201-249). Click Done. The printer calibration begins. When calibration is complete, the following dialog box appears. Click Quit to close the Calibration Utility. Your printer is now calibrated. Calibrating the Printer...
-
Page 32: Uninstalling The Calibration Software
You can remove the calibration software from your computer in two ways: • Select Start > Programs > KODAK Calibration Utility > Uninstall KODAK Calibration Utility and follow the directions to uninstall the software. - Page 33 Software” on page 3-8 “Installing the Calibration Software” on page 3-1. • Check the Kodak Web site for an updated version of the calibration software. • Close the calibration software. • Check that the printer cables are secure. • Check that the printer is turned on and the operator panel Ready light is illuminated.
- Page 34 Paper Jam” on page 6-3. Close the upper cover by pressing on the center of the cover until it clicks. Contact your KODAK Service Representative. Have available: • the error code number • the printer model number and serial number (listed on the printer data plate) Contact your KODAK Service Representative.
- Page 35 Possible Solution • Check the USB cable connection. • Replace the USB cable. • Try using a different USB port on the computer. • If the printer is connected through a USB hub, try connecting directly to the computer. 3-11...
-
Page 37: Operating The Printer
PVC-based. Printer Status The printer power is on. The printer is ready to make prints. An error has occurred. See the message on the operator panel, then see “Resolving Operator Panel Error Messages” on page... -
Page 38: Using Setup Mode To Review Printer Settings
Press +/- to scroll through selections. Press Enter to initiate an action or accept a change. Press Clear to exit Setup Mode. Press Menu repeatedly to scroll through the printer settings in the following order. Action Required None. The printer is on and ready to make prints. -
Page 39: Maintaining The Printer
Clean the stripper plate, platen roller, and cleaning rollers monthly, using the alcohol pads included in the KODAK Thermal Printer Cleaning Kit. Only clean the thermal head if directed to do so by a KODAK Service Representative. Do not include the thermal head in your monthly cleaning process. -
Page 40: Cleaning The Thermal Head And Stripper Plate
90˚ Thermal head Stripper plate In the United States for health, safety, and environment information, call 585-722-5151. Customers outside the U.S. can contact their local KODAK Service Representative. CAUTION Fingerprints can damage the thermal head, which looks like a glass bar. Never touch it with your bare hands or fingers. -
Page 41: Cleaning The Platen Roller
Remove the rear cleaning roller by pulling up on the black knob. Remove an alcohol pad from its packaging. Wipe the rubber section of the roller with the pad. Reinstall the rear cleaning roller in the printer. Push the black knob until the roller clicks into place. CAUTION There are sharp cutter blades inside the front roller area. - Page 42 Maintaining the Printer Close the upper cover by pressing on the center of the cover until it clicks in place. Allow the alcohol to dry completely (about five minutes) before you resume printing. May 4, 2005...
-
Page 43: Troubleshooting
Clean the thermal head. See Thermal Head and Stripper Plate” on page If the problem persists, the heating element may be damaged. Contact your KODAK Service Representative. The cleaning rollers are dirty. Clean the cleaning rollers. See Cleaning Rollers” on page... -
Page 44: Resolving Operator Panel Error Messages
Help for tips on memory optimization. • See requirements. Refer to the following table to resolve errors reported on the operator panel. If the problem persists, contact your KODAK Service Representative. page A-1 for recommended system Possible Solution Load the paper. See “Loading the Paper”... -
Page 45: Clearing A Paper Jam
Press Paper Rewind until the Paper Empty message appears. Press Paper Advance to re-load the paper into the printer. The printer advances the paper, then cuts and discharges about 20 in. (508 mm) of blank paper. This reduces the possibility of fingerprints or other damage to the prints (see The operator panel displays the Ready message. -
Page 46: Recovering From A Power Interruption
NOTE: If the Paper Jam message is still displayed on the operator panel, and you are at the end of a paper roll, it is possible that a segment of paper is too short to automatically exit the printer. Remove the front cleaning roller (see “Cleaning the Cleaning Rollers”... -
Page 47: Appendix A: Important Printer Information
90 V to 132 V / 48 Hz to 62 Hz 180 V to 264 V / 48 Hz to 62 Hz 320 watts maximum KODAK Photo Printer 6850: • 4 x 6 in. (10 x 15 cm) • 6 x 8 in. (15 x 20 cm) with border... -
Page 48: Printer Supplies
Photo Print Kits are sold separately. For best results, replace both the paper and ribbon at the IMPORTANT: same time. KODAK Photo Print Kit 6800 / 4R Specifications Storage specifications 86° F (30° C) or lower 60% relative humidity or lower... -
Page 49: Thermal Printer Cleaning Kit
Repack the printer in the original packing box. See the packing/unpacking instructions included with the box. As an ENERGY STAR Partner, Eastman Kodak Company has determined that this product meets the ENERGY STAR Guidelines for energy efficiency. Help with your printer is available from the following sources: •... -
Page 51: Appendix B: Safety And Regulatory Information
• Always unplug the power cable from the printer before cleaning or when the printer is not in use. • If the printer has been dropped or damaged, be sure a qualified service person examines the printer before you use it. -
Page 52: Safety Labels
CAUTION SHARP CUTTER BLADE There are sharp cutter blades inside the printer. Do not insert hands or objects. This label is posted behind the trim tray. Please observe the important safety warnings that are posted on the printer. P/N 2J5451 1641132182 P/N 2J5439... -
Page 53: Regulatory And Safety Compliance
Regulatory and Safety Compliance Safety Electromagnetic Compatibility (EMC) May 4, 2005 Safety and Regulatory Information Complies with UL 60950 Third Edition—CAN/CSA C22.2 No. 60950 Third Edition EN 60950-1 IEC 60950 Tested for Norwegian IT Power systems 240V phase to phase NOTE: This equipment has been tested and found to comply with the limits for a Class A digital device, pursuant to part 15 of the FCC rules. -
Page 54: Noise Emission
In the European Union, this symbol indicates that when the last user wishes to discard this product, it must be sent to appropriate facilities for recovery and recycling. Contact your local KODAK Representative or refer to www.kodak.com/go/recycle the collection and recovery programs available for this product. -
Page 55: Index
3-1 paper, 1-9 print catcher, 1-4 printer driver, 2-1 ribbon, 1-5 trim tray, 1-4 KODAK Photo Print Kit, A-2 KODAK Thermal Printer Cleaning Kit, A-3 labels, safety, B-2 loading paper, 1-9 ribbon, 1-5 maintenance cabinet, 5-1 cleaning rollers, 5-3... - Page 56 1-5 reordering, A-2 specifications, A-2 ribbon status, checking, 4-2 safety compliance, B-3 tips, B-1 warning labels, B-2 setting up the printer, 1-1 setup mode, 4-2 software installing calibration software, 3-1 printer driver, 2-1 uninstalling calibration software, 3-8 printer driver, 2-3...
- Page 57 A-3 trim tray, 1-4 troubleshooting clearing paper jam, 6-3 error messages, operator panel, 6-2 potential problems, 6-1 power interruption, 6-4 uninstalling calibration software, 3-8 printer driver, 2-3 unpacking, 1-3 USB cable, connecting, 1-8 May 4, 2005 Index...
Need help?
Do you have a question about the 6850 and is the answer not in the manual?
Questions and answers