Table of Contents
Advertisement
Quick Links
Advertisement
Table of Contents

Subscribe to Our Youtube Channel
Related Manuals for AVer FB3028-RT1


Summary of Contents for AVer FB3028-RT1
- Page 1 AVer Rugged Bullet type Camera Installation Guide...
-
Page 2: Table Of Contents
NSERT MICRO ARD TO YSTEM HARDWARE RESET ......................11 TECHNICAL SPECIFICATIONS ..................12 FB2028-T1 (E)/FB2028-T2 (E)/FB2028-TM (E) ......... 12 FB3028-RT1 (E)/FB3028-RT2 (E)/FB3028-RTM (E)........16 COPYRIGHT ........................20 NOTICE ..........................20 WARNING .......................... 20 GOVERNING LAW AND YOUR RIGHTS ................22... -
Page 3: Important Safeguard
ENGLISH Important Safeguard Do not submerge the unit in the water. Do not use power supply with different voltage other than DC12V/PoE. Unplug the power supply before cleaning. Use only a lens cleaning cloth and never use Unplug the power of this unit as soon as smoke benzene, thinner, or other solvent for cleaning. -
Page 4: Package Contents
Package Contents The following items are included in the package. AVer rugged bullet type camera Software & Manual CD 2 L-type Wrenches Sun Shield 2 Sun Shield Bolts Torx Pin Head Bolt Wall Mount Bracket Alignment Sticker 3 Screws 3 Washers... -
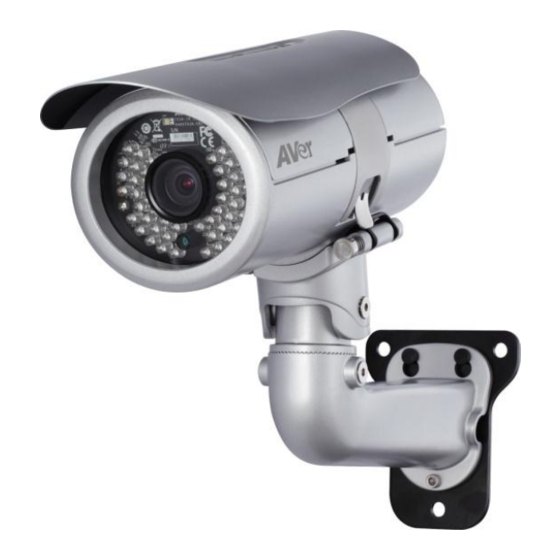
Page 5: Rugged Bullet Ip Camera Parts
ENGLISH Rugged Bullet IP Camera Parts Function Function Sun Shield BNC Jack (Video Out) Camera Lens RJ45 Ethernet Jack Light Sensor I/O Terminal Block Latch Phone Jack (Audio In) (10) Power Jack Phone Jack (Audio Out) -
Page 6: Mounting The Ip Camera
Mounting the IP Camera This section provides useful tips on how to adjust the IP camera to meet your needs. Deploying Network Network Connection via Ethernet Switch Connect the RJ45 cable from the Ethernet switch to RJ45 Ethernet jack of camera ... -
Page 7: Power Over Ethernet Connection
ENGLISH Power over Ethernet Connection Rugged bullet type camera is fully complies with PoE standard. It allows you to use PoE enabled switch or PoE injector to transmit data and power thru single Ethernet cable. PoE Enabled Switch Connection Diagram ... -
Page 8: Connecting External Devices To I/O Terminal Block
Connecting External Devices to I/O Terminal Block Function Power 12V Digital Output Digital Input Ground [Note] Maximum power output is 12V/100mA Power LED Status Steady Red Heating Blinking Green System working Steady Green Booting Firmware updating No Light Power off Internal Connection Diagram of DI/DO... -
Page 9: Mounting The Ip Camera
ENGLISH Mounting the IP Camera Use the supplied 2 sun shield bolts and secure the sun shield on the IP camera. Place the sticker on the wall surface. Then spot the mark and drill the 4 holes indicated on the sticker. It’s not necessary to drill the biggest hole if you are going to run the wire on the side. - Page 10 After adjusting the focus and zoom control, use the torx pin head bolt to secure the IP camera from being tampered.
-
Page 11: Focusing The Ip Camera With Bnc Monitor
ENGLISH Focusing the IP Camera with BNC Monitor The IP camera is supported with BNC analog video out jack which allows you to connect an analog display devices such as an LCD BNC monitor for you to adjust the camera focus and zoom. 1. -
Page 12: Insert Microsd Card To System
Insert microSD Card to System 1. Open up the IP camera case. 2. Insert microSD card [Note] We recommend to use industrial grade microSD card (support operating temp from -40°C to 85°C) for extreme temperature condition. -
Page 13: Hardware Reset
ENGLISH Hardware Reset 1. Open the IP camera case. 2. Short PJ1 pins around 10 seconds. WARNING!! This will cause all the configuration settings back to factory default. -
Page 14: Technical Specifications
Technical Specifications FB2028-T1 (E)/FB2028-T2 (E)/FB2028-TM (E) Model FB2028-T1 (E) FB2028-T2 (E) FB2028-TM (E) CBC AGP3Z0312LMRP Lens spec. CBC AG3Z0312LMRP-N CBC AG2.3Z1016LMRP-N -E111T51 Lens type Vari-focal Lens (Board mount, M19) F/1.2 F/no F/1.2 F/1.6 Iris type DC Iris Focal length f3~9mm f10~23mm f3~9mm... - Page 15 ENGLISH Model FB2028-T1 (E) FB2028-T2 (E) FB2028-TM (E) Video Image orientation mirror, flip Motion Detection zones Privacy mask areas D-WDR De-noise 2D/3D Day & night Auto/Manual/Schedule function ePTZ Corridor Mode Cross Detection Audio G.711 (μ-law)/G.726 (bit rate 16K~64bps) /AAC Encoder audio compression Streaming 2-ways audio...
- Page 16 Model FB2028-T1 (E) FB2028-T2 (E) FB2028-TM (E) Event Profiles 32 sets Triggers Alarm Interval, Motion Detection Region, Digital Input, SD Card, Network Trigger: Digital Output, Alarm Audio Actions Send out video clip: FTP, NAS, SD card Send out snapshot / log: FTP, NAS, SD card, mail Interface Digital input/output...
- Page 17 ENGLISH Model FB2028-T1 (E) FB2028-T2 (E) FB2028-TM (E) General -25°C~60°C, 20%~90% Cold Start -40°C~60°C, 20%~90% Operating Temperature and humidity 12V/4A DC-In -25°C~60°C, 20%~90% Cold Start -60°C~60°C, 20%~90% Operating IP Rating IP68 Software Requirement Windows® XP/7/8 IE 8/9/10/11 (Full Function), Chrome Browser Firefox and Safari (Basic Function) Firmware remote...
-
Page 18: Fb3028-Rt1 (E)/Fb3028-Rt2 (E)/Fb3028-Rtm (E)
FB3028-RT1 (E)/FB3028-RT2 (E)/FB3028-RTM (E) Model FB3028-RT1 (E) FB3028-RT2 (E) FB3028-RTM (E) CBC AGP3Z0312LMRP Lens spec. CBC AG3Z0312LMRP-N CBC AGP3Z0312LMRP -E111T51 Lens type vari-focal Lens (Board mount, M19) F/1.2 F/no F/1.2 F/1.6 Iris type DC Iris Focal length f3~9mm f10~23mm f3~9mm H 73.2°(W)~35°(T) - Page 19 ENGLISH Model FB3028-RT1 (E) FB3028-RT2 (E) FB3028-RTM (E) Video Smart Stream Yes, 5 windows Image orientation mirror, flip Motion Detection zones Privacy mask areas Sensor-WDR De-noise 2D/3D Day & night Auto/Manual/Schedule function ePTZ Corridor Mode Cross Detection Audio G.711 (μ-law)/G.726 (bit rate 16K~64bps) /AAC...
- Page 20 Model FB3028-RT1 (E) FB3028-RT2 (E) FB3028-RTM (E) Event Profiles 32 sets Triggers Alarm Interval, Motion Detection Region, Digital Input, SD Card, Network Trigger: Digital Output, Alarm Audio Actions Send out video clip: FTP, NAS, SD card Send out snapshot / log: FTP, NAS, SD card, mail...
- Page 21 ENGLISH Model FB3028-RT1 (E) FB3028-RT2 (E) FB3028-RTM (E) General Net weight 2180g -25°C~60°C, 20%~90% Cold Start -40°C~60°C, 20%~90% Operating Temperature and humidity 12V/4A DC-In -25°C~60°C, 20%~90% Cold Start -60°C~60°C, 20%~90% Operating IP Rating IP68 Software Requirement Windows® XP/7/8 Browser IE 8/9/10/11 (Full Function), Chrome, Firefox and Safari (Basic Function)
-
Page 22: Copyright
© 2014 AVer Information Inc. All rights reserved. All rights of this object belong to AVer Information Inc. Reproduced or transmitted in any form or by any means without the prior written permission of AVer Information Inc. is prohibited. All information or specifications are subject to change without prior notice. - Page 23 You as the original purchaser. Except for the foregoing, the Product is provided “AS IS.” In no event does AVer warrant that You will be able to operate the Product without problems or interruptions, or that the Product is suitable for your purposes. Your exclusive remedy and the entire liability of AVer under this paragraph shall be, at AVer’s option, the repair or replacement...
-
Page 24: Governing Law And Your Rights
Governing Law and Your Rights This warranty gives you specific legal rights; You may also have other rights granted under state law. These rights vary from state to state.
Need help?
Do you have a question about the FB3028-RT1 and is the answer not in the manual?
Questions and answers