
Subscribe to Our Youtube Channel
Related Manuals for Avermedia AverDiGi EH1000H-4 Nano


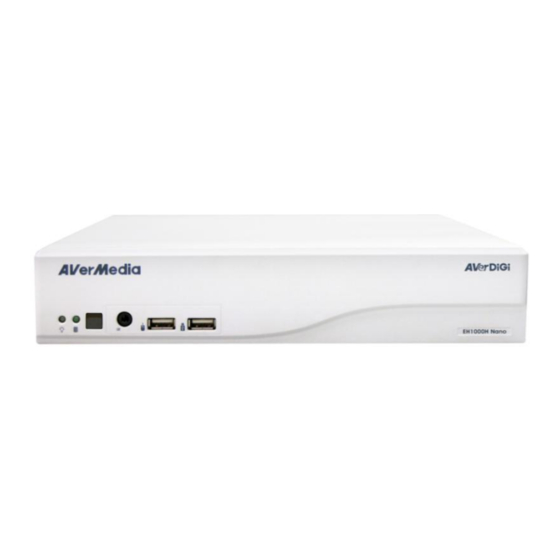
Summary of Contents for Avermedia AverDiGi EH1000H-4 Nano
- Page 3 AVerMedia, being authorized AVerMedia Information, Inc. to use, is registered trademarks of AVerMedia TECHNOLOGIES, Inc. “AVerDiGi” and “AVer” are trademarks (or registered trademarks) of AVerMedia Information, Inc. Other trademarks used herein for description purposes only belong to each of their respective companies. All other products or corporate names mentioned in this documentation are for identification and explanation purposes only, and may be trademarks or registered trademarks of their respective owners.
-
Page 5: Table Of Contents
Table of Content Package Contents ..................1 EH1004H-4 Nano ..................1 EH1008H-4 Nano ..................1 Hardware Installation ................... 2 Install the hard disk ................2 Device Connection ................4 III. First Time Using the DVR Unit ..............7 IV. Recording the Live Video ................10 Familiarizing the Buttons in Preview Mode .......... -
Page 7: Package Contents
Package Contents If there is any damage, shortage or inappropriate item in the package contents, please contact with local dealer EH1004H-4 Nano (5) Power Cord (*The power cord may vary (1) EH1004H-4 unit(4CH) according to the local electricity system.) (2) Quick Installation Guide (6) Screws for internal HDD installation (3) Software CD (Manual is included) (7) Remote Control... -
Page 8: Hardware Installation
Hardware Installation A. Install the hard disk User can install 1 SATA hard disks inside the DVR unit. Follow the illustrated instructions below to install the hard disk: 1. Loosen all screws(2 sides and rear side) 2. Push the cover backward and lift. The cover is a little bit tight, please be carefully the hands. - Page 9 5. Hold the cover and connect the power cable 6. And then, turn the cover over carefully. and SATA cable to the hard disk. 7. Hold the cover parallel with DVR unit and put 8. Finally, Push the cover forward and secure the cover back to the DVR unit and be the cover carefully the hard disk that inside the cover.
-
Page 10: Device Connection
B. Device Connection Pen drive and external hard disk must be FAT32 format. All connected devices have their own power supply are necessary. EH1004H-4 Nano - EH1004H-4 Nano supports both Analog and IP camera in 4 channels. - 1.3 M with H.264/MPEG4/ MJPEG on the first 4 channels and 2.3M with MJPEG on the 1st channel for IP cam connection. - Page 11 EH1008H-4 Nano - EH1008H-4 Nano only supports first 4 channels for IP camera connection. - 1.3 M with H.264/MPEG4/ MJPEG on the first 4 channels and 2.3M with MJPEG on the 1st channel for IP cam connection. The back panel of the EH1008H-4 Nano user can connect up to 8 cameras in combination of analog and IP camera (EH1008H-4 Nano only support first 4 channels for IP camera connection).
- Page 12 EH1004H-4 Nano/EH1008H-4 Nano For backup recorded video, plugging the pen drive or external hard disk through USB port that are located at front panel of DVR unit, and then, use the bundled software enables user to transfer, playback and segment the video. Follow the illustration below to make the connection:...
-
Page 13: First Time Using The Dvr Unit
III. First Time Using the DVR Unit 1. Connect the mouse to DVR unit (through USB port). 2. Connect all necessary external devices. DVR unit doesn’t supply the power to connected external devices. 3. Plug the power to turn on the DVR unit. 4. - Page 14 c. Select the hard disk from list. d. Click Format button and click Start to begin formatting e. When formatting is done, click OK. 6. Adjust time and date: Setup the DVR system date and time in order to have correct recording time and date.
- Page 15 IP camera - EH1008H-4 Nano only supports first 4 channels (CH1~4) for IP camera. - EH1004H-4 supports both analog and IP camera in 4 channels. - 1.3 M with H.264/MPEG4/ MJPEG on the first 4 channels and 2.3M with MJPEG on the 1st channel for IP cam connection.
-
Page 16: Recording The Live Video
In IP Camera Setting window, click Protocol, and then, select Protocol, Mode, and Video Format. g. Enter IP address in IP Camera site column or enter the URL of IP camera. h. Enable Authentication and enter ID and password if IP camera’s access authority is required. -
Page 17: Familiarizing The Buttons In Preview Mode
Familiarizing the Buttons in Preview Mode Name Function (1) Logout Reboot: To restart the DVR system. It is required to enter the password Power Off: To shut down the DVR system. It is required to enter the password Login: Using different ID to login to DVR system. Cancel: To return to DVR application. - Page 18 Name Function (5) Network Enable/disable remote system access. This feature allows you to access DVR server from a remote location via internet connection. The default is disabled. (6) Setup Configure the system settings. (7) PTZ Access PTZ control panel. (8) Preview Switch to Preview mode.
-
Page 19: Playback Recoded Video
VI. Playback Recoded Video 1. In preview mode, click the Playback button. Preview Mode 2. In Time and Date Selection window, select the date and time to playback. The numbers from 00 to 23 represent the time in 24-hour clock. The numbers from 01 to 08 represent the camera ID. The blue colored column indicates that there is a recorded video file on that period of time. -
Page 20: Familiarizing The Buttons In Playback Mode
VII. Familiarizing the Buttons in Playback Mode To switch in Playback mode, click Playback button at the lower right corner of Preview mode. Name Function Select from 4 different split screen type to playback the recorded video file (1) Split Screen of all the camera, or one camera over the other or alongside on a single Mode screen. - Page 21 Name Function (5) Date Select the date on the calendar and the time from 00 to 23 to where to start playing the recorded video file. The numbers from 00 to 23 represent the time in 24-hour clock. The numbers from 01 to 08 represent the camera ID.
- Page 22 Name Function Search for the next event or changes in the motion detector frame. You (15) Find Next can use this when you are using Event Search function. Search from the recorded activities that were recorded in event log (i.e., (16) Event Search Sensor, Motion, Video Loss).
- Page 23 P/N: 300AC2H8-DLD Oct. 2010...
Need help?
Do you have a question about the AverDiGi EH1000H-4 Nano and is the answer not in the manual?
Questions and answers