
Related Manuals for Kleenmaid OMFP7510


Summary of Contents for Kleenmaid OMFP7510
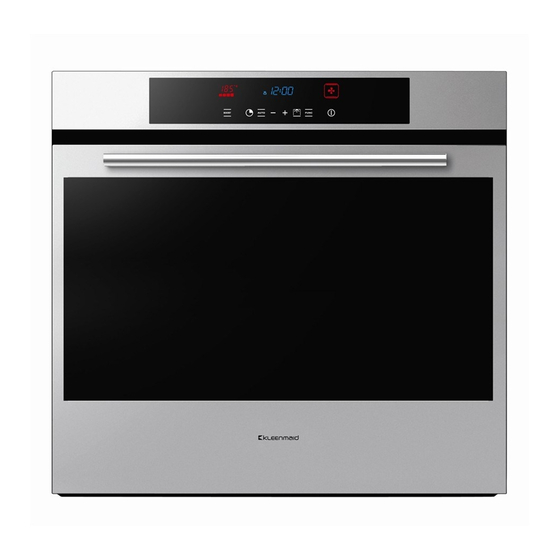
- Page 1 Instructions for use and warranty details Built In Oven Model No.: OMFP7510...
- Page 2 Congratulations on the purchase of your new Kleenmaid appliance. Your new Kleenmaid appliance has been designed and manufactured to give you years of reliable performance. For best results, carefully read the instructions on how to install your new appliance. Correct installation will avoid delays and unnecessary service call costs.
-
Page 3: Table Of Contents
Table of Contents IMPORTANT SAFETY INSTRUCTIONS ............ 3 Product Features ..................5 About Your Oven ......................5 Cooling Fan ........................5 Rack Positions ....................... 5 Baking Elements ......................6 Grilling Element ......................6 Convection Element ....................... 6 About Convection Ovens ....................6 General Oven Tips .................. - Page 4 Door and commands lock for children safety (pyro)............24 Buzzer volume ......................25 Night mode ........................25 Care & Cleaning ..................25 Cleaning and maintenance ............... 27 Do-it-Yourself Maintenance Oven Door Removal ........30 Replacing an Oven Light ................. 31 Solving Operational Problems ..............
-
Page 5: Important Safety Instructions
IMPORTANT SAFETY INSTRUCTIONS WARNING - When using this appliance, basic safety precautions should always be followed to reduce the risk of fire, electric shock, and/or injury to persons, including the following: 1. Read All Instructions before Using the Oven. 2. Proper Installation - Be sure your appliance is properly installed and grounded by a qualified technician. - Page 6 is cool. If rack must be moved while oven is hot, do not let the oven glove contact the hot heating element in the oven. 16. It is recommended that not abrasive detergents and no steam cleaning equipment are used. 17.
-
Page 7: Product Features
Product Features Cooling Vents Broil Element Control panel Door gasket Meat probe (if present) Halogen Light Level rack of cavity Embossed Halogen Light Model and Serial # Plate Bottom Element Convection Fan and (not visible) Element (not visible) Figure 1 About Your Oven Above you will find an illustration of an oven showing the components of the oven. -
Page 8: Baking Elements
Baking Elements The oven uses two elements for baking: one located at the top of the oven and the second located below the floor of the oven cavity to provide ease in cleaning the oven cavity. Grilling Element The grilling element of the oven is located at the top of the oven cavity. Do not touch the heating element or let oven gloves touch the grilling element. -
Page 9: General Oven Tips
General Oven Tips Preheating the Oven · Preheat the oven when using the Bake, Convection Bake and Convection Roast modes. · Use BOOST mode when a short time is necessary to preheat the oven. · Selecting a higher temperature does not shorten the preheat time. ·... -
Page 10: Oven Racks
Oven Racks · The oven has rack guides at six levels as shown in the illustration on Page 5. · Rack positions are numbered from the bottom rack guide (#1) to the top (#6). · Check cooking charts for best rack positions to use when cooking. ·... -
Page 11: Oven Extendable Racks
Oven Extendable Racks · The extendable rack allows for easier access to cooking foods. It extends beyond the standard flat rack bringing he food closer to the user. CAUTION When the rack is outside of the oven, slide arms do not lock. They could unexpectedly extend if the rack is carried incorrectly. -
Page 12: Electronic Control
Electronic control Control panel description The oven control panel is made by three displays and eight touch sensor keys. The displays show: - Time - Temperature - Function Figure 3 [A] Touch this key to enable the fast preheat [B] This key is used to set the clock, the minute minder and the buzzer volume. [C] This key is used to set the cooking duration and the stop time. -
Page 13: Setting The Time Of Day
Setting the time of day The time of day is always displayed in the 24 hours format. Touch the [B] key (clock/timer) until the word “hour” appears on the clock display. Wait until the time value appears then touch [D]/[E] keys in order to set the proper value. Hold the keys to fasten the decrease/increase operations After a few seconds the whole time of day value starts flashing: wait until the new time of day is steady. - Page 14 on its own display, touch [D] or [E] keys (-/+) in order to select the desired value, in a range between a minimum and a maximum, depending on the mode. Check the value on the temperature display. 5. Touch the [G] key once more to confirm the selection otherwise it will be confrmed automatically after a short time.
-
Page 15: Setting An Automatic Oven Function
Setting an automatic oven function After having selected a function as described before, the control can be programmed in order to set timed cooking activities. The time program remains active even if the function is changed (exception: pyrolyse). The following options are available: 1. -
Page 16: Cooking Functions
Cooking functions Each type of oven is provided for various cooking systems. Icon Mode Description Used for… The light is on only. In this mode only the internal oven convection This mode is used to defrost deepfrozen food. fan is ON i.e. there is no oven heating Only the lower (bottom) oven heating This mode is used to keep foods warm. - Page 17 The Ring + Down Convection mode uses the Useful for multilevel cooking of soufflés and lower + circular heating elements and internal pizzas. fan. The Convection Down mode uses the lower Useful for soufflés, pizzas and pastry dishes. (Bottom) heating element and internal fan. suitable for preparing a complete dinner Ideal for steak, hamburgers, chicken quarters (small portions).
-
Page 18: Bake Tips And Techniques
Bake Tips and Techniques Baking is cooking with heated air. Both upper and lower elements in the oven are used to heat the air but no fan is used to circulate the heat. Follow the recipe or convenience food directions for baking temperature, time and rack position. -
Page 19: True Convection Bake Tips And Techniques
True Convection bake Tips and Techniques Reduce recipe baking temperatures by 25 °F (15 °C). • For best results, foods should be cooked uncovered, in low-sided pans to take advantage of the forced air circulation. Use shiny aluminum pans for best results unless otherwise specified. -
Page 20: Quick And Easy Recipe Tips
Figure 5 Quick and easy recipe tips Converting from standard BAKE to CONVECTION BAKE: • Reduce the temperature by 25 °F (15 °C). • Use the same baking time as Bake mode if under 10 to 15 minutes. • Foods with a baking time of less than 30 minutes should be checked for doneness 5 minutes earlier than in standard bake recipes. - Page 21 Double convection cavity TEMP. °F (°C) FOOD ITEM RACK POSITION TIME (MIN) (PREHEATED OVEN) Cake Cupcakes 325 (160) 16-18 Bundt Cake 325 (160) 37-43 Angel Food 325 (160) 35-39 2 crust, fresh, 9” 350-400 (175-205) 35-45 2 crust, frozen fruit, 9” 350 (175) 68-78 Cookies...
-
Page 22: Convection Roast Tips And Techniques
Convection Roast Tips and Techniques • Preheat for Convection Roast. • Roast in a low-sided, uncovered pan. • When roasting whole chickens or turkey, tuck wings behind back and loosely tie legs with kitchen string. • Use the 2-piece broil pan for roasting uncovered. •... - Page 23 Double convenction cavity WEIGHT OVEN TEMP. RACK TIME INTERNAL MEATS (lb) °F (C°) POSITION (min. per ib) TEMP. °F (C°) Beef Rib Roast 325 (160) 18-22 145 (63) medium rare 20-25 160 (71) medium Riv Eye Roast, (bone- 325 (160) 18-22 145 (63) medium rare less)
-
Page 24: Convection Broil (Grill) Tips And Techniques
Convection Broil (Grill) Tips and Techniques • Place rack in the required position needed before turning on the oven. • Use Convection Broil mode with the oven door closed. • Do not preheat oven. • Use the 2-piece broil pan. •... -
Page 25: Broil (Grill) Tips And Techniques
Broil (Grill) Tips and Techniques • Place rack in lhe required posilion needed before lurning on lhe oven. • Use Broil mode wilh lhe oven door closed. • Do nol preheal oven. • Use lhe 2-piece broil pan. • Meals may be brushed wilh cooking oil or buller lo prevenl slicking. •... -
Page 26: Oven Functions
Oven functions The control can manage many cooking functions, their number and availability depends on the oven model. The temperature range is between 75°C and 250°C for most functions. Preset temperatures are mainly 190°C for convection modes, 210°C for thermal modes and 230°C for grill functions. -
Page 27: Buzzer Volume
Buzzer volume The buzzer volume can be set, when the control is in stand-by mode, touching first the [B] key until the writing “L1”, ”L2” or ”L3” is displayed (depending on the set volume) then touching the [D]/[E] key. At any touch the buzzer sounds a double beep, selecting the volume out of three available levels. - Page 28 • Frame Outside Door Gasket Area - Make sure oven is cool then use warm soapy water With a non-abrasive plastic scrubbing pad clean the frame surface outside the door gasket area This area must be cleaned by hand because the area outside the gasket does not get hot enough to burn off the soil (see Figure 6) •...
-
Page 29: Cleaning And Maintenance
Cleaning and maintenance Prior to taking any action for cleaning, make sure the apparatus is cut-out from the mains. It is recommended that the oven interior be frequently cleaned. In particular, it should be cleaned every time the grill is used to prevent excessive fouling of the oven interior that may generate fumes or odours during subsequent cooking. - Page 30 The maximum allowed clean time is 3 hours, the minimum 1 hour. The standard time is 1h:30min, the clock display shows P1:30. At the end of the self-cleaning activity the display shows “---“ steady and flashing as long as the oven is cooling and the door remains locked. Once the oven is cool enough, the door unlocks and the display shows “End”.
- Page 31 Cooking mode table with preset, minimum, maximum temperatures (°C) and nominal power (Watt) HEATING T MIN PRESET T MAX MH06 MH05 MODE ELEMENTS NAME (°C) (°C) (°C) Pr00 Pr00 LIGHT Pr01 Pr01 DEFROST 2870 Pr02 Pr02 KEEP WARM 3350 Pr03 Pr03 ECO-BAKE 3350...
-
Page 32: Do-It-Yourself Maintenance Oven Door Removal
Do-it-Yourself Maintenance Oven Door Removal WARNING • Make sure oven is cool and power to the oven has been turned off before removing the door. Faiture to do so could result in electrical shock or burns. • The oven door is heavy and fragile. Use both hands to remove the oven door. The door front is glass. -
Page 33: Replacing An Oven Light
Replacing an Oven Light • Each oven is equipped with halogen lights located in the lateral walls of the oven. • The lights are switched on when the door is opened or when the oven is in a cooking cycle. •... -
Page 34: Solving Operational Problems
Solving Baking Problems With either Bake or Convection Bake, poor results can occur for many reasons other than a malfunction of the oven. Check the chart below for causes of the most common problems. Since the size, shape and material of baking utensils directly affect the baking results, the best solution may be to replace old baking utensils that have darkened and warped with age and use. -
Page 35: If You Need Assistance Or Service
Failure declarations and error codes The control is continuously checking the status of the system. If an abnormal condition is detected for more than 1 minute, a failure occurs: - The heaters and the other loads are disabled. - The display shows a “E” letter flashing, followed by a numeric code that depends on the kind of failure. - The control emits an acoustic warning signal that will last for some minutes. -
Page 36: Installation Introduction
Installation Introduction Please read these instructions COMPLETELY AND CAREFULLY. They will save you time and effort and help to ensure optimum oven performance. Be sure to observe all WARNINGS. These installation instructions are intended for use by a qualified installer. In addition to these instructions the oven must be installed in compliance with the current Australian Standard. -
Page 37: Steps For Installation
Sleps For Installation The following pages provide the necessary information for proper installation of the oven arranged as follows: • Technical Data • Installation Cut-out Dimensions Required Clearances and Mounting instructions for: -Wall Installation Single Oven • Electrical Supply and Wiring Requirements •... -
Page 38: Wall Installation, Single Oven
Wall Installation, Single Oven Secure oven to cabinet using the screws provided. Screws should be inserted through the mounting holes in the positions indicated in the frame (open door to see frame and mounting holes). Do not over tighten screws. Figure 11 Note: 1. -
Page 39: Electrical Supply
Electrical Supply Before installing the oven have a qualified electrician verify that your home is provided with adequate electrical service and that the addition of the oven will not overload the circuit on which it is to be installed A separate three-wire single phase 230-240 V 50/60 Hz circuit is required If the supply cord is damaged. - Page 40 1 Remove the two upper oven covers (1) by unfastening the relative self-tapping screws (2). Unfasten the nut (3) for the cable holder and feed the cable through the hole leaving enough cable slack to to avoid stretching. 2 Remove about 12 cm of outside insulation from the cable and shorten the two active wires (live and neutral) to 6cm.
-
Page 41: Warranty
Purchase even though this warranty is in place will not bind Compass Capital Services trading as Kleenmaid to repair the appliance at no charge under this warranty and will require the Purchaser to pay for the service costs in full. - Page 42 Other products available in the Kleenmaid range of appliances Washing machines Clothes dryers Dishwashers Ovens Cooktops Steam ovens Microwave ovens Built in espresso coffee machines Rangehoods Freestanding ranges Sinks Taps Compass Capital Services Pty Limited trading as Kleenmaid ABN 96138214525 Level 29, Chifley Tower,...
Need help?
Do you have a question about the OMFP7510 and is the answer not in the manual?
Questions and answers