
Related Manuals for Kleenmaid OMF6031


Summary of Contents for Kleenmaid OMF6031
- Page 1 Instructions for use and warranty details Built In Oven OMF6031...
- Page 2 Once installation is complete, please read this instruction manual carefully and get to know the controls and the features of your new Kleenmaid appliance. These simple instructions will enable you to achieve excellent results from the very first time you use it.
-
Page 3: Table Of Contents
CONTENTS PAGE General warnings Description of the product Control panel User guide for oven Electronic programmer Oven functions Maintenance and cleaning Removal/assembly of the lateral guides Installing the shelves Removing/mounting the telescopic guides and Replacing the oven light bulb Instructions for installation Inserting the oven into the cabinet Oven electrical connection Assembly/replacement of the power supply cable... -
Page 4: General Warnings
GENERAL WARNINGS Warnings This appliance is marked in compliance with ATTENTION the European Directive 2012/19/EU. The crossed bin symbol indicates that the waste product must be disposed of separately Do not remove the plate applied on the internal face. It from household waste. - Page 5 Warnings regarding correct use of the oven • Do not lift or pull the oven with your hands. • The appliance can be installed and run in ventilated rooms according to the local regulations in force. • Use of the appliance is only intended for adults. Ensure it remains out of reach of children.
-
Page 6: Description Of The Product
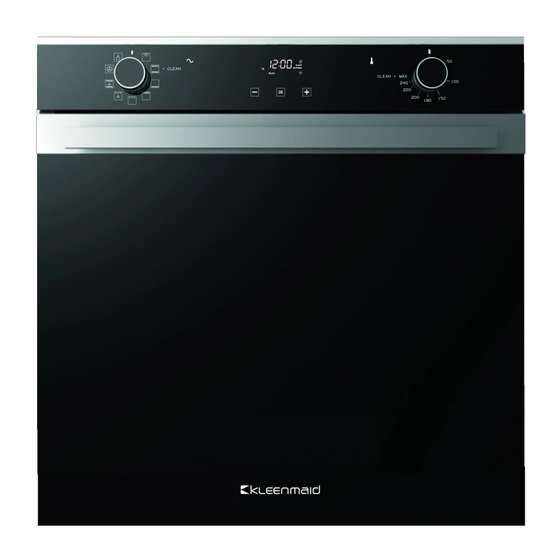
DESCRIPTION OF THE PRODUCT Control panel Fan-cover panel Telescopic guides Support grids Sauce collection tray Grill cooking resistance CONTROL PANEL Thermostat Programs selector Clock/Timer/BT6 programmer Power Operating... -
Page 7: User Guide For Oven
USER GUIDE FOR OVEN Commissioning Disconnect the appliance from the mains electricity and remove the accessories from the appliance. Clean them thoroughly with warm water and detergent and put them back in the initial position. Before using the oven for the first time, allow it to run on empty and at maximum for about 2 hours while ventilating the room well. -
Page 8: Electronic Programmer
ELECTRONIC PROGRAMMER Manual cooking For manual cooking do not use the programmer (the Man symbol is illuminated), use only the selector knobs. The TIMER function can be used in either manual or automatic mode. Semi-automatic operation (with cooking duration programming) Press on the OK symbol until the appearance of the flashing numbers 0:00 and h:m symbol, set cooking duration by pressing on the... -
Page 9: Oven Functions
Acoustic signal Child safety or against accidental operation To stop the acoustic signal, touch one of the three boxed symbols This is a function that can block access to the functionality of . It is possible to adjust the volume of the signal to the electronic programmer keys both when the oven is running three levels, as follows. -
Page 10: Maintenance And Cleaning
Maintenance and cleaning ATTENTION Disconnect the electric power supply before performing any type of maintenance on the product • Do not clean the appliance using steam cleaners. • Do not use rough, abrasive materials or sharp metal scrapers to clean the oven door, as they can damage the surfaces and cause the glass to break. - Page 11 Removing the glasses inside the oven door Removing/mounting the oven door Soft-closing hinges ATTENTION The doors that have this model of hinges have an amortized closing. The soft-closing hinges make the closing of the door Do not use any type of bevelled or sharp tool, which more delicate and silent.
-
Page 12: Removal/Assembly Of The Lateral Guides
Removal/mounting of the lateral guides Make sure that the oven is cool before proceeding. Tightly Lift it off the bottom 2 seat posts and lift out of the oven cavity. grip the guide at the centre top, pull slightly down and (fig.2). -
Page 13: Installing The Shelves
Make sure that the grill front is placed inside the Inserting the shelves end stops of the telescopic guide rail (fig.3g). Drip pan insertion CAUTION use t h e r m a l l y p r o t e c t i v e oven gloves if these operations are performed with a hot oven, as the drip pan can be very hot. -
Page 14: Removing/Mounting The Telescopic Guides And Replacing The Oven Light Bulb
Removing/mounting the telescopic guides You will find telescopic guides installed. To remove them, release the lateral support guides as described in the “REMOVAL / MOUNTING OF THE LATERAL GUIDES” paragraph. Holding the lateral guides vertically on a flat surface, release the lower part of the runner, making it turn as indicated in figure 1. -
Page 15: Inserting The Oven Into The Cabinet
Inserting the oven into the cabinet The cabinet and its components must be capable of withstanding a temperature of 90°C without presenting any deformities and/ or surface defects. The cabinet must enable the free passage of the oven connections. All household kitchen units must be protected with fire-resistant material in accordance with the standards in force. -
Page 16: Oven Electrical Connection
Oven electrical connection Ensure the electric current has been disconnected before In case of permanent connection to the electric mains, apply a connecting the oven to the electric mains. bipolar switch dimensioned to the corresponding load, with opening for each contact of at least 3 mm in accordance with the current local regulations. -
Page 17: Earth Connection
Earth connection Installation, connection and earthing of the electric system In case of replacement of the electric cable, ensure the use must comply with the Australian standard requisites and of an electric cable certified according to the Standards in meet the provisions of the local Standards in force. force and suitable to the technical features of the product. -
Page 18: Electrical Data And Dimensions
ELECTRIC DATA Voltage 220-240 V ~ 50/60Hz OMF6031 Total power 3400 Top resistance Resistance Grill 1800 Base resistance 1200 Circular resistance 2200 Oven light Oven fan Tangential fan EXTERNAL DIMENSIONS Width 59.5 Height 59.5 Depth INTERNAL DIMENSIONS Gross internal volume... - Page 19 This page intentionally left blank.
- Page 20 This page intentionally left blank.
- Page 21 This page intentionally left blank.
- Page 22 The benefits given to you under this Kleenmaid Warranty are in addition to other rights and remedies to which you may be entitled under the Australian Consumer Law in relation to the Product to which this Kleenmaid Warranty relates. Subject to the conditions below, the Product is warranted by Kleenmaid and/or its agents to be free from defects in materials and workmanship for the Warranty Period for normal Domestic Use.
- Page 23 13. Kleenmaid accepts no liability for items that are lost, damaged, or stolen as a result of freight, transport or storage. If you are required to transport the Product to an authorised service centre, you must ensure that it is securely packed and insured.
- Page 24 Refrigerators & Freezers Beverage Serving Cabinets Water Dispensers Vacuum Cleaners Compass Capital Services Pty Limited trading as Kleenmaid ABN 96138214525 Level 2, 204 Botany Road Alexandria NSW 2015 Register your Kleenmaid Appliances Warranty www.kleenmaidwarranty.com.au Request a Warranty Service www.kleenmaidwarranty.com.au E: support@kleenmaid.com.au www.kleenmaid.com.au...
Need help?
Do you have a question about the OMF6031 and is the answer not in the manual?
Questions and answers