
Subscribe to Our Youtube Channel
Related Manuals for Kleenmaid OMF6040K


Summary of Contents for Kleenmaid OMF6040K
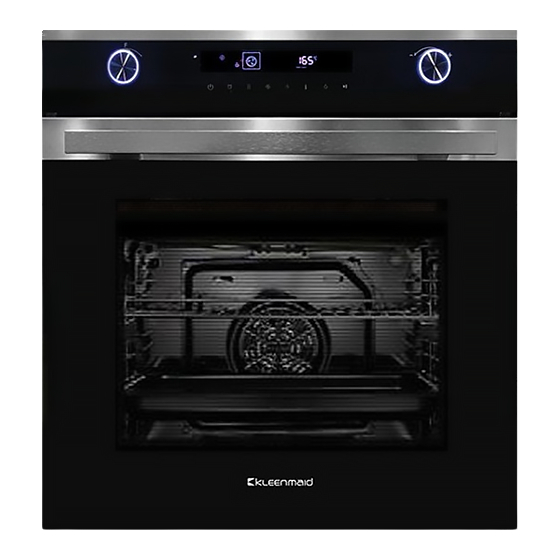
- Page 1 Instructions for use and warranty details To register your warranty or make a warranty claim, scan this QR code: Multifunction Oven Model No.: OMF6040K & OMF6040X...
- Page 2 Once installation is complete, please read this instruction manual carefully and get to know the controls and the features of your new Kleenmaid appliance. These simple instructions will enable you to achieve excellent results from the very first time you use it.
-
Page 3: Table Of Contents
ENERGY EFFICIENT USE THIS MAINTAINING APPLIANCE APPLIANCE DOOR TELESCOPIC GUIDES REPLACING OVEN LAMP TROUBLE SHOOTING GUIDE CUSTOMER SERVICE COOKING & BAKING - TIPS & TRICKS SUGGESTED OVEN SETTINGS BY RECIPE TYPE Cakes Bread & pizza Meat SPECIFICATIONS ENVIRONMENT KLEENMAID WARRANTY... -
Page 4: Safety Information
SAFETY INFORMATION Intended Use Before unpacking this appliance, please read the User Manual carefully. Only then will you be able to operate your appliance safely and correctly. We recommend you retain the user manual and installation instructions for future use or for subsequent owners. The latest version of this manual is available on our website. - Page 5 Risk of burns! The appliance becomes very hot. Never touch the interior surfaces of the appliance or the heating elements. Always allow the appliance to cool down. Keep children at a safe distance. Accessories and oven-ware become very hot. Always use oven gloves to remove accessories or oven-ware from the cavity.
-
Page 6: Causes Of Damage
Causes of Damage Accessories, foil, greaseproof paper or ovenware on the cavity floor: do not place accessories on the cavity floor. Do not cover the cavity floor with any sort of foil or greaseproof paper. Do not place ovenware on the cavity floor if a temperature of over 50 ºC has been set. -
Page 7: Installation
NOTE: Before making preparations for or commencing installation, the installer should refer to the current online version of the User Manual, which is available on the Kleenmaid website (see back cover for details). min.35 Note: Diagram dimensions are in mm. - Page 8 FITTING THE OVEN INTO THE KITCHEN UNIT Fit the oven into the space provided in the kitchen unit. It may be fitted underneath a work top or into an upright column. Fix the oven in position by screwing into place, using the two fixing holes in the frame.
-
Page 9: Operating The Appliance
OPERATING THE APPLIANCE CONTROL PANEL 13 16 17 18 19 20 Usage Knobs and Function Keys Related Indicators 1. Oven – Function Knob 14, 15, 17 Turn this knob to change cooking mode. Switch between on and off. 2. ON / OFF Use timer function/3 sec press for child- 11/19 3. -
Page 10: Before Using The Appliance
BEFORE USING THE APPLIANCE Before using the appliance to prepare food for the first time, you must clean the cavity and accessories. See Maintaining this Appliance pp18-21 for extra instructions. Remove all stickers, surface protection foils and transport protection parts. Remove all accessories and the side-racks from the cavity. -
Page 11: Functions
FUNCTIONS This table explains the oven functions to help the user choose the correct type of heating for each dish. Functions Temperature To view interior of oven. Light To shorten the preheat time. Not available with defrost or dough proofing Boost Preheat functions. -
Page 12: Using Your Appliance
Notes To defrost large portions of food, the side-racks may be removed and the food container placed o n the cavity floor. To warm tableware, it is beneficial to remove the side-racks and use the heating modes “Fan Assisted Double Grill” OR “Baking: Fan Forced” with the temperature set at 50°C. -
Page 13: Automatic Cooking
Automatic cooking (set duration and end time) After setting the cooking duration, you can set a time that cooking will end. , then turn the adjustment knob to set the end time in hours, touch Touch again then set it in minutes. When finished setting the time, touch to confirm. -
Page 14: Kitchen Timer
Caution! Even after the appliance is switched off, it may be very hot, especially inside the cavity. Never touch the interior surfaces of the appliance or the heating elements. Use oven gloves to remove accessories or ovenware from the cavity, and allow the appliance to cool down. -
Page 15: Using Sabbath Mode
USING SABBATH MODE Sabbath mode Sabbath mode supports adherence to certain religious observances. To use the Sabbath mode function: 1. . In standby mode, press and hold the Boost preheating key for 3 seconds to enter Sabbath mode. The screen displays The time adjustment range is 24-80 hours. -
Page 16: Accessories
ACCESSORIES Your appliance is accompanied by a range of accessories. This section contains an overview of the accessories included and information on how to use them correctly. Accessories included Your appliance is equipped with the following accessories: Wire Rack x2 Deep Baking Tray (50mm) x1 For ovenware, cake tins and ovenproof For tray bakes and small baked... - Page 17 Locking feature Accessories can be pulled approximately halfway out until they lock in place. The locking function prevents accessories from tilting with the gravity of food and accessories themselves while they get pulled out. Accessories should be inserted into cavity correctly for this tilt protection.
-
Page 18: Energy Efficient Use
ENERGY EFFICIENT USE Remove all accessories which are not necessary during the cooking & baking process. Do not open the door during the cooking & baking process. If you open the door during cooking & baking, switch the mode to “Lamp” (without changing the temperature setting). - Page 19 Caution! Risk of surface damage Do not use: Harsh or abrasive cleaning agents. Cleaning agents with a high alcohol content. Hard scouring pads or cleaning sponges. High-pressure cleaners or steam cleaners. WARNING! Do not clean the oven door safety lock system. Wash new sponge cloths thoroughly before use.
- Page 20 Surface Area Cleaning Use hot soapy water: Clean with a dish cloth and then dry with a soft cloth. Door handle If descaler comes into contact with the door handle wipe it off immediately, otherwise any stains will not be able to be removed. Use hot soapy water: Clean with a dish cloth, wipe with a damp cloth, then dry with a Enamel surfaces...
-
Page 21: Appliance Door
Warning: Do not use a rough or sharp metal scraper to clean the glass of the oven door. If the glass surface of the oven door gets scratched this can cause the glass to shatter. Enamel is baked on at very high temperatures. This can cause some slight colour variation. - Page 22 Removing the appliance door Open the appliance door fully. right. See Fig. 1 below. Fold open the two locking levers on the left and Close the appliance door as far as the limit stop. With both hands, grip the door on the left- and right-hand side, and pull it out upwards. Fitting the appliance door Reattach the appliance door in the opposite sequence to removal.
- Page 23 Removing the door cover The plastic inlay in the door cover may become discolored. The cover may be removed to thoroughly clean it. Remove the appliance door as instructed above. Press on the right and left side of the cover. See Fig.1 below. Remove the cover.
- Page 24 Caution! It is possible to remove the door cover when the door is installed on the oven, however: Removing the door cover releases the inner glass of the door so that it can easily move leading to damage or injury. Removing the door cover and inner glass reduces the overall weight of the door.
-
Page 25: Telescopic Guides
INSTALLING THE TELESCOPIC GUIDES These instructions are for the left side of the cavity. Use a similar method to install guides on the right side. Place the point A and B of the telescopic guides horizontally on the outer wire. Fig.1 Rotate the telescopic guides anti-clockwise (clockwise for right side) by 90 degrees. - Page 26 REMOVING THE TELESCOPIC GUIDES These instructions are for the left side of the cavity. Use a similar method to remove the guides on the right side. Lift up the front end of the telescopic guide firmly. To do this, the special release latch first needs to be pressed towards the wall of the cavity.
-
Page 27: Replacing Oven Lamp
Replacing Oven Lamp If the oven lamp fails, it must be replaced. Heat-resistant, 25 watt, 230 V halogen lamps are available from specialist retailers. When handling the halogen lamp, use a dry cloth. This will increase the service life of the lamp. -
Page 28: Trouble Shooting Guide
TROUBLE SHOOTING GUIDE Repairs should be performed by a licensed technician only as incorrect repair may result in considerable danger to you and others. However if a fault occurs, before contacting the service department, please ensure that it is not due to incorrect operation. - Page 29 Fault Possible Cause Notes/remedy The oven may Oven responds to Press and hold the Power On/Off sensor for 3 sec. be in Retail control panel Within the following 3 sec. turn the adjustment Showroom actions except knob to the left to turn off the demonstration Mode.
-
Page 30: Customer Service
Model No and the individual Serial Number of your appliance, which are found on the rating plate. The rating plate bearing these numbers can be found when you open the appliance door. OMF6040K and OMF6040X Model: Rated voltage:... -
Page 31: Cooking & Baking - Tips & Tricks
COOKING & BAKING - TIPS & TRICKS You want to cook your Try to use settings of similar recipes first and optimize the cooking process according to the result. own recipe. Put a wooden skewer inside the cake about 10 minutes Is the cake completely baked? before the given baking time is reached. - Page 32 Any heat resistant baking ware can be used. It is recommended not to use aluminum in direct contact with Which kind of baking food, especially when it is sour/acidic. ware can be used? Please ensure a good fit between the container and its lid. Preheat the oven for 5 minutes and place the food in the level given in this manual.
-
Page 33: Suggested Oven Settings By Recipe Type
SUGGESTED OVEN SETTINGS BY RECIPE TYPE Duration CAKE Form Level Mode Temp.in °C in minutes Intensive Sponge Cake (simple) Cooking in a Box shape Traditional Sponge Cake (simple) Cooking in a Box shape Intensive Sponge Cake with Round form Cooking Fruits in a round Form Traditional Sponge Cake with... - Page 34 Duration CAKE Form Level Mode Temp.in °C in minutes Traditional Tray Small Cakes Cooking Traditional p.h.t:10:00 Tray Small Cakes Cooking b.t.:34:00 Traditional p.h.t.: 8:00 Butter Yeast Cake Tray Cooking b.t.: 30:00 Traditional p.h.t.: 8:00 Shortbread Tray Cooking b.t.: 13:00 Intensive Shortbread 2 Trays Tray p.h.t:8:20...
-
Page 35: Meat
Duration MEAT Form Level Mode Temp.in °C in minutes Fan Assisted Beef Tender Loin Tray 1,6 KG Double Grill Traditional Meatloaf 1 kg Meat Tray Cooking Fan Assisted Chicken 1 kg Tray L2:Rack L1:Tray Double Grill Traditional Fish (2,5 kg ) Tray Cooking Traditional... -
Page 36: Specifications
SPECIFICATIONS OMF6040K and OMF6040X No of Cavities Heat Source Electric EC Electric, Cavity (Conventional) 1.06kWh/cycle EC Electric, Cavity (Forced Air) 0.69kWh/cycle EEI Cavity Energy Efficiency Class (A+++ to D) ENVIRONMENT The packaging is made to protect your new appliance against damage during transport. -
Page 37: Kleenmaid Warranty
The benefits given to you under this Kleenmaid Warranty are in addition to other rights and remedies to which you may be entitled under the Australian Consumer Law in relation to the Product to which this Kleenmaid Warranty relates. Subject to the conditions below, the Product is warranted by Kleenmaid and/or its agents to be free from defects in materials and workmanship for the Warranty Period for normal Domestic Use. - Page 38 13. Kleenmaid accepts no liability for items that are lost, damaged, or stolen as a result of freight, transport or storage. If you are required to transport the Product to an authorised service centre, you must ensure that it is securely packed and insured.
- Page 39 This page has been intentionally left blank.
- Page 40 Other products available in the Kleenmaid range of appliances Washing machines Clothes dryers Dishwashers Ovens Cooktops Steam ovens Microwave ovens Built in espresso coffee machines Rangehoods Freestanding ovens Refrigerators & Freezers Beverage Serving Cabinets Water Dispensers Vacuum Cleaners Compass Capital Services Pty Limited...
Need help?
Do you have a question about the OMF6040K and is the answer not in the manual?
Questions and answers