
Subscribe to Our Youtube Channel
Related Manuals for Kleenmaid OMFFS9010


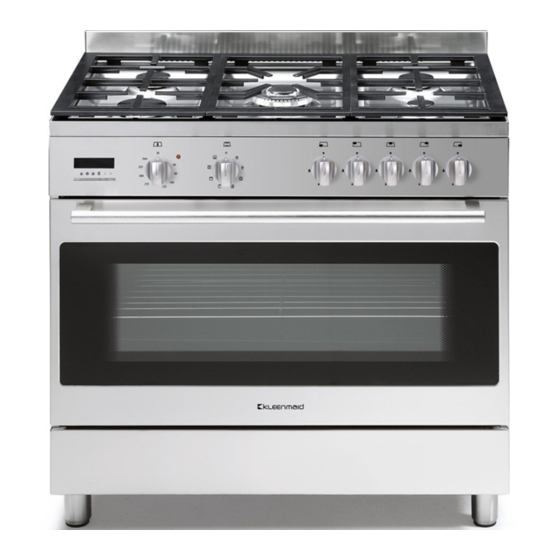
Summary of Contents for Kleenmaid OMFFS9010
- Page 1 Instructions for use and warranty details Free Standing Oven Model No.: OMFFS9010...
- Page 2 Congratulations on the purchase of your new Kleenmaid appliance. Your new Kleenmaid appliance has been designed and manufactured to give you years of reliable performance. For best results, carefully read the instructions on how to install your new appliance. Correct installation will avoid delays and unnecessary service call costs.
-
Page 3: General Information
WHEN YOU CALL FOR SERVICE RECORD HERE FOR EASY REFERENCE GENERAL INFORMATION ENVIRONMENTAL WARNING Waste packaging Getting to know your new cooker Thank you for choosing one of our products. SECTION FOR THE QUALIFIED TECHNICIAN Our cookers are of simple, rational design. They are constructed to the best standards to ensure good O V E R A L L D I M E N S I O N S service and outstanding safety. -
Page 4: Installation
I N S TA L L AT I O N Clearances to non- combustible materials PROVISION FOR VENTILATION POSITIONING Clearances to combustible materials Note: the cooker is fitted with a metallic rear hob protecting profile (”F”, see fig. 1) which must be assembled in following way: - put the profile (F) on the rear part of the cooker as in fig. -
Page 5: Gas Connection
GAS CONNECTION TO FIX THE COOKER TO THE REAR WALL WARNING - “R” “G” IMPORTANT: If the cooker is moved for any reason (e.g. maintenance) resulting in the cooker being unclipped from the wall, the cooker must be re-clipped to the wall at the completion of the task. -
Page 6: Special Note
GAS ADJUSTEMENTS REPLACEMENT OF THE INJECTORS Gas Type Jet mm Ø Burners Power MJ/h MINIMUM FLOW ADJUSTMENT FOR HOB-TOP TAPS Gas Type Jet mm Ø Burners Power MJ/h Attention: SPECIAL NOTE ELECTRICAL CONNECTION IMPORTANT ELECTRICAL CONNECTION WARNING: THIS APPLIANCE MUST BE EARTHED. - Page 7 2nd SECTION FOR THE USER “LED” PROGRAMMER Features WARNING: Functions Display Minute timer Cooking time Cooking end - WARNING - Manual Subtract time Add time Setting + and - buttons (5 and 6). Setting the time Manual use Automatic use Semi-automatic use with cooking time setting Semi-automatic use with end time setting Automatic use with cooking time and end time setting...
- Page 8 Start programme and check Setting error Minutes counter Cancelling a setting Sound signal - 1 Minute Tour - Be safe Automatic electric ignition Gas and Electricity on WARNING...
- Page 9 HOW TO USE YOUR ELECTRIC OVEN Defrosting with fan MULTIFUNCTIONAL OVEN The oven is fitted with: Natural convection N.B.: Oven thermostat knob (fig. 3) Oven commutator knob (fig. 3A) Fan oven Medium grill Total grill Note: Fan assisted total grill Always use the oven with the oven door closed.
-
Page 10: General Instruction
GENERAL INSTRUCTION Warning: GUIDE FOR CONVENTIONAL COOKING GUIDE FOR FORCED CONVECTION COOKING (Back rolled electric element with fan) Food Thermostat Shelf Position Cooking Time setting °C (Counted from Bottom) Food Thermostat setting °C Cooking Time PLATE WARMING Warning:... -
Page 11: Use Of The Electric Grill
USE OF THE ELECTRIC GRILL C L E A N I N G USlNG THE GRILL Pan supports and burners Warning: burner cap notch for electrode in burner head electrode Oven Shelves To remove the shelves from the oven, To replace, Daily Bump Oven accessories... - Page 12 Interior: Fig. 9 Fig. 9A IMPORTANT Fig. 9B Fig. 9C The interior glass of the oven The interior glass of the oven door can be removed: Fig. 9D Fig. 9E with the door in a semi-open position, remove the screws A and B and the profime C as shown in fig.
- Page 13 Disassembly of the worktop must only be done by a qualified S O M E S A F E T Y P O I N T service technician. DISASSEMBLE OF WORK-TOP If you smell gas Open a window. Do not use any electrical switches. Immediately extinguish naked flames.
-
Page 14: Problem Solver
PROBLEM SOLVER OVEN DOES NOT WORK AT ALL LIGHT BULB DOESN’T COME ON Note: THINGS TO TRY BEFORE CALLING FOR AN ENGINEER SMOKE COMING FROM OVEN Burner does not burn well Burner does not ignite CLOCK/TIMER DOES NOT WORK If, after checking through this section, you cannot resolve your problem please call the number on the data plate fixed to the front cover of these instructions for service and spare Pan supports... -
Page 15: Warranty And Service
Purchase even though this warranty is in place will not bind Compass Capital Services trading as Kleenmaid to repair the appliance at no charge under this warranty and will require the Purchaser to pay for the service costs in full. - Page 16 Other products available in the Kleenmaid range of appliances Washing machines Clothes dryers Dishwashers Ovens Cooktops Steam ovens Microwave ovens Built in espresso coffee machines Rangehoods Freestanding ranges Sinks Taps Compass Capital Services Pty Limited trading as Kleenmaid ABN 96138214525...
Need help?
Do you have a question about the OMFFS9010 and is the answer not in the manual?
Questions and answers