
Subscribe to Our Youtube Channel
Related Manuals for Kleenmaid OMF6012K


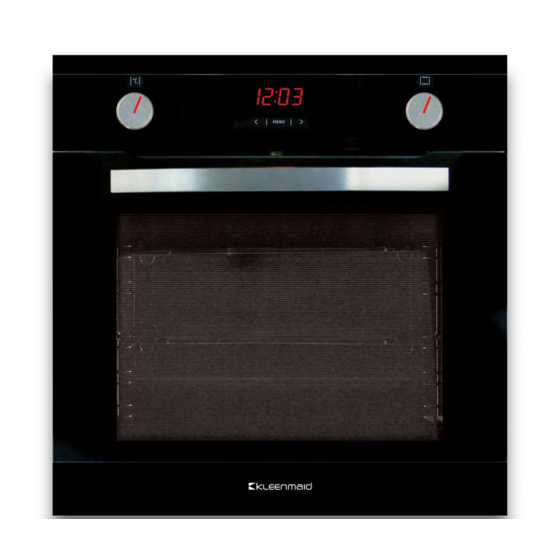
Summary of Contents for Kleenmaid OMF6012K
- Page 1 Instructions for use and warranty details Built In Oven Model No: OMF6012K...
- Page 2 Once installation is complete, please read this instruction manual carefully and get to know the controls and the features of your new Kleenmaid appliance. These simple instructions will enable you to achieve excellent results from the very first time you use it.
- Page 3 Caution! user...
-
Page 4: Table Of Contents
TABLE OF CONTENTS Safety instructions ......................4 Description of the appliance ..................... 8 Operation ........................... 10 Baking in the oven – practical hints ................18 Cleaning and maintenance ....................22 Installation instructions ....................26 ........................28... -
Page 5: Safety Instructions
SAFETY INSTRUCTIONS Warning: The appliance and its accessible parts become hot during use. Young children should be kept away. This appliance is not intended for use by persons (including children) with reduced physical, sensory or mental capabilities, or lack of experience and knowledge, unless they have been given supervision or instruction concerning use of the appliance by a person responsible for their safety. - Page 6 SAFETY INSTRUCTIONS Danger of burns! Hot steam may escape when you open the oven door. Be careful when you open the oven door during or after cooking. Do NOT lean over the door when you open it. Please note that depending on the temperature the steam can be invisible.
- Page 7 HOW TO SAVE ENERGY Using energy in a respon- sible way not only saves money but also helps the environment. So let’s save energy! And this is how you can do it: Do not uncover the pan too often (a watched pot never boils!). Do not open the oven door unnecessarily often.
- Page 8 DISPOSAL OF THE APPLIANCE UNPACKING During transportation, protec- Old appliances should not sim- tive packaging was used to ply be disposed of with normal protect the appliance against household waste, but should any damage. After unpack- be delivered to a collection and ing, please dispose of all recycling centre for electric and elements of packaging in a...
-
Page 9: Description Of The Appliance
DESCRIPTION OF THE APPLIANCE Electronic Temperature control... - Page 10 SPECIFICATIONS OF THE APPLIANCE Cooker fittings: Roasting tray How to use wire shelf supports? Most often used for moist cakes. The bak- wire shelf supports have ing tray is also recommended for baking, levels where accessories can be placed. frozen foods and large roasts. The tray can Level one is the lowest available level.
-
Page 11: Operation
OPERATION Important! Remove packaging and clean the interior The time “0.00” will start flashing of the oven. in the display field upon connection to the power supply. The programmer should be set with the current time. Take out and wash the oven fittings with (See p11). - Page 12 OPERATION Operate the control panel You can adjust the time later. To do this touch < / > simultaneously and adjust the current time while the dot below the symbol is flashing. Note: The oven can be turned on when you see the symbol on the display.
- Page 13 OPERATION Timed operation Delayed timed operation To set the appliance to switch off after a In order to set the appliance to switch off at a specific duration: specific time after a set Duration has elapsed, set the Duration and the End Time: l set the function selector knob and the l Touch repeatedly until the display...
- Page 14 OPERATION Change the beep tone l set the function selector knob and the temperature selector knob to preferred You can change the beep tones as follows: settings. The functions are now active. The appliance will switch on at l simultaneously touch the < / >, sensors End Time minus Duration (i.e.
- Page 15 OPERATION l Use the < / > sensors to select your pre- ferred brightness: Use > to select the setting 1 to 9 Use < to select the setting 9 to 1 Note: The display is at its brightest setting when the panel is active, i.e.
- Page 16 OPERATION Oven with automatic air circulation Oven is off (including a fan and fan-forced element) Oven lighting Set the knob in this position to light up The oven can be heated up using the bottom the oven interior. and top elements, the grill or the fan- forced element.
- Page 17 OPERATION Baking Pizza and bread When the knob is set to this position With this setting the convection fan the oven is heated using only the and bottom heater are on, which in- bottom heater. Baking of cakes from creases the temperature at the bottom the bottom until done (moist cakes of the cooked dish.
- Page 18 OPERATION Use of the grill The grilling process operates through infrared rays emitted onto the dish by the incandes- cent grill heater. In order to switch on the grill you need to: Set the oven knob to the position marked grill Heat the oven for approx.
-
Page 19: Baking In The Oven - Practical Hints
BAKING IN THE OVEN – PRACTICAL HINTS Baking We recommend using the baking trays which were provided with your cooker. It is also possible to bake in cake tins and trays bought elsewhere which should be put on the drying rack. For baking it is preferable to use black trays which conduct heat better and shorten the baking time. - Page 20 BAKING IN THE OVEN – PRACTICAL HINTS Oven with automatic air circulation (including a fan and ring heater) Type of Type Temperature Level Time dish of heating (min.) Sponge cake 160 - 200 2 - 3 30 - 50 Yeast cake/ 160 - 170 25 - 40 Pound cake...
- Page 21 TEST DISHES. According to standard EN 60350-1. Baking Type of dish Accessory Level Type Temperature Baking of heating time (min.) Baking tray 160 - 170 25 - 40 Baking tray 155 - 170 25 - 40 Baking tray 155 - 170 25 - 40 Small cakes 2 + 4...
- Page 22 TEST DISHES. According to standard EN 60350-1. Grilling Type of dish Accessory Level Type Temperature Time of heating (min.) Wire rack 1,5 - 2,5 White bread toast Wire rack 2 - 3 Wire rack + 4 - wire rack roasting tray 1st side 10 - 15 Beef burgers 3 - roasting...
-
Page 23: Cleaning And Maintenance
CLEANING AND MAINTENANCE By ensuring proper cleaning and mainte- Important! nance of your oven you can have a Do not use any abrasive agents, significant influence on the continuing fault- harsh detergents or abrasive ob- free operation of your appliance. jects for cleaning. - Page 24 CLEANING AND MAINTENANCE This oven is equipped with easily Replacement of the oven light bulb removable wire shelf supports. To remove them for washing, pull the front catch, then In order to avoid the possibility of an tilt the support and remove from the rear electric shock ensure that the appliance catch.
- Page 25 CLEANING AND MAINTENANCE Removing the inner panel Door removal 1. Using a flat screwdriver unhook the up- per door slat, prying it gently on the sides In order to obtain easier access to the oven (fig. B). cavity for cleaning, it is possible to remove the 2.
- Page 26 CLEANING AND MAINTENANCE 3. Pull the inner glass panel from its seat Regular inspections (in the lower section of the door). Re- move the inner panel (fig. D). Besides keeping the oven clean, you should: 4. Clean the panel with warm water with ●...
-
Page 27: Installation Instructions
INSTALLATION INSTRUCTIONS Installation and technical assistance must Inserting the oven in the cabinet only be performed by qualified persons. Carefully read the safety instructions in this Make an opening with the dimensions manual before using the oven. Incorrect given in the diagram for the oven to be installation, maintenance, assistance and fitted. - Page 28 INSTALLATION INSTRUCTIONS Electrical connection 230V 1N~ Warning: This appliance must be earthed. The appliance is supplied fitted with a power cord and 3 pin plug. Plug the 3-pin plug into Neutral (Black or Blue) a properly earthed, 15A general purpose power outlet.
- Page 29 The bulb is loose or damaged. Tighten up or replace the work. blown bulb (see ‘Replacement of the oven light bulb' p22) SPECIFICATIONS Model OMF6012K Oven dimensions (H/W/D) 595 x 595 x 575 mm Rated voltage 230-240 V ~50/60 Hz Total power...
- Page 30 The benefits given to you under this Kleenmaid Warranty are in addition to other rights and remedies to which you may be entitled under the Australian Consumer Law in relation to the Product to which this Kleenmaid Warranty relates. Subject to the conditions below, the Product is warranted by Kleenmaid and/or its agents to be free from defects in materials and workmanship for the Warranty Period for normal Domestic Use.
- Page 31 13. Kleenmaid accepts no liability for items that are lost, damaged, or stolen as a result of freight, transport or storage. If you are required to transport the Product to an authorised service centre, you must ensure that it is securely packed and insured.
- Page 32 Other products available in the Kleenmaid range of appliances Washing machines Clothes dryers Dishwashers Ovens Cooktops Steam ovens Microwave ovens Built in espresso coffee machines Rangehoods Freestanding ovens Compass Capital Services Pty Limited trading as Kleenmaid ABN 96138214525 Level 2, 204 Botany Road Alexandria...
Need help?
Do you have a question about the OMF6012K and is the answer not in the manual?
Questions and answers