Advertisement
Quick Links
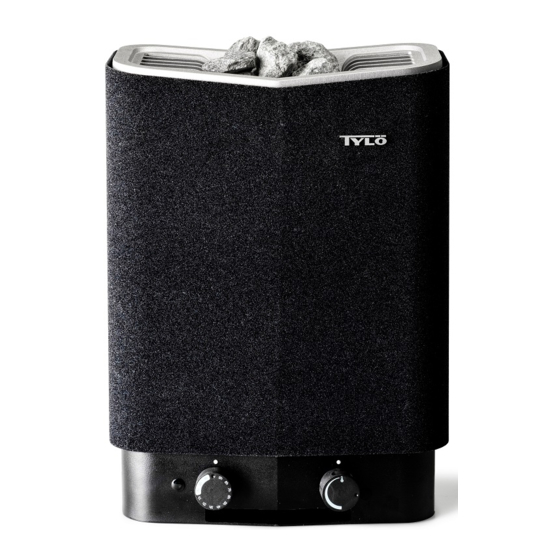
sauna USA
TYLÖ AB, Svarvaregatan 6, S-30250 Halmstad, Sweden.
Tel + 46 35 10 00 80, Fax + 46 35 102580. E-mail: info@tylo.se, Internet: www.tylo.se
Instructions for installation and use
WARNING!
•
Do not cover the sauna heater. This creates a fire hazard.
•
Do not touch the top of the heater. This will cause severe burns.
•
Incorrect ventilation or an incorrectly located sauna heater can, under certain
circumstances, cause excessive drying of the wood in the sauna and create a
fire hazard.
•
Cover sauna floors with a non-slip material.
•
Never hose down the sauna.
•
There must always be at least 1.7 in. insulation directly behind the wood
panelling in the sauna (no other material may be used, such as particle board,
plaster, etc).
•
Sauna doors must always open outwards. All that should be needed to open
the sauna door is just a little light pressure. Never provide the door with any
locking or latching. Make sure that the door do not cause any entrapment.
•
Do not use the sauna for any purpose other than sauna bathing.
•
Do not install more than one sauna heater in a sauna room, unless you follow
exactly the special instructions for twin-heater installations.
•
Sauna fragrances, etc. may ignite if poured undiluted into the rock
compartment.
•
Never leave young children unattended in the sauna.
•
Sauna bathing is not always suitable for persons in poor health. Consult your
doctor for advice.
•
Enjoy your sauna bath as long as it feels pleasant, prolonged exposure is
capable of inducing hyperthermia
•
Store this information in a safe place.
*
Hyperthermia occurs when the internal temperature of the body reaches a
level several degrees above the normal temperature of 98.6
of hypothermia include an increase in the internal temperature of the body,
dizziness, lethargy, drowsiness and fainting. The effect of hyperthermia include:
a) Failure to perceive heat;
b) Failure to recognize the need of exit the room;
c) Unawareness of impending hazard;
d) Fatal damage of pregnant women;
e) Physical inability to exit the room; and
f) Unconsciousness
-
WARNING
The use of alcohol, drugs, or medication is greatly increasing the
risk of fatal hyperthermia.
Installation
Fig. 1.
Tylö SuperSport sauna heater with integral control panel.
Fig. 2.
Tylö Sport-U sauna heater with integral control panel.
Fig. 3.
Tylö Deluxe, SE-U sauna heater with separate TS or CC control panel (type
SE-U only uses a CC panel).
Fig. 4.
Tylö Combi -U whit integral control panel - for private use only (in public
saunas Tylarium/CC20/CC200 should be installed).
Installing the sauna heater.
The sauna heater should be placed on the same wall as the door, see figure 7. In an
exceptional circumstance, the heater may be placed on a side wall, but as close as
possible to the wall with the door. Fit the heater 10½ in. above the floor, observing the
regulations for the minimum distance to the side wall. You can use the box which
contains the sauna rocks to help you when installing Tylö heaters (not the Combi-U).
When placed on its short end, the box is 10½ in. high.
Art nr 29000120
*.
°
F. The symptoms
Sauna Heaters
Tylö sauna heaters are connected by a normal standard wire or cable approved for
permanent installation. The cable or conduit is laid on the outside of any heating
insulation; see figs. 10, 11 and 12. Single-core cables must be protected by a flexible
metal conduit up to the heater. When the heater has been installed, a set screw (I,
figs. 11 and 12) locks it in place on the supporting brackets. This prevents the heater
from being removed from the wall.
Important ! The enclosed metal plate "Caution, Reduce the risk of fire." must be
mounted on the interior wall adjacent to the heater. The enclosed metal plate
"Warning, Reduce the risk of overheating." must be mounted on the outside of the
room at about eye level where clearly visible.
Fig. 5 – Minimum safety distances.
A = standard installation. B = recess installation. Please refer to the table for minimum
distances to side wall (X,Y). When installing Deluxe sauna heaters in a recess, the
sensor (C) should be placed 10 in. from the rear wall of the recess and 59 in. above
floor level.
Fig. 6 – Minimum safety distances.
Minimum distance to sauna fittings in front of a sauna heater.
Fig. 8 – Sauna.
(Sauna heater type Deluxe and control panel type CC ). 1 = sauna heater.
2 = thermistor (sensor). 3 = control panel CC 10/ CC 50/ CC 100. 4 = external power
switch (if any). 5 = distribution box. 6 = relay box RB30/60.
Fig. 9 – Sauna.
(Sauna heater type SE-U and control panel type CC ).
1 = sauna heater. 2 = thermistor (sensor). 3 = control panel CC 10/ CC 50/
CC 100. 4 = external power switch (if any). 5 = distribution box.
Fig. 10 – Combi - U
A = electric conduit. B = wooden panel. C = insulation. D = built-in sensor. E =
built-in control panel. G = vent. H = wooden batten. I = set screw. J = temperature
limit control (in the reservoir). K = drainage pipe. L = Hanging console.
Fix the hanging console at a minimum distance (M) of 180 mm
(7.1 in) from the side wall and 675 mm (26.6 in) above floor level (N).
Fig. 11 – SuperSport, Sport-U.
A = electric conduit. B = wooden panel. C = insulation. D = built-in sensor.
E = built-in control panel (Supersport). E = built-in control panel (Sport-U).
G = vent. H = wooden batten. I = set screw.
Fig. 12 – Deluxe.
A = electric conduit. B = wooden panel. C = insulation (behind control panel).
D = sensor. E = TS separate control panel (CC panel in folded figure).
F = capillary tube/thermistor wire G = vent. H = wooden batten. I = set screw.
Amperage and conductor area:
Model
Output kW Voltage / Amps AWG
SU 2/4
2,2
SU 2/4
4,5
SU 7, AU 7, CU 7
5,3
SU 7, AU 7, CU 7
SU 8, AU 8, CU 8
6,3
SU 8, AU 8, CU 8
8,3
AU 11
10,7
AU16
16
*) Min. copper wire size, supply power - control panel
**) Min. copper wire size, control panel - heater.
***) Model SU and CU is only available in single phase.
115V1~
240V1~
240V1~
208V1~/ 26A
***208V3~ / 20A
240V1~/ 30 A
7
***240V3~ / 17 A
208V1~/ 30A
***208V3~/18A
240V1~/ 35 A
***240V3~ / 20 A
240V1~ / 45 A
208V3~ / 30 A
208V3~ / 45 A
0208
10*
14*
10*
10*
10*
8*
10*
8*
10*
8*
10*
6* 8**
8* 10**
6* 8**
1
Advertisement

Related Manuals for Tylo SU 2/4


Summary of Contents for Tylo SU 2/4
- Page 1 USA TYLÖ AB, Svarvaregatan 6, S-30250 Halmstad, Sweden. Tel + 46 35 10 00 80, Fax + 46 35 102580. E-mail: info@tylo.se, Internet: www.tylo.se Instructions for installation and use Tylö sauna heaters are connected by a normal standard wire or cable approved for WARNING! permanent installation.
-
Page 2: Building Instructions
Sauna volume and min. installation distances: Lighting. (Not CC 10) Minimum ceiling Connect the lighting according to the wiring diagram. Output Sauna volume Min. distance from side wall (in.) height min/max cu.ft. normal installation “X” recess installation “Y” in sauna (in.) Remote control operation. -
Page 3: General Information
Fig. 16. Recommendations for sauna construction: Operating Instructions A. Floor frame, corner posts, studs, ceiling frame. B. Battens, rafters, vents. SuperSport, Sport-U and TS C. 3 in. mineral wool as heat insulation, approx. 3/4 in. air gap between insulation and outer wall. Temperature setting. - Page 4 TYLÖ AB, Svarvaregatan 6, S-30250 Halmstad, Sweden. open. Tel +46 35 10 00 80, Fax +46 35 102580. E-mail: info@tylo.se, Internet: www.tylo.se • Open the air outlet fully after bathing. Once the automatic drying process has © This publication many not be reproduced, in part or in whole, without the written permission of Tylö.
- Page 5 M o n d a y 1 0 : 0 0 : 0 0 C C 1 0 0 i s o f f INFO P r e s s O N t o s t a r t P r e s s I N F O f o r h e l p MENU TEMP LIGHT...
- Page 6 59 in. 10½ in. 10½ in.
- Page 7 Sauna Alt A Alt B A = min. 4 in. (2.2 - 8 kW) B = min. 8 in. (2.2 - 8 kW) min. 8 in. (10.7 - 16 kW) min. 16 in. (10.7 - 16 kW) Max 8 in. Min 3/4 in.
- Page 8 208/240 V 1 ~ 1 = Supersport 7-8 1 = Deluxe 7-8-11 Sport-U 7-8 2 = thermistor (sensor) Combi-U 7-8 3 = CC10, CC50, CC100 4 = external switch 6 = RB 30 3A4B 5B 6B 11 12 13 14 15 16 11 12 13 14 15 16 17 18 19 20 21 40 41 B 208/240 V 1~...
Need help?
Do you have a question about the SU 2/4 and is the answer not in the manual?
Questions and answers