Table of Contents

Related Manuals for Tylo SENSE COMMERCIAL Series


Summary of Contents for Tylo SENSE COMMERCIAL Series
- Page 1 SENSE COMMERCIAL 2017-03-16 SVENSKA РУССКИЙ INSTALLATIONSANVISNING ИНСТРУКЦИИ ПО УСТАНОВКЕ ENGLISH POLSKI INSTALLATION GUIDE INSTRUKCJA INSTALACJI DEUTSCH NEDERLANDS INSTALLATIONSANLEITUNG INSTALLATIEHANDLEIDING FRANÇAIS NOTICE D’INSTALLATION 2900 5300...
- Page 2 WARNING! • Poor ventilation or heater positioning may lead to dry distillation, posing a fi re risk under certain circum- stances! • Insuffi cient insulation of the sauna cabin may pose a fi re risk! • Use of the wrong materials in the sauna cabin, such as particle board, drywall, etc., may pose a fi re risk! •...
-
Page 3: Prior To Installation
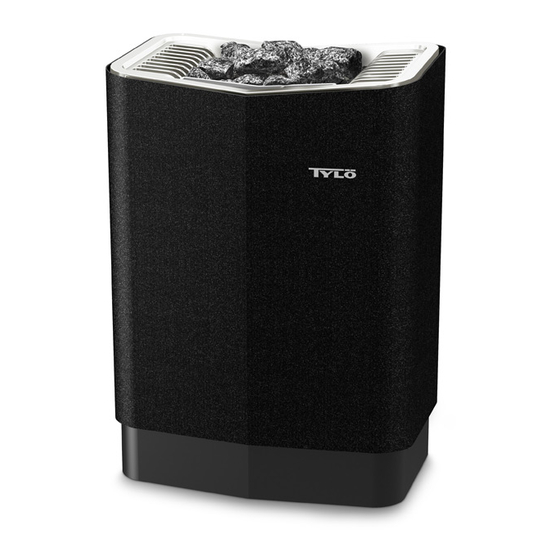
PRIOR TO INSTALLATION Installation requirements To ensure safe use of the heater, check that the following criteria Parts are met: Check that the following parts are included in the packaging: • Cable (EKK) or electrical ducting (Fk) for connecting the hea- ter must be run on the outside of the heat insulation. - Page 4 Positioning the heater - normal installation DANGER! No more than one heater may be instal- led in the same sauna cabin. Position the sauna heater: • on the same wall as the door (or the side wall if very close to the door wall).
- Page 5 If the wall on which the sensor is to be installed is made of highly Sense Commercial 6-8-10: 1900 mm heat-absorbing material (e.g. concrete, brick, etc.), or of hardened Sense Commercial 16-20: 2100 mm glass, the sensor may be installed in the ceiling at a distance from 10.
-
Page 6: Installation
Positioning the outlet vent DANGER! The air exhaust vent must not lead out- doors. This could cause the ventilation direction to be reversed, which may negatively aff ect the heater temperature cut-out. DANGER! Any gap above the sauna ceiling should not be sealed without leaving at least one vent hole on the same wall as the sauna door! Position the outlet vent •... - Page 7 Figure 13: Dimensioning 1. 262 mm 2. 270 mm 3. 532 mm 4. 206 mm Fit herb bowl/air humidifi er (see Fig. 14). Figure 16: Electrical wiring 1. Electrical cable 2. Terminal for connection of electrical cable Connect the control panel, relay box (RB30) (if applicable) and lighting (if applicable) according to the wiring diagram.
- Page 8 Figure 18: Dimensioning 1. 599 mm 2. 270 mm 3. 426 mm 4. 310 mm Figure 21: Installing the sensor Sauna heater installation Sense Commercial 6-20 (Fig. 19-22) Hang the heater on the screws see Fig. 19. Figure 22: Wiring through the wall. Unusual voltages/numbers of phases Contact Tylö...
-
Page 9: Connection/Wiring Diagram
CONNECTION/WIRING DIAGRAM WIRING DIAGRAM 200-240 V~ A B C D 200-208 V~ 230-240 V~ mm² mm² Figure 23: Control panel TS 30-012, TS 30-6 1. Sauna heater Sense Commercial 6-8 2. Control panel TS 30-012, TS 30-6 RJ10 4P4C 3 x 1.5 mm² RJ10 4P4C * ** RJ10 4P4C... - Page 10 WIRING DIAGRAM 200-240 V 3~ A B C D 200-208 V 3~ 230-240 V 3~ kW Amp mm² mm² 10.7 31 L2 L3 Fig 25: Control panel TS 30-012, TS 30-6 1. Sauna heater Sense Commercial 6-8-10 2. Control panel TS 30-012, TS 30-6 1 2 3 1 2 3 200-...
- Page 11 WIRING DIAGRAM 400-415 V 3~ 400 V 3 ~ A B C D kW Amp mm² 10.7 16 L2 L3 Fig 28: Control panel TS 30-012, TS 30-6 1. Sauna heater Sense Commercial 6-8-10 2. Control panel TS 30-012, TS 30-6 400 V 3 ~ kW Amp mm²...
-
Page 12: Self-Inspection Of The Installation
WIRING DIAGRAM 400-415 V 3N~ 400 V 3 ~ kW Amp mm² Max 500W ² 2.5 mm 10.7 16 L2 L3 N Fig 31: Control panel TS 16-6B 1. Sauna heater Sense Commercial 6-8-10 2. Control panel TS 16-6B RJ10 4P4C 3 x 1.5 mm²...
Need help?
Do you have a question about the SENSE COMMERCIAL Series and is the answer not in the manual?
Questions and answers