
Related Manuals for Bang & Olufsen BeoSound 5 Encore


Summary of Contents for Bang & Olufsen BeoSound 5 Encore
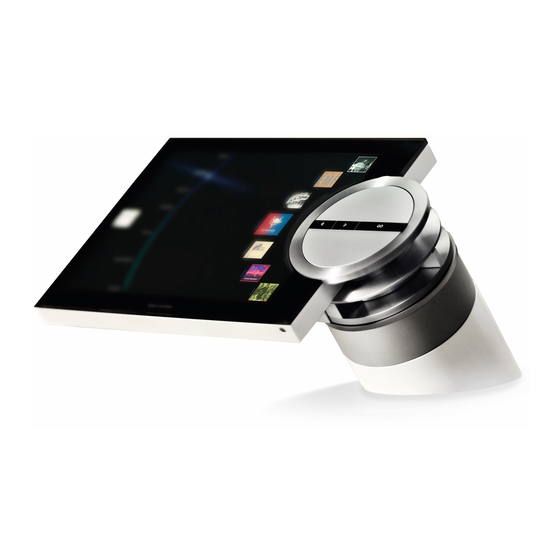
- Page 1 BeoSound 5 Encore Installation Guide for installation and setup of BeoSound 5 Encore English – Version 1.3...
-
Page 2: Introduction
Introduction Introduction With BeoSound 5 Encore the customer can access digital content from a recommended Network Attached Storage (NAS) or a BeoMaster 5 in a an extended ‘Client software’, e.g. BeoConnect – from a connected PC or MAC. The connection between BeoSound 5 and the Network Link system can either be:... -
Page 3: Installation
Installation Introduction Installation Installation overview The following section describes the step-by-step installation of BeoSound 5 Encore. In order to obtain a problem-free and smooth Connection installation, follow the instructions carefully. Wired connection Wireless connection (LAN) (WLAN) Installing during an installation. - Page 4 Link room Technical control room existing network Master Link Home Automation Internet System (192.168.1.X) ML Gateway Radio/CD BeoSound 5 Encore BeoSound 5 Encore (192.168.1.10) ISP router Client PC/MAC (192.168.1.1) Video master (192.168.1.X) Network Link BeoSound 5 Audio/Video Bang & Olufsen (192.168.100.X)
-
Page 5: Wired Connection (Lan) And Other Physical Connections
Wired connection (LAN) and other physical connections Wired connection (LAN) and other physical connections Connecting the product First step is to connect all necessary cables to the product. See the socket locations below: POWER POWER LINK 0.5 A POWER For connecting the music system to the mains using the supplied power supply USB connection –... -
Page 6: Wireless Connection (Wlan) And Other Physical Connections
Wireless connection (WLAN) and other physical connections Wireless connection (WLAN) and other physical connections Connecting the product POWER POWER LINK 0.5 A POWER For connecting the music system to the mains using the supplied power supply. USB connection – for permanent music storage on POWER LINK Power Link socket for loudspeaker connection - Loudspeaker connections –... -
Page 7: Installing Power Supply
Installing power supply Installing power supply before connecting the unit. DO NOT CONNECT TO THE MAINS YET! Connecting the product Strip the wire ends and mount them as shown below: Silver Black Green Silver Green Black Mount the power supply Mount the bracket for power supply. -
Page 8: Preparing Setup
Preparing setup Perform the next basic settings before continuing to the setup part. Connect to mains Connect the power supply to the mains. When the startup procedure is running (takes approximately one minute), the LED lights red and the screen is black. The product is ready, when the source menu appears on the screen. Pincode switches to standby after approximately three minutes. -
Page 9: Router Setup
Ethernet switch and use the default password admin. Click OK. (192.168.100.X) (192.168.100.1) BeoSound 5 Encore Now the setup screen appears. IP addresses are only examples Routing, etc. where network settings can be made. The purpose of changing the IP address is to dedicate an open space for customer’s existing network. -
Page 10: Network Settings (Lan)
> Click on the tab Management > Click on the Save Settings button to store settings. From this point, the installer must continue the installation by choosing which kind of network connection BeoSound 5 Encore is connected to: Network settings (LAN) - Page 11 Network settings (LAN) The next step is to ensure that the network connection is correct in order to be able to acces the network components, the Internet, ect. The Check network connection By default the product is set to obtain network settings such as IP address and MODE In this case it is not necessary to perform any network settings.
-
Page 12: Wireless - Wps
Network settings (WLAN) The next step is to ensure that the network connection is correct in order to be able to access the network components, the internet ect. methods are safe, so it is recommended to choose the easiest solution, listed in descending order. ! Only WEP, WPA and WAP2 is supported encryption standards WIRELESS - WPS (recommended) that the router has this feature. - Page 13 WIRELESS - AUTO The WIRELESS - AUTO manually. Follow the procedure below to establish the wireless network connection: > Use the pointer to highlight MODE. > Turn the wheel to select SETTINGS, and press GO. MODE > Use the pointer to highlight NETWORK SETTINGS. SOUND >...
- Page 14 WIRELESS - MANUAL The WIRELESS - MANUAL Set ID When this method is used, the installer must know the exact name of the SSID, the encryption type and the wireless password of the router. Follow the procedure below to establish the wireless network connection: >...
- Page 15 NETWORK SETTINGS NETWORK SETTINGS. Check network connection By default the product is set to obtain network settings such as IP address and MODE SOUND Protocol). In this case it is not necessary to make network settings. HOSTNAME BeoSound5-Encore-xxxxxxxx SYSTEM SETTINGS MAC ADDRESS 00-09-A7-00-C1-09 DHCP...
-
Page 16: Connecting To Network Server
Connecting to network server existing network Home Automation Internet System (192.168.1.X) ML Gateway (192.168.1.10) ISProuter (192.168.1.1) (192.168.1.X) Network Link Windows 7 Windows Media Server Home Server (192.168.100.X) Bang & Olufsen Network Link router Smart Phone BeoMaster 5 (192.168.100.1) Ethernet switch Client PC/MAC (192.168.100.X) IP addresses are only examples... - Page 17 BeoMaster 5 (music server) BeoSound 5). The following example is based on an existing BeoSound 5 installation. Follow the procedure below: > Use the pointer to highlight MODE. > Turn the wheel to select SETTINGS, and press MODE > Use the pointer to highlight SERVICE SETTINGS. SYSTEM INFO >...
- Page 18 NAS server (UPnP) the following: Home Automation Internet System (192.168.1.X) ML Gateway (192.168.1.10) ISP router Depending on whether it is a completely new installation or it is an expansion of an existing network (192.168.1.1) (192.168.1.X) setup. When the case is an existing network with a NAS server, the DLNA function must be activated manually.
- Page 19 DHCP reservation > Open a web browser and enter the IP address for the Network Link router (192.168.100.1). > Enter the password in the login box. > Click the tab Setup, Basic Setup, and in the section Network Setup-> DHCP Server Setting click on the DHCP Reservation button. Œ...
- Page 20 Check for software update Follow the procedure below to check and install any software updates: > Use the pointer to highlight MODE, turn the wheel to select SETTINGS, and press GO. > Use the pointer to highlight MAINTENANCE, turn the wheel to select UPDATE SOFTWARE, and press GO. >...
-
Page 21: Table Of Contents
Contents Introduction ..................2 Introduction Installation ............Installation ..................3 Connection ..............Connection ..................Wired connection Wireless connection Wired connection (LAN) and other physical connections ....5 (LAN) (WLAN) Wireless connection (WLAN) and other physical connections ..6 Installing power supply ..............7 Installing power supply Preparing setup ................
Need help?
Do you have a question about the BeoSound 5 Encore and is the answer not in the manual?
Questions and answers