Table of Contents
Advertisement
Quick Links
User's Manual
Intel Socket LGA 2011 / 1366 / 1156 / 1155 / 1150 / 775 CPUs
* Optional 92mm fan is required for Intel LGA 2011/1366 sockets.
AMD Socket FM2 / FM1 / AM3+ / AM3 / AM2+ / AM2 CPU&APUs
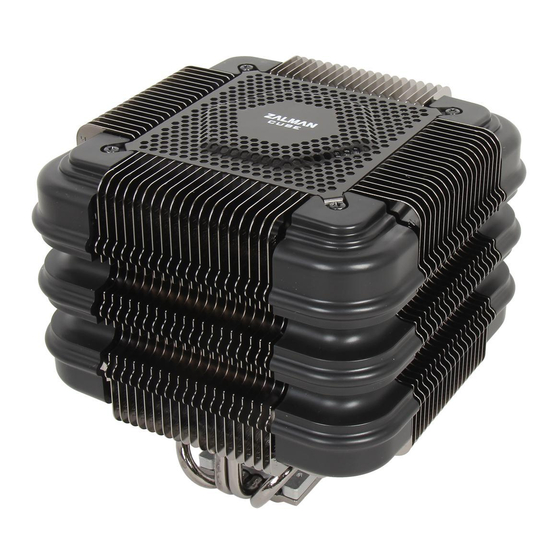
FX100
To ensure safe and easy installation,
please read the following precautions.
www.ZALMAN.com
Ver. 130620
Advertisement
Table of Contents

Related Manuals for ZALMAN FX100


Summary of Contents for ZALMAN FX100
- Page 1 User's Manual FX100 Intel Socket LGA 2011 / 1366 / 1156 / 1155 / 1150 / 775 CPUs * Optional 92mm fan is required for Intel LGA 2011/1366 sockets. AMD Socket FM2 / FM1 / AM3+ / AM3 / AM2+ / AM2 CPU&APUs To ensure safe and easy installation, please read the following precautions.
-
Page 2: Specifications
7) Product design and specifications may be revised to improve quality and performance. Disclaimer) Zalman Tech Co., Ltd. is not responsible for any damages due to external causes, including but not limited to, improper use, problems with electrical power, accident, neglect, alteration, repair, improper installation, or improper testing. - Page 3 3. Components Cooler Clip support Backplate Nuts & Side Caps Nipple A Nipple B Nuts Bolts Installation Clip Fan Clip Thermal Grease Manual Double-sided Intel Washer AMD Washer Loading Tape (0.1mm) (1mm) Block .COM...
-
Page 4: Installation Requirements
4. Installation Requirements 1) Space Requirments The cooler’s installation requires an unobstructed space of 156mm(width), 156mm(length), and 157mm(height), with the CPU as a central reference point. Please check if components such as ODDs and PSU protrude into the required space. 2) Air Guide Removal Air guides on enclosures must be removed before the cooler’s installation since they protrude into the cooler’s required space. -
Page 5: Installation
5. Installation A. Intel Socket Installation ※ Make sure to install the Clip Support by following specific instructions based on your CPU socket. ※ Optional fan is required for LGA 2011 socket CPUs. (fan sold separately) Intel Socket 2011 Installation ①... - Page 6 * Optional fan is required for LGA 1366 socket CPUs. (fan sold separately) 2) Intel Socket LGA 1366/1156/1155/1150 Installation ① Install Bolts to the Backplate according to the Socket Type and secure with Side Caps. Socket 775 Socket 1156/1155/1150 Socket 1366 ②...
- Page 7 ④ Install the clip support on the motherboard using nuts. Clip Support Caution Please make a note of the orientation of the Clip Support. 3) Intel Socket 775 Installation ① Install Bolts to the Backplate according to the Socket Type and secure with Side Caps.
- Page 8 Caution Please make a note of the orientation of the Loading Block. Intel Washer ④ Align the Backplate’s nuts with motherboard’s clip support holes, attach it to the back side of the motherboard, and then fix it with Intel’s washer(0.1mm) and Nipple A. ⑤...
- Page 9 B. AMD Socket Installation 1) AMD Socket FM2/FM1/AM3+/AM3/AM2+/AM2 Installation ① Install Bolts to the Backplate according to the Socket Type and secure with Side Caps. ② Remove the Sticker Cover from the Lower Tier of the Loading Block and attach to the Backplate. Loding Block ③...
-
Page 10: Cooler Installation
④ Take away the fixed Clip support from the motherboard, and then install the included Clip support using Nipple A, AMD’s washer(1mm) and nuts. AMD Washer Clip Support Caution Please make a note of the orientation of the Clip Support. C. - Page 11 ② Take off the heatsink cover and remove the protection pad. Heatsink cover Protection pad ③ Place Installation Clip on top of the base cover, and secure it by screwing down two bolts on each end of Installation Clip. Bolt ④...
-
Page 12: Optional Fan Installation
D. Optional fan installation ※Users must purchase the optional 92mm fan for installation (Zalman ZM-F2Q(BL) fan is recommended) ① Take off the heatsink cover installed on the cooler. ② Attach two Fan clips to the top mounting holes on the fan. Then, vertically insert the fan to the center of the heatsink while the Fan Clips are suspended between the heatsink fins. - Page 13 ③ Place the heatsink cover back on the cooler. ④ Connect the cooler’s 4-pin connector to the motherboard’s Option Fan header. Caution After installing, be sure to activate the PWM control mode in BIOS on the motherboard. .COM...
Need help?
Do you have a question about the FX100 and is the answer not in the manual?
Questions and answers