Table of Contents
Advertisement
w w w . e a t o n . c o m
Pulsar Series
Revision History
Evolution Installation and User Manual, 86-81700-00
Copyright © 2008 EATON
All rights reserved.
For Technical Support, Customer Care Center, or Customer FAQ,
please call (800) 279-7776 or visit our website: www.eaton.com
Evolution
650/650 Rack 1U
850/850 Rack 1U
1150/1150 Rack 1U
1550/1550 Rack 1U
Installation and User
Manual
Advertisement
Table of Contents

Related Manuals for Eaton Evolution 650/650 Rack 1UEvolution 850


Summary of Contents for Eaton Evolution 650/650 Rack 1UEvolution 850
- Page 1 1550/1550 Rack 1U Installation and User Manual Pulsar Series Revision History Evolution Installation and User Manual, 86-81700-00 Copyright © 2008 EATON All rights reserved. For Technical Support, Customer Care Center, or Customer FAQ, please call (800) 279-7776 or visit our website: www.eaton.com...
-
Page 2: Table Of Contents
Contents Introduction ........................5 IMPORTANT SAFETY INSTRUCTIONS ................6 Symbol Usage ........................7 1. Presentation 1.1 Standard Positions ......................9 1.2 Rear Panels........................10 1.3 Control Panel ........................10 2. Installation 2.1 Unpacking and Contents Check ..................11 2.2 Installation of Tower Model ..................... 12 2.3 Installation of Rack Model .................... -
Page 3: Introduction
Before installing Evolution, please read the booklet on the required safety instructions. Then follow the indications in this manual. To discover the entire range of EATON products and the options available for the Evolution range, we invite you to visit our web site at www.eaton.com or contact your EATON representative. -
Page 4: Important Safety Instructions
It does not contain any Chlorofluorocarbon (CFC) or Hydrochlorofluorocarbon (HCFC). UPS recycling at the end of service life: EATON undertakes to recycle, by certified companies and in compliance with all applicable regulations, all UPS products recovered at the end of their service life (contact your EATON branch office). -
Page 5: Symbol Usage
Symbol Usage Important instructions that must always be followed Information, advice, help Visual indication Action Audible signal LED off LED on LED flashing 86-81700-00EN A02 - Page 7... -
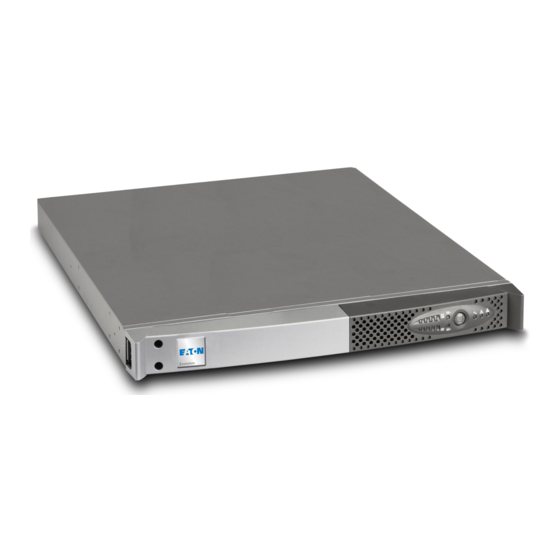
Page 6: Presentation
1. Presentation Standard Positions Tower Models Dimensions (W x H x D) in inches Evolution 650 5.8 x 9.2 x 16.5 Evolution 850 5.8 x 9.2 x 16.5 Evolution 1150 5.8 x 9.2 x 16.5 Evolution 1550 5.8 x 9.2 x 19.4 Weights in lbs Evolution 650 18.8... -
Page 7: Rear Panels
1. Presentation Rear Panels Evolution 650/850/1150/1550 Slot for optional communication card AC OUTPUT I max 12A Attached 6 ft. input power cord with 5-15P plug, 15A 2 NEMA 5-15R for connection of equipment U.S. PAT. NO. 6,094,363 RS232 communication port 36Vdc, 9Ah 55K6 U.P.S. -
Page 8: Installation
Installation Unpacking and Contents Check (16) Evolution UPS, tower or rack model with (20) RS232 communication cable input cable attached (21) USB communication cable (18) Documentation (22) Mounting kit for 19-inch bays (rack model (19) Solution-Pac CD-ROM only) Packing materials must be disposed of in compliance with all local regulations concerning waste. Recycling symbols are printed on the packing materials to facilitate sorting. -
Page 9: Installation Of Tower Model
2. Installation Installation of Tower Model Installation of Rack Model Follow steps 1 to 4 for module mounting on the rails. The rails and necessary hardware are supplied by EATON. 86-81700-00EN A02 - Page 12... -
Page 10: Installation Of The 650 Rack Model
2. Installation Installation of the 650 Rack Model Follow steps 1 to 3 for rack mounting. Wall mounting The necessary hardware is supplied by EATON. 86-81700-00EN A02 - Page 13... -
Page 11: Communication Ports
(20) or (21) to the USB (6) or RS232 (4) 55K6 U.P.S. communication port on the UPS. AC INPUT The UPS can now communicate with EATON power management software. Installation of the communication cards (optional) It is not necessary to shutdown the UPS before installing a communication card. -
Page 12: Equipment Connections
(3) and the nonpriority loads to the two programmable outlets marked (5). To program shutdown of outlets (5) during operation on battery power and thus optimize the available backup time, the EATON communication software is required. Evolution 650/850/1150 Evolution 1550... -
Page 13: Operation
3. Operation Start-Up and Normal Operation Press button (10) for approximately 1 second. w The buzzer beeps once and all the LEDs go ON simultaneously. w If AC input power is available, button (10) and LED (13) are ON. The load is supplied by the AC-power source. -
Page 14: Ups Shutdown
3. Operation UPS Shutdown Press button (10) for approximately 2 seconds. The devices connected to the UPS are no longer supplied. UPS Remote Control Evolution offers a choice between two remote control functions. AC OUTPUT I max 12A RPO: Remote Power OFF allows a remote contact to be used to disconnect all the equipment connected to the UPS. -
Page 15: Main-Output Personalization
4. Access to Maintenance and Personalization Data Insert the Solution-Pac CD-ROM in the drive. w On the first navigation screen, select "Point to Point solution" and follow the instructions on how to install the Personal Solution-Pac software. w Then select "Settings", "Advanced settings" and "UPS settings". Note that the Linux/Unix/MacOS versions of Personal Solution-Pac software do not offer this possibility. -
Page 16: Battery Personalization
4. Access to Maintenance and Personalization Data Voltage-threshold personalization Function Factory setting Other available settings Automatic start Enabled Disabled Cold start Enabled Disabled Forced shutdown Enabled Disabled Energy-savings mode Disabled Enabled UPS ON/OFF controlled by software Enabled Disabled Battery level before restart 0 to 100% Battery personalization Function... -
Page 17: Maintenance
5.2, Battery-module replacement). on bargraph (11) are flashing. A UPS internal fault has occurred Visit www.eaton.com for after-sales LED (15) alone is ON and the and the load is not supplied. support or call (800) 279-7776. -
Page 18: Replacing The Battery Module In The Rack Model
Mounting the new battery module Carry out the above instructions in reverse order. To ensure safety and high performance, use only batteries supplied by EATON. Take care to firmly press together the two parts of the connector during remounting. Replacing the Battery Module in the Rack Model Safety recommendations The battery can cause electrocution and high short-circuit currents. - Page 19 Mounting the new battery module Carry out the above instructions in reverse order. w To ensure safety and high performance, use only batteries supplied by EATON. w Take care to firmly press together the two parts of the connector during remounting.
-
Page 20: Appendices
6. Appendices Technical Specifications Evolution 650 / 650 Rack 850 / 850 Rack 1150 / 1150 Rack 1550 / 1550 Rack 650 VA / 850 VA / 1150 VA / 1550 VA / Output power 420 W 600 W 770 W 1100 W AC input power Single phase 120 V... -
Page 21: Programming The Programmable Outlets
6. Appendices Programming the Programmable Outlets To open the Setting window, left-click on Start Menu / Programs / EATON / Personal Solution Pac / Settings, or right-click on the PSP power plug located in the SYS Tray. Click on the “+” symbol next to “UPS Settings” to expand the “UPS Settings” section. - Page 22 6. Appendices Repeat step 3 for each programmable outlet. After making the changes,s click on the “Apply” button. The section entitled “Shutdown timer” allows the user to define how long the powershare outlet should provide power after a power loss. To configure the powershare to power off at the same time as the main outlets: Set the “The group of outlet is powered OFF after”...
-
Page 23: Glossary
6. Appendices Glossary Backup time Time during which the load can be supplied by the UPS operating on battery power. Battery test Internal UPS test to check battery status. Booster mode Automatic UPS mode that steps up the AC voltage if it is too low, to a level above the personalised set-point, without discharging the battery.
Need help?
Do you have a question about the Evolution 650/650 Rack 1UEvolution 850 and is the answer not in the manual?
Questions and answers