Table of Contents
Advertisement
Advertisement
Table of Contents

Related Manuals for Mellanox Technologies SX67X0


Summary of Contents for Mellanox Technologies SX67X0
-
Page 1: User Manual
Mellanox SX67X0 1U Switch Systems Hardware User Manual Rev. 1.0 www.mellanox.com... - Page 2 KIND AND SOLELY FOR THE PURPOSE OF AIDING THE CUSTOMER IN TESTING APPLICATIONS THAT USE THE PRODUCTS IN DESIGNATED SOLUTIONS. THE CUSTOMER'S MANUFACTURING TEST ENVIRONMENT HAS NOT MET THE STANDARDS SET BY MELLANOX TECHNOLOGIES TO FULLY QUALIFY THE PRODUCTO(S) AND/OR THE SYSTEM USING IT. THEREFORE, MELLANOX TECHNOLOGIES CANNOT AND DOES NOT GUARANTEE OR WARRANT THAT THE PRODUCTS WILL OPERATE WITH THE HIGHEST QUALITY.
-
Page 3: Table Of Contents
About this Manual ............3 Chapter 1 Introduction to Mellanox SX67X0 Systems......4 1.1 Overview . - Page 4 6.1 SX67X0 Series........
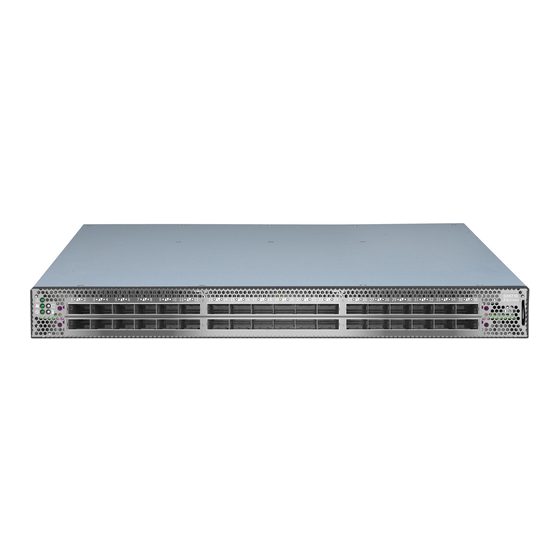
- Page 5 SX67X0 Front Side View ........
- Page 6 SX67X0 Specifications ........
-
Page 7: Revision History
Revision History Table 1 - Revision History Table Date Revision Description November 2014 Initial release Mellanox Technologies... -
Page 8: About This Manual
This icon indicates information that is helpful to the user. This icon indicates a situation that can potentially cause damage to hardware or soft- ware. BEWARE! This icon indicates a situation that can potentially cause personal injury or damage to hardware or software. Mellanox Technologies... -
Page 9: Chapter 1 Introduction To Mellanox Sx67X0 Systems
Introduction to Mellanox SX67X0 Systems Overview The SX67X0 systems provide the highest performing fabric solution in a 1U form factor by delivering up to 4Tb/s of non-blocking bandwidth with 200ns port-to-port latency. These systems are the industry's most cost-effective building blocks for embedded systems and storage with a need for low port density systems. -
Page 10: Speed And Switching
Introduction to Mellanox SX67X0 Systems Figure 2: SX6710/SX6720 Rear Side View Figure 3: SX6730 Rear Side View Speed and Switching Table 3 describes maximum throughput and interface speed per system model. Table 3 - Speed and Switching Capabilities 10GbE* SFP+... -
Page 11: Certifications
Supplies (AC), x86 dual core, standard depth, rear to front airflow, Rail Kit, RoHS6 SX6730 MSX6730-FS2F2 SwitchX®-2 based FDR InfiniBand Switch NEBS certified, 36 QSFP ports, non- blocking switching capacity of 4Tbps, 2 Power Supplies (DC), Standard depth, Man- aged, rear to front airflow, Rail Kit must be purchased separately, RoHS6 Mellanox Technologies... -
Page 12: Chapter 2 Installation
For Safety Warnings in Croatian see Section E.9, “Sigurnosna upozorenja za instaliranje (Croa- tian),” on page 77. For Safety Warnings in Italian see Section E.10, “Avvertenze di sicurezza per l’installazione (italiano),” on page 82. For Safety Warnings in Turkish see Section E.11, “Montaj Güvenlik Uyarıları (Türkçe),” on page 86. Mellanox Technologies... -
Page 13: Air Flow
Red latches are placed on the power inlet side. Power side inlet to connector side outlet. Blue latches are placed on the power inlet side. Figure 4: Air Flow Direction Marking - Power Side Inlet to Connector Side Outlet Mellanox Technologies... -
Page 14: Package Contents
For connection of the SX6730, a DC cable is required. Such a cable is not included in the basic package and should be ordered separately. If anything is damaged or missing, contact your sales representative at support@mella- nox.com. Mellanox Technologies... -
Page 15: Mounting Options
Battery Backup Unit (BBU) Installation for SX6720 If the BBU is deformed, leaking, corroded or visually damaged, replace it immediately Do not use a BBU that was not provided by Mellanox Technologies • A BBU that has not been used for two years or longer past ts printed manufacturing date is unusable. -
Page 16: Figure 7: Unlocking The Latches And Extracting The Psu
Installation Figure 7: Unlocking the Latches and Extracting the PSU Figure 8: BBU Location Mellanox Technologies... -
Page 17: 19" Systems Mounting
• 10x M6 Standard cage nuts¹ ² and 10x M6 Standard pan-head Phillips screws¹ (D) • 2x Phillips100 DEG F.H TYPE-I ST.ST 6-32 X 1/4 screw with around patch (E). ¹ Other threads are available by special order: M5, 10-32, 12-24 ² G-type cage-nut is available by special order. Mellanox Technologies... -
Page 18: Figure 10: Rack Rail Kit Parts
Installation Figure 10: Rack Rail Kit Parts Mellanox Technologies... -
Page 19: Figure 11: Mounting The Outer Rails Into The Rack
Secure the chassis in the inner rails screwing the 2 flat head Phillips screws in the designated points. Figure 11: Mounting the Outer Rails into the Rack Figure 12: Attaching the Inner Rails to the Chassis Mellanox Technologies... -
Page 20: Figure 13: Securing The Chassis In The Inner Rails
Step 3. Press on the locking spring (appears in red in Figure 16) on both sides simultaneously, and con- tinue pulling the unit towards you until it is fully removed. Mellanox Technologies... -
Page 21: Figure 15: Pulling The Unit Outwards
Figure 15: Pulling the Unit Outwards Figure 16: Locking Mechanism Mellanox Technologies... -
Page 22: Cable Installation
A 40GbE port can be split to 4 (or less) 10GbE ports by using a Mellanox breakout cable. When using a port to split a data stream into four 10 Gb/s data streams and one of the other ports on the switch will be disabled and unmapped from the switch. Mellanox Technologies... -
Page 23: Figure 18: Breakout Or Fanout Cable
When using this feature you should log into the MLNX-OS® CLI and configure the individual ports to be ‘split-2’ or ‘split-4’. Not all ports can be split. For further information, refer to the MLNX-OS User Man- ual. Figure 18: Breakout or Fanout Cable 2.5.1.1 Splitting Options Mellanox Technologies... -
Page 24: Initial Power On
Step 4. with normal operation (initially flashing and then moving to a steady color) as shown in Figure 19 below. For more information, refer to “LEDs” on page 30. Figure 19: System Status LEDs 5 Minutes After Power On Mellanox Technologies... -
Page 25: Bring-Up Of Managed Systems
Mellanox Switch Mellanox configuration wizard Do you want to use the wizard for initial configuration? yes Step 1: Hostname? [my-switch] Step 2: Use DHCP on mgmt0 interface? [yes] no <localhost># In such case the serial connection should be used. Mellanox Technologies... -
Page 26: Table 8: Serial Terminal Program Configuration
‘zeroconf’ configuration or not. If you enter ‘no’ (no Zeroconf), you must enter a static IP, and the session will continue. Step 3: Enable IPv6? [yes] The management interface will be able to use IPv6 addresses. Mellanox Technologies... - Page 27 To change an answer, enter the step number to return to or hit Note: <enter> to save changes and exit. To re-run the configuration wizard, run the command “configura- Choice: <Enter> tion jump-start” in Config mode. Configuration changes saved. Mellanox Technologies...
-
Page 28: Table 10: Configuration Wizard Session - Static Ip Configuration
To change an answer, enter the step number to return to. Otherwise hit <enter> to save changes and exit. Choice: Configuration changes saved. To return to the wizard from the CLI, enter the “configuration jump-start” command from configure mode. Launching CLI... > Mellanox Technologies... -
Page 29: Remote Connection
Set up an Ethernet connection between the system and a local network machine using a stan- Step 1. dard RJ45 connector. Start a remote secured shell (SSH) using the command: “ssh -l <username> <IP_address>”, Step 2. # ssh -l <username> <ip address> Mellanox Technologies... -
Page 30: Fru Replacements
Grasping the handle with your hand, push the latch release with your thumb while pulling the Step 2. handle outward. As the power supply unit unseats, the power supply unit status LEDs will turn off. Remove the power supply unit. Step 3. Mellanox Technologies... -
Page 31: Fans
Make sure that the fans have the air flow that matches the model number. An air flow opposite to the system design will cause the system to operate at a higher (less than optimal) temperature. For power supply unit air flow direction, refer to Section 2.2 on page 8 Mellanox Technologies... -
Page 32: Figure 22: Fan Module Latches
The green Fan Status LED should light. If not, extract the fan unit and reinsert it. After system two unsuccessful attempts to install the fan unit, power off the before attempt- ing any system debug. Mellanox Technologies... -
Page 33: Chapter 3 Interfaces
This interface is not found in externally managed systems. The port labeled “Console” is an RS232 serial port on the back side of the chassis that is used for initial configuration and debugging. Upon first installation of the system, you need to Mellanox Technologies... -
Page 34: Management
DO NOT use a sharp pointed object such as a needle or a push pin for pressing the Reset button. Use a flat object to push the reset button. To reset the system and the CPU of its management board, perform the following: Mellanox Technologies... -
Page 35: Leds
Shows the health of the power supply units Green Bad Port LED lights up when a symbol error is detected on one Green of the ports. *Unit Identifier LED Lights up on command through the CLI *This function is currently disabled. Mellanox Technologies... -
Page 36: Figure 23: System Status Leds - Front And Rear Sides
Mellanox representa- tive for assistance. 3.2.1.2 Fan Status LED All fans must be operating while the power supply is plugged in. Mellanox Technologies... -
Page 37: Figure 24: Fan Status Led - Front And Rear Sides
The fan unit should be replaced. System boot Risk of Electric Shock! With the fan module removed, power pins are accessible within the module cavity. DO NOT insert tools or body parts into the fan module cavity. Mellanox Technologies... -
Page 38: Figure 25: Power Status Led
Table 15 - Power Supply Unit Status Front LED Assignments LED Behavior Description Action Required Solid Green Both of the power supplies are running nor- mally. Solid Red One or both of the power supplies are not The faulty FRUs should be replaced. operational. System boot Mellanox Technologies... -
Page 39: Table 16: Power Supply Unit Status Rear Led Assignments
Error, one or more ports have received symbol Check symbol error counters on the sys- errors. tem UI to identify the ports. Possible causes are: Replace the cable on these ports. • Bad cable • Bad connection • Bad connector Mellanox Technologies... -
Page 40: Figure 27: Port Leds
When a logical connection is made the LED will change to green. When data is being transferred the light will blink green. Mellanox Technologies... -
Page 41: Inventory Pull-Out Tab
Inventory Pull-out Tab The system’s inventory parameters (such as serial number, part number, GUID and MAC address) can be extracted from the Inventory pull-out tab on the lower right side of the front panel. Figure 28: Pull-out Tab Mellanox Technologies... -
Page 42: Chapter 4 Software Management
Fabric Inspector includes a complete set of InfiniBand tools for fabric wide diagnostics to check node-node and node-switch connectivity and to verify routes within the fabric. Advanced filtering allows creating filtering rules on a system wide basis, between nodes or port connections based on traffic patterns and user assigned system names (GUIDs). Mellanox Technologies... -
Page 43: Upgrading Software (On Managed Systems)
SwitchX®-2 based managed systems. MLNX-OS® includes a CLI, WebUI, SNMP, system management software and IB management software (OpenSM). The Ethernet ports for remote management connect to Ethernet systems. These sys- tems must be configured to 100Mb/1 Gb auto-negotiation. Mellanox Technologies... -
Page 44: Chapter 5 Troubleshooting
This state is indicative of a problem with the PSU. • Check/replace the power cable. • Replace the PSU if needed. The activity LED does not Make sure that there is an SM running in the fabric. light up (InfiniBand): Mellanox Technologies... - Page 45 Press enter to boot the selected image or 'p' to enter a password to unlock the next set of features. Highlighted entry is 0: " • Select previous image to boot by pressing an arrow key and choosing the appropriate image. Mellanox Technologies...
-
Page 46: Chapter 6 Specifications
Specifications Specifications SX67X0 Series Table 20 - SX67X0 Specifications Feature Value Mechanical Size: Short - 1.716” (H) H x 16.85” (W) x16.8” (D), 43.6mm (H) x 428mm (W) x 428.9 mm (D) Standard - 1.716” (H) H x 16.85” (W) x24.75” (D), 43.6mm (H) x 428mm (W) x 722.3 mm (D) Mounting: 19”... -
Page 47: Appendix A Accessory And Replacement Parts
Power cord Type C13-C14 MTEF-FANF-A Fan module w/rear to front airflow fan for SX67X0/SX1710 switch systems MTEF-FANF-B Fan module w/rear to front airflow fan with Orange cap for SX67X0 switch systems MTEF-FANR-A Fan module w/front to rear airflow fan for SX67X0/SX1710 switch systems... -
Page 48: Appendix B Thermal Threshold Definitions
When the SwitchX®/SwitchX-2 device crosses this temperature, the firmware will automatically shut down the device. 3.Emergency – 130°C In case the firmware fails to shut down the SwitchX®/SwitchX-2 device upon crossing the Criti- cal threshold, the SwitchX® device will auto-shutdown upon crossing the Emergency (130°C) threshold. Mellanox Technologies... -
Page 49: Appendix C Interface Specifications
Vcc Tx +3.3 V Power supply transmitter Vcc 1 +3.3 V Power Supply LPMode Low Power Mode Ground Tx3p Transmitter Non-Inverted Data Input Tx3n Transmitter Inverted Data Input Ground Tx1p Transmitter Non-Inverted Data Input Tx1n Transmitter Inverted Data Input Mellanox Technologies... -
Page 50: Figure 29: Qsfp Connector Male And Female Views
Figure 29: QSFP Connector Male and Female Views 18.35 View into Rear of Connector 8.50 18.35 View into Front of Cage 8.50 Mellanox Technologies... -
Page 51: Rj-45 Console And I²C Interface
Not connected RJ45 to DB9 Harness Pinout In order to connect a host PC to the Console RJ45 port of the system, a RS232 harness cable (DB9 to RJ45) is supplied. Figure 30: RJ45 to DB9 Harness Pinout Mellanox Technologies... -
Page 52: Appendix D Disassembly And Disposal
(EEE) should be collected separately and not disposed of with regular household waste. Dispose of this product and all of its parts in a responsible and environmentally friendly way. Follow the instructions found at http://www.mellanox.com/page/dismantling_procedures for proper disassembly and disposal of the switch, according to the WEEE directive. Mellanox Technologies... -
Page 53: Appendix E Safety Warnings (Multiple Languages)
5. Over-temperature This equipment should not be operated in an area with an ambient temperature exceed- ing the maximum recommended: 45°C (113°F). Moreover, to guarantee proper , allow at least 8cm (3 inches) of clearance around the ventilation openings. Mellanox Technologies... - Page 54 When this product is mounted or serviced in a rack, special precautions must be taken to ensure that the system remains stable. In general you should fill the rack with equip- ment starting from the bottom to the top. Mellanox Technologies...
- Page 55 For European connection, select a power supply cord that is internationally harmonized and marked “<HAR>”, 3 - conductor, minimum 1.0 mm wire, rated at 300 V, with a PVC insulated jacket. The cord must have a molded plug rated at 250 V, 10 A. Mellanox Technologies...
- Page 56 Caution: Slide/rail mounted equipment is not to be used as a shelf or a work space. The rails are not intended for sliding the unit away from the rack. It is for permanent instal- lation at final resting place only, not used for service and maintenance Mellanox Technologies...
-
Page 57: 安裝安全性警告 (Chinese)
This unit is intended for connection to a TN power system and an IT power system of Norway only. 安裝安全性警告 (Chinese) 1. 安裝指示 本設備附有備援電源供應器或在適當位置配有空白蓋板。 2. 因重量導致的人身受傷 為了安全起見,請安排足夠的人員以合力抬起本產品。 <40 lbs 70 - 121 lbs >121 lbs 40 - 70 lbs <18 kgs 32 - 55 kgs >55 kgs 18 - 32 kgs 3. 重設備 本設備極重,應使用機械式起重機來搬移,以避免人員受傷。 Mellanox Technologies... - Page 58 請勿將工具或機身零件插入到風扇模組空腔內。 5. 溫度過高 本設備不應在超過所建議的最高環境溫度的區域中運作:45°C (113°F)。此外, 為了保證氣流的流通正常,請在通風口旁保留至少 8 公分 (3 英吋 ) 的間距。 6. 堆疊機箱 機箱不應堆疊在任何其他設備上。如果機箱掉落,可能造成人員受傷與設備損 壞。 7. 複式電源連接時的電擊危險 本設備附有備援電源供應器或在適當位置配有空白蓋板。如果是電源供應器空 白蓋板,在空白蓋板已取下或未牢牢固訂的情況下,請勿操作本產品。 8. 雙極 / 中性保險絲 本系統具有雙極 / 中性保險絲。請拔掉所有電源線後,再打開本產品的蓋板或 碰觸任何內部零件。 9. 多電源輸入座 電擊與能源危害的危險。 所有 PSU 均各自獨立。 將所有電源供應器斷電,確保交換器平台內部在電源關閉狀態。 10. 閃電時的電擊危險 在閃電期間,不要使用本設備或連接或拔下纜線。 Mellanox Technologies...
- Page 59 11. InfiniBand 銅纜連接 / 拔下 InfiniBand 銅纜很重且沒有彈性,因此必須小心裝在連接器上或自連接器上拔 下。如需相關的特殊警告 / 指示,請洽詢纜線製造商。 12. 機架安裝與維修 此產品已安裝在機架中或在機架中維修時,必須採取特定預防措施以確保系統 維持穩定。一般您應該將設備從底部到頂端放滿機架。 13. 設備安裝 本設備僅限由經過訓練與 / 或合格的人員安裝、更換或維修。 14. 設備棄置 棄置本設備應遵照所有國內法規。 15. 當地與國家電氣法規 請遵照當地與國家電氣法規安裝本設備。 16. 安裝法規 請務必遵循最新版的國家電氣法規,安裝本設備。在北美地區,請務必遵循美 國國家電工法規和加拿大電工法規中的適用規定,安裝本設備。 17. 更換電池 警告:只能以 UL 認可電池,且取得最大異常充電電流低於 4mA 認證的電池進 行更換。 若更換錯誤類型的電池,會有爆炸的危險。 請依據指示棄置廢電池。 Mellanox Technologies...
- Page 60 請務必遵循最新版的國家電氣法規,安裝本設備。在北美地區,請務必遵循美 國國家電工法規和加拿大電工法規中的適用規定,安裝本設備。 22. 互連設備 連接至 RS232 設備和乙太網路介面的纜線必須是 UL 認證類型 DP-1 或 DP-2。 ( 請注意位於非 LPS 電路時 ) 過電流保護:準備好使用的列名分支電路過電流保護裝置最大額定值 20 A 必須 整合在配線中。 23. 切換開關不可用作機架或工作空間 小心:滑軌 / 導軌安裝設備不可用作機架或工作空間。導軌不適用於將設備滑 出機架使用。僅限永久安裝在最後安置區域時使用,不可用於維修和保養。 24. WEEE 指令 根據 WEEE 指令 2002/96/EC,所有廢棄的電氣與電子設備 (EEE),應分開集 中,而且不應與一般家庭廢棄物一起棄置。 請以負責和環保的方式棄置本產品及其所有零件。 Mellanox Technologies...
- Page 61 25. 挪威國家電源限制 本設備僅限連接至挪威的 TN 電源系統和 IT 電源系統。 Mellanox Technologies...
- Page 62 26. China CCC Warning Statement Mellanox Technologies...
-
Page 63: Avertissements De Sécurité Pour L'installation (French)
8 cm (3") autour des orifices de ventilation. 6. Châssis empilé sur d'autres équipements Le châssis ne doit pas être empilé sur d'autres équipements. S'il tombe, il peut endom- mager l'équipement ou entraîner des blessures. Mellanox Technologies... - Page 64 En règle générale, le rack doit être rempli en commençant par le bas. 13. Installation de l'équipement Cet équipement ne doit être installé, remplacé et maintenu que par un personnel formé et qualifié. Mellanox Technologies...
- Page 65 300 V, avec une gaine isolante en PVC. Le cordon doit avoir une prise moulée 250 V 10 A. 19. Courant de fuite élevé Avertissement : courant de fuite élevé, une connexion à la terre est indispensable avant de brancher l'alimentation. Mellanox Technologies...
- Page 66 électroniques (EEE) doivent être collectés séparément et ne pas être mis au rebut avec les déchets ménagers habituels. Ce produit et toutes ses pièces doivent être mis au rebut d'une manière responsable, respectant l'environnement. 25. Restrictions concernant l'alimentation pour la Norvège Mellanox Technologies...
-
Page 67: Installation Sicherheitshinweise(German)
8 cm (3 in.) Freiraum um die Belüftungsöffnungen sein, um einen einwandfreien Luftstrom zu gewährleisten. 6. Stapeln des Chassis Das Chassis sollte nicht auf andere Geräte gestapelt werden. Wenn das Chassis herun- terfällt, kann es zu Verletzungen und Beschädigungen an Geräten führen. Mellanox Technologies... - Page 68 Allgemeinen sollten Sie das Gestell von unten nach oben mit Geräten füllen. 11. Geräteinstallation Diese Gerät sollte nur von geschultem und qualifiziertem Personal installiert, ausge- tauscht oder gewartet werden. 12. Geräteentsorgung Die Entsorgung dieses Geräts sollte unter Beachtung aller nationalen Gesetze Bestim- mungen erfolgen. Mellanox Technologies...
- Page 69 19. Installationscodes Dieses Gerät muss installiert sein, entsprechend auf die neueste Version des Landes National Electrical Code. Für Nordamerika, müssen in Übereinstimmung mit den gel- tenden Vorschriften in der US-amerikanischen National Electrical Code und dem Canadian Electrical Code. Mellanox Technologies...
-
Page 70: Advertencias De Seguridad De Instalación (Spanish)
2. Lesión corporal a causa de peso .Recurra a suficientes personas para levantar este producto sin <40 lbs 70 - 121 lbs >121 lbs 40 - 70 lbs <18 kgs 32 - 55 kgs >55 kgs 18 - 32 kgs Mellanox Technologies... - Page 71 9. Tomas de alimentación múltiples Riesgo de descarga eléctrica y peligro de corriente. Todas las fuentes de alimentación son independientes. Desconecte todas las fuentes de alimentación, para asegurar que no haya corriente alguna dentro de la plataforma de conmutación. Mellanox Technologies...
- Page 72 Este dispositivo se debe instalar conforme a la versión más reciente de los códigos eléctricos nacionales del país en cuestión. En América del Norte, el equipo se debe instalar de acuerdo con las disposiciones vigentes del Código Eléctrico Nacional de los EE.UU. y del Código Eléctrico de Canadá. Mellanox Technologies...
- Page 73 Este dispositivo se debe instalar conforme a la versión más reciente de los códigos eléctricos nacionales del país en cuestión. En América del Norte, el equipo se debe instalar de acuerdo con las disposiciones vigentes del Código Eléctrico Nacional de los EE.UU. y del Código Eléctrico de Canadá. Mellanox Technologies...
-
Page 74: Предупреждения По Технике Безопасности При Установке (Russian)
2. Травмы при переносе тяжелых предметов Для поднятия этого изделия следует задействовать достаточное количество людей. <40 lbs 70 - 121 lbs >121 lbs 40 - 70 lbs <18 kgs 32 - 55 kgs >55 kgs 18 - 32 kgs Mellanox Technologies... - Page 75 нейтральном проводах. Открывать кожух этого изделия или касаться внутренних деталей можно только после отсоединения всех шнуров питания. Несколько источников питания Опасность поражения электрическим током и опасные энергетические воздействия. Блоки питания независимы друг от друга. Чтобы обесточить все компоненты внутри платформы коммутации, следует отсоединить все блоки питания. Mellanox Technologies...
- Page 76 правилами установки электрооборудования. 16. Правила установки электрооборудования Это устройство устанавливается в соответствии с последним изданием национальных правил установки электрооборудования. В Северной Америке оборудование устанавливается в соответствии с действующими требованиями Национальных правил эксплуатации и обслуживания электрических установок США и Канады. Mellanox Technologies...
- Page 77 телекоммуникационном центре или специальном помещении для компьютеров). 21. Правила установки электрооборудования Это устройство устанавливается в соответствии с последним изданием национальных правил установки электрооборудования. В Северной Америке оборудование устанавливается в соответствии с действующими требованиями Национальных правил эксплуатации и обслуживания электрических установок США и Канады. Mellanox Technologies...
-
Page 78: Avertismente Privind Siguranţa La Instalare (Romanian)
Apelaţi la un număr suficient de persoane pentru a ridica în siguranţă acest produs. <40 lbs 70 - 121 lbs >121 lbs 40 - 70 lbs <18 kgs 32 - 55 kgs >55 kgs 18 - 32 kgs Mellanox Technologies... - Page 79 9. Multiple mufe electrice Risc de şoc electric şi pericol electric. Toate aparatele cu alimentare de la reţea sunt independente. Deconectaţi toate sursele de alimentare cu energie pentru a asigura decuplarea în inte- riorul platformei de comutare. Mellanox Technologies...
- Page 80 Acest dispozitiv trebuie să fie instalat în conformitate cu ultima versiune a codurilor electrice naţionale ale ţării în cauză. Pentru America de Nord, echipamentul trebuie să fie instalat conform cerințelor aplicabile din Codul electric naţional al SUA şi Codul electric canadian. Mellanox Technologies...
- Page 81 Acest dispozitiv trebuie să fie instalat în conformitate cu ultima versiune a codurilor electrice naţionale ale ţării în cauză. Pentru America de Nord, echipamentul trebuie să fie instalat conform cerințelor aplicabile din Codul electric naţional al SUA şi Codul electric canadian. Mellanox Technologies...
-
Page 82: Sigurnosna Upozorenja Za Instaliranje (Croatian)
2. Tjelesne ozljede uslijed težine Kako biste sigurno podignuli ovaj proizvod, koristite dovoljan broj ljudi. <40 lbs 70 - 121 lbs >121 lbs 40 - 70 lbs <18 kgs 32 - 55 kgs >55 kgs 18 - 32 kgs Mellanox Technologies... - Page 83 9. Višestruki ulazi za napajanje Rizik od strujnog udara i opasnost od električne energije. PSU jedinice su neovisne. Odspojite sva napajanja kako biste osigurali stanje bez napajanja unutar platforme preklopnika. Mellanox Technologies...
- Page 84 Ova oprema trebala bi se instalirati u skladu s lokalnim i nacionalnim električnim kodovima. 16. Instalacijski kodovi Ovaj se uređaj mora instalirati sukladno najnovijoj verziji nacionalnih električnih kodova države. U Sjevernoj Americi oprema se mora instalirati sukladno važećim zahtjevima navedenim u US National Electrical Code i Canadian Electrical Code. Mellanox Technologies...
- Page 85 21. Instalacijski kodovi Ovaj se uređaj mora instalirati sukladno najnovijoj verziji nacionalnih električnih kodova države. U Sjevernoj Americi oprema se mora instalirati sukladno važećim zahtjevima navedenim u US National Electrical Code i Canadian Electrical Code. Mellanox Technologies...
- Page 86 Sukladno WEEE direktivi 2002/96/EZ, sav električni i elektronički otpad (EEE) trebao bi se prikupljati zasebno i ne bi se trebao odlagati kao običan kućanski otpad. Odlaganje ovog proizvoda i svih njegovih dijelova vršite na odgovoran i ekološki način. Mellanox Technologies...
-
Page 87: Avvertenze Di Sicurezza Per L'installazione (Italiano)
Questa apparecchiatura non va utilizzata in un’area con una temperatura ambiente superiore a quella massima consigliata: 45 °C (113 °F). Inoltre, per assicurare un flusso d’aria adeguato, lasciare almeno 8 cm (3 pollici) di spazio attorno alle aperture di ventilazione. Mellanox Technologies... - Page 88 Quando questo prodotto viene montato o sottoposto a manutenzione su un rack, è necessario adottare delle precauzioni speciali per assicurarsi che il sistema resti stabile. In generale, il rack va riempito con apparecchiature, procedendo dal basso verso l’alto. Mellanox Technologies...
- Page 89 PVC. Il cavo deve disporre di una spina stampata di potenza nominale pari a 250 V, 10 A. 19. Corrente di dispersione elevata Avvertenza: corrente di dispersione elevata; il collegamento a terra è essenziale prima di collegare l’alimentazione. Mellanox Technologies...
- Page 90 Secondo la direttiva RAEE 2002/96/EC, tutti i rifiuti da apparecchiature elettriche ed elettroniche (RAEE) vanno raccolti separatamente e non smaltiti nei normali rifiuti domestici. Smaltire questo prodotto e tutte le sue parti in modo responsabile e rispettoso dell’ambiente Mellanox Technologies...
-
Page 91: Montaj Güvenlik Uyarıları (Türkçe)
8 cm (3 inç) açıklık bırakılmalıdır. 5. Aşırı ısınma Bu ekipman, önerilen maksimum ortam sıcaklığını aşan alanlarda çalıştırılmamalıdır: 45 °C (113 °F). Ayrıca, düzgün hava akışı sağlamak için havalandırma deliklerinin etrafında en az 8 cm (3 inç) açıklık bırakılmalıdır. Mellanox Technologies... - Page 92 önce bütün güç kablolarını çıkartın. 9. Çoklu Güç Girişleri Elektrik çarpması riski ve enerji tehlikesi. Bütün PSU'lar (Güç Kaynağı Üniteleri) ayrıdır. Anahtar platformundaki gücü kapatmak için tüm güç kaynaklarının bağlantılarını kesin. Mellanox Technologies...
- Page 93 Bu ekipmanın montajında yerel ve ulusal elektrik kodlarına uyulması gerekir. 16. Montaj Kodları Bu cihazın, ülke ulusal elektrik kodlarının son sürümüne göre monte edilmesi gerekir. Kuzey Amerika için, ekipmanın ABD Ulusal Elektrik Kodu ve Kanada Elektrik Kodu'nun uygulama koşullarına göre monte edilmesi gerekir. Mellanox Technologies...
- Page 94 özel görevli bilgisayar odası gibi). 21. Montaj Kodlarıi Bu cihazın, ülke ulusal elektrik kodlarının son sürümüne göre monte edilmesi gerekir. Kuzey Amerika için, ekipmanın ABD Ulusal Elektrik Kodu ve Kanada Elektrik Kodu'nun uygulama koşullarına göre monte edilmesi gerekir. Mellanox Technologies...
- Page 95 (EEE) ayrı olarak toplanmalı ve evsel atıklarla birlikte çöpe atılmamalıdır. Bu ürün ve tüm parçaları çevreye dost ve sorumlu bir şekilde imha edilmelidir. 25. Norveç Güç Kısıtlamaları Bu ünite, bir TN güç sistemine ve sadece Norveç'in IT güç sistemine bağlanmak içindir. Mellanox Technologies...
Need help?
Do you have a question about the SX67X0 and is the answer not in the manual?
Questions and answers