Advertisement
Quick Links
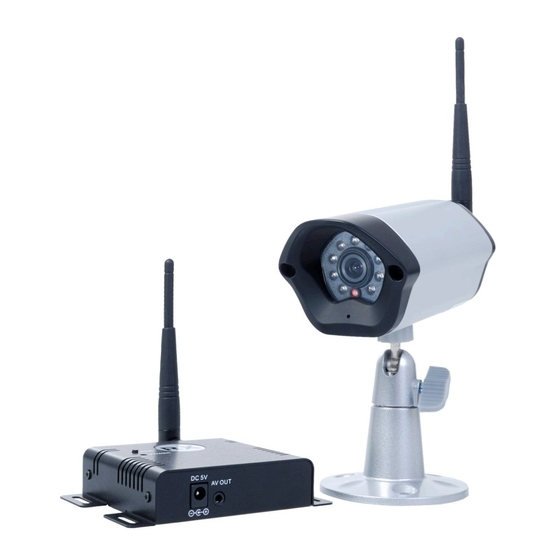
MVL24KIT Digital Camera/Receiver System
Setup and Usage Guide
The MVL24KIT 420 Line 2.4GHz Digital Wireless video IR camera kit is a reliable and exceptionally easy to
install monitoring solution for home or office. It includes these features:
30' IR Range
•
500' line of sight (camera to receiver) range
•
Weather-resistant IP55 housing
•
Red LED deterrent light built-in
•
Digital wireless frequency hopping technology
•
3 dB omnidirectional antenna
•
A local area can accommodate up to 4 camera - receiver systems concurrently.
The MVL24KIT is composed of three SKUs: MVL24CM Digital Wireless IR Camera, MVL24RX 2.4GHz Digital
Wireless Receiver, and CON-4 female RCA to male BNC Adapter. An optional hi-gain antenna is available
for the MVL24RX receiver to improve reception and extend the range of the system.
What's in the box:
MVL24CM Digital Wireless IR Camera:
Camera assembly
•
12 VDC power adapter
•
Antenna (1)
•
Mounting bracket and gimbal assembly
•
Hardware kit
•
MVL24RX 2.4GHz Digital Wireless Receiver:
Receiver (RX) module
•
5 VDC power adapter
•
Antenna (1)
•
A/V cable
•
Hardware kit
•
Step 1.
Installation - camera
The camera is installed onto a mounting bracket and gimbal assembly, then powered on.
Mounting Bracket
www.supercircuits.com
1
1.
Tighten the adjustment knob on the side
of the gimbal assembly, then screw the
gimbal assembly onto the mounting
bracket until it is tight.
2.
Anchor the camera mounting bracket and
gimbal assembly onto a flat surface at the
surveillance location. The hardware kit
provided is useful for securing the bracket
onto most surfaces.
3.
Attach the rubber washer (included in the
hardware kit) onto the gimbal bolt.
4.
Loosen the adjustment knob.
5.
Screw the gimbal bolt into the threaded hole on the underside of the camera.
6.
Aim the camera at your surveillance target, then tighten the adjustment knob.
7.
Attach the antenna to the back of the camera assembly.
8.
Plug the camera power cord into the 12 VDC power adapter provided, then plug the power adapter
into a standard 120 VAC outlet. WARNING: Do not use the 5 VDC power adapter provided for the
RX module with the MVL24CM camera.
Step 2.
1.
Find a location for the RX module that is within 500' of the camera. If obstructions (walls, etc.)
exist between the camera and RX module, the module must be positioned closer to the camera.
The RX module can be anchored to the mounting surface, if necessary. The hardware kit provided is
useful for securing the module onto most surfaces.
2.
Attach the A/V cable provided to the RX
module A/V OUT connector, then plug the
yellow RCA jack into a video recorder or
monitoring system. (NOTE: This kit does not
support audio monitoring.)
3.
Attach the RX module antenna to the antenna
connector on the back of the module.
4.
Plug the RX module 5 VDC power adapter
into the DC5V connector on the RX module,
then into a standard 120 VAC outlet.
WARNING: Do not use the 12 VDC power
adapter provided for the MVL24CM camera
with the RX module.
Gimbal Assembly
Rubber
washer
Antenna
connector
PAIR button
(under cap)
Installation - RX module
button
Adjustment
knob
Power cord
DC5V
power
connector
PAIR
A/V OUT
connector
MVL24KIT_SQ
Advertisement

Subscribe to Our Youtube Channel
Related Manuals for Super Circuits MVL24KIT


Summary of Contents for Super Circuits MVL24KIT
- Page 1 The MVL24KIT 420 Line 2.4GHz Digital Wireless video IR camera kit is a reliable and exceptionally easy to Anchor the camera mounting bracket and install monitoring solution for home or office. It includes these features: gimbal assembly onto a flat surface at the 30’...
-
Page 2: Troubleshooting
Step 3. PAIRing the camera and RX module Specifications - system To PAIR the camera and RX module is the process for establishing a communication link between them. Item Specification Effective PAIRing is achieved when video from the receiver module can be seen at the video monitoring Transmission channels 80 channels, auto selected equipment.
Need help?
Do you have a question about the MVL24KIT and is the answer not in the manual?
Questions and answers