Fagor Oven Installation And User Manual
Hide thumbs
Also See for Oven:
- Installation and user manual (23 pages) ,
- User manual (40 pages) ,
- Installation and user manual (143 pages)
Table of Contents
Advertisement
Advertisement
Table of Contents

Related Manuals for Fagor Oven


Summary of Contents for Fagor Oven
- Page 1 FEINGL.05/05 29/6/05 10:36 Página 1...
-
Page 2: Table Of Contents
........16 a) How to turn the oven on and off ......16 b) Step-by-step guide to cooking with the oven . - Page 3 9.1.2. The inside of the oven ........38...
- Page 4 FEINGL.05/05 29/6/05 10:36 Página 4...
- Page 5 GREETING Dear client, You are now the proud owner of a FAGOR oven and we would like to thank you for the confidence you have shown in us. FAGOR provides you with a new generation of domestic appliances that contribute to an improvement in your quality of life thanks to our range of innovative, easy-to use and environmentally-friendly products.
-
Page 6: Safety Advice
INSTALLATION • Once all the packaging materials have been removed, check that the oven is not damaged and that the power cable is in perfect condition. If you detect any damage or minor problems caused in transit, call the Customer Service Centre, and do not use the oven. -
Page 7: Use And Operation
• Do not leave the oven to cool down with the door open. Even if the oven door is only left a little ajar, the front panels of the adjacent units may be damaged over time. -
Page 8: Child Safety
• Avoid the use of hard sponges or scouring pads on the inside of the oven, as they might damage the enamel. Follow the instructions provided in the part entitled... -
Page 9: Assembly And Installation
2.1. UNPACKING 1. Cut the plastic film covering the package. 2. Carefully remove all the oven’s protective elements: top cover, edge protection and polystyrene base. To protect the environment, please follow the advice given in the part entitled “Environmental Note”. - Page 10 FEINGL.05/05 29/6/05 10:36 Página 10 2. At the back of the oven you will find cable “A” which is used to make the electrical connection. WARNING: Before plugging the appliance in, check the following: • that the mains voltage corresponds to the voltage indicated on the feature identification plate;...
- Page 11 FEINGL.05/05 29/6/05 10:36 Página 11 Fasten the oven to the unit with the 2 screws you will find in the accessories bag. -Figure 2- 6. Access the oven’s set-up menu.
-
Page 12: Your New Oven
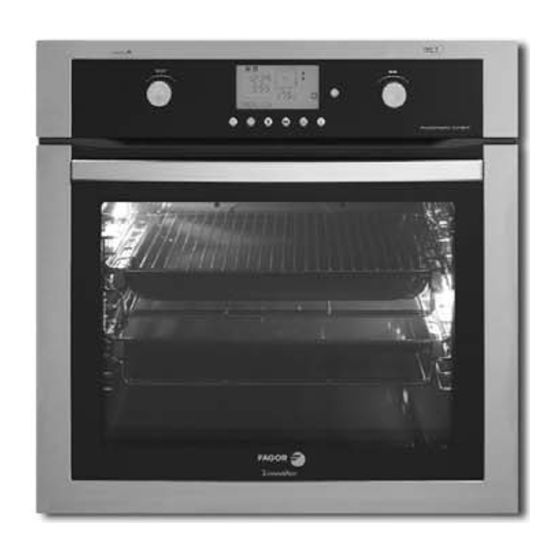
FEINGL.05/05 29/6/05 10:36 Página 12 3. YOUR NEW OVEN 3.1. GENERAL DESCRIPTION Control panel 1. SELECT Control. 2. MENU Control. 3. LCD display. Your oven has 2 rotating controls that can be turned to the left or right. -
Page 13: B) Lcd Display
10. Set-up symbol 11. Progress bar symbol 12. Oven stopped symbol 13. Automatic disconnection indicator symbol 14. NET Comp@tible oven symbol 15. Technical Service symbol 16. On/Off and stop button 17. Information and set-up menu button 18. Recipe selector button 19. -
Page 14: Before Using The Oven For The First Time
OFF: when the oven is off, the display will not show the time and date. NOTE: • Once the time and date have been set for the first time, your oven includes a system to allow it to remember these even after a power cut SOUND Choose one of these four options and confirm your selection by pressing the control: KEY: the oven will only beep when a button is pressed. - Page 15 “Auto Shut-off" option so that it switches itself off. Turn the rotating control to select the amount of time you would like the oven to wait (you can choose between 5 and 30 minutes) before switching itself off after you last operate a control. Once you have...
-
Page 16: B) Initial Cleaning
10:36 Página 16 INITIAL CLEANING Before using your new oven for the first time, heat it up when empty for about 30 minutes, with the door closed. Select the cooking function and adjust the temperature to 250º C, having previously checked that all protective plastic sheeting and labels have been removed. -
Page 17: C) How To Select A Cooking Function
Página 17 HOW TO SELECT A COOKING FUNCTION Once the oven is on, the display will show one or other of the functions available. Turn the MENU control and you will be able to display the different cooking functions described below. Select the function you want to use and press in the MENU control. - Page 18 The Celeris function will then be enabled so that every time you operate the oven, it will come into play automatically until the required temperature is reached. Once the oven has reached this temperature, it will beep to indicate that the food may now be put in the oven;...
-
Page 19: D) Electronic Temperature Control And Adjustment
• The symbol indicates the temperature inside the oven relative to the temperature selected. The lower circle on the scale will flash while the oven is warming up, otherwise it will stay lit. The 4 marks on the circle indicate the percentage of the pre-set temperature reached;... -
Page 20: Accessories
If your oven has a "Deep Tray", place it under the grill to roast, gratiné and brown. The juices will then fall into the tray and the oven will be kept clean. - Page 21 The new “Pull System” design ensures that food can be handled safely and conveniently, and can be placed at any of the 5 levels of the oven. The trays can be pulled out of their housing about three quarters of the way without tipping over or wobbling, thus reducing the risk of burns.
- Page 22 Just take the tray out of the oven. b. Take the whole set out of the oven. To do so, you will have to lift the “Pull System” slightly to get past the catches that prevent it from tipping over.
- Page 23 Just take the tray out of the oven. b. Take the whole set out of the oven. To do so, you will have to lift the “Removable Tray” slightly to get past the catches that prevent it from tipping over.
-
Page 24: Avanssis Ventilation System
The AVANSSIS ventilation system incorporated into your FAGOR oven will allow you to achieve better cooking results with less power consumption. Thanks to this new system, the oven itself takes care of regulating automatically the optimal degree of humidity for each recipe, so as to obtain more homogeneous cooking results every time. -
Page 25: Setting The Clock
The time cannot be adjusted during the cooking process, so as not to interfere with possible pre-set cooking programmes. Once the time and date have been set, your oven includes a system that allows them to be remembered even after a power cut... -
Page 26: Cooking Time
The progress bar will gradually light up as the pre-set time is completed. Once the pre-set time has elapsed, the oven will turn itself off automatically and start to beep while the symbol flashes. To switch off the beeper, press any button. -
Page 27: Auto-Stop Cooking
Example: I want the food to be ready at 14:30. SELECT MENU After a few seconds, the function will be activated and the oven will start working as programmed. Once the pre-set time has elapsed, the oven will turn itself off automatically and start to beep while the symbol flashes. -
Page 28: Beeper
WARNING: Remember that certain recipes for fish, shellfish, cakes and pastries require the oven to be pre-heated. This type of recipe does not allow the cooking end-time to be pre-set, as the food must not be placed in the oven before it has warmed up. -
Page 29: Cancellation Of Timer Functions
Once the time set has elapsed, the oven will start to beep while the symbol flashes. Press any button to turn off the beeper. The oven will stop beeping but the symbol will continue to flash. Press any button to stop it flashing. -
Page 30: How To Programme The Automatic Recipes In A "Cookbook"Oven
For each recipe, there is a range of possible weights. The fact that the oven may only be programmed in steps of 100 g. must be taken into account when setting the weight. - Page 31 “Auto-stop cooking”. WARNING: Remember that certain recipes for fish, shellfish, cakes and pastries require the oven to be pre-heated. The food should be placed in the oven when it beeps to indicate that pre-heating has finished and the screen shows the symbol completely lit up, i.e.
-
Page 32: How To Programme Cooking Times In An "Auto-Chef" Oven
100 g. must be taken into account when setting the weight. For best results it is important that the weight set using the oven controls is as close as possible to the true weight of the food to be cooked. NOTE: •... - Page 33 “Auto-stop cooking”. WARNING: Remember that certain recipes for fish, shellfish, cakes and pastries require the oven to be pre-heated. The food should be placed in the oven when it beeps to indicate that pre-heating has finished and the screen shows the symbol completely lit up, i.e.
-
Page 34: How To Memorize Your Own Recipes
“Memories Menu”. How to memorize a recipe recently cooked: Once you have finished baking or the recipe included in the oven, keep the button pressed until the text line displays: “MEMORIZED”; the recipe will have been stored in the first free memory. - Page 35 (any re-adjustment will be understood by the oven as a new cooking phase). In order to prevent the memorization of undesired phases, we recommend you turn off the oven and turn it on again each time you start a new batch of cooking.
-
Page 36: Safety Functions
Página 36 8. SAFETY FUNCTIONS 8.1. AUTOMATIC CUT-OFF If you have not pressed any control button for several hours with the oven on, then it will turn itself off automatically for safety reasons. 8.2. CHILD SAFETY LOCK When the oven is operating, you can lock it to prevent children from altering anything. -
Page 37: Cleaning And Maintenance
Follow the manufacturer's indications closely. b. Oven with aluminium front: Clean the outside of the oven with warm soapy water and a soft sponge. Rinse it very well. Dry it with a soft cloth immediately afterwards. Aggressive detergents, scouring pads and rough cloths should not be used. -
Page 38: The Inside Of The Oven
9.1.2. The inside of the oven In order to ensure the continued attractive appearance of your oven in the long term, you should clean the inside regularly, preferably every time you use it; this will avoid generating fumes and unpleasant odours in subsequent uses. - Page 39 The door will then be correctly installed. • In some ovens it is possible to fold the grill down from the oven roof. WARNING: The oven must be cold. How to fold the grill down: 1. Lift up the grill rod.
-
Page 40: The Accessories
29/6/05 10:37 Página 40 How to re-insert the grill after cleaning: 1. Press the grill’s rod towards the back of the oven and hook the grill back into place in its support. Accessories 9.1.3. Soak the accessories immediately after use in a normal household detergent. In this way, any scraps of food that may have adhered can be easily removed with a sponge or a soft brush. -
Page 41: The Smoke Filter
9.1.6. The Grease filter If your oven has a grease filter (in the bag with the tray), it can be placed in the bottom of the oven, as shown in the diagrams. Wash the grease filter in the dishwasher; to remove very stubborn dirt soak it in very hot water with an ordinary household detergent. -
Page 42: How To Replace The Bulb In The Interior Light
9.2. HOW TO REPLACE THE BULB IN THE INTERIOR LIGHT You can replace the oven’s interior light bulb if it stops working. You can obtain these heat-resistant 25W replacement bulbs capable of withstanding 300ºC from the Official Technical Service or from a specialised electrical store. Only use these lamps. -
Page 43: Practical Advice And Cooking Table
Always use the cooking tables in this manual as a base for programming the oven. To cook one of your own recipes, find a similar dish in the table as an aid to choosing the most suitable function, temperature and cooking time. - Page 44 Cakes and pastries do not •Wrong function selected • Check the function and rise enough temperature selected •The oven has not been pre- against the temperature heated enough shown in the table •Check the table for any pre- heating recommendations The roast or the baked •Temperature too low...
-
Page 45: Cooking Tables
FEINGL.05/05 29/6/05 10:37 Página 45 COOKING TABLES PRO- POSITION PRE- FOOD TEMPERATURE TIME ACCESSORIES GRAMME FOOD HEATING MEAT AND POULTRY Veal 50-60 min 1,5 kg Pork loin 50-60 min 1,5 kg Roast chicken 50-60 min 1,25 kg Roast rabbit 25-35 min 1,2 kg Roast lamb 40-50 min... - Page 46 FEINGL.05/05 29/6/05 10:37 Página 46 PRO- POSITION PRE- FOOD TEMPERATURE TIME ACCESSORIES GRAMME FOOD HEATING STARTERS AND VEGETABLES Stuffed 12-16 min aubergines Roast red 30-40 min peppers1,25 kg Stuffed 15-19 min tomatoes (4) Stuffed 25-35 min courgettes (2) FISH AND SEAFOOD Roast 7-9 min hake 1,5 kg...
- Page 47 FEINGL.05/05 29/6/05 10:37 Página 47 PRO- POSITION PRE- FOOD TEMPERATURE TIME ACCESSORIES GRAMME FOOD HEATING MEAT AND POULTRY Veal 50-60 min 1,5 kg Pork loin 50-60 min 1,5 kg Roast chicken 50-60 min 1,25 kg Roast rabbit 25-35 min 1,2 kg Roast lamb 40-55 min 1 kg...
- Page 48 FEINGL.05/05 29/6/05 10:37 Página 48 PRO- POSITION PRE- FOOD TEMPERATURE TIME ACCESSORIES GRAMME FOOD HEATING STARTERS AND VEGETABLES Stuffed 12-16 min aubergines Roast red 30-40 min peppers1,25 kg Stuffed 15-19 min tomatoes (4) Stuffed 25-35 min courgettes (2) FISH AND SEAFOOD Roast 7-9 min hake 1,5 kg...
-
Page 49: Locating And Troubleshooting Problems
Engineer unnecessarily, check to see if the failure you have encountered is included in the table below: If your oven is still not working correctly after checking the points indicated in the table, call the Technical Service department indicating the type of failure, the appliance model, the product number and the serial number indicated on the features identification plate. - Page 50 •Collegare il forno o verificare or your automatic cut-out il differenziale. fuse switch has tripped. •Riesaminare il Menu di •Oven has been set up not to configurazione use the lamp at low temperatures or never to use it. Smoke comes out when in •Oven temperature too high.
-
Page 51: Net Comp@Tible Oven: Connection To Mains Networks
NET Comp@tible ovens include a serial port to provide connectivity with a home network over signal-carrying power lines. To connect a NET Comp@tible oven to the home network, you need to purchase and connect the Domotics Kit or optional communications module sold separately, and there must be a FAGOR Maior-Domo®... -
Page 52: Environmental Note
Disposing of the packaging from your new oven Your new oven is covered by protective packaging during its transportation to your home. All of the packaging materials used are environmentally-friendly and can be recycled or re-used. -
Page 53: Energy-Saving Tips
13.2. ENERGY-SAVING TIPS • Pre-heat the oven only where this is indicated in the recipe or in the cooking table for the dish you want to cook. • It is better to use dark baking dishes, preferably black enamel, as these materials absorb heat particularly well. - Page 54 FEINGL.05/05 29/6/05 10:37 Página 54 ENVIRONMENTAL TIPS In order to protect the environment, deliver your used appliance to an official collection centre or recyclable material recovery centre. Before you dispose of your used appliance, make it unusable by cutting the power cable.
- Page 55 FEINGL.05/05 29/6/05 10:37 Página 55...
- Page 56 FEINGL.05/05 29/6/05 10:37 Página 56 Fagor Electrodomésticos S.Coop UK REPRESENTATIVE OFFICE LEROY HOUSE UNIT 3P, 436 ESSEX ROAD LONDON N1 3QP PHONE: 0207 354 0044 Fax: 0207 354 0789 sales@fagorappliances.co.uk 06-05 C60T246A2 Printed on recycled paper...
Need help?
Do you have a question about the Oven and is the answer not in the manual?
Questions and answers