moon 610 LP Evolution Series Owner's Manual
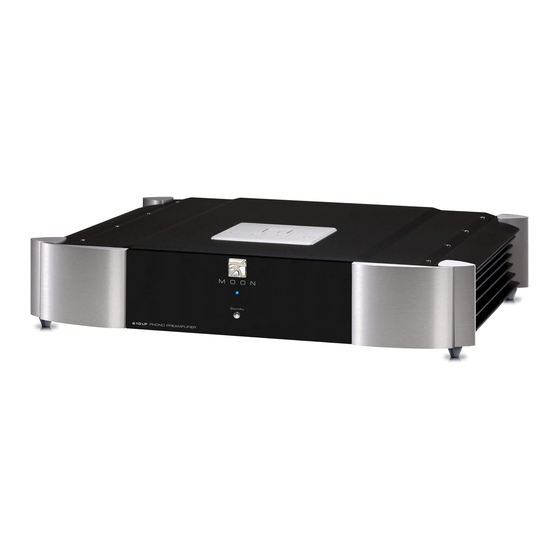
Evolution series dual-mono phono preamplifier
Hide thumbs
Also See for 610 LP Evolution Series:
- Owner's manual (13 pages) ,
- Owner's manual (16 pages)
Table of Contents
Advertisement
Quick Links
Download this manual
See also:
Owner's Manual
Advertisement
Table of Contents

Subscribe to Our Youtube Channel
Related Manuals for moon 610 LP Evolution Series


Summary of Contents for moon 610 LP Evolution Series
- Page 1 Owner’s Manual MOON Evolution Series 610 LP Dual-Mono Phono Preamplifier...
-
Page 2: Important Safety Instructions
MOON 610LP Dual-Mono Phono Preamplifier Important Safety Instructions Read these instructions. Keep these instructions. Heed all warnings. Follow all instructions. Do not use this apparatus near water. Clean only with a dry cloth. Do not block ventilation openings. Install in accordance with the manufacturer’s instructions. - Page 3 To prevent shock hazard, all three connections must ALWAYS be used. Connect the MOON 610LP only to an AC source of the proper voltage; Both the shipping box and rear panel serial number label will indicate the correct voltage. Use of any other voltage will likely damage the unit and void the warranty.
-
Page 4: Table Of Contents
MOON 610LP Dual-Mono Phono Preamplifier Table of Contents Congratulations ..........5 Unpacking and Warnings ........5 Introduction ............ 6 Installation & Placement ........6 Bottom Panel Layout ........7 Cartridge Loading Adjustments ......8 Rear Panel Connections ........11 Balanced Operation ........12 Operating the 610LP ........12... -
Page 5: Congratulations
Before setting up your new MOON 610LP, we encourage you to please read this manual thoroughly to properly acquaint yourself with its features. We hope you enjoy listening to the MOON 610LP Phono Preamplifier as much as the pride we have taken in creating this fine audio product. -
Page 6: Introduction
MOON 610LP Dual-Mono Phono Preamplifier Introduction Your MOON 610LP Phono Preamplifier incorporates many significant design features to achieve its “world class” level of performance. This is an abbreviated list of the more important features: The oversized power supply, located within the main chassis, is housed in an isolated enclosure that is constructed from satin coated 14-gauge steel to eliminate all traces of AC artifacts. -
Page 7: Bottom Panel Layout
Examples of the DIP switch positions for all available settings are clearly shown on the bottom panel – below and to the right of the actual DIP switches. Since the MOON 610LP is a genuine dual-mono design, there are 2 sets of DIP switches for each adjustment –... -
Page 8: Cartridge Loading Adjustments
MOON 610LP Dual-Mono Phono Preamplifier Cartridge Loading Adjustments Prior to making any of these adjustments, always disconnect the AC power cord and all interconnects from MOON 610LP. pen shaped plastic hand tool We strongly recommend using the that we have included with your 610LP as it was specifically designed for this purpose. - Page 9 MOON 610LP Dual-Mono Phono Preamplifier Internal Settings (cont’d) Resistance Loading: There are sixty-four (64) unique resistance loading settings available using DIP switches 1 through 6, located at the bottom of the upper DIP switch bank. The range of available settings starts at 12.1Ω and ends at 47kΩ: Figure 3: Left and right channel DIP switches for resistance loading adjustments The factory default is 47KΩ, whereby DIP switches 6, 5, 4, 3, 2 and 1 are all in the right...
-
Page 10: Gain Setting
(‘ON’) position and DIP switches 2 and 4 are in the right (‘OFF’) position. Equalization Curve: The MOON 610LP Phono Preamplifier is equipped with circuitry for two (2) different equalization curves; The RIAA standard and the less common IEC modified curve. The main difference is that the RIAA curve produces a flat frequency only response from 20Hz to 20kHz;... -
Page 11: Rear Panel Connections
To the right of the array of audio connectors is a 4-pin XLR connector labeled “DC Input” which is reserved for future use when an external power supply will be made available for the MOON 610LP. Directly to the right of the 4-pin XLR are two 12 Volt triggers, each on a 1/8”... -
Page 12: Balanced Operation
For example, when one conductor is carrying a signal of +2 Volts, the other will be carrying a signal of –2 Volts. When these two inverted signals on a balanced line are output from the MOON 610LP, any noise picked up by the interconnect will be eliminated since a differential circuit amplifies only the difference between these two signals: Noise on a balanced interconnect will be equal on both conductors and therefore not be processed. -
Page 13: Specifications
MOON 610LP Dual-Mono Phono Preamplifier Specifications Configuration ............Fully balanced, dual-mono Power Supply Transformer ........25VA Power Supply Capacitance ........40 000µF Balanced inputs ............1 pair (XLR) Single-ended inputs ..........1 pair (RCA) Input Impedance - Adjustable ......... 64 settings from 12.1Ω to 47kΩ...
Need help?
Do you have a question about the 610 LP Evolution Series and is the answer not in the manual?
Questions and answers