Advertisement
Quick Links
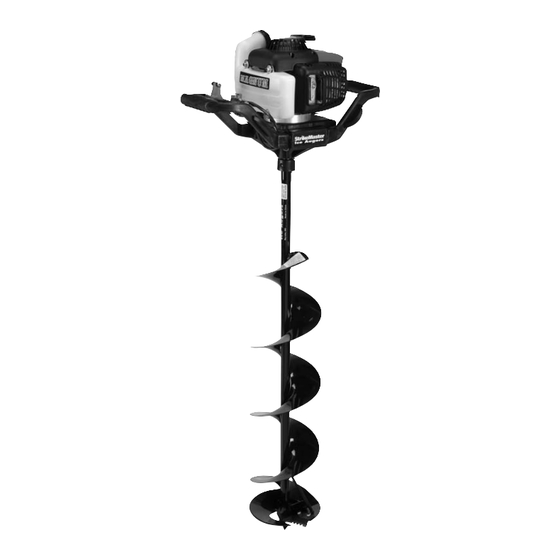
OPERATING & PARTS MANUAL
MAG
MAG
ATTENTION:
FOR BEST PERFORMANCE IDLE ENGINE FOR 1-2 MINUTES
BEFORE YOU START DRILLING.
StrikeMaster Corporation
17217 198th Avenue • Big Lake, Minnesota 55309
Phone (763) 263-8999 • Fax (763) 263-8986
www.strikemaster.com
Solo® Germany The registered Solo® trademark is licensed for use in the U.S. to the German company Solo
Kleinmotoren Gmbh by the U.S. affiliate, Solo incorporated.
SM09
Advertisement

Related Manuals for STRIKEMASTER Solo Magnum


Summary of Contents for STRIKEMASTER Solo Magnum
- Page 1 OPERATING & PARTS MANUAL ATTENTION: FOR BEST PERFORMANCE IDLE ENGINE FOR 1-2 MINUTES BEFORE YOU START DRILLING. StrikeMaster Corporation 17217 198th Avenue • Big Lake, Minnesota 55309 Phone (763) 263-8999 • Fax (763) 263-8986 www.strikemaster.com Solo® Germany The registered Solo® trademark is licensed for use in the U.S. to the German company Solo Kleinmotoren Gmbh by the U.S.
- Page 2 1946. And, there is no doubt that this year's model is the finest ever produced by StrikeMaster Corporation. Your new StrikeMaster ice auger has all of the most wanted features in a power ice auger, to assure many years of enjoyable ice fishing. Some of these features such as workmanship, engineering excellence, and dependability have long been standards at StrikeMaster.
- Page 3 Thoroughly read these operating instructions before undertaking any maintenance, installation and cleaning steps. IMPORTANT SAFEGUARDS It is recommended that everyone who uses this product should read the StrikeMaster OPERATING MANUAL and the engine OPERATOR'S MANUAL before operation in addition to viewing the enclosed safety DVD.
- Page 4 1. Recoil (starter) Handle 9. Choke Lever 2. Fuel Cap 10. Transmission 3. Fuel Tank 11. Start/Stop Switch 4. Fuel (FULL) Level 12. Spark Plug Cap 5. Decompression Button 13. Recoil 6. Throttle Lever 14. Muffler Guard 7. Air Filter Cover 15.
- Page 5 ASSEMBLY Carefully remove blade guard and make sure blade bolts are tight. 10mm nut and bolt. Use two 10mm LAZER BLADE CHIPPER BLADE bolts and wrenches above and below blades to tighten. closed Stamping or blade identification must be legible for blade to be installed wrench properly.
- Page 6 STARTING PREPARATIONS Check the complete machine for operational safety • The stop switch should function properly. • The throttle must have freedom of movement and return to the idle position on its own accord. • The auger blades and collar bolt must be tightly secured and in perfect condition.
- Page 7 STARTING YOUR ENGINE Turn the ON/OFF switch to ON. Make sure to read the switch correctly. Read this side of the switch. Do not read Press the primer bulb (Fig 1 ) 5 to 8 times. You want to see this side fuel returning in the fuel line.
- Page 8 The air filter is blocked if the engine speed noticeably drops when the carburetor is correctly adjusted. With your purchase of a StrikeMaster power auger, you have Under these circumstances, the filter needs replacing (part no. acquired one of the world’s best precision cutting machines. A 20 48 154).
- Page 9 LIMITED WARRANTY WARRANTY CE DECLARATION OF CONFORMITY The manufacturer warranties trouble-free quality In accordance with EG Directives 98/37/EC, and will cover the cost of replacing parts which are 2000/14/EC and 89/336/EEC (amended by found to be faulty in material or workmanship within 92/31/EEC), SOLO Kleinmotoren GmbH, the prescribed warranty period after the date of Stuttgarter Strasse 41, D-71069 Sindelfingen,...
- Page 10 Record Your Serial Number Below Spec # EMISSION CONTROL INFORMATION and On Your Warranty Card SOLO INCORPORATED 9S9XS 0374SA EMISSIONS COMPLIANCE PERIOD = NA Locate This Decal on Your Auger Typ 137 36.5 cc 2000692 Engine Type 01000 0 3 / 2 0 0 9 THIS ENGINE COMPLIES WITH US EPA REGULATIONS FOR WINTER TIME PRODUCT ONLY 2009 SPARK IGNITION ENGINES...
- Page 11 To make claim under this warranty write or call (763) 263-8999 directly to "CUSTOMER SERVICE", StrikeMaster Corporation at the above address for a warranty return authorization. StrikeMaster Corporation will make every effort to repair or replace the product if found to be defective within the terms of this warranty within 30 days after receipt of the product.
- Page 12 For Information on our Tune-Up Service, please visit our website at www.strikemaster.com or call 763-263-8999 PLACE STAMP HERE StrikeMaster Corporation 17217 198th Avenue Big Lake, Minnesota 55309...
- Page 13 Tips on starting your new StrikeMaster Auger Powered by SOLO® Before starting your new StrikeMaster Auger we recommend these simple steps to ensure proper conditioning of your new auger powered by the legendary German motor SOLO®. Conditioning Your Recoil Prior to putting gas in your auger’s power head we recommend (in a warm environment), liberally spray WD‐40® on the recoil mechanism as show in the pictures below: Spray the WD‐40® where the recoil rope and the metal guide meet. Again, please liberally spray the WD‐40® to ensure it lubricates the whole recoil mechanism. This will ensure your power head performs in the conditions Ice fishermen encounter during the winter. How to properly start the Solo Engine: 1. Turn ON/OFF switch to ON. 2. Prime Engine 5 to 8 times. 3. Slide the choke lever to start. 4. Press the decompression button in. Gently and slowly pull recoil rope until resistance is felt, then finish the pull with a short, quick pull. Note: it is VERY important to find that resistance before pulling cord. That engages all the components properly. This decompression and resistance check must be done before every pull. 5. Once you hear the engine fire, slide the choke lever to run. Continue the pulling procedure until engine starts. ...
Need help?
Do you have a question about the Solo Magnum and is the answer not in the manual?
Questions and answers
What is the jet setting on the magnum lll plus how many turns out
Magnuml lll plus