STRIKEMASTER LITHIUM 40v Owner's Manual
Hide thumbs
Also See for LITHIUM 40v:
- Owner's manual (83 pages) ,
- Owner's manual (13 pages) ,
- Owner's manual (19 pages)

Related Manuals for STRIKEMASTER LITHIUM 40v


Summary of Contents for STRIKEMASTER LITHIUM 40v
- Page 1 OWNER’S MANUAL TOLL-FREE HELPLINE: 905-571-3001 (Monday - Friday / 8am - 4:30pm CST) READ ALL SAFETY RULES AND INSTRUCTIONS CAREFULLY BEFORE OPERATING...
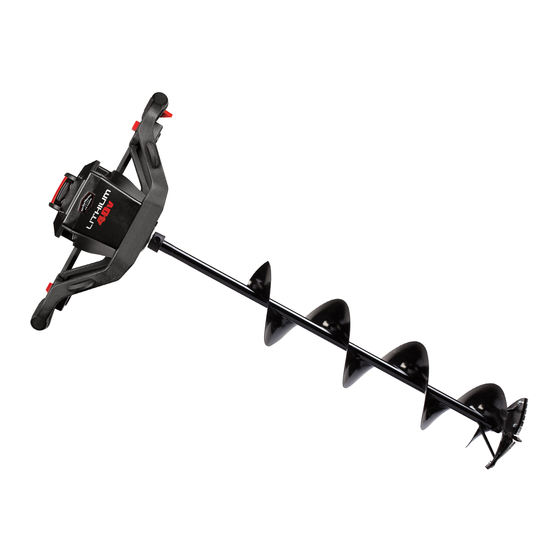
- Page 2 • StrikeMaster Lithium 8” or 10” Auger Spiral, Blades and Blade Cover Your New StrikeMaster Lithium 40v has two LED lights on the bottom side of the Powerhead to illuminate the cutting area. The lights will turn on when the operating lock BATTERY CHARGING TIME lever and POWER button are engaged.
-
Page 3: Quick Start
2. Unpack Battery Charging base, slide Battery onto Battery Charging Base using the 1. Remove Lithium 40v Battery Charging Base from carton (Image 1). Plug in. channels on both sides as a guide. Press down until you hear it click in place. -
Page 4: Safety Information
• Accurate, safe and effective use of this product is the operator’s responsibility. For outdoor use only. Charge StrikeMaster Lithium 40v 5 amp hour rechargeable batteries only using the StrikeMaster Charging Base (LFV-CB). Other types of batteries may burst causing injury to persons or damage. - Page 5 GENERAL POWER AUGER SAFETY WARNINGS SYMBOLS W A R N I N G The following signal words and meanings are intended to explain the levels of risk associated with this product. READ ALL SAFETY WARNINGS AND ALL INSTRUCTIONS. SYMBOL SIGNAL MEANING Save all warning and instructions for future reference.
-
Page 6: Know Your Ice Auger
KNOW YOUR ICE AUGER ASSEMBLY PACKING LIST The safe use of this product requires an understanding of the information on the product and in this owner’s manual as well as a knowledge of the project you are attempting. Before using this product, familiarize yourself with all 1 Powerhead operating features and safety rules. -
Page 7: Operation
ASSEMBLY OPERATION NOTE: The StrikeMaster Lithum 40v comes with two hex wrenches: One is stored on the bottom of the Powerhead. TO OPERATE POWER BUTTON - ON AND OFF The other is taped to the the mid-point of the spiral. Remove hex wrench from spiral before operating. -
Page 8: Maintenance
The maintenance schedule applies to normal operating conditions. If you operate your Powerhead under ® unusual conditions, such as sustained high-load, or use in unusually wet conditions, consult StrikeMaster Powerhead starts then stops Battery low on power Charge Battery customer service for recommendations applicable to your individual needs and use. -
Page 9: Year Limited Warranty
® for a period of two (2) years against defects in materials, parts or workmanship. StrikeMaster, at its own discretion will repair or replace any and all parts found to be defective, through normal use, free of charge to the customer. - Page 10 6. Enlevez le protecteur de lames de la base de la mèche de tarière et rangez-le dans un CARACTÉRISTIQUES DU PRODUIT endroit sécuritaire (image 6). Votre appareil StrikeMaster Lithium 40v est prêt à être utilisé. . MARCHE AVANT/MARCHE ARRIÈRE Votre nouvel appareil StrikeMaster 40v peut fonctionner en marche avant et en marche COMPOSANTS arrière.
- Page 11 1. Sortez l’accumulateur StrikeMaster Lithium 40 v de l’emballage (image 1). 2. Glissez l’accumulateur sur la base de chargement en utilisant les rainures sur les 1. Sortez la base de chargement Lithium 40v de l’emballage (image 1). deux côtés comme guide. Pressez vers le bas jusqu’à ce que vous l’entendiez cliquez en place 2.
- Page 12 • Lisez et suivez toutes les instructions concernant la sécurité. StrikeMaster Lithium 40v, 5 ampères/heure. D’autres types d’accumulateurs peuvent éclater causant des blessures aux personnes • Entretenez l’appareil en tenant compte des instructions et de l’échéancier contenus dans le livre de l’utilisateur.
- Page 13 AVERTISSEMENTS GÉNÉRAUX DE SÉCURITÉ POUR LES SYMBOLS ÉQUIPEMENTS MOTORISÉS The following signal words and meanings are intended to explain the levels of risk associated with this product. AVERTISSEMENT SYMBOLE SIGNAL SIGNIFICATION DANGER LISEZ TOUS LES AVERTISSEMENTS CONCERNANT LA SÉCURITÉ ET TOUTES LES INSTRUCTIONS. Indique une situa tion éminemment dangereuse qui, si elle n’est pas Conservez tous les avertissements et toutes les instructions pour les consulter éventuellement.
-
Page 14: Montage
CONNAÎTRE VOTRE TARIÈRE MONTAGE LISTES DES ARTICLES L’utilisation sécuritaire de ce produit exige une compréhension de l’information concernant le produit et de celle contenue dans le manuel de l’utilisateur, en plus d’une connaissance du travail à exécuter. Avant d’utiliser ce 1 bloc-moteur produit, familiarisez-vous avec toutes les caractéristiques et les règles de sécurité. - Page 15 MONTAGE FONCTIONNEMENT NOTEZ BIEN: L’appareil StrikeMaster Lithium 40v vous parvient avec deux clés hexagonales. L’une d’elle est rangée POUR FAIRE FONCTIONNER LE BOUTON DE MISE EN MARCHE – ON ET OFF sous le bloc-moteur. L’autre est scotchée au milieu de la mèche de tarière. Enlevez la clé hexagonale de la mèche avant l’utilisation.
-
Page 16: Entretien
ENTRETIEN TROUBLESHOOTING Lisez le programme d’entretien et suivez ces recommandations pour augmenter la durée de vie de votre tarière PROBLÈME CAUSE POSSIBLE REMÈDE/ACTION à glace. Le moteur ne tourne pas Le bouton de mise en marche Tenez le bouton durant Un bon entretien est essentiel pour un fonctionnement sécuritaire, économique et sans problèmes. -
Page 17: Garantie Limitée De 2 Ans
(2) ans contre tout défaut de fabrication, de matériaux ou de pièces. STRIKEMASTER, à sa discrétion, réparera ou remplacera toutes les pièces jugées défectueuses, suite à un usage normal, sans frais pour le client. Cette garantie s’applique uniquement aux appareils utilisés pour un usage personnel, qui n’ont pas été...
Need help?
Do you have a question about the LITHIUM 40v and is the answer not in the manual?
Questions and answers