Table of Contents
Advertisement
191017210
Käyttöohje • Suomi
0640
Bruksanvisning • Svenska
Bruksanvisning • Norsk
Bruksanvisning • Dansk
Operation instructions • English
Gebrauchsanweisung • Deutsch
Gebruiksaanwijzing • Nederlands
Manuel d'utilisation • Français
Manual de instrucciones • Español
Instrukcja obsługi • Polski
Инструкции по эксплуатации • По-русски
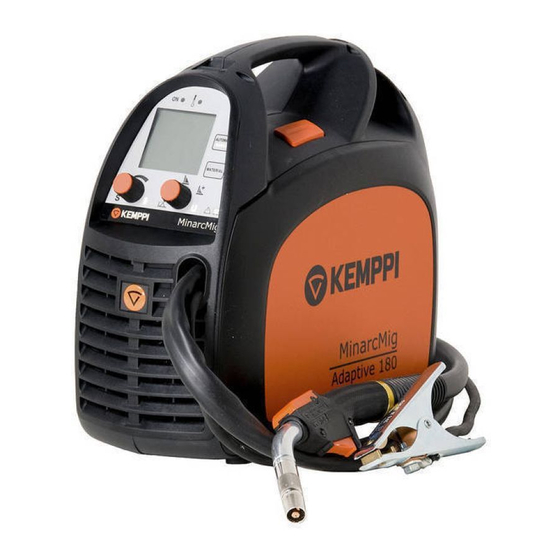
MinarcMig™ 180
Advertisement
Table of Contents

Subscribe to Our Youtube Channel
Related Manuals for Kemppi MinarcMig 180


Summary of Contents for Kemppi MinarcMig 180
- Page 1 191017210 Käyttöohje • Suomi 0640 Bruksanvisning • Svenska Bruksanvisning • Norsk Bruksanvisning • Dansk Operation instructions • English Gebrauchsanweisung • Deutsch Gebruiksaanwijzing • Nederlands Manuel d’utilisation • Français Manual de instrucciones • Español Instrukcja obsługi • Polski Инструкции по эксплуатации • По-русски MinarcMig™...
- Page 3 MinarcMig™ Adaptive 180 OperatiOn instructiOns english © Kemppi Oy 0640...
-
Page 4: Table Of Contents
4.1. DAILY MAINTENANCE ............. 18 4.2. MAINTENANCE OF THE WIRE FEED MECHANISM ....18 4.3. MACHINE DISPOSAL ............... 20 4.4. ORDERING NUMBERS ............. 21 5. trOuBleshOOting ............22 6. technical Data .............23 7. terMs OF guarantee ..........24 © Kemppi Oy 0640... -
Page 5: Introduction
Shielding gas must be used during welding in order to prevent air from mixing with the weld pool. Pure carbon dioxide or a mixture of argon and carbon dioxide is suitable for steel wire shielding gas. Argon + 2 % CO ² mixture is © Kemppi Oy 0640... -
Page 6: Safety Instructions
Welding is always classified as hot work, so pay attention to fire safety regulations. Protect the environment from welding spatters. Remove inflammable material, such as burning fluids, from the vicinity of the welding site and supply the site with adequate fire-fighting equipment. © Kemppi Oy 0640... -
Page 7: Supply Voltage
2.6. WelDing FuMes Make sure ventilation is sufficient. Take special precautions when welding metals containing lead, cadmium, zinc, mercury or beryllium. Supply of sufficient clean air can also be ensured with the use of a fresh air mask. © Kemppi Oy 0640... -
Page 8: Machine Use
-20°C – +40°C. Place the machine in such a way that it does not come in contact with hot surfaces, sparks and spatters. Make sure the air flow in the machine is unrestricted. © Kemppi Oy 0640... -
Page 9: General View Of The Machine
The earthing cable is already connected to the machine. Clean the workpiece surface and fix the earthing cable clamp to the piece in order to create a closed and interference-free circuit needed for welding. © Kemppi Oy 0640... -
Page 10: Welding Gun
The machine is delivered with a 4.5 m long shielding gas hose. Connect the bayonet socket of the shielding gas hose to the machine’s hose connector and the hose connector end to the gas bottle’s control valve. © Kemppi Oy 0640... - Page 11 8-15 l/min. 3. Close the bottle’s valve after use. NOTE! Use a shielding gas suitable for the material’s welding. Fix the gas bottle securely in an upright position before installing the control valve. © Kemppi Oy 0640...
-
Page 12: Filler Wire
6. Pull the feed roll from its shaft. 7. Turn the feed roll and reinstall it to its shaft all the way to the bottom making sure that the screw is on the shaft’s level. 8. Tighten the feed roll locking screw. © Kemppi Oy 0640... -
Page 13: Threading The Filler Wire
If the pressure is too high, it removes metal fragments from the wire surface and may damage the wire. On the other hand, if the pressure is too low, the feed gear slips and the wire does not run smoothly. © Kemppi Oy 0640... -
Page 14: Reversing Polarity
5. Install the washers in place and close the tightening nuts to spanner tightness. 6. Put the rubber cover of the earthing cable’s pole firmly in place. The rubber cover must always protect the earthing cable’s pole. © Kemppi Oy 0640... -
Page 15: Controls And Indicator Lights
Indicator lights display the machine’s standby mode and inform of a possible overheating. © Kemppi Oy 0640... -
Page 16: Display In Automatic Mode
The selected operating mode and material are shown on the display. The display also shows a recommendation as to what shielding gas and wire diameter should be used with the material in question. © Kemppi Oy 0640... -
Page 17: Welding Power Adjustment In Automatic Mode
The trimmer is preset at 0 which is, in most cases, a suitable basic setting. If the weld is too convex, the arc is too short or cold. Then adjust the arc longer or hotter by turning the control clockwise. © Kemppi Oy 0640... -
Page 18: Display In Manual Mode
Welding current is visible on the display only during welding. Values for actual welding voltage and welding current remain on the display after welding until welding is restarted or settings are changed. © Kemppi Oy 0640... -
Page 19: Adjustments In Manual Mode
Figure 3.9. Threading the shoulder strap in place The machine is delivered with a shoulder strap which helps carrying the machine. Thread the shoulder strap in place according to the picture. NOTE! The machine should not be hung up from the shoulder strap. © Kemppi Oy 0640... -
Page 20: Service
• Remove welding spatters from the welding gun’s tip and check the condition of the parts. Change damaged parts to new ones immediately. Only use original Kemppi spare parts. • Check that the insulating tips of the welding gun’s neck are undamaged and in place. - Page 21 5. Tighten the wire guide in place with the mounting nut. 6. Cut the wire guide 2 mm from the mounting nut and file the sharp edges of the cut round. 7. Reattach the gun in place and tighten the parts to spanner tightness. © Kemppi Oy 0640...
-
Page 22: Machine Disposal
As the owner of the equipment, you should get information on approved collection systems from our local representative. By applying this European Directive you will improve the environment and human health. © Kemppi Oy 0640... -
Page 23: Ordering Numbers
9876635 Contact tip M6 ø 0,9 mm 9876633 Contact tip M6 ø 1,0 mm 9876636 Contact tip adapter 9580173 Neck insulating ring 9591079 Wire guide 0,6-1,0 mm (Fe) 4307650 Wire guide 0,6-1,0 mm (Ss, Al) 4307660 © Kemppi Oy 0640... -
Page 24: Troubleshooting
• Machine’s volume-capacity ratio has been exceeded; wait for the indicator light to switch off • The supply voltage is too low or too high If the machine’s malfunction can not be corrected with these measures, contact the KEMPPI maintenance service. © Kemppi Oy 0640... -
Page 25: Technical Data
Temperature class H (180°C) / F (155°C) Dimensions L 400 x W 180 x H 340 mm Weight (incl. gun and cables 3,0 kg) 9,8 kg Operating temperature range -20°C...+40°C Storage temperature range -40°C...+60°C Protection class IP23C © Kemppi Oy 0640... -
Page 26: Terms Of Guarantee
MinarcMig™ Adaptive 180 7. terMs OF guarantee Kemppi Oy provides a guarantee for products manufactured and sold by them if defects in manufacture and materials occur. Guarantee repairs must be carried out only by an Authorised Kemppi Service Agent. Packing, freight and insurance costs to be paid by orderer. - Page 27 Telefax (03) 899 428 Telefax 44 941 536 Telefax (06033) 72 528 www.kemppi.com e-mail: sales.dk@kemppi.com e-mail: sales.de@kemppi.com KEMPPI BENELUX B.V. KEMPPI SP. z o.o. KEMPPIKONEET OY Postbus 5603 UI. Piłsudskiego 2 PL 13 NL – 4801 EA BREDA 05-091 ZABKI FIN –...
Need help?
Do you have a question about the MinarcMig 180 and is the answer not in the manual?
Questions and answers