
Related Manuals for BNF UMX Habu S DF180


Summary of Contents for BNF UMX Habu S DF180
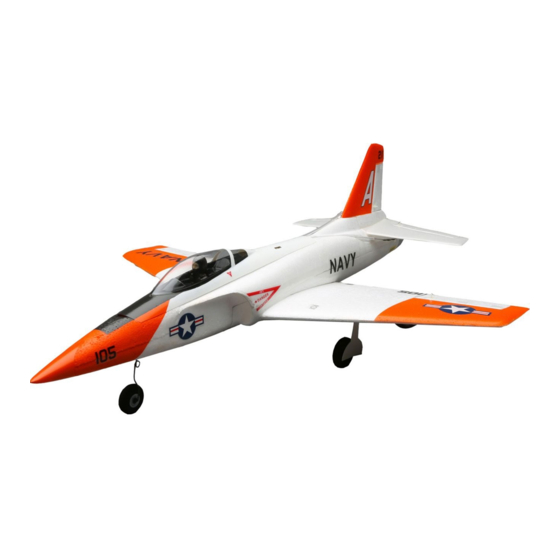
- Page 1 ™ Habu S DF180 Instruction Manual Bedienungsanleitung Manuel d’utilisation Manuale di Istruzioni...
-
Page 2: Safety Precautions And Warnings
NOTICE All instructions, warranties and other collateral documents are subject to change at the sole discretion of Horizon Hobby, LLC. For up-to-date product literature, visit www.horizonhobby.com and click on the support tab for this product. Meaning of Special Language: The following terms are used throughout the product literature to indicate various levels of potential harm when operating this product: NOTICE: Procedures, which if not properly followed, create a possibility of physical property damage AND little or no possibility of injury. -
Page 3: Table Of Contents
Table of Contents ™ SAFE Transmitter Setup ........4 Factory Control Horn Settings......12 ™ SAFE Technology Flight Modes ......5 Landing Gear Removal ........12 Charger Warnings ..........6 Post Flight Checklist ...........12 Battery Charging ...........6 Troubleshooting Guide ........13 Transmitter and Receiver Binding ......7 Troubleshooting Guide (Continued) ......14 ESC/Receiver Arming, Battery Installation and Limited Warranty ..........14... -
Page 4: Safe ™ Transmitter Setup
™ SAFE Transmitter Setup Your DSM2/DSMX transmitter will need to be confi gured using the provide transmitter setup chart in order ™ to experience all the features and benefi ts of the receiver with SAFE in this aircraft. Quick Overview •... -
Page 5: Safe ™ Technology Flight Modes
™ SAFE Technology Flight Modes Flight Mode The installed receiver has been programmed ™ SAFE Flight Modes Switch for operation in only this aircraft, providing the following selectable fl ight modes. Beginner Mode Beginner Mode: Pitch (nose up and down) and Roll (wing Pitch Roll tips up and down) angles are limited to... -
Page 6: Charger Warnings
Charger Warnings The battery charger (EFLUC1007) included with • Always inspect the battery before charging. your aircraft has been designed to safely charge the • Always disconnect the battery after charging, and Li-Po battery. let the charger cool between charges. •... -
Page 7: Transmitter And Receiver Binding
Transmitter and Receiver Binding For a list of compatible DSM2/DSMX transmitters, please visit www.bindnfl y.com Binding Procedure ® CAUTION: When using a Futaba transmitter with a Spektrum DSM module, you must reverse the throttle channel and rebind. Refer to your Spektrum module manual for binding and failsafe instructions. Refer to your Futaba transmitter manual for instructions on reversing the throttle channel. -
Page 8: Esc/Receiver Arming, Battery Installation And Center Of Gravity
ESC/Receiver Arming, Battery Installation and Center of Gravity NOTICE: Always keep material or debris away from the intake. When armed, the rotor will turn in response to throttle movement and could ingest in any loose objects. Arming the ESC/receiver also occurs after binding as previously described, but subsequent connection of a fl... -
Page 9: Control Centering
Control Centering Before the fi rst fl ights, or in the event of an accident, make sure control surfaces are centered when the transmitter controls and trims are neutral. The transmitter sub-trim must be set to zero. Adjust the linkages mechanically if the control surfaces are not centered. -
Page 10: Dual Rates And Expos
Dual Rates and Expos To obtain the best fl ight performance, we recommend using a DSM2/DSMX radio capable of Dual Rates Expos Dual Rates and Expo. The suggested settings shown High High here are the recommended starting settings. Adjust according to the individual preferences after the Aileron 100% initial fl... -
Page 11: Flying Tips And Repairs
Flying Tips and Repairs Range Check your Radio System During fl are, keep the wings level and the airplane pointed into the wind. Gently lower the throttle while After fi nal assembly, range check the radio system pulling back on the elevator to bring the aircraft with the aircraft. -
Page 12: Factory Control Horn Settings
Factory Control Horn Settings The illustration shows linkage positions chosen for the most balanced aerobatic response. Linkage Aileron Elevator Rudder connections on the control horns directly affect aircraft response. Landing Gear Removal If desired, remove the landing gear for belly landing the aircraft in a soft landing area. -
Page 13: Troubleshooting Guide
Troubleshooting Guide SAFE Technology Problem Possible Cause Solution Control surfaces not at Control surfaces may not have been Center control surfaces mechanically by neutral position when mechanically centered from factory adjusting the U-bends on control linkages transmitter controls are Aircraft was moved after the fl ight battery Keep the Aircraft upright and immobile for 5 at neutral was connected and before sensors... -
Page 14: Troubleshooting Guide (Continued)
Troubleshooting Guide (Continued) Problem Possible Cause Solution LED on receiver fl ashes Less than a 5-second wait between fi rst Leaving transmitter on, disconnect and rapidly and aircraft will powering on transmitter and connecting reconnect fl ight battery to aircraft not respond to transmit- fl... - Page 15 of purchase is required for all warranty claims. until it arrives and is accepted at our facility. An SERVICE OR REPLACEMENT AS PROVIDED UNDER Online Service Request is available at http://www. THIS WARRANTY IS THE PURCHASER’S SOLE AND horizonhobby.com/content/_service-center_render- EXCLUSIVE REMEDY. service-center.
-
Page 16: Warranty And Service Contact Information
(in accordance with ISO/IEC 17050-1) users in the European Union No. HH2014092001 This product must not be disposed Product(s): UMX Habu S DF180m BNF of with other waste. Instead, it is the Item Number(s): EFLU4380 Equipment class: 1 user’s responsibility to dispose of their... -
Page 17: Replacement Part
Descrizione Numéro • Codice Pushrod Linkage E-fl ite UMX Habu Set de tringleries: Set barrette comandi: EFLU4446 Set: UMX Habu BNF BNF Basic: Gestänge UMX Habu BNF Basic UMX Habu BNF Basic Basic / Anlenkungen Landing Gear Set: E-fl ite UMX Habu S: Train d’atterrissage:... -
Page 18: Optional Parts And Accessories
– Optional Parts and Accessories – – Optionale Bauteile und Zubehörteile – – Pièces optionnelles et accessoires – – Pezzi opzionali e accessori – Part # • Nummer Description Beschreibung Description Descrizione Numéro • Codice Hook and Loop Set Klettband (5): Ultra Bande auto- Set fascette fi... - Page 19 © 2014 Horizon Hobby, LLC. E-fl ite, SAFE and the SAFE Logo, AS3X, Delta-V, Blade, Celectra, UMX, DSM, DSM2, DSMX, ModelMatch, Bind-N-Fly, the Bind-N-Fly logo and the Horizon Hobby logo are trademarks or registered trademarks of Horizon Hobby, LLC. The Spektrum trademark is used with permission of Bachmann Industries, Inc. Futaba is a registered trademark of Futaba Denshi Kogyo Kabushiki Kaisha Corporation of Japan.
Need help?
Do you have a question about the UMX Habu S DF180 and is the answer not in the manual?
Questions and answers