
Related Manuals for BNF BLADE 450 X


Summary of Contents for BNF BLADE 450 X
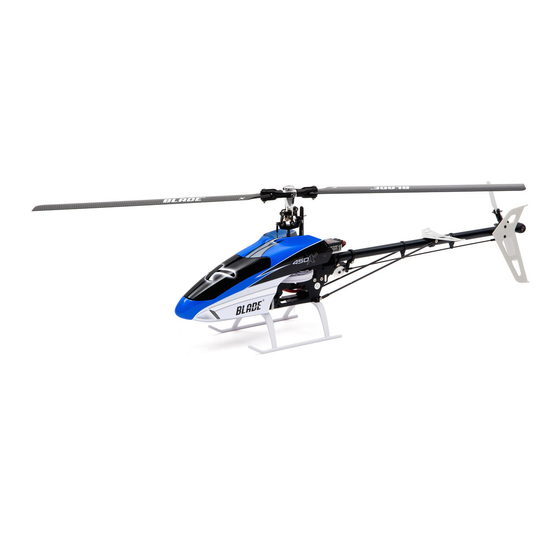
- Page 1 450 X Instruction Manual Bedienungsanleitung Manuel d’utilisation Manuale di Istruzioni ®...
-
Page 2: Additional Safety Precautions And Warnings
NOTICE All instructions, warranties and other collateral documents are subject to change at the sole discretion of Horizon Hobby, Inc. For up-to-date product literature, visit horizonhobby.com and click on the support tab for this product. Meaning of Special Language The following terms are used throughout the product literature to indicate various levels of potential harm when operating this product: NOTICE: Procedures, which if not properly followed, create a possibility of physical property damage AND a little or no possibility of injury. CAUTION: Procedures, which if not properly followed, create the probability of physical property damage AND a possibility of serious injury. -
Page 3: Table Of Contents
Throttle Hold ....................10 25.3 oz (717 g) Flying Weight Installing the Flight Battery ................. 10 Control Tests ....................11 Components Flying the Blade 450 X ................12 440H Brushless outrunner, 4200Kv (installed) Motor AR7200BX Parameter Menu Tips ..............13 Post-Flight Inspections and Maintenance ............ 13 35-amp brushless (installed) AR7200BX Default Blade 450 X Setup ............ -
Page 4: Charging The Flight Battery
Charging the Flight Battery DC Li-Po Balancing Charger Features The Blade 450 X comes with a DC balancing charger and 3S Li-Po battery. Use only Horizon Hobby approved battery packs and chargers compatible with this • Charges 3-cell lithium polymer battery packs product. Never leave the battery and charger unattended during the charge • 1.8A charge rate process. Failure to follow the instructions properly could result in a fire. When charging, make certain the battery is on a heat-resistant surface. Charge the • LED charge status indicator flight battery before binding the aircraft or performing control tests. • LED cell balance indicator • 12V alligator clip input cord Specifications... -
Page 5: Transmitter Setup
Transmitter Setup Program your transmitter before attempting to bind or fly the helicopter. Transmitter programming values are shown below for the Spektrum DX6i, DX7/ DX7se, DX7s and DX8. The Spektrum model files for AirWare™ transmitters are also available for download online in the Spektrum Community. NOTICE: When using a Futaba transmitter with a Spektrum DSM module, you must reverse the throttle channel. Spektrum DX6i SETUP LIST ADJUST LIST Model Type Reverse Swash Type Timer Expo TRAVEL ADJUST SUB-TRIM* THRO HELI THRO—N 1 Servo 90 Degree Type—Down THRO 100% AILE 0 100% AILE—N Time—4:00... - Page 6 Transmitter Setup Spektrum DX7s SYSTEM LIST Model Type Swash Type Switch Select F Mode Setup Warnings Frame Rate 1 Servo All Switches Flight Mode — F Throttle —Over Helicopter 11ms Normal Mode Stunt 1 DSMX Hold — Hold —Active Hold —Active Alarm —Tone/Vibe FUNCTION LIST SERVO SETUP D/R AND EXPO TRAVEL SUB TRIM*...
- Page 7 Transmitter Setup Spektrum DX8 SYSTEM LIST Model Type Swash Type Switch Select F Mode Setup Trim Step Warnings Frame Rate Helicopter 1 Servo Normal All Switches INH Flight Mode — F Mode THR 5 Throttle —Over 10 11ms Hold — Hold AIL** 0 Stunt 1—Act DSMX ELE** 0 Stunt 2—Act RUD** 0 Hold—Act R TRIM 0...
-
Page 8: Transmitter And Receiver Binding
Transmitter and Receiver Binding Binding is the process of programming the receiver to recognize the GUID (Globally Unique Identifier) code of a single specific transmitter. You need to ‘bind’ your chosen Spektrum™ DSM2™/DSMX® technology equipped aircraft transmitter to the receiver for proper operation. Binding Procedure 1. Program your transmitter using the Transmitter Setup found in this manual. Insert the bind plug in the BND/DAT port on the receiver. 3. Connect the flight battery to the ESC. The H menu LED should be flashing, indicating the AR7200BX is in bind mode. Move the throttle stick to the desired failsafe position (low throttle position in normal mode). Follow the procedures of your specific transmitter to enter Bind Mode. The system will connect within a few seconds. Once connected, the H LED will turn off and the AR7200BX will start the initialization process. 6. When the initialization process is complete, menu LED H will turn OFF and the Status LED light will come ON solid BLUE. 7. Disconnect the flight battery and remove the bind plug from the AR7200BX. Store the bind plug in a convenient place. WARNING: You must move the throttle to the LOW/OFF position during binding. Failure to do so may cause the rotor blades to spin and the helicopter to lift during the AR7200BX initialization, which could result in damage to property and injury. NOTICE: Remove the bind plug to prevent the system from entering bind mode the next time the power is turned on. -
Page 9: Control Tests
Control Tests Rudder and Cyclic Gyro Test Rudder 5. Release the rudder control. Manually turn the helicopter nose to the left. 1. Power on the transmitter. The tail rotor blades automatically 2. Turn TH HOLD ON and put transmitter in normal mode. move as shown. If they do not move 3. Connect the helicopter battery to the ESC as shown, refer to the AR7200BX NOTICE: Do not allow the helicopter to move until the Status LED is solid... -
Page 10: Flying The Blade 450 X
The helicopter may go up or down when you change between modes due to takeoff or the helicopter may crash during takeoff. the difference in the throttle and pitch curves. WARNING: Do not use wooden main blades with the Blade 450 X or Flying injury and/or property damage could occur. Only use Blade 450 X ap- proved carbon fiber main blades. -
Page 11: Ar7200Bx Parameter Menu Tips
Gyro Gain Adjustment • If the tail wags or oscillates, lower the gain on the gyro. • If the tail is drifting while hovering, increase the gain on the gyro. On your transmitter’s gyro menu, decrease the gyro gain values a small On your transmitter, increase the gyro gain values a small amount at a time amount at a time until the helicopter is stable within a particular flight until the tail starts to wag/oscillate. -
Page 12: Ar7200Bx Default Blade 450 X Setup
If you update the firmware on the AR7200BX to non-Blade 450 X firmware: All Blade 450 X helicopter default settings will be deleted. You will need to complete the entire AR7200BX setup process before flying the helicopter again. Please refer to the Spektrum AR7200BX instruction manual included... -
Page 13: Blade Helicopter Belt Tension
The helicopter tail stops too abruptly Decrease Dial 3 on the AR7200BX Increase Dial 3 on the AR7200BX Increase the rudder gain in your transmitter The helicopter tail does not stop precisely Adjust the rudder heading lock gain parameter in the AR7200BX Make sure the tail drive belt tension is adjusted correctly Blade 450 X Troubleshooting Guide Problem Possible Cause Solution Low flight battery or transmitter battery voltage Fully charge or replace the flight battery and/or transmitter batteries AR7200BX is not in bind mode... -
Page 14: Limited Warranty
Blade 450 X Troubleshooting Guide, continued Problem Possible Cause Solution Input voltage to the charger is too low Input voltage must be between 11.5–15V DC with a minimum 3A current The battery balance tab is damaged Make sure the balance tab wires are fully seated in the balance plug Flight battery will not charge If any cell voltage drops below 3V, the battery is damaged and must be re- The flight battery is overdischarged placed. Make sure the rudder control and the rudder sensor are operating in the cor- Rudder control and/or sensor direction reversed rect direction The helicopter tail spins out of... -
Page 15: Warranty And Service Contact Information
Union No. HH2011111301 This product must not be disposed of with other waste. Instead, it is the user’s responsibility to dispose of their waste equipment by Product(s): Blade 450 X BNF handing it over to a designated collections point for the recy- Item Number(s): BLH4380 cling of waste electrical and electronic equipment. The separate Equipment class:... -
Page 16: Parts List
Parts List / Ersatzteile / Pièces de rechange / Pezzi di ricambio Part # English Deutsch Français Italiano Flybarless-Anlenkgestänge-Set: BLH4301 Flybarless Linkage Set: B450 X Set de tringleries Flybarless : B450 X Set giunti senza flybar: B450 X B450 X Main Rotor Blade Grip FBL Control FBL Hauptrotorblatthalterung- Rotules de commande de pieds de pales Sfere di controllo FBL stringi pale del BLH4303 Balls (2): B450 X Steuerungskugelköpfe (2) B450 X principales FBL (2) : B450 X rotore principale (2): B450 X CF FBL Main Blade Set 325mm with CF FBL Hauptblatt-Set 325 mm, Set de pales principales 325 mm CF FBL Set pale principali CF FBL 325 mm con BLH4315 washers: B450 X mit Unterlagsscheibe B450 X avec rondelles : B450 X rondelle: B450 X Flybarless-Hauptrotor-Halterungs-... - Page 17 Parts List / Ersatzteile / Pièces de rechange / Pezzi di ricambio Part # English Deutsch Français Italiano 5 x 10 x 4 Bearings Main Shaft (2): 5 x 10 x 4 Lager Hauptwelle (2): Roulements 5x10x4 d'axe principal (2) : 5 x 10 x 4 cuscinetti albero principale (2): BLH1642 B450 3D/X, B400 B450 3D/X, B400 B450 3D/X, B400 B450 3D/X, B400 Aluminum Motor Mount Set: B450 Aluminium-Motorbefestigungs- Set de fixations moteur en Set montante del motore in allumino: BLH1643 3D/X, B400 Set: B450 3D/X, B400...
-
Page 18: Optional Parts
Parts List / Ersatzteile / Pièces de rechange / Pezzi di ricambio Part # English Deutsch Français Italiano Canopy-Befestigungselemente Staffe di montaggio calottina (2): B450 BLH1679 Canopy Mounts (2): B450 3D/X Fixations de bulle (2) : B450 3D/X (2): B450 3D/X 3D/X SPMAR Spektrum AR7200BX Spektrum AR7200BX Spektrum AR7200BX Spektrum AR7200BX 7200BX 7.6-Gram Sub-Micro Digital Servo 7,6-Gramm-Sub-Micro- Servo numérique Sub Micro 7.6 g (ELE/ 7,6 grammi servo digitale Sub-Micro EFLRDS76 (ELE/AIL/PIT) Digitalservo (NICK/ROLL/PITCH) AIL/PIT) (ELE/AIL/PIT) 7,6-Gramm-Sub-Micro- 7,6 grammi servo digitale Sub-Micro EFLRDS76T... - Page 19 Optional Parts / Optionale Bauteile / Pièces optionnelles / Pezzi opzionali Part # English Deutsch Français Italiano Puleggia trasmissione in Tail Rotor Shaft Aluminum Drive Pulley: Welle und Antriebsscheibe Heckrotor, Axe d'anticouple et poulie aluminium : B450 BLH1665A alluminio dell'albero del rotore di B450 3D/X Aluminium (2): B450 3D/X 3D/X coda: B450 3D/X Aluminum Tail Rotor Pitch Lever Set: Aluminium-Heckrotor-Pitchhebel-Set: Levier de pas d'anticouple Set leva del pitch del rotore di BLH1667A B450 3D/X B450 3D/X...
- Page 26 ©2011 Horizon Hobby, Inc. Blade, DSM, DSM2, ModelMatch, AirWare and EC3 are trademarks or registered trademarks of Horizon Hobby, Inc. DSMX is a trademark of Horizon Hobby, Inc., registered in the U.S. The Spektrum trademark is used with permission of Bachmann Industries, Inc. BeastX is a trademark of Markus Schaack and is used with permission.The Spektrum AR7200BX employs technology exclusively licensed to Horizon Hobby, Inc. from freakware GmbH. Futaba is a registered trademark of Futaba Denshi Kogyo Kabushiki Kaisha Corporation of Japan US patent number 7,391,320. Other patents pending. Created 10/11 32111 BLH4380...
Need help?
Do you have a question about the BLADE 450 X and is the answer not in the manual?
Questions and answers