
Related Manuals for Thermal Zone 9A45YIMI


Summary of Contents for Thermal Zone 9A45YIMI
-
Page 1: Air Conditioning
OPERATING INSTRUCTIONS FOR MINI-SPLIT UNITS AIR CONDITIONING HEAT PUMP MODELS 9A45YIMI 9H45YIMI 12A45YIMI 12H45YIMI 12A45ZIMI 12H45ZIMI 18A45ZIMI 18H45ZIMI 24A45ZIMI 24H45ZIMI 950-0212revA November13, 2013... -
Page 2: Table Of Contents
TABLE OF CONTENTS USER INSTRUCTIONS……..……………………………………...……………..…………….……………1 PARTS IDENTIFICATION…….………..…………..………………………………...………………………2 DISPLAY PANEL..............…….……………………...…………………...….3 OPERATING TEMPERATURE......…………………………………………….……………………4 EMERGENCY OPERATION......……………………………………………………………………4 AIRFLOW DIRECTION CONTROL....………………………………………………………..……………5 CARE AND MAINTENANCE..…………………………………………………………..…………………6 USING THE REMOTE CONTROL………....……………………………………………..…………………7 REMOTE CONTROL OPERATION…......……………………………………………….……………….8 LCD INDICATORS......………………………………………………………...…………..9 USE OF THE REMOTE CONTROL........………………………………………….…..10 DRY (DEHUMIDIFYING)....…………………………………..………………………………..……10 SWING OPERATION.......………………………………………..……………………………………10 AUTO OPERATION.......………………………………………..……………………………………11 COOLING/HEATING/FAN OPERATION…..……………………………..……………………………………11 TIMER OPERATION.......………………………………………..……………………………………12 ECONOMY OPERATION..……....…………………………..……………………………………13 DEFROST..............…….……………………...…………………...…..14... -
Page 3: User Instructions
USER INSTRUCTIONS AND INFORMATION In this manual, you will find safety information for operating your new unit. For your safety and the safety of others, please read and understand all cautions located throughout this manual. Retain this manual for future reference. WARNINGS AND CAUTIONS Please read the instruction manual prior to use to ensure proper operation of your unit. -
Page 4: Parts Identification
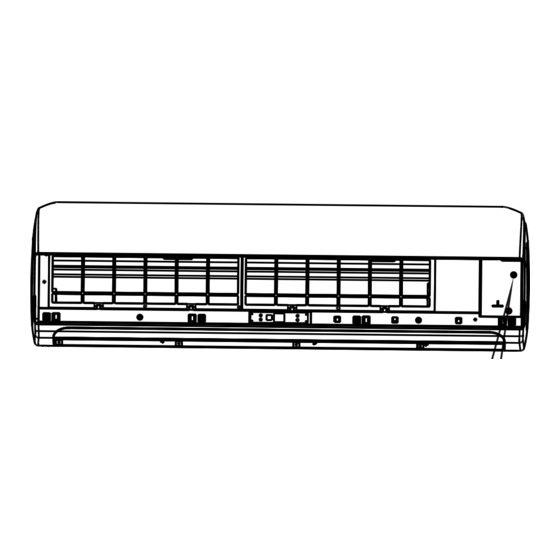
PARTS IDENTIFICATION Indoor unit Indoor unit 1. Front panel 2. Air inlet 3. Air filter (under cover) 4. Air outlet 5. Horizontal air flow grille 6. Vertical air flow louver 7. Display panel 8. Remote control Outdoor unit 9. Connecting pipe, drain hose 10. -
Page 5: Display Panel
DISPLAY PANEL Indicator Lights on Display panel defrost (LED) Indicator illuminates when unit starts automatic defrost or when warm air control feature is Temperature activated in heat mode. Set Point IR Receiver defrost run timer run (LED) Indicator illuminates when unit is running. timer (LED) The indicator illuminates when TIMER is activated. -
Page 6: Operating Temperature
OPERATING TEMPERATURE Mode Heating operation Cooling operation Drying operation Temperature 62 °F ~ 86 °F 32 °F ~ 86 °F 50 °F ~ 86 °F Selectable temperature Outdoor temperature 5 °F ~ 122 °F 5 °F ~ 86 °F 32 °F ~ 122 °F CAUTION: 1. -
Page 7: Airflow Direction Control
AIRFLOW DIRECTION CONTROL - Adjust the horizontal louver using the remote control. - Adjust the vertical louver manually. Setting the air flow direction (Up-Down) Perform this function while the unit is in operation. Use the remote controller to adjust the air flow direction. The horizontal louver can be moved at an angle of 6°... -
Page 8: Care And Maintenance
CARE AND MAINTENANCE Beginning of Season: PRIOR TO OPERATION - Carefully inspect both indoor and outdoor unit for blockages of the inlet and outlet exhaust vents. - Inspect ground connection. Ensure that ground wire is properly connected. - Inspect Air Filters and clean if necessary. - Install new batteries in the remote control unit (2 ea. -
Page 9: Using The Remote Control
USING THE REMOTE CONTROL The remote control can be used from a distance up to 25 feet from the indoor unit. When pressing a button on the remote, confirmation the command sent has been received is when the unit beeps. 25 ft. -
Page 10: Remote Control Operation
REMOTE CONTROL OPERATION 1) TEMP UP Button Press this button to increase indoor temperature. Increments 1°F each press. 2) TEMP DOWN Button Press this button to increase indoor temperature. Decrements 1°F each press. 3) MODE Button HEAT PUMP Each time the button is pressed, the operation °... -
Page 11: Lcd Indicators
LCD INDICATORS MODE DISPLAY Displays the current selected mode. Including AUTO, COOL, DRY, FAN, and HEAT (heat pump models). COMMUNICATION INDICATOR This indicator will illuminate and an audible beep heard when the remote control transmits a signal to the indoor unit. TEMP./TIMER DISPLAY The temperature setting (62 °F to 86 °F) or timer setting (0-24h) will be displayed. -
Page 12: Use Of The Remote Control
USE OF THE REMOTE CONTROL DRY (DEHUMIDIFYING) SET TEMPERATURE(°F) 1) Press the MODE button to select the DRY mode. AUTO 2) Press the TEMP (▲▼) to adjust the temperature setting. COOL HIGH The temperature can be set to 62 °F ~ 86 °F in 1°F increments. HEAT 3) Press the ON/OFF button to start the unit. -
Page 13: Auto Operation
USE OF THE REMOTE CONTROL AUTO OPERATION SET TEMPERATURE(°F) The AUTO indicator in the display panel of the indoor unit will illuminate if AUTO mode is selected. AUTO COOL HIGH 1) Press the MODE button to select AUTO. 2) Press the TEMP (▲▼) to adjust the temperature setting. HEAT The temperature can be set to 62 °F ~ 86 °F in 1°F increments. -
Page 14: Timer Operation
USE OF THE REMOTE CONTROL TIMER OPERATION SET TEMPERATURE(°F) Press TIMER ON button. The remote control shows TIMER ON, the last Auto-On time setting and the icon "h" (hours) is shown on AUTO COOL HIGH the display. Each press w ill increase the time setting by 30 minutes up t o 10 hours, then 1 hour increments up to 24 h ours. -
Page 15: Economy Operation
COMBINING TIMERS (Setting both ON and OFF timers simultaneously) TIMER OFF => TIMER ON (On => Stop => Start Operation) TIMER ON OFF This feature is useful when you want to stop the unit after you go to bed, and start it again in the morning when you wake up or when you return home. -
Page 16: Defrost
OPERATION TIPS The following events may occur during normal operation. 1. Compressor Protection The compressor will not restart for 3 to 4 minutes after it turns off. This prevents rapid cycling of the compressor. 2. Indoor Fan Operation The unit is designed not to reduce the possibility of blowing cold air in the HEAT mode during one of the three conditions and the set temperature has not been reached. -
Page 17: Troubleshooting Tips
TROUBLESHOOTING TIPS Stop the air conditioner immediately if one of the following faults occur. Disconnect the power and contact your qualified service technician. If the following code appears on the LED display, disconnect the power and contact a qualified service technican: E0, E1, E2, E3, E4, E5, EC, F1, F2, F3, F4, P0, P1, P2, and P4. Fuse blows or circuit breaker trips frequently - Contact a qualified service technician. -
Page 18: Warranty
WARRANTY International Refrigeration Products warrants the accompanying split air conditioner system to be free of defects in material and workmanship for the applications specified in the operation manual and installation manual for a period of (1) year on parts and five (5) years on the compressor, valid from date of original retail purchase in the United States or Canada.
Need help?
Do you have a question about the 9A45YIMI and is the answer not in the manual?
Questions and answers