
Related Manuals for Trianco CLASSIC 2KW


Summary of Contents for Trianco CLASSIC 2KW
-
Page 1: Servicing Instructions
CLASSIC 2, 6, 9, 11 & 12kW BOILER INSTALLATION, OPERATION AND SERVICING INSTRUCTIONS Please read these instructions carefully before installing and operating this appliance... -
Page 2: Table Of Contents
CONTENTS PAGE PAGE HEALTH AND SAFETY PRE INSTALLATION NOTES AFTER SALES INFORMATION INTRODUCTION USERS INSTRUCTIONS SIMPLE FAULT FINDING INSTALLATION INSTRUCTIONS Regulations Health and safety Siting the boiler Fixing to the wall Dimensional details Ventilation Water systems 11 - 12 11 - 12 Multiple boiler installation Wiring instructions 14 - 19... -
Page 3: Health And Safety
HEALTH AND SAFETY INFORMATION FOR THE INSTALLER AND SERVICE ENGINEERS Under the Consumer Protection Act 1987 and the Health and Safety at Work Act 1974, it is a requirement to provide information on substances hazardous to health (COSHH Regulations 1988). The Company takes every reasonable care to ensure that these products are designed and constructed to meet these general safety requirements, when properly used and installed. -
Page 4: Pre Installation Notes
IMPORTANT PRE-INSTALLATION NOTES Before installation, it is imperative that the following guidelines are heeded to ensure the trouble-free and efficient operation of the boiler: Ventilation and Siting When siting the boiler in a confined space it is essential that adequate ventilation be provided. This will ensure that air is allowed to circulate freely around the appliance keeping down the ambient temperatures. -
Page 5: After Sales Information
After Sales Service Information A qualified field service engineer is available to attend a Important: breakdown occurring during the boiler’s guarantee period. Invoices for attendance and repair work by any third party will not be accepted unless authorised in advance The boiler must be made available for attendance during by T R Engineering Ltd. -
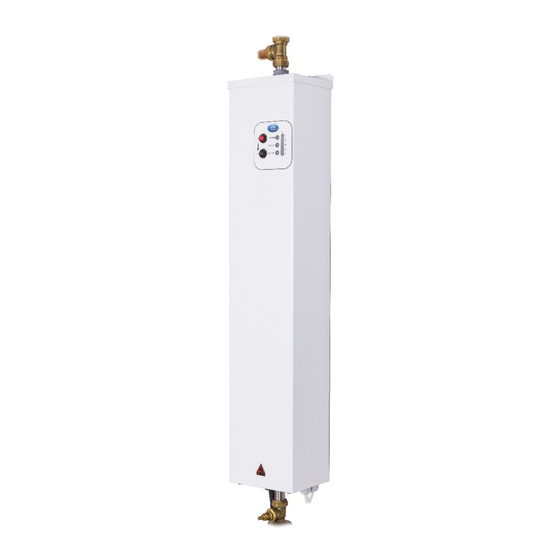
Page 6: Introduction
There are five boilers in the range with outputs ranging from 2kW (6825 Btu/hr) to 12kW (41,000 Btu/hr). The Trianco Aztec Wall Mounted Boiler has been designed to conform to European Directive/Standards. EN60335-1:1994/A16:2001, EN60335-2-35:1998/A1:2000, EN55014-1:2000, EN55014- 2:1997, EN61000-3-2:2000 and EN61000-3-3:1995. -
Page 7: Users Instructions
There are three LED indicator lights on the boiler fascia panel these are: The Trianco Aztec boiler has been designed and constructed to give years of trouble free service and LED 1 – GREEN – Power on to the boiler these instructions are provided to assist you in obtaining LED 2 –... -
Page 8: Simple Fault Finding
SIMPLE FAULT FINDING If the boiler fails to start for no apparent reason make Checks to see if all external controls i.e. programmer the following checks before calling your service or room thermostat are calling for heat. engineer. Resetting the Boiler If a fault has occurred and the red LED is illuminated but Is the green LED light illuminated? the pump continues to run, then switching the power off... -
Page 9: Installation Instructions
4. Installation Regulations Installation of the boiler must comply with the following British Standards and Regulations: BS 5449 – Forced Circulation Hot Water Central Heating Systems. BS 7074 – Part 1 – Code of Practice for Sealed Water Systems. The Building Regulations UNPACKING THE BOILER Part ‘L’... -
Page 10: Ventilation Requirements
VENTILATION REQUIREMENTS Removing four casing screws and washers will allow casing to be removed. If the appliance is to be fitted in a confined space or Slide top casing cap upwards this will allow front casing compartment with a potential ambient temperature of 60°C to slide forward. -
Page 11: Water System
WATER SYSTEM above an entrance or a window or any public access area, be clear of any electrical fittings and positioned so that any IMPORTANT: USE ONLY COMPRESSION FITTINGS WHEN discharge can be seen. CONNECTING THE BOILER TO THE CENTRAL HEATING Expansion Vessel Capacity SYSTEM A diaphragm type expansion vessel, conforming to the current... -
Page 12: Multiple Boiler Installation
Safety valve setting (bar gauge) 3 bar Vessel charge and initial system pressure (bar gauge) Total water content of system Vessel Volume Litre Litre Litre Litre 11.8 10.0 17.7 13.4 23.7 11.7 16.7 29.6 14.1 20.1 35.5 16.4 23.4 41.4 18.8 26.8 47.4... - Page 13 Auto Auto...
-
Page 14: Wiring Instructions
WIRING INSTRUCTIONS NOTE RCD UNIT can be used as the isolating switch if mounted close enough to the boiler. Miniature circuit breakers MCB MUST be fitted ALL ELECTRICAL WORK MUST BE CARRIED OUT IN ACCORDANCE WITH CURRENT WIRING between RCD unit and boiler and RCD and any external controls. - Page 15 IMPORTANT: When a 3-phase supply, a warning WIRING INSTRUCTIONS notice MUST be placed by the boiler to indicate a (CONTINUED) voltage in excess of 250V. 3 PHASE SUPPLY CONNECTIONS FOR 2 OR MORE BOILERS MAINS SUPPLY CABLES Connect each boiler to each phase. CONTROLS SIGNAL Wire as shown in wiring diagram.
- Page 19 ELEMENT 4 ELEMENT 3 ELEMENT 1...
-
Page 20: Service Instructions
5. SERVICING PARTS REPLACEMENT To ensure reliable operation of your Aztec electric boiler, Casing removal it is recommended that you have your boiler serviced IMPORTANT once a year. Isolate mains electrical supply to the boiler before carrying out any maintenance work. The person(s) who services or carries out any remedial work, i.e. -
Page 21: Element Replacement
HIGH LIMIT THERMOSTAT REPLACEMENT REPLACEMENT ELEMENT Ensure electrical supply is isolated to boiler. Isolate electrical supply to boiler. The high limit thermostat can be found fixed to Drain down system. top front face of boiler. Disconnect terminal connectors from high Remove 2 terminal connectors from high limit limit thermostat. -
Page 22: Fault Finding
FAULT FINDING Jumpers Are the jumpers set correctly. permanently illuminated Green LED indicates one of the following faults. If the green LED is illuminated but the boiler is not High limit thermostat has operated or faulty functioning, check that any external controls fitted are electrical connections calling for heat. - Page 23 NO HEAT – PERMANENT GREEN LIGHT IS THE PROGRAMMER TURNED ON I.E. CALL SIGNAL? CHECK ELECTRIC IS CALL WIRE LIVE I.E. LINE SYSTEM VOLTAGE? CHECK EXTERNAL CICIRCUIT CONTROLS ARE CALLING FOR HEAT IS THE HEAT EXCHANGER GETTING UP TO TEMPERATURE – AMBER ON OR FLASHING? CHANGE PCB OPEN...
- Page 24 FLASHING RED LIGHT ARE CABLES AND REPLACE CONNECTIONS CABLES IS THERE IS THERE POWER CONTINUITY TO ALL ACROSS THE ELEMENTS ELEMENTS ARE JUMPERS SET CORRECTLY DOES THE PUMP GIVE CORRECT FLOW CHANGE PCB REPLACE ELEMENT CHANGE PCB OR HEAT EXCHANGER...
- Page 25 PERMANENT RED LIGHT IS INCOMING POWER SUPPLY OK? DOES THE BOILER GO DOES THE BOILER FROM GREEN TO GO STRAIGHT TO AMBER THEN RED? RED LIGHT? HAS THE HIGH LIMIT STAT TRIPPED? RE-SET HIGH LIMIT STAT ARE THE LIMIT IS THE SYSTEM IS THE THERMISTER STAT PRESSURE...
- Page 26 NO GREEN LIGHT IS THERE POWER TO THE BOARD? HAS THE FUSE HAS THE RCD CHANGE FUSE RESET RCD BLOWN ON THE TRIPPED? AND CHECK PCB? PUMP IS THERE POWER TO LIVE CHANGE PCB AND NEUTRAL? CHECK SYSTEM WIRING...
-
Page 27: Spares List
24 25 13/14 22/23... - Page 28 ITEM DESCRIPTION 11kW 12kW Heat Exchanger Assembly 221881 221882 221883 221884 221880 PCB Assembly 211559 211559 211559 211559 211559 Element 222641 221802 221850 221850 221802 221850 Thermistor 221824 221824 221824 221824 221824 Tube Insulation 221863 221826 221843 221843 221843 Back Casing Assembly 221865 221830 221845...
- Page 30 S35 2PH United Kingdom Tel: 0114 2572300 Fax: 0114 2571419 E-mail: infor@trianco.co.uk Web: www.trianco.co.uk © TR Engineering Ltd Copyright in this brochure and the drawings and illustrations contained in it is vested in TR Engineering Ltd and neither the brochure or any part thereof may be reproduced without prior written consent.
Need help?
Do you have a question about the CLASSIC 2KW and is the answer not in the manual?
Questions and answers