Table of Contents
Advertisement
Advertisement
Table of Contents

Related Manuals for Miele CS 1234-1


Summary of Contents for Miele CS 1234-1
- Page 1 Operating and installation instructions Ceramic cooktops with induction To avoid the risk of accidents or damage to the appliance, it is essential to read these instructions before it is installed and used for the first time. en - AU, NZ M.-Nr.
-
Page 2: Table Of Contents
Contents Guide to the appliance ..........4 Warning and Safety instructions . - Page 3 Contents Appliance and building-in dimensions ....... 36 Preparing the worktop ..........37 Installation of several appliances.
-
Page 4: Guide To The Appliance
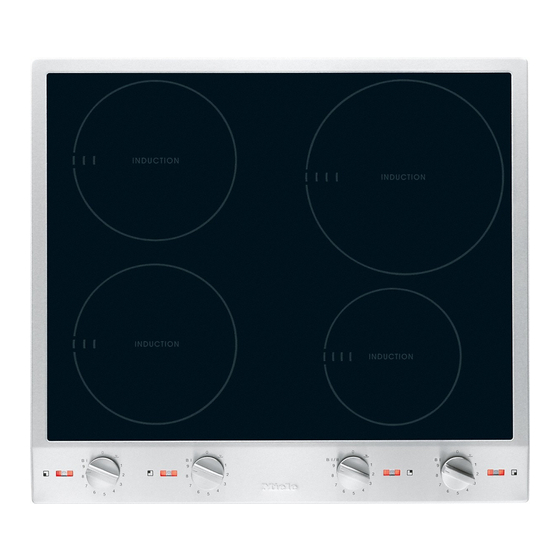
Guide to the appliance Cooktop abd Cooking zones with Single Cooking zone controls: Booster (BI) g Front right c Cooking zone with TwinBooster h Rear right (BI/II) i Rear left e Symbols to indicate which cooking j Front left zone the control is for f Indicators k Display Indicators... -
Page 5: Cooking Zone Data
Guide to the appliance Display ß = No pan on cooking zone or pan unsuitable = Auto heat-up = Booster I = Booster II (only for cooking zones with TwinBoosters) = System lock (see "Safety features") Cooking zone data Cooking zone Minimum to maximum Rating in watts C in cm*... -
Page 6: Warning And Safety Instructions
They contain important notes on Any other usage is at the owner's risk installation, safety, use and and could be dangerous. Miele cannot maintenance. be held liable for damage resulting from incorrect or improper use or Keep these instructions in a safe operation. - Page 7 Warning and Safety instructions Safety with children Technical safety Activate the system lock to ensure Before installation, check the that children cannot switch on the appliance for visible signs of damage. appliance inadvertently. Do not install and use a damaged appliance.
- Page 8 (e.g. danger of Repairs and other work by unqualified overheating). persons could be dangerous. Miele This appliance is not intended to be cannot be held liable for unauthorised operated by means of an external timer work.
- Page 9 Warning and Safety instructions Correct use For added protection, it is advisable to use heat-resistant pot holders or For people fitted with a heart gloves when using the appliance. Do pacemaker: not let them get damp or wet, as this Please note that the area immediately causes heat to transfer through the surrounding the cooktop is...
- Page 10 Never heat an empty pan unless the allow the appliance to cool down, and manufacturer of the pan expressly then clean with the Original Miele states that you can do so. Because ceramic and stainless steel cooktop induction heating works extremely cleaner.
- Page 11 Metal utensils stored in a drawer under the cooktop can become hot if Miele cannot be held liable for the induction cooktop is used damage caused by non-compliance intensively for a long time.
-
Page 12: Caring For The Environment
Caring for the environment Disposal of the packing Disposal of your old appliance material or machine The transport and protective packing Electrical and electronic appliances / has been selected from materials which machines often contain materials are environmentally friendly for disposal which, if handled or disposed of and can normally be recycled. -
Page 13: Before Using For The First Time
Before using for the first time Before using for the first time Please stick the extra data plate for the appliance supplied with this When the induction cooktop is first documentation in the space provided in connected, and after a power cut, all of the "After sales service"... -
Page 14: Induction
Induction The induction principle If no pan or an unsuitable pan is placed on the cooking zone, the cooking zone An induction coil is located under each will switch off automatically after 3 cooking zone. When a cooking zone is minutes. -
Page 15: Noises
Induction Noises The appliance has a cooling fan to help extend the life of the electronics. When When using an induction cooking zone, the cooktop is being used intensively, the following noises can occur in the this will come on and you will hear a pan, depending on what it is made of whirring sound. -
Page 16: Pans
Induction Pans Pan size Please be aware that the properties of Type of pans the pan base can affect the eveness Suitable pans include: with which food heats up in the pan. – stainless steel pans with a magnetic To make optimum use of the cooking base zones, choose pans with diameters larger than the innermost markings but... -
Page 17: Operation
Operation Switching on and off Residual heat indicator Each cooking zone is switched on by The residual heat indicator remains on turning the control clockwise a to the until the cooktop is cool enough to power setting required, and is switched touch. -
Page 18: Settings
Operation Settings Cooking process Settings* Keeping food warm Melting butter 1 - 2 Dissolving gelatine Making porridge Warming small quantities of liquid Cooking rice Defrosting frozen vegetables Cooking broths, pulse soups Warming liquid and semi-solid foods Preparing omelettes, lightly fried eggs Steaming fruits Cooking dumplings Steaming vegetables, fish... -
Page 19: Auto Heat-Up
Operation Auto heat-up To activate Auto heat-up ^ Turn the control anti-clockwise as far Continued Heat-up time as it will go, and hold in that position cooking setting in minutes and until A appears in the display. seconds (approx.) 0 : 15 If the control is held in this position for too long, L will appear in the 0 : 15... -
Page 20: Booster Function
Operation Booster function The extra boost of energy is only available by taking a proportion of The cooking zones are equipped with energy away from another cooking Single (l) or TwinBoosters (I/II) (see zone. For this reason, the cooking "Guide to the appliance"). zones are networked in pairs as shown. - Page 21 Operation To activate Booster l To deactivate the Booster function ^ Turn the control past power setting 9 The Booster function can be cancelled to BI or BI/II, and then back to 9. early. ^ Keep turning the control past power I will appear in the display for the setting 9 to BI or BI/II until the I or II cooking zone and B will light up.
-
Page 22: Keeping Warm Function
Operation Keeping warm function Useful tips Each cooking zone has a keeping Only use pans for keeping food warm. warm function. Cover the pan with a lid. If the keeping warm function has been You do not have to stir food while it is activated, the cooking zone will switch being kept warm. -
Page 23: Tips On Saving Energy
Tips on saving energy – Use a lid whenever possible to minimise heat loss. Uncovered Covered – Select a smaller pan when cooking small quantities. A small pot requires less energy than a larger, less filled pot. – Cook with as little water as possible. –... -
Page 24: Safety Features
Safety features System lock Safety switch-off Keep children away from the cooktop Your cooktop is fitted with a safety for their own safety. Your appliance is switch-off feature in case you forget to equipped with a system lock to prevent switch it off yourself. -
Page 25: Overheating Protection
^ Turn the control for the affected If the overheating protection zone(s) to "0". mechanism triggers again, contact Miele. The cooking zone can only be used again as usual after the H has gone out. If the control is not turned back to "0", C and 0 will flash in the display alternately. -
Page 26: Cleaning And Care
Cleaning and care To avoid damaging the outer Do not use a steam cleaning surfaces of your appliance, do not appliance to clean this appliance. use: The steam could reach the electrical – cleaning agents containing soda, components and cause a short alkalines, ammonia, acids or circuit. - Page 27 Spots caused by limescale, water and aluminium residues (spots with a metallic appearance) can be removed using the Original Miele ceramic and stainless steel cooktop cleaner.
-
Page 28: Problem Solving Guide
"0", and disconnect the on the cooking zone. appliance from the electricity supply for – The overheating protection approx. 1 minute. mechanism has been triggered (see If it still will not switch on, contact a section "Overheating protection"). qualified electrician or Miele. - Page 29 (<1 sec.) as far as it will go. Then turn it once more and hold for power supply, please contact Miele. approx. 3 seconds..one or more cooking zones have ... L appears in the display for a few switched off automatically.
- Page 30 Problem solving guide ... the food in the pan hardly heats up or does not heat up at all when the Auto heat-up function is switched on. This could be because: – there is too much food in the pan. –...
-
Page 31: Optional Accessories
Optional accessories Miele offers a range of useful accessories, as well as cleaning and conditioning products for your appliance. Depending on country, these can be ordered online at: These products can also be obtained by contacting Miele (see back of instructions for contact details). -
Page 32: Safety Instructions For Installation
Safety instructions for installation Observe carefully the safety Fit the wall units and rangehood distances given on the following pages. before fitting the cooktop to avoid All dimensions in this instruction booklet damaging the surface. are given in mm. The veneer or laminate coatings of worktops (or adjacent kitchen units) must be treated with 100 °C heat-resistant adhesive which will not... -
Page 33: Safety Clearances
Safety clearances Safety clearance above the cooktop When two or more appliances are installed together below a rangehood, e.g. an electric cooktop and a gas wok combiset, which have different safety clearances given in the installation instructions, you should select the greater clearance of the two. - Page 34 Safety clearances Side / rear clearances to the cooktop Ideally the cooktop should be installed with plenty of space on either side. There may be a wall at the rear and a tall unit or wall at one side. On the other side, however, no unit or divider should stand higher than the cooktop (see illustrations).
- Page 35 Safety clearances Safety clearance underneath the Interim shelf cooktop It is not necessary to install an interim shelf underneath the cooktop. To ensure sufficient ventilation to the cooktop, a certain gap must be left A gap of 10 mm is needed at the back between the underside of the cooktop for laying the mains connection cable.
-
Page 36: Appliance And Building-In Dimensions
Appliance and building-in dimensions a Spring clamps b Front c Building-in depth d Mains connection box with mains connection cable, L = 2,000 mm... -
Page 37: Preparing The Worktop
Preparing the worktop ^ Make the worktop cut-out for one or more appliances as applicable. Remember to maintain a minimum safety distance from the back wall, as well as from any tall unit or side wall to the right or left of the appliance. -
Page 38: Installation Of Several Appliances
Installation of several appliances When installing two or more appliances next to each other, a spacer bar b must be used between each one. See "Fitting the spacer bars and support brackets". Worktop cut-out Worktop cut-out - two appliances - three appliances When installing two appliances, the When installing three appliances, the width of the cut-out required (D) is... - Page 39 Installation of several appliances Worktop cut-out calculation example for three appliances Appliance width Appliance Appliance width Worktop less 8 width less 8 cut-out 1032 1424 1124 1516 1136 1320 1136 All dimensions are given in mm...
- Page 40 Installation of several appliances a Spring clamps b Spacer bars c Gap between spacer bar and worktop d Cover The illustration shows a worktop cut-out with spring clamps a and spacer bars b for 3 appliances. An additional spacer bar is required for each additional appliance. The position for securing each additional spacer bar will depend on the width of appliance B (288 mm / 380 mm / 576 mm).
-
Page 41: Fixing The Spring Clamps And Spacer Bars
Fixing the spring clamps and spacer bars Wooden worktops ^ Position the spring clamps supplied a and spacer bars b on the top edge of the cut-out in the positions marked. ^ Secure the spring clamps and spacer bars with the 3.5 x 25 mm screws supplied. - Page 42 Fixing the spring clamps and spacer bars Granite and marble worktops The screws are not required for granite or marble worktops. ^ Coat the side edges and the lower edges of the spring clamps a and the spacer bars b with silicone. ^ Then fill gap e between the spacer bars and the worktop with silicone.
-
Page 43: Installing/Removing The Appliance(S)
In stubborn cases, or if the appliance is When installing several appliances, a not accessible from below, use a cover must be inserted into the spacer cooktop lever (available from Miele) to bar. lift up the cooktop. To prevent damage ^ Slide the installed appliance to one... -
Page 44: General Installation Tips
General installation tips Seal between the appliance and the Tiled worktop worktop Grout lines a and the hatched area underneath the appliance frame must be smooth and even. If they are not, the The sealing strip under the edge of the appliance will not sit flush with the top part of the appliance provides a worktop and the sealing strip... -
Page 45: Elektroanschluss
Elektroanschluss Important All electrical work should be carried The wires in the mains lead are out by a suitably qualified and coloured in accordance with the competent person in strict following code: accordance with national and local safety regulations. Green/yellow = earth Blue = neutral For extra safety, it is advisable to install... -
Page 46: Wiring Diagram
Elektroanschluss Wiring diagram 200-240 V~ 200 - 240 V~ 200 - 240 V~ (L3) 200 - 240 V~ 200 - 240 V~ (L2) 200 - 240 V~ N.B. This appliance is supplied single phase... -
Page 47: After Sales Service, Data Plate, Warranty
After sales service, data plate, warranty In the event of any faults which you cannot remedy yourself, please contact Miele. The contact details for Miele are given at the back of these instructions. When contacting Miele, please quote the model and serial number of your appliance. - Page 52 CS 1234-1 en - AU, NZ M.-Nr. 09 319 470 / 03...
Need help?
Do you have a question about the CS 1234-1 and is the answer not in the manual?
Questions and answers