
Subscribe to Our Youtube Channel
Related Manuals for Uniden BW2101


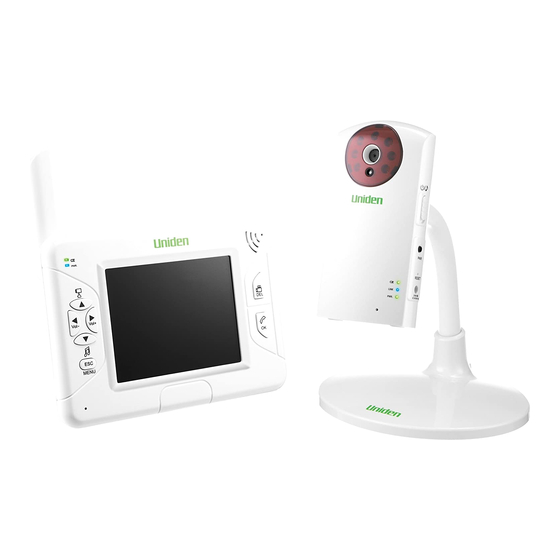
Summary of Contents for Uniden BW2101
- Page 1 BW2101 3.5” LCD Portable Wireless Baby Monitoring System For more exciting new products please visit our website: Australia: www.uniden.com.au New Zealand: www.uniden.co.nz...
-
Page 2: Important Safety Precautions
Important Safety Precautions This manual contains important information about this product’s operation. If you are installing this product for others, leave this manual or a copy with the end user. When using your equipment, always follow basic safety precautions to reduce the risk of fire, electric shock and injury to persons, including the following: •... - Page 3 Clean only with a dry cloth. Failure to follow the instructions in this operating manual will void the warranty. Uniden assumes no liability for damages to property or injury to persons caused by improper handling or failure to comply with these safety instructions.
-
Page 4: Table Of Contents
Contents Important Safety Precautions ..............What’s in the Box? ..................Parts of the BW2101 Baby Monitoring System ........Getting Started ..................STEP 1. Set-up and Installation ............. STEP 2. Basic Operation ................ I. Get to Know the Camera ..............II. Get to Know the LCD Monitor ............ -
Page 5: Parts Of The Bw2101 Baby Monitoring System
Parts of the BW2101 Baby Monitoring System Camera PWR. DC IN 5V/1A 1. Lens 8. Power / Lullaby play switch 2. IR (Infra Red) LEDs 9. Pairing Key 3. EDS (sensor) 10. Reset 4. Battery Indicator 11. DC IN Jack 5. -
Page 6: Getting Started
Getting Started Step 1. Connection & Installation Camera Connection 1. Connect the power cable to the camera’s DC IN jack and then plug the power adaptor to a 240VAC wall outlet. 2. Slide the power switch down once to turn ON the camera. NOTE! The built-in Lithium battery charges automatically when the power adaptor is connected. -
Page 7: Getting Started
Getting Started (cont’d) Installing the Camera on the Goose Neck Mount Stand Use the goose neck mount stand to install the camera at an appropriate angle in a semi-permanent (desktop mount option) or permanent (wall mount option) location. NOTE! Ensure the install location is within range of a 240VAC wall outlet. Desktop mount option 1. -
Page 8: Step 1. Set-Up And Installation
Step 2: Basic Operation I. Get to Know the Camera PWR. DC IN 5V/1A (1) Battery Indicator Green LED: Battery Charging; charge battery until Green LED turns off. Red LED: Battery Low (portable mode); Camera will turn off within 3 minutes. -
Page 9: Step 2. Basic Operation
Step 2: Basic Operation (cont’d) II. Get to Know the LCD Monitor (1) Battery Indicator Green LED: Battery charging; charge the battery until the Green LED turns off. Red LED: Battery Low (portable mode); Monitor will turn off within 3 minutes. Connect the power adaptor for charging or continuous use. -
Page 10: Step 3. Advanced Operation
Step 3: Advanced Operation I. Get to Know the Display Icons Signal indicator VOX record ON Current Channel indicator VOX alarm ON SD Card Battery low indicator (Cam) - available - locked (flashing) Push-to-talk indicator - full (flashing) - error (flashing) System time Record indicator (flashing) Lullaby play indicator... -
Page 11: Get To Know The Main Menu
Advanced Operation (cont’d) II. Get to Know the Main Menu 1. Press MENU in standard view mode to display the main menu (the example shows the menu with the Brightness option highlighted). 2. Use to highlight a menu option. 3. Press OK to enter the setting menu. 4. -
Page 12: Camera Setup - Turn Camera(S) On/Off / Camera Scan Period
Advanced Operation (cont’d) II. Get to Know the Main Menu (cont’d) Camera Setup - Turn Camera(s) On/Off 1. Use to select the camera you want to turn off. 2. Press OK to change ON/OFF status. NOTE! Make sure available cameras are set to ON for SCAN or Quad mode. -
Page 13: Pairing A Camera / Power Save Mode / Sd Card Format
Advanced Operation (cont’d) II. Get to Know the Main Menu (cont’d) Pairing - Pairing a Camera 1. Use to select a channel. 2. Press OK to start system countdown from 60 seconds. 3. Within the 60 second countdown press PAIR at the camera side. The camera signal will display when pairing is complete. -
Page 14: Vox Setting - Vox Sensitivity / Enable Vox Recording
Advanced Operation (cont’d) II. Get to Know the Main Menu (cont’d) VOX Setting - VOX Sensitivity to adjust the VOX sensitivity level. Level 1 - low sensitivity Level 3 - high sensitivity. NOTE! At OFF setting the VOX function is disabled. VOX Setting - Enable VOX Recording When set to ON, the system will auto record for 30 sec when the camera is... -
Page 15: Alarm Setup / Event List
Advanced Operation (cont’d) II. Get to Know the Main Menu (cont’d) Alarm Setup - Alarm Setup 1. Use to move between the items. 2. Press OK to shift to on /off. VOX alarm ON: The monitor will give an alarm for 15 seconds when the camera is triggered by voice. -
Page 16: About Digital Wireless Technology
About Digital Wireless Technology This section offers some helpful information to overcome most problems you may encounter. Problem Diagnosis About 2.4GHz Digital Wireless Signal This innovative digital wirelss solution integrates advance Frequency Hopping Spread Spectrum (FHSS) technolgy. This technology greatly reduces the interference that comes from other devices using the same radio frequency (2.4GHz), e.g. -
Page 17: Troubleshooting
Troubleshooting Guide If you have any trouble with your phone, check this section first. If you need help, visit the customer support page of our website listed on the front cover. Problem Possible Causes Remedies No power supply Check power adaptor and power cable to camera connection or battery been run out. -
Page 18: Product Specifications
UNIDEN BW2101 Important: Satisfactory evidence of the original purchase is required for warranty service Please refer to our Uniden website for any details or warranty durations offered in addition to those contained below. Warrantor: The warrantor is either Uniden Australia Pty Limited ABN 58 001 865 498 (“Uniden Aust”) or Uniden New Zealand Limited (“Uniden NZ”) as the case may be. - Page 19 Product, together with satisfactory evidence of your original purchase (such as a legible copy of the sales docket) to Uniden at the addresses shown below. You should contact Uniden regarding any compensation that may be payable for your expenses incurred in making a warranty claim.
- Page 20 © 2011 Uniden Australia Pty. Limited. Uniden New Zealand Limited. Printed in PRC.
Need help?
Do you have a question about the BW2101 and is the answer not in the manual?
Questions and answers