
Related Manuals for Uniden BW3451R+1


Summary of Contents for Uniden BW3451R+1
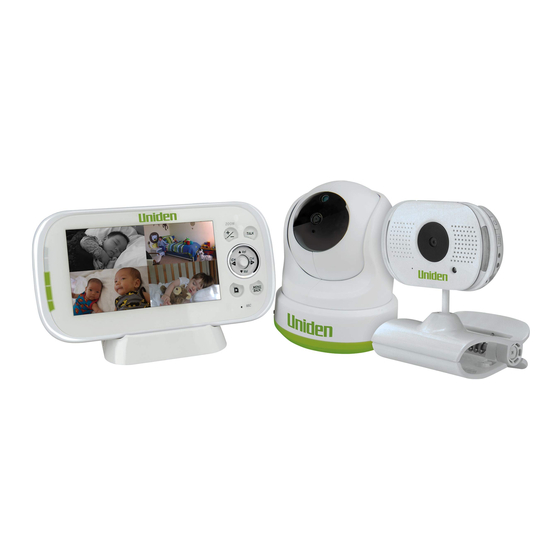
- Page 1 BW3451R+1 4.3” LCD Portable Wireless Baby Monitoring System For more exciting new products please visit our website: Australia: www.uniden.com.au...
- Page 2 IMPORTANT SAFETY INSTRUCTIONS This manual contains important information about this product’s operation. If you are installing this product for others, you must leave this manual or a copy with the end user. When using your equipment, always follow basic safety precautions to reduce the risk of fire, electric shock and injury to persons, including the following: •...
- Page 3 • Clean only with a dry cloth. Failure to follow the instructions in this operating manual will void the warranty. Uniden assumes no liability for damages to property or injury to persons caused by improper handling or failure to comply with these safety...
-
Page 4: Table Of Contents
BW3000 Wall Mount ..........................9 BASIC OPERATION ..................10 BW31PTZ ..............................10 BW3000................................ 11 WIRELESS MONITOR ..........................13 LCD Display ............................... 16 USING THE BW3451R+1 ..................18 Viewing Modes ............................18 SYSTEM MENUS ....................19 SYSTEM ...............................19 Date/Time ................................ 20 Brightness ................................. 20 Format Storage ..............................21... - Page 5 Deleting Folders and Video Files .......................36 Viewing Recorded Video on your Computer ..................37 ZOOM ................................. 37 NIGHT LIGHT ............................37 LULLABIES ..............................37 USING THE INTERCOM ...........................38 CAMERA PAIRING ............................38 MAINTAINING YOUR SYSTEM ....................... 38 TROUBLESHOOTING ..................39 SPECIFICATION .................... 40 ONE-YEAR LIMITED WARRANTY ..............
-
Page 6: What's In The Box
Screws & Anchors • If any item is missing or damaged, contact your place of purchase immediately. Never use damaged products! • Need help? Get answers at our website: www.uniden.com.au for Australian model All trademarks are registered trademarks of their respective owners. -
Page 7: Installation
INSTALLATION MONITOR INSTALLATION 1. Place the monitor in a location with clear reception from your camera(s). 2. If you are using the monitor as a stand-alone unit, flip out the stand on the back of the monitor and extend the antenna. Connect an AC adaptor to the power input on the side of the receiver. -
Page 8: Bw31Ptz Wall Mount Bracket
BW31PTZ Wall Mount Bracket The BW31PTZ camera mounting bracket has slots that fit over screws to mount the bracket on the wall. 1. Mark the position of the screw holes on the wall. 2. Drill holes and insert the anchors and screws provided. Be sure to leave room for the mounting bracket to fit over the screw heads. -
Page 9: Bw3000 Wall Mount
BW3000 Wall Mount The BW3000 camera mounting clip has two slots that fit over screws to mount the unit on the wall. WALL 1. Mark the position of the screw holes on the wall. 2. Drill holes and insert the anchors and screws provided. -
Page 10: Basic Operation
BASIC OPERATION BW31PTZ... -
Page 11: Bw3000
Item What it does Light sensor: Measures light intensity on the camera side. Lens: Camera lens. Microphone: Receives sounds for the area near the camera, and transmits sound from the camera to the monitor. Temperature sensor: Detects temperature at camera side and displays it on the monitor LCD. - Page 12 Item What it does Camera Antenna: Sends and receives signals to or from the monitor. Temperature sensor: Detects temperature at camera side and displays it on the monitor LCD. PAIR: Pairs the camera to the monitor. Clip: This fastener can attach the camera to shelves or ledges. Suction Base: Attach to mount the camera on glass or metallic surfaces.
-
Page 13: Wireless Monitor
WIRELESS MONITOR NOTE: RESET button on back of monitor. Item What it does Antenna: Receives video and audio signals from the camera. POWER: Turns the monitor on and off. Please note, if connected to the charge/ethernet cradle, the monitor cannot be powered off using the POWER switch. - Page 14 ▲Vol: • Increase speaker volume. • In Menus: Scroll up. • In Lullaby: Increase volume. • In Zoom: Scroll up. • In Video Playback - Pause or playback. CH◄: • In Menus: Scroll left. • In Zoom: Scroll left. • In Live view: Switch between available cameras. •...
- Page 15 DC 5V: Connects the DC 5V power adaptor to the monitor. *Please ensure that the correctly labelled power adaptor is used. Charge LED • Green = Battery is fully charged. • Orange = Battery is almost half charged. • Red = Battery is charging. If the monitor becomes unplugged from the adaptor, this LED turns off.
-
Page 16: Lcd Display
LCD Display Cam 1 21°C REC063020-1.AVI Item Icon What it does Signal Indicator (displays in full screen mode only). The number of bars in the signal indicator shows the strength of the signal received from the camera. One or no bars indicates the signal is poor, and 4 bars indicate a very strong signal. - Page 17 New Record Indicator. This flashing icon indicates when a new video record is available. Temperature indicator (displays in full screen mode 21°C only). Displays the temperature on the camera side. Night light indicator (displays in full screen mode only). Displays when the night light is turned on. (See page 37) Battery level.
-
Page 18: Using The Bw3451R+1
USING THE BW3451R + 1 Viewing Modes Live view displays live images from the cameras in the following modes: • Quad mode: Monitor displays video from all cameras on a single screen in 4 quadrants. Any channel that does not have a camera is blank. •... -
Page 19: System Menus
SYSTEM MENUS Press MENU/BACK to access system menus. Use the navigating buttons to navigate up (▲Vol), down (▼Vol ), left (CH◄), and right (CH►) in the menus, then press JOY STICK (OK) to confirm a setting. Use CH► or CH◄ to focus on the 5 different system menu selections on the clothesline. -
Page 20: Date/Time
Date/Time This option allows you to set the system date and time. The display format is Year.Month.Day Hour:Minute 1. From the System menu, select Date/Time and press JOY STICK (OK). The Date/Time screen displays. 11 30 10 30 2. Press ▲Vol or ▼Vol to increase/decrease the number for that setting. 3. -
Page 21: Format Storage
Format Storage Turning on Format Storage allows you to delete the files on your microSD card. (Default = No) 1. From the System menu, select Format Storage and press JOY STICK (OK). The Format Storage screen displays. 2. Press ▲Vol or ▼Vol to toggle between accepting or canceling the microSD card reformat. -
Page 22: Language
Language This option allows you to select the system’s display language from English, Español, or Français. (Default = English) 1. From the System menu, select Language and press JOY STICK (OK). The Language screen displays. 2. Press ▲Vol or ▼Vol to select a language. 3. -
Page 23: Temperature Alert Range
Temperature Alert Range Your BW3451R+1 able to provide ambient room temperature around the camera as a reference only. If the temperature falls outside of a preset range, the system alerts you. Temperature alert range lets you set that range. [Default = Low Temperature: 16°C ;... -
Page 24: Alert
ALERT An alert triggers when either the temperature or the cameras go out of range. This option allows you to set the alert volume. There are 6 levels available. [Default = Zero (Mute)] 1. From the main menu selections, select Alert and press JOY STICK (OK). The Alert Volume screen displays. -
Page 25: Record
RECORD This option allows you to set the parameters for your recorded files. The RECORD options are: • Quality • Record Time • VOX • Overwrite Quality This option allows you to choose between a high or low resolution recording quality. (Default = Low 320 x 240) 1. -
Page 26: Record Time
Record Time This option allows you to select how long the camera will record when the VOX sensitivity function is activated. (Default = 30 secs.) 1. From the Record menu, select Record Time and press JOY STICK (OK). The Record Time screen displays. 2. -
Page 27: Overwrite
2. Press ▲Vol or ▼Vol to toggle between Yes and No to activate or deactivate this feature. 3. Press JOY STICK (OK) to save the selection and return to the main RECORD options. Please use well-known brands of microSD cards to avoid operation errors. The BW3451R+1 supports up to 32GB microSD cards. -
Page 28: Camera
CAMERA This option allows you to pair the monitor with cameras (up to 4 cameras supported) to turn on/off individual camera. The cameras are still powered on but no longer visible to the monitor. 1. From the main menu selections, select Camera and press JOY STICK (OK). 2. -
Page 29: On/Off
2. Press ▲Vol or ▼Vol to select the camera you want to pair, then press JOY STICK (OK). The monitor prompts you to press the PAIR button on the bottom of the camera within 30 seconds. 3. Press PAIR button on the bottom of the camera within 30 seconds. 4. -
Page 30: Power Save
POWER SAVE Activating the Power Save feature turns off the LCD after two minutes of inactivity. Be sure that VOX is activated. However (see page 26), if VOX is deactivated, press any button on the monitor to turn the LCD back on. This option allows you to enable or disable this function. -
Page 31: Special Features
SPECIAL FEATURES REMOTE VIEWING VIA APP You can download Uniden Baby Watch app to remotely view the system. 1. Connect the AC adaptor to the power port on the cradle and the power outlet. 2. Connect the cradle to the router using the ethernet cable (provided). - Page 32 13. The Add Device screen displays with the UID code in the field. Enter the default password, 000000, and tap Save or OK. The Device List screen displays. Tap on the image to get Live View. The following will NOT work, when the BW3451R+1 system is being viewed remotely: - Auto-Scan...
- Page 33 Live View From the Device List screen, tap on the snapshot view to display the Live View. In Live View, swipe across the screen to pan and tilt the camera. Icon/Option Function Tap on this icon to view the saved snapshots. Tap to take a snapshot in Live View.
- Page 34 Advanced Settings Password Uniden strongly recommends changing the default password to a more personalised one. After your device displays on your Device List screen, tap on the icon to access the Edit Device screen. Tap on the Advanced Setting option to display the Advanced Setting screen below.
- Page 35 Video Quality On the Advanced Setting screen, tap the option, Video Quality, to select the resolution of the video. The option available are: Max, High, Medium, Low, Min. About Device On the Advanced Setting screen, tap the option, About Device, to view the model name and firmware version.
-
Page 36: Recording Video
RECORDING VIDEO You can manually record video to a microSD card (not included). The BW3451R+1 supports up to 32GB microSD card. The system records video in 10 minute blocks; however, you can manually stop recording at any time. # During recording, only TALK and Manual Record is active. All other buttons are disabled. -
Page 37: Viewing Recorded Video On Your Computer
Viewing Recorded Video on your Computer The microSD card saves video records in AVI format. You can take that card and play it on your computer. You will need a microSD card and adaptor (not included) or an SD card reader for other systems (not included). 1. -
Page 38: Using The Intercom
USING THE INTERCOM The Intercom feature lets you talk to whomever is within camera range. 1. Decide which camera you want to establish an intercom link with, and make it the full screen live view camera. 2. Press and hold TALK the monitor. 3. -
Page 39: Troubleshooting
TROUBLESHOOTING If you have problems with the system, there is often a quick and simple solution. Please try the following: There is no picture • checking all connections to the camera. Make sure from the camera the adaptor is plugged in. •... -
Page 40: Specification
SPECIFICATION GENERAL Camera Monitor Operating Frequency Range 2.400 ~ 2.4835GHz TX Power 15dBm RX Sensitivity –81dBm Type of Spread Spectrum Used FHSS Type of Modulation Used GFSK Communication Range 150ms Line of Sight BW31PTZ Image Sensor Type Manufacturer/ Model # 1/6.5” Color CMOS Image sensor Effective Pixel 640 x 480 Image Processing... - Page 41 BW3000 Image Sensor Type Manufacturer/ Model # 1/6.5” Color CMOS Image sensor Effective Pixel 640 x 480 Image Processing MJPEG Lens 3.0mm / F2.8 Exposure Auto White Balance Auto Power Requirement 5.0VDC /1.0 mA Power Consumption 150mA Max (IR OFF) 730mA Max (IR ON) 440mA Max (Charging) Operating Temperature Range...
-
Page 42: One-Year Limited Warranty
(“Uniden Aust”) . Terms of Warranty Uniden Aust warrants to the original retail purchaser only that the BW3451R+1 (“the Product”), will be free from defects in materials and craftsmanship for the duration of the warranty period, subject to the limitations and exclusions set out below. - Page 43 (such as a legible copy of the sales docket) to Uniden. Please refer to the Uniden website for address details. You should contact Uniden regarding any compensation that may be payable for your expenses incurred in making a warranty claim.
- Page 44 ©2016 Uniden Australia Pty Ltd Printed in PRC...
Need help?
Do you have a question about the BW3451R+1 and is the answer not in the manual?
Questions and answers