
Related Manuals for Uniden BW34 Series


Summary of Contents for Uniden BW34 Series
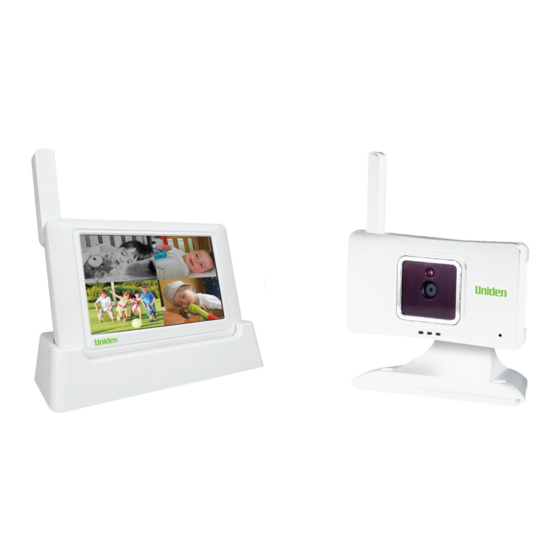
- Page 1 BW34xx Series 4.3” LCD Portable Wireless Baby Monitoring System For more exciting new products please visit our website: Australia: www.uniden.com.au...
-
Page 2: Important Safety Instructions
IMPORTANT SAFETY INSTRUCTIONS This manual contains important information about this product’s operation. If you are installing this product for others, you must leave this manual or a copy with the end user. When using your equipment, always follow basic safety precautions to reduce the risk of fire, electric shock and injury to persons, including the following: •... - Page 3 • Clean only with a dry cloth. Failure to follow the instructions in this operating manual will void the warranty. Uniden assumes no liability for damages to property or injury to persons caused by improper handling or failure to comply with these safety instructions.
-
Page 4: Table Of Contents
CONTENTS IMPORTANT SAFETY INSTRUCTIONS ........2 sYsteM setUP sCReen ................ 32 Power saving ..................32 GETTING STARTEd ..............5 screen auto Lock .................. 33 What’s in the Box? ................5 time ......................34 GettinG to KnoW the MonitoR anD the CaMeRa .....6 What the Lights Mean? ................7 Format storage .................. -
Page 5: Getting Started
Not pictured: 2x AC Adaptors 1x Ethernet Cable 1x SD Card Owner’s Manual Need Help? Get answers at our website: www.uniden.com.au for Australian model If any item is missing or damaged, contact your place of purchase immediately. Never use damaged products! -
Page 6: Getting To Know The Monitor And The Camera
GETTING TO KNOW THE MONITOR AND THE CAMERA Monitor Cradle Antenna (back/side) Reset Monitor- Power Power Dock On/O Ethernet Cable Connection SD slot AC Power Connection AC Power Pull-Out Connection Stand Camera Antenna Light Sensor Power IR LEDs Link Lens DC Jack Charge Link Power Microphone... -
Page 7: What The Lights Mean
What the Lights Mean? Light State What it means? Power Status The camera is on. The camera is off. Link Status Flashing The camera is in pairing mode. The camera is connected to the monitor. The camera is in standby. Charge Status On (Green) The battery is charging. -
Page 8: Setting Up The Equipment
3 - 4 seconds to power it up. POWER 4. The monitor displays the Uniden Welcome screen for a few seconds and then transitions to the LIVE view. The screen remains dark until the cameras are powered up. - Page 9 AC adapter power plug 1. Connect one end of an AC adaptor to the camera and plug the other end into a 240 volt AC (standard indoor) power outlet. 2. Press and hold button and make sure the Power LED turns on. If it doesn’t, try POWER reconnecting the AC adaptor, and make sure the power outlet isn’t controlled by a wall switch.
-
Page 10: Setting Up Your System
SETTING UP YOUR SYSTEM You can now set your cameras and system to your preferred settings. Camera Settings • Pairing (Page 20) • Camera On (Page 21) • Brightness (Page 21) Recording Settings • Motion Detection (Page 22) • Email Alert (Page 23) •... -
Page 11: Bw34Xx Series Software Operation Overview
BW34xx SOFTWARE OPERATION OVERVIEW Your BW34xx Series software operates through a series of screens that let you choose groups of operations. For example, when you tap on the camera icon in the Pop-up menus, you can set how you want the main viewing screen - called the LIVE screen - to display images from the paired cameras. -
Page 12: What The Icons Mean
What The Icons Mean Icon What does it mean Select how you want the LIVE screen to display camera input: CAMERA MODE • Scan between cameras (5 seconds) • Quad view (all paired cameras display) • Full view (1 camera displays on full screen) Adjust the volume level. - Page 13 Icon What it does Appears in LIVE view. Indicates remote viewing in progress. Appears in LIVE view. Indicates the intranet connection is es- tablished. Displays the camera number and signal strength through the CAMERA NUMBER status lines to the left of the number. Tap to start or stop recording for that camera RECORD STATUS •...
-
Page 14: Changing How The Live Screen Displays
Changing How the LIVE Screen Displays The LIVE screen displays in 2 views - Quad View or Full View. Quad View divides the screen’s image area into 4 quadrants and displays camera video in each quadrant. If less than 4 cameras are on, only those cameras’... -
Page 15: Using Your System
USING YOUR SYSTEM Recording LIVE Video Recordings are saved to the SD card (approximate recording time per GB is 225 min- utes). The SD card must be installed for recording to begin. 1. On the LIVE screen, tap for the camera to begin recording. 2. -
Page 16: Adding New Cameras
Deleting Recorded Files You can delete a single recorded file or a folder containing all recorded files for a specific day. 1. On the Record List screen (see previous Record List screen), tap the day with recorded files you want to delete. The list of recorded files displays. 2. - Page 17 TROUBLESHOOTING CAMERA PAIRING Consult the following table for camera pairing troubleshooting suggestions: If... Try... • the camera’s signal status • making sure the camera is plugged in and the Power LED is icon shows no bars • making sure that the camera’s antenna is extended. •...
-
Page 18: Bw34Xx Series Screen Descriptions
BW34xx SERIES SCREEN DESCRIPTIONS OVERVIEW This section describes the BW34xx Series screens in detail. It provides a path to the screen be- ing viewed. BW34xx Series SETTINGS SCREEN From the pop-up menu, tap the This screen should display: following icons as they appear on the screens: ... - Page 19 Main Screen Sub Screens What it does Network Setup Internet Setup Select the type of internet connection to be used. (DHCP is most common.) Security Code Set a security code for remote access. Network Information Displays information about your network and the monitor’s unique DID number.
-
Page 20: Camera Setup Screen
Camera Setup Screen Pairing Your camera is paired to the monitor at the factory. When you add a new camera to your system, you have to pair it to the monitor (that is, you have “introduce” the camera and monitor so they can communicate). -
Page 21: Camera On
Camera On When you add a camera to your system, pair up the camera with the monitor and the system will automatically turn it on. An X indicates a camera that is turned off; a check mark indicates the camera is turned on. From the pop-up menu, tap the This screen should display: following icons as they appear... -
Page 22: Recorder Setup Screen
Recorder Setup Screen Use the Recorder Setup screen to select be- tween Motion Detection, Email Alert or Schedule Record. Select Motion Detection. See “Motion Detection” below. Motion Detection From the pop-up menus, tap This screen should display: the following icons as they appear on the screens: ... -
Page 23: Email Alert
In order to enable the BW34xx Series system, you must enter both incoming and outgoing email addresses. Uniden recommends you set up and use Gmail as the outgoing mail server. The outgoing email server (SMTP server) is responsible for sending out the email notifi cation to tell users when the BW34xx Series system detects motion from any camera (Motion Detection must be activated). - Page 24 1. Tap Enable To activate Email Alert or Disable To deactivate it. 2. Tap on the SMTP Server field. A keyboard screen displays. Enter your outgoing e-mail SMTP server (e.g. for gmail server, enter: smtp@gmail.com). You can switch the keyboard from alphabetical characters to numbers/symbols and back again by tapping the field to the left of the space bar.
- Page 25 The incoming email account can be the same as, or different from, the outgoing email account. If a different email account is used then the outgoing email account serves as a relay for the alert messages. Only one incoming email account will be accepted by the BW34xx Series system.
-
Page 26: Schedule Record
Schedule Record You can schedule up to 5 recording sessions. The length of the total recording time is limited to the size of the SD card. These recording sessions must begin and end within a single 24-hour period. They cannot cross into the next day. From the pop-up menus, tap This screen should display: the following icons as they... -
Page 27: Network Setup Screen
Scheduled recordings are broken up into 15 minute fi le sizes. For example, if you record a 50 minute event, you will have three 15-minute recordings plus one 5-minute recording. It is important to set the correct time to ensure that the recorded video fi les and the scheduled record times are correct. -
Page 28: Internet Setup
Internet Setup 1. Tap Internet Setup icon to display the Internet Setup screen. 2. Tap on your selection and fill in the fields requested. Tap OK. Selection Fields • IP Address • Subnet Mask Static IP • Default Gateway • DNS Server DHCP None 3. -
Page 29: Security Code
Security Code Set up your security code to limit who can have access to the system from a remote location. 1. Tap Security Code icon to display the Security Code screen. 2. If you have not entered a security code, you can enter it here. -
Page 30: Network Information
Network Information 1. Tap the Network Information icon to display the Network Information screen. 2. Tap to return to the previous screen. The DID is a unique code specific to your monitor and is required (along with the security code) to gain remote access to your cameras over the internet. -
Page 31: Period
Period This selection allows you to select the length of time the alarm will sound for the alarm clock. 1. Tap Period. The Set Siren Duration screen displays. 2. Tap the duration you want the siren to last (2, 10, or 30 seconds) or tap None to turn sirens off. -
Page 32: System Setup Screen
System Setup Screen Power Saving When you turn on Power Saving mode, the monitor goes into sleep mode (LCD turns off) after it is idle for 2 minutes. Press the POWER button once to reactivate the monitor. (Default = Disable). If a motion detection event or scheduled recording begins, the LCD turns back on. -
Page 33: Screen Auto Lock
Screen Auto Look When you turn on Auto Lock mode, the monitor will automatically enter screen lock mode after it has been idle for 2 minutes. Auto Lock disables the touchscreen and removes the icons from the display. When the auto-lock feature has been enabled and your LIVE screen is locked, just tap the POW- ER button once to unlock the screen and return to normal touch screen operation. -
Page 34: Time
Time The Time screen lets you set up clock alarms, set the system time, and set time zone. The following screen displays: From the pop-up menu, tap the The following screen displays: following icons as they appear on the screens: ... - Page 35 Time Setting This screen contains fi elds to set the Month, Day, Year, Hour, Minute, and AM/PM. 1. Tap to display the Time Setting screen. 2. Tap on each field to set it. The UP/DOWN arrows shift to that field. Use UP/DOWN to set the field.
-
Page 36: Format Storage
Format Storage Format Storage lets you reformat your SD card (erasing all records) or allow new video records to copy over older records when the SD card is full. Overwrite erases the oldest record to free space for the new fi le. More than one record may be erased depending on the size of the new fi le. The BW34xx Series System supports up to a 32 GB SD Card. -
Page 37: System Upgrade
System Upgrade To upgrade the BW34xx Series fi rmware, you will need to download the fi le from the Uniden website (see front cover of this manual) to your computer. This fi le must then be transferred to the root directory of the SD card used in your BW34xx Series system. -
Page 38: Quick Tips
Quick Tips The Quick Tips screen provides more detail into 10 common areas. Tap on a subject to display the information. -
Page 39: Remote Access
REMOTE ACCESS Overview BW34xx Series lets you view LIVE video from your iPhone®, iPad®, or Android® smartphone or tablet. Free apps are available through the App Store or the Android Market. This system uses P2P remote access technology and does not require configuring your router, port forwarding or a remote DDNS service. -
Page 40: Connecting To The Intranet (Home Network)
1. Connect one end of the Ethernet cable into the back of the cradle. 2. Connect the other end into your primary router (typically, the router from your service provider). 3. Before placing the monitor into the cradle, make sure all video recordings are stopped, otherwise, the system may lock up. -
Page 41: Remotely View Your Bw34Xx Series System
Remotely View Your Uniden BW34xx Series System To remote view via your PC, please log on to www.unidenvideo.com. The screen shown below will be displayed. Click on the link ‘Start Viewing’. On the next screen, please enter your DID and security code. -
Page 42: Record Video
In order to view LIVE video from your PC, you must download and install the OCX plug in. Click on the link near the bottom of the page and it will ask you to Run or Save the file. If you choose to Save, remember where the download location on your computer. After the download is complete, find that file and click on it to install. -
Page 43: Downloading Apps
3. A message displays, recommending that you change the security code from the default. Tap OK. 4. The Uniden Guardian 2 system Main screen displays. A globe displays for each system you connect to the Uniden Guardian 2 app. 5. Tap on the globe to view LIVE video from that system. - Page 44 If only one system is connected, the app will display the globe screen momentarily and then display the last image from that system. G755 Home APP Operation When you open the APP on your Android phone, the image displayed on the main screen is the last camera image, captured automatically, from your previously established session.
- Page 45 2. Tap Notifications. A list of apps displays. 3. Tap Uniden Guardian 2. 4. The Uniden Guardian 2 setting screen displays. Turn the notification ON or OFF as desired. TO VIEW RECORDED FILES FROM YOUR MOBILE DEVICE Before you can view recorded files from your mobile device, you must connect your system to the internet (see page 39).
- Page 46 3. Tap VIEW RECORDED FILES. A list of recorded fi les (Event List) displays.You also have the following options available: • Across the bottom of screen is a camera selection fi eld with a drop-down menu; you can select which camera’s Event List you want to view.
- Page 47 TO TAKE SNAPSHOTS AND RECORD FROM LIVE VIEW: From the LIVE view, three icons display on this screen - Snapshot, Record, and Return. Snapshot icon. Tap to take a picture. Pictures are saved to your phone. Record icon. Tap to begin recording. A red circle displays in the upper right-hand corner of the screen.
-
Page 48: Iphone
BW34xx Series System to remotely connect to and view camera videos. Follow these steps to download the Uniden Guardian 2 iPhone® App and set it up to work with your BW34xx Series system. 1. From your iPhone® or iPad®, go to the Apple App Store and search for Uniden Guardian 2. - Page 49 APP Operation When you open the APP on your iPhone or iPad, several icons display on the bottom task bar. Tap to add an additional BW34xx Series system. Tap to enter System Setup page. Tap to refresh the system. Tap to enter the APP Information page. There is also an option to enable/disable the PIN lock.
- Page 50 2. Tap Notifications. A list of apps displays. 3. Tap Uniden Guardian 2. 4. The Uniden Guardian 2 setting screen displays. Turn the notification ON or OFF as desired. TO VIEW RECORDED FILES FROM YOUR MOBILE DEVICE Before you can view recorded files from your mobile device, you must connect your system to the internet (see page 39).
- Page 51 Pause icon. Tap to pause playback. Tap again to resume playback. Return icon. Tap to return to the previous screen. TO DELETE FILES 1. Tap the DELETE ALL or DELETE ONE button on the bottom of the list of files. 2.
- Page 52 TO TAKE SNAPSHOTS AND RECORD FROM LIVE VIEW: From the LIVE view, three icons display on this screen - Snapshot, Record, and Return. Snapshot icon. Tap to take a picture. Pictures are saved to your phone. Record icon. Tap to begin recording. A red circle displays in the upper right-hand corner of the screen.
-
Page 53: Solving Problems
SOLVING PROBLEMS If you have any trouble with your system, try these simple steps. If you still have a question, visit the customer support page of our website listed on the front cover. If... Try... The motion sensor won’t respond to Increasing the sensitivity of the motion sensor (see movement. - Page 54 If... Try... The camera won’t pair with the monitor making sure the camera is plugged in and the power LED is on. pressing and releasing the Link button quickly. Do not press and hold the Link button. When I power up my monitor and cameras If the Power Saving feature has been turned on, for the first time, they seem to be on but the monitor’s LCD screen will power off.
-
Page 55: Additional Information
ADDITIONAL INFORMATION PRODUCT SPECIFICATIONS Radio Frequency Transceiver RF Frequency 2.4 GHz Modulation GFSK Spread spectrum Frequency Hopping Anti Interference Clean Channel Dynamic Select Selectable camera channel Data rate 3 Mbps Transmitting range 500 feet (152 metres) in an open area (line of sight) Image Specification Output Image resolution... - Page 56 Camera System Specifications Power consumption 650 mA max Low light solution 12 IR LEDs, 1 Low light sensor Low light sensitivity 1-8 lux Picture sensor OV7725 1/4’ Color CMOS Lens F2.8mm H:46 V:35 Lithium-Polymer Battery Warning This equipment contains a rechargeable lithium-polymer battery. A.
-
Page 57: One-Year Limited Warranty
If a warranty claim is made, this warranty will not apply if the Product is found by Uniden to be: A. Damaged or not maintained in a reasonable manner or as recommended in the relevant Uniden Owner’s Manual;... - Page 58 Product, together with satisfactory evi- dence of your original purchase (such as a legible copy of the sales docket) to Uniden at the address shown below. You should contact Uniden regarding any compensation that may be payable for your expenses incurred in making a warranty claim.
- Page 60 © 2014 Uniden Australia Pty. Limited. Printed in PRC.
Need help?
Do you have a question about the BW34 Series and is the answer not in the manual?
Questions and answers