Table of Contents
Advertisement
Instructions for use
IT
GB
Italiano
E E n n g g l l i i s s h h
ES
PT
Español
Português
FR
Français
NL
Nederlands
Contents
Choice of location
Electrical connection
Technical characteristics
Overview
Control panel
Display
Getting started & using your oven
Using your oven for the first time
Setting the time
Setting the timer
Child safety device
Getting startedr
My recipes
Programming a cooking cycle
Cooking advice
Safety instructions
Care for the environment
Automatic PYROLYSIS cleaning
Switching off the power
Cleaning the outer surfaces
Cleaning the door
Service calls
Important safety instructions.
Read carefully and retain for future use.
OVEN
GB
Advertisement
Table of Contents

Related Manuals for SCHOLTES OVEN


Summary of Contents for SCHOLTES OVEN
-
Page 1: Instructions For Use
Nederlands Description of the appliance Overview Control panel Display Accessories Getting started & using your oven Using your oven for the first time Setting the time Setting the timer Child safety device Getting startedr My recipes Programming a cooking cycle... -
Page 2: Installing Your Appliance
The above diagrams determine the dimensions of a cabinet that will be able to hold your oven. The oven can be installed under a work top or in a column of cabi- netry (open* or closed) having the appropriate dimensions for built- in installation (see adjacent diagram). - Page 3 Ensure that: If the oven malfunctions in any way, unplug the appliance or - the electrical installation has sufficient voltage, remove the fuse corresponding to the sector where the oven - the electrical wires are in good condition, is hooked up.
-
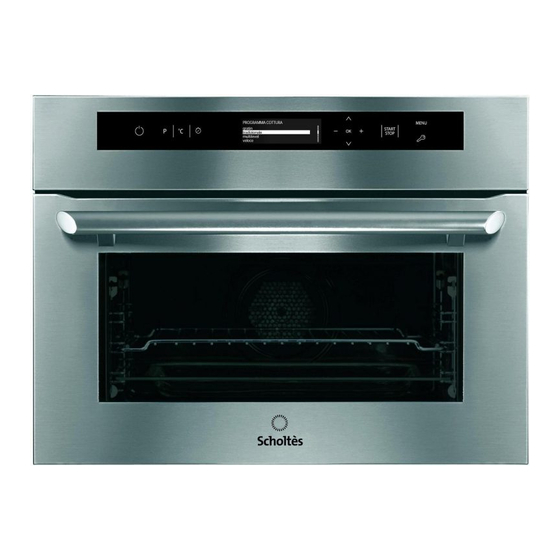
Page 4: Description Of The Appliance
Description of the appliance PROGRAMMA COTT URA gra tin tradizionale multilev vel o ce Programmer Control panel Wire shelf supports Réglage Setting the T T i i m m e e Temps Touche Sélection de Flèche START/ P P r r o o g g r r a a m m m m e e O O K K U U p p la programmation... - Page 5 “bain-marie.” fig.2 Avoid placing roasts or meat directly in the dish because this is certain to cause significant spattering on the oven walls. See cooking table on p. 11.
- Page 6 O O v v e e n n l l i i g g h h t t i i n n g g off. When the oven is off, the light switches on when the door is opened. The timer is displayed: once the time is up, the oven beeps for one minute or until any of the icons is pressed.
- Page 7 9. In the event of a power cut, if the oven temperature is not The heat is radiated in a single direction, in combination too low, a special device causes the programme to restart with the fan, in order to spread the heat evenly throughout at the point where it was was interrupted.
- Page 8 D D E E F F R R O O S S T T programme The fan at the bottom of the oven circulates the air at room temperature around the food. This function can be used to...
- Page 9 Cook from cold. If the oven is already hot from prior A A U U T T O O M M A A T T I I C C c c o o o o k k i i n n g g p p r r o o g g r r a a m m m m e e cooking, the display will show the message “Oven too hot”...
- Page 10 • The weight of the dough must be between 350g and 500g. • Lightly oil the drip tray or oven dishes. Cook from cold. If the oven is already hot from prior cooking, the display will show the message “Oven too hot” until the temperature has dropped to 120°C.
- Page 11 The display shows the cooking end time and the duration, alternately. The cooking end time may be changed as long as the oven is in wait mode: follow the procedure indicated above. To cancel a programme, switch off the oven...
- Page 12 (shortcrust and puff) Pastry (2) pastry (sablé or sugar crust) Brioche brioche Cake cakes Pizza pizza The cooking times are approximate * A pie dish containing 100 ml water must be placed on the base of the oven before cooking...
-
Page 13: Precautions And Recommendations
— This appliance is designed to cook with the door closed. — Do not use your oven as a larder or to store any items after use. — This oven was designed for use by private persons in their homes. -
Page 14: Cleaning And Maintenance
• Once the door is locked, it is no longer possible to phenomenon. change the duration or end time. The oven informs the user when it is time to perform a Programming is only possible once the PYROLYSIS cleaning cycle; the screen displays “PYROLYSIS programme has been selected. - Page 15 C C L L E E A A N N I I N N G G T T H H E E O O U U T T E E R R S S U U R R F F A A C C E E S S To clean both the electronic programmer window and the oven door, use a window washing product applied to a soft cloth.
- Page 16 Cleaning and Maintenance - Remove the frame and the glass (fig.4). - Remove all the door’s interior windows by rotating them. This assembly comprises 2 glass windows, the 1 of which has 2 rubber stops on the 2 front corners (fig. 5). fig.4 - Clean the glass using a soft sponge and washing-up liquid.
- Page 17 Cleaning and Maintenance Place the glass frame assembly back in the door (fig. 7). - T T a a k k e e c c a a r r e e t t o o c c o o r r r r e e c c t t l l y y s s l l o o t t t t h h e e f f r r a a m m e e i i n n t t h h e e h h i i n n g g e e u u s s i i n n g g t t h h e e l l u u g g (fig.8).
- Page 18 Cleaning and Maintenance S S E E R R V V I I C C E E C C A A L L L L S S Any repairs that are made to your appliance must be handled by a qualified professional authorised to work on the brand. When you call, mention your appliance’s complete reference (model, type, serial number).
Need help?
Do you have a question about the OVEN and is the answer not in the manual?
Questions and answers