Table of Contents
Advertisement
Advertisement
Table of Contents

Subscribe to Our Youtube Channel
Related Manuals for SCHOLTES OVEN


Summary of Contents for SCHOLTES OVEN
-
Page 2: Table Of Contents
Description of the appliance Overview Control panel Display Accessories Cookware Getting started & using your oven Using your oven for the first time Setting the time Setting the timer Child safety device startedr My recipes Programming a cooking cycle Cooking advice... -
Page 3: Precautions And Recommendations
WARNING: — Only allow children to use the oven without supervision if adequate instructions have been given so that the child is able to use the oven safely and understands the dangers of incorrect use. — The appliance and the accessible parts of it will become hot during use. Be careful not to touch the heated elements. -
Page 4: Care For The Environment
WARNING: — If the door or door seal is damaged, the oven should not be used until it has been repaired by an authorised person. — It is recommended that you clean your oven regularly and to remove any food build-up. -
Page 5: Installing Your Appliance
The diagrams above determine the dimensions of a cabinet that will be able to hold your oven. The oven can be installed under a work top or in a column of cabinetry (open* or closed) having the appropriate dimensions for built-in installation (see adjacent diagram). -
Page 6: Electric Connection
- the diameter of the wires complies with the installation requirements. Your oven must be connected with a (standardised) power cable with 3 conductors of 1.5mm2 (1 live + 1 neutral + earth) which must be connected to a 220-240V ~ single-phase grid via the intermediary of a 1 live + 1 neutral + earth CEI 60083 standardised power sock- et or via an all-pole cut-off device or in compliance with the installation rules. -
Page 7: Description Of The Appliance
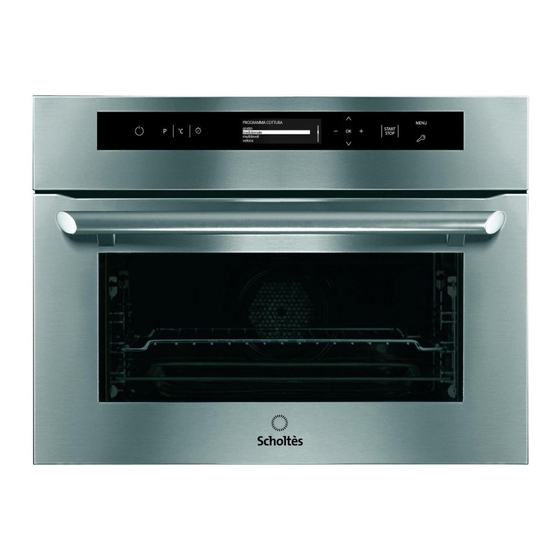
Description of the appliance PROGRAMMA COTT URA gra tin tradizionale multilev vel o ce Programmer Control panel Wire shelf supports Setting the Réglage time Temps OK button START/ Programming Sélection de Touche Flèche START/ arrow STOP selection la programmation Haut STOP Selection button Touche de... -
Page 8: Accessories
Fig. 02 Comments : Be careful never to use the enamel dish with the micro-wave function. You could damage your oven. • The side shelf supports (Fig. 3) 2 hook-on shelf supports allow you to use the accessories on three levels. -
Page 9: Getting Started & Using Your Oven
6. Once the timer has been set, the oven may be switched Oven lighting off. When the oven is off, the light switches on when the door is opened. The timer is displayed: once the time is up, the oven beeps for one minute or until any of the icons is pressed. - Page 10 9. In the event of a power cut, if the oven temperature is not The heat is radiated in a single direction, in combination too low, a special device causes the programme to restart with the fan, in order to spread the heat evenly throughout at the point where it was was interrupted.
- Page 11 The GOLDEN MERINGUE programme is unbeatable for cooking meringues. DEFROST programme The fan at the bottom of the oven circulates the air at room temperature around the food. This function can be used to defrost any type of food but it is particularly recommended...
- Page 12 Getting started & using your oven Cook from cold. If the oven is already hot from prior AUTOMATIC cooking programme cooking, the display will show the message “Oven too hot” until the temperature has dropped to 40°C. The bread may So as not to distort the cooking times or change the then be cooked.
- Page 13 • Make cuts with a sharp knife. • Slide the grid into level 1. • Place a pie dish on the base of the oven and pour in 100 ml cold water. • Cook from cold. • Start the automatic BREAD function.
-
Page 14: Programming A Cooking Cycle
The display shows the cooking end time and the duration, alternately. The cooking end time may be changed as long as the oven is in wait mode: follow the procedure indicated above. To cancel a programme, switch off the oven... - Page 15 You can preheat your microwave oven just as you would for a Food covered with ice crystals will take longer to defrost. In this fan oven programme.
-
Page 16: Cooking Chart
Cooking chart... -
Page 17: Cooking Guide
Cooking chart COOKING GUIDE Micro-wave function type quantity power time level notes reheating dishes cooked straight from the refrigerator 400 g 800W 5-7 min 1 or 2 covered glass dish on the wire shelf (lasagne, gratins, fish, meats, rice, etc.) frozen cooked dishes (lasagne, gratins, fish, 400 g... -
Page 18: Microwave Function
2 x 200 g plates 4 to 6 min (purée, peas, celery, etc.) Foods with varying textures (Cassoulet, Beef Bourguignon, 2 x 300 g plates 6 to 8 min Ravioli, etc.) multi-level function oven temp cooking cooking type quantity support level (starting notes... - Page 19 160°C On the shelf at level 1, depending 90 - 180 min (hotpot, stew) on the dish. Bread (500 g flour) 220°C* On the shelf at level 2 25 - 30 min * Preheat the oven to the indicated temperature.
-
Page 20: Cleaning And Maintenance
In general abrasive powders and scouring pads as well as sharp objects should be avoided. It is recommended that you clean your oven regularly using a damp sponge and soapy water and to remove any food build-up. If the appliance is not cleaned regularly, its surface could become damaged, affecting the appliance’s lifespan and possibly causing... -
Page 21: Service Calls
Cleaning and Maintenance SERVICE CALLS Any repairs that are made to your appliance must be handled by a qualified professional authorised to work on the brand. When you call, mention your appliance’s complete reference (model, type, serial number). This information appears on the manufacturer’s nameplate (Fig.1).
Need help?
Do you have a question about the OVEN and is the answer not in the manual?
Questions and answers
Pyrolytic Oven how to use cycle
To use the pyrolytic cycle on a SCHOLTES oven:
1. Remove all accessories, telescopic rails, and supports.
2. Clean excess soiling with a damp sponge (no detergent).
3. Ensure no towels or cloths are on the oven handle.
4. Wait for the oven to cool if it’s too hot.
5. Press the button to start programming.
6. Select "END" and press “OK” to confirm.
7. Adjust the end time using “--” and “++” buttons.
8. Press “OK” to confirm.
9. Select “PYROLYSIS recommended - START” and choose the desired level.
10. Press the “START/STOP” button to activate the programme.
11. Ensure the oven door is shut; the cycle will not start otherwise.
12. A beep will signal the end of the cleaning cycle.
This answer is automatically generated
Oven markings, do you have explanation as you see on the photo, don’t know what arcticle, thanks