Table of Contents
Advertisement
Advertisement
Table of Contents

Subscribe to Our Youtube Channel
Related Manuals for Concept Pro VHSDIR-870EXT-IP


Summary of Contents for Concept Pro VHSDIR-870EXT-IP
- Page 1 VHSDIR-870EXT-IP External IP HIGH SPEED DOME USE R MAN U AL...
-
Page 2: About This Document
VHSDIR-870EXT-IP User Manual About this Document Purpose This document is for the VHSDIR-870EXT-IP, including the product features, hardware installation, network access, network configuration, technical specification and troubleshooting. Intended Audience This document is intended for: Technical support engineers. • Maintenance engineer. - Page 3 IR Network High Speed Dome User Manual About this Document Special notices When using video surveillance products, comply with applicable statutory and regulatory requirement to enable and maintain legal surveillance cameras. It is illegal for a company or person to install surveillance cameras in an office to monitor employees outside the scope of local law, or to use surveillance cameras to invade other people’s privacy with illegal purposes.
-
Page 4: Table Of Contents
VHSDIR-870EXT-IP Contents User Manual Contents About this document………………………………………………………………..……. i Contents……………………………………………………………………………….….…. iii 1. Installation Preparation.…………………………………………………….…….….1 1.1 Safety Precautions.…………………………………………………………….….….1 1.2 Check the Installation Environment……………………………………….….….3 1.3 Network Plan.…………………………………………………………………….….…3 2 Camera Port and Description………………………………………………….….…..4 2.1 Product Appearance………………………………………………………….…….…4 2.2 Features………………………………………………………………………….…….…9 3 Hardware Installation………………………………………………………………….10 3.1 Preparing Installation Tools……………………………………………………….10 3.2 Installing a Dome Camera………………………………………………………….11... - Page 5 VHSDIR-870EXT-IP User Manual Contents 9 Privacy Masking…………………………………………………………………….…….56 10 Network Service……….…………………………………………………………….….57 10.1 DDNS……….……………………………………………………………………….…..57 11 Service Centre…………………………………………………………………….……..58 11.1 SMTP…………………………………………………………………………………….58 12 Privilege Manager………………………………………………………………………59 13 Protocol..………………………………………………………………..………………..61 14 Maintenance…………………………………………………………..………………...62 15 Technical Specification……….……………………………………..………………..63 16 Troubleshooting…………………………………………………………………………66 17 Lightning Proof and Surge Signal Proof…………………………………………..67 18 Declaration on Hazardous Substances in Electronic Information Products……………………………………………………………………………………….69...
-
Page 6: Installation Preparation
1.1 Safety precaution The following precautions provide important information to prevent fire and personal injury caused by improper use of the VHSDIR-870EXT-IP. Read this section carefully before installing the camera and comply with these cautions during use. If you want to install the camera in a public place, provide a warning message such as “CCTV camera are in operation”. - Page 7 VHSDIR-870EXT-IP User Manual Keep the power plug clean and dry to prevent electric shock or other risks. • Precaution For Use Avoid heavy weight, violent vibration, soaking during transport, store, and • installation. Otherwise, the camera may be damaged. Any damage caused by improper transport of the assembled camera during delivery from or sending back to the manufacture for repair causes the warranty to be void.
-
Page 8: Check The Installation Environment
VHSDIR-870EXT-IP User Manual 1.2 Checking the Installation Environment Before installing the camera, check the installation environment according to Table 1-1. Table 1-1 Installation environment check items Check Standard Item Moisture The relative environment humidity must be in the range from 5% to 90%. -
Page 9: Camera Port And Description
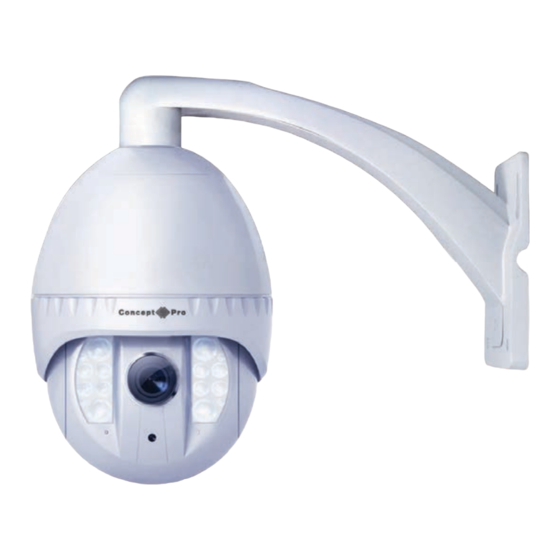
VHSDIR-870EXT-IP User Manual 2. Camera Port and Description 2.1 Product Appearance Figure 2-1 shows the appearance of a VHSDIR-870EXT-IP Figure 2-1 VHSDIR-870EXT-IP Issue V1.1... - Page 10 VHSDIR-870EXT-IP User Manual Figure 2-2 shows the structure diagram of the VHSDIR-870EXT-IP. Figure 2-2 Structure diagram of the VHSDIR-870EXT-IP Figure 2-3 shows the multi-head cable used by a dome camera. Table 2-1 describes cores of the multi-head cable. Issue V1.1...
- Page 11 VHSDIR-870EXT-IP User Manual Figure 2-3 Multi-head cable Table 2-1 cores of the multi-head cable Color Function Description Video output port You can connect the camera to a TV monitor through this port to view analog video. It also tells you the IP address of the camera.
- Page 12 VHSDIR-870EXT-IP User Manual Color Function Description core (error:±5 degrees centigrade), the heater must be turned on to ensure that the camera runs correctly. Grounding wire Yellow Alarm output Seven alarm input channels and core channel 2 two alarm output channels.
- Page 13 VHSDIR-870EXT-IP User Manual Color Function Description black (positive) core Yellow RS485 input black (positive) core Pink core RS485 input (negative) Issue V1.1...
-
Page 14: Features
VHSDIR-870EXT-IP User Manual 2.2 Features Network Features Supports TCP/IP protocol. • Supports video, audio, and alarm data. • Provides a built-in web browser using IE, Google Chrome, Mozilla Firefox • and Safari etc. Supports network data transmission and remote access. -
Page 15: Hardware Installation
VHSDIR-870EXT-IP User Manual 3. Hardware Installation 3.1 Preparing Installation Tools Table 3-1 shows a list of installation tools that you may need. Table 3-1 Installation tools Tool Description Phillips screwdriver Claw hammer Hammer drill Level ruler Slotted screwdriver (camera accessory) -
Page 16: Installing A Dome Camera
VHSDIR-870EXT-IP User Manual 3.2 Installing a Dome Camera Installation Modes A dome camera supports wall-mounted and suspension installation modes. The following describes how to install a dome camera in wall-mounted and on a ceiling. Wall-Mounted installation Two kinds of bracket could be used. The following are steps for two different brackets, wall mount and pendant mount. - Page 17 VHSDIR-870EXT-IP User Manual tighten the three screws using it to fix the bracket to the camera, shown in Figure 3-2. Figure 3-2 Fix the camera and bracket together Tighten screws Thread all the cables through the cable hole on the side of the bracket Put on the bracket’s cover as shown in Figure 3-3.
- Page 18 VHSDIR-870EXT-IP User Manual Figure 3-4 Bracket installing size Insert four expansion bolts into the holes. Thread all the cables through the cable hole on the side of the bracket, shown in Figure 3-5. Figure 3-5 Thread all cables through the bracket Cables Issue V1.1...
- Page 19 VHSDIR-870EXT-IP User Manual Attach the PTZ camera to the bracket and rotate the camera clockwise to align the screw holes on the base of the camera and the bracket. Then tighten the three screws using it to fix the bracket to the camera, shown in Figure 3-6.
- Page 20 VHSDIR-870EXT-IP User Manual Insert the expansion bolts into the holes. Thread all cables through the cable hole on the side of the pendant bracket, shown in Figure 3-8. Figure 3-8 Thread the cables through the cable hole on the bracket...
-
Page 21: Finding The Cameras Ip Address
VHSDIR-870EXT-IP User Manual 4. FINDING THE CAMERA’S IP ADDRESS Use the steps below to find the camera’s IP address and connect to the camera over the local area network (LAN) using HD-IP, UPnP on Windows® 7, or Bonjour® on Mac OS®. -
Page 22: Finding The Cameras Ip Address Using Upnp In Windows 7
VHSDIR-870EXT-IP User Manual 4. Click on a camera IP address in the Device List to login. 5. Under User Name, enter the user name for the camera (default: admin). Under Password, enter the password for the camera (default: admin). Click Continue. - Page 23 VHSDIR-870EXT-IP User Manual 1. Click Start > Computer > Network. The camera’s IP address appears under Network Infrastructure. Double click to open the camera Network 2. Double-click the camera to open it in your default browser. 3. Under User Name and Password, enter the camera’s User Name (default: admin) and Password (default: admin) and click Login.
-
Page 24: Finding The Cameras Ip Address Using Bonjour In Mac Os
VHSDIR-870EXT-IP User Manual 4.3 Finding the Camera’s IP Address using Bonjour® in Mac OS® NOTE: To use this method, the camera and computer must be on the same network. Bonjour® is enabled by default, and can be enabled/disabled using HD-IP (check the HD-IP manual for details). -
Page 25: Finding The Cameras Ip Address Using Bnc Test Cable
VHSDIR-870EXT-IP User Manual 4.4 Finding the Camera IP using the BNC Test Cable When the BNC test cable is connected to the camera, the IP address is shown on the test monitor. The camera must be connected to power to use the BNC test cable. -
Page 26: Configuration
VHSDIR-870EXT-IP User Manual 5. Configuration 5.1 Login and Logout You must use Internet Explorer 6 or a later version to access the web management system, otherwise some functions may be unavailable. Login system Open the Internet Explorer, enter the IP address of IP camera (default value: 192.168.0.120) in the address box, and press Enter. -
Page 27: Main
VHSDIR-870EXT-IP User Manual 5.2 Main page layout On the main page, you can view real-time video, set the sensor parameters, set the video parameters, video control, PTZ control, PTZ Configuration and log out of the system. Figure 5-2 shows the main page layout. -
Page 28: Browsing Video
VHSDIR-870EXT-IP User Manual Element Description out, and change the focal length and aperture for a dome camera. NOTE Currently the automatic aperture adjustment function is not supported. You can perform the following operations in this area: configuration • Add, delete, and invoke the presents and tacks. - Page 29 VHSDIR-870EXT-IP User Manual Figure 5-3 Adding the a trusted site In the Internet Explorer, choose Tool > Internet Options > Security > Customer level, then set Download unsigned ActiveX control, initialize and script ActiveX controls not marked as safe for scripting under ActiveX controls and plug-ins to Enable, as shown in Figure 5-4.
- Page 30 VHSDIR-870EXT-IP User Manual The login page is display when the control is loaded. Download the right control in the Internet Explorer Preparation Use Internet Explorer to browse video. • Real-time video page pop-ups the message “clicks to play live video with •...
- Page 31 VHSDIR-870EXT-IP User Manual Unable to display video picture, and need to download and install the control Preparation Use Internet Explorer to browse video. • Real-time video page pop-up the message “click to download the latest • version of Flash Play live video” and “click to play video with ActiveX control to reduce latency”...
-
Page 32: Sensor Config
VHSDIR-870EXT-IP User Manual 5.4 Sensor Configuration The Sensor Configuration menu is used to adjust camera image settings. To configure camera image settings using the Sensor Configuration menu: • Log into the camera using a web browser, and from the Live Video page, right-click on the video area and select Sensor Config. - Page 33 VHSDIR-870EXT-IP User Manual Image Adjust Adjust the Brightness, Saturation, and Contrast settings for the image. Mirror Enable/disable image mirroring. • Mirror: Select Horizontal to mirror the image horizontally, Vertical to mirror vertically, or Picture Flip to mirror both horizontally and vertically. Select Close to disable image mirroring.
- Page 34 VHSDIR-870EXT-IP User Manual WB Setting Adjust White Balance. WB Mode: Select Auto for automatic white balance or Manual to manually set the white balance. • Manual Mode: Select a mode for the lighting conditions or select Customized and manually adjust the Red Gain and Blue Gain.
- Page 35 VHSDIR-870EXT-IP User Manual Night Color: Select Auto, Day Mode, Night Mode and Timer to have the camera switch to black and white during night mode. Set the day to night time and night to day time if Timer mode has been chosen.
-
Page 36: Device Info
VHSDIR-870EXT-IP User Manual Privacy Configure the Privacy Area for the camera, you can choose up to 8 Privacy Areas. 5.5 Device Info Description The Device Info page shows information about your IP camera, such as the Device Name (which appears in the Device List in HD-IP), firmware version, MAC address, and camera inputs and outputs. -
Page 37: Device Configuration
VHSDIR-870EXT-IP User Manual Procedure ATTENTION: The device ID is unique. Do not change it unless your installation has special requirements. To configure the Device Name: Click Device Info • Under Device Name, enter the disered device name and then click Set •... -
Page 38: Parameter Description
VHSDIR-870EXT-IP User Manual Figure 5-8 Local Network page Set the parameters according to Table 5-2. Table 5-2 Local network parameters Parameter Description Setting IP Protocol IPv4 is the IP protocol that [Setting method] uses an address length of 32 Select a value from the bits. - Page 39 VHSDIR-870EXT-IP User Manual Parameter Description Setting IP Address Camera IP address that can [Setting method] be set as required. Enter a value manually. [Default value] 192.168.0.120 Subnet Mask Subnet mask of the network [Setting method] adapter. Enter a value manually.
-
Page 40: Device Port
VHSDIR-870EXT-IP User Manual 5.6.2 Device Port Description The Device Port (Device Configuration > Device Port) allows you to configure the camera’s ports The camera has the following ports: Control Port: The default is 30001. It enables video streaming • HTTP Port: The default is 80. It enables web access. -
Page 41: Date And Time
VHSDIR-870EXT-IP User Manual Procedure • To change the Channel Name, configure it as needed and then click the Set button next to the Channel Name • To change the Video System Frequency, select the desired setting under video system and then click the Set button. - Page 42 VHSDIR-870EXT-IP User Manual To set the camera’s date and time using an NTP server: Click Device Configuration > Date & Time. • Under Time Zone, select your time zone. • If your region observes daylight savings time, check Adjust clock for •...
-
Page 43: Osd
VHSDIR-870EXT-IP User Manual 5.6.5 OSD Description The OSD page allows you to configure the camera’s on-screen display text, shown in Figure 5-11. Figure 5-11 OSD Procedure To configure the cameras OSD: Click Device Configuration > OSD. • Check the following options to enable OSD text: •... - Page 44 VHSDIR-870EXT-IP User Manual Device Name Channel ID Channel Name Time Custom Enter the desired Row and Column for enabled OSD messages. Text on row 0 is shown at the top of the screen, and moves down as the row number increases.
-
Page 45: Microphone
VHSDIR-870EXT-IP User Manual 5.6.6 Microphone Description Configure microphone settings for audio. Self-powered microphone required (not included), shown in Figure 5-12. Figure 5-12 Procedure To configure microphone settings: Click Device Configuration > Microphone. • Check Enable Microphone to enable the microphone or un-check to •... -
Page 46: Cvbs Configuration/Bnc Output
VHSDIR-870EXT-IP User Manual Procedure Click the text box to change the ID of the camera and then click OK. 5.6.8 CVBS Configuration/BNC Output Description To turn the BNC output on or off, shown in Figure 5-14 Figure 5-14 Procedure Under BNC Output (Device Configuration > BNC Output), select on to enable analog output or off to disable and click OK. -
Page 47: System Configuration
VHSDIR-870EXT-IP User Manual 5.6.9 System Configuration Description Change the language for the camera OSD display (e.g. time and date display) and email alarms. Supported languages are English, Polish, Russian, and Chinese. You can also change the web mode from HTTP and HTTPS, shown in Figure 5-15... -
Page 48: Stream Configuration
VHSDIR-870EXT-IP User Manual 6. Stream Configuration Description The stream configuration page allows you to configure the camera’s video streams. The camera supports two streams. This allows you to have a high quality recording stream (stream 1) and a lower quality stream (stream 2) to preserve bandwidth for remote connections shown in Figure 6-1. - Page 49 VHSDIR-870EXT-IP User Manual Table 6-1 Stream configuration Parameter Description Setting Video Encode Set the video encoding [Setting method] Type type for the stream Click on the dropdown box: H.264 High Profile, H.264 Main Profile, H.264 Base Profile, MJPEG Audio Encode...
-
Page 50: Alarm Configuration
VHSDIR-870EXT-IP User Manual 7. Alarm Configuration Alarm configuration contains the following sub menus: Alarm I/O • Disk Alarm • Network Alarm • I/O Alarm • Motion Alarm • 7.1 Alarm I/O Description The Alarm I/O page allows you to configure the alarms. It lets you configure the names of the alarms, and alarm modes, shown in Figure 7-1. -
Page 51: Disk Alarm
VHSDIR-870EXT-IP User Manual Procedure To configure the alarm I/O: Choose which Alarm In you would like to configure. • Name that Alarm In • Choose a Voltage Level either High or Low • Choose which Alarm Out you would like to configure •... - Page 52 VHSDIR-870EXT-IP User Manual Figure 7-2 Disk Alarm Procedure To configure Disk Alarms: Click Alarm Configuration > Disk Alarm. • Check Disk Full Alarm to enable Disk Full Alarms. • Under Max Disk Space, enter the disk full percentage that will trigger an alarm •...
-
Page 53: Network Alarm
VHSDIR-870EXT-IP User Manual 7.3 Network Alarm Description The network alarm allows you to set an alarm when the camera is disconnected from the network. You can also set it to go to a preset position or a track, shown in figure 7-3. -
Page 54: I/O Alarm Linkage
VHSDIR-870EXT-IP User Manual 7.4 I/O Alarm Linkage Description The I/O Alarm Linkage allows you to configure the alarm inputs and choose if it activates a preset, track and alarm output, shown in Figure 7-4. Figure 7-4 I/O Alarm Linkage Procedure To configure the I/O Alarm Linkage: Choose which Alarm In you would like to configure. -
Page 55: Motion Alarm
VHSDIR-870EXT-IP User Manual 7.5 Motion Alarm Description The Motion alarm page allows you to configure camera motion detection alarm settings, shown in Figure 7-5. Figure 7-5 Motion Alarm Procedure To configure motion detection: Click Alarm Configuration > Motion Alarm. •... - Page 56 VHSDIR-870EXT-IP User Manual Figure 7-5 Schedule Time Setting Configure the weekly schedule. The schedule is divided into 3 periods, and motion detection will be enabled in all times during all 3 periods. Click Motion Area, and configure up to 8 motion detection areas, shown in Figure 7-6: Select Area Motion or Area Mask to configure motion detection areas.
-
Page 57: Local Record
VHSDIR-870EXT-IP User Manual 8. Local Record Local Record contains the following sub-menus: • Record Policy • Record Directory 8.1 Record Policy The Record Policy menu allows you to set the NAS and FTP recording parameters. Once configured, the device can record video directly to the NAS and FTP. -
Page 58: Record Directory
VHSDIR-870EXT-IP User Manual To enable Motion Alarm Recording, check Enable under Alarm Record. • Configure Pre-recording and Post-recording times. Check Motion • Alarm, Channel. • Under Stream, select the stream to use for recording. Stream 1 is • recommended if you want to record high quality video, stream 2 is recommended if you want to save bandwidth or storage space. - Page 59 VHSDIR-870EXT-IP User Manual To configure FTP storage location: Click Local Record > Record Directory. • Under Disk Name, select ftp. • Select ftp Click Modify Click Modify. The Record Disk Path opens. Check Enable. • Configure the following: • Check Enable...
- Page 60 VHSDIR-870EXT-IP User Manual NOTE: On the Record Directory page, Status will be OK when FTP is selected if FTP is accessible and all settings have been entered correctly. Status OK To configure a NAS storage location: Click Local Record > Record Directory.
-
Page 61: Privacy Masking
VHSDIR-870EXT-IP User Manual File System: Enter the NAS file system (cifs or nfs). Use All Space: Check to enable the camera to record until the NAS is full. Uncheck to limit the amount of space the camera can record on and enter the amount of space (in MB) available to the camera under Free Space. -
Page 62: Network Service
VHSDIR-870EXT-IP User Manual To configure privacy areas: Click Privacy Masking. Check Enable Privacy Masking. • Click and drag inside the video area to configure privacy areas. Privacy areas • will be shown as green rectangles. Right-click to delete the last created area. -
Page 63: Service Centre
VHSDIR-870EXT-IP User Manual Password: Enter the Password you have set on the account. • Click OK to save settings. • 11. Service Centre Service Centre contains the following sub-menus: • SMTP 11.1 SMTP (Email Alert Setup) The SMTP sub-menu allows you to configure email alerts when motion alarms occur. -
Page 64: Privilege Manager
VHSDIR-870EXT-IP User Manual Sender E-mail Address: Enter the email address that will be used to send email alerts. Recipient E-mail Address 1~5: Enter up to 5 email addresses that will receive email alerts. Attachment Image Quality: Select the quality of the image attachments: High, Mid, or Low. - Page 65 VHSDIR-870EXT-IP User Manual The Group page (Privilege > Group) allows you to manage permissions for user groups. Users obtain permissions from their group. The Administrators group contains all permissions and cannot be deleted or edited. To add a user group: Click Add.
-
Page 66: Protocol
VHSDIR-870EXT-IP User Manual Unlocking User Accounts The admin account is the only account that can unlock user accounts that have been locked out. User accounts are locked out if the wrong password is entered 3 or more times. To unlock a user account: Login to the camera as admin. -
Page 67: Maintenance
VHSDIR-870EXT-IP User Manual 14. Maintenance Device Restart Click Device Restart. Click Restart then click OK to restart the camera. Default Settings Click Default Settings. Click Restore then click OK to restore the camera to factory default settings. The camera will reboot. -
Page 68: Technical Specification
VHSDIR-870EXT-IP User Manual 15. Technical Specification VHSDIR-870EXT-IP Technical Parameters Parametres Description MODULE Sensor 1/2.8” CMOS Sensor 1920x1080 30/25 fps Max Res./ Max Frame Rate Synchronization Internal Auto/Manual Focus Zoom 22x Optical Lens 4.7mm(wide) – 103mm(tele), F1.6 – F3.5 Minimum working distance... - Page 69 VHSDIR-870EXT-IP User Manual Horizontal angle of View 55°-2.9° PTZ Speed Pan 0.01°~360/s, Tilt 0.01°~360/s Horizontal angle 360 degrees continuous Vertical angle 0-93 degrees Position-indicating Support 3D positioning Support Coordinate direction Support RS485 PELCO-D, PELCO-P/Full-duplex Preset 200 User Defined Positions 255 User Positions Preset Speed 360 degrees/sec.
- Page 70 VHSDIR-870EXT-IP User Manual SD card Micro SD card interface supports up to 32GB Micro SD/HC card RTSP Video Standard RFC2326, Support Quicktime/VLC Player. User security authentication (Enabled/Disabled) Web Language English, Chinese, Russian, Polish Recording Simultaneous. Local Micro SD Memory, Remote FTP server, TCP/UDP CMS, RTSP connection.
-
Page 71: Troubleshooting
VHSDIR-870EXT-IP User Manual 16. Troubleshooting Table 15-1 describes the common faults and solutions Table 15-1 Common faults and solutions Problems Possible Causes Remedies Power supply fault Replace No action when power Bad connection of the Check connections is switched on... -
Page 72: Lightning Proof And Surge Signal Proof
IR Network High Speed Dome User Manual 17. Lightning Proof and Surge Signal Proof The product adopts TVS lightning proof technology to prevent damage by lightning strikes below 1500W and impulse signals such as power surges, but it is also necessary to abide by the following precautions to ensure electrical safety based on practical circumstances: Keep the communication cables at least 50 meters away from high voltage •... - Page 73 VHSDIR-870EXT-IP User Manual Figure 17-1 Ground conductor Issue V1.1...
-
Page 74: Declaration On Hazardous Substances In Electronic Information Products
VHSDIR-870EXT-IP User Manual 18. Declaration on Hazardous Substances in Electronic Information Products Hazardous Substances Part Cr6+ PBDE Mechanical ○ ○ ○ ○ ○ ○ part Board/circuit ○ ○ ○ ○ ○ ○ module Connector ○ ○ ○ ○ ○ ○...
Need help?
Do you have a question about the VHSDIR-870EXT-IP and is the answer not in the manual?
Questions and answers