
Related Manuals for Nautilus E10


Summary of Contents for Nautilus E10
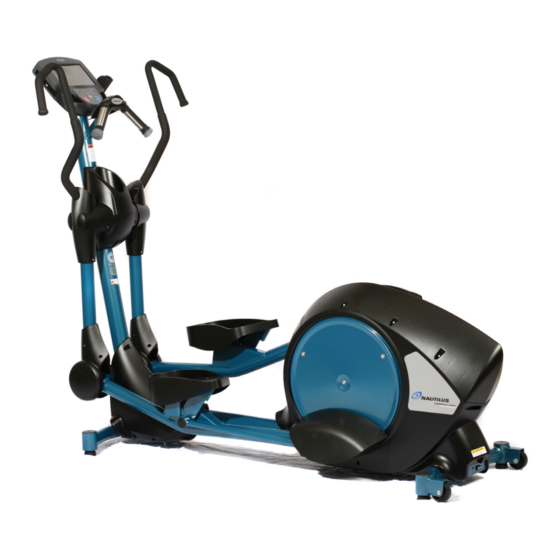
- Page 1 ® ® STRONGER THAN EVER ™ Owner’s Instructions And Assembly Of The E10 Elliptical Trainer Core Fitness, exclusive manufacturer of Nautilus Commercial Fitness Equipment ® P/N 19-1029 07-24-14...
- Page 3 Please carefully read through this manual to familiarize yourself with the operation of your new E10 Elliptical Trainer. Doing so will help ensure that your customers get the most out of the machine, and enjoy safe and effective workouts ahead.
-
Page 4: Table Of Contents
Getting Started ....................Installation Notice ..................Guidelines For Safe Operation ..............Guidelines For Getting On And Off .............. Heart Rate Monitoring .................. E10 Assembly ....................Tools And Components ................Receiving ..................... Moving ......................Unpacking And Assembling ................. Scanning For TV Channels ................ -
Page 5: Important Safety Instruction
IMPORTANT SAFETY INSTRUCTIONS - SAVE THESE INSTRUCTIONS This icon means a potentially hazardous situation exists which, if not avoided, could result in death or serious injury. When using an electrical appliance, basic precautions should always be followed, including the following: 1. -
Page 6: Product Specifications
PRODUCT SPECIFICATIONS Model E10 Elliptical Trainer Dimensions: 38” W x 86” L x 66” H (97cm x 218cm x 168cm) Unit Weight: 370 lbs (168kg) Shipping Package Weight: 450 lbs (205kg) Workout Area: 58” W x 106” L (147cm x 269cm) Power Adaptor Rating: 100V~ to 240V~, 50/60 Hz, 1.5A Input... -
Page 7: Safety Warning Decals
Safety Warning Decals Safety warnings are located on the E10 Elliptical Trainer as shown below. Please read all safety precautions and warning information prior to using the machine. Be sure to replace any safety warning decal that is damaged, illegible, or missing. For replacement decals, please contact a Core Fitness Customer Excellence representative at 800-235-2233, or 276-773-2881 outside the United States. - Page 8 Safety Warning Decals continued Decal #1 - General Warnings Decal #2 - Power Caution...
-
Page 9: Getting Started
GETTING STARTED Installation Notice The E10 Elliptical Trainer must be properly installed before being used. Core Fitness recommends that you contact your dealer or sales representative when your machine arrives. The representative will help unpack, install, and demonstrate proper use of the machine to ensure that the machine is free from shipping damage, and that installation and operation are in accordance with Core Fitness standards. -
Page 10: Guidelines For Getting On And Off
Guidelines For Getting On And Off The E10 Elliptical Trainer To avoid injury, carefully follow these instructions. 1. Hold on to the upper swingarms and step onto the footplates (pedals); 2. Stand up straight and begin to stride slowly; 3. Tap Press To Start on the console display;... -
Page 11: Heart Rate Monitoring
Heart rate monitoring helps users monitor their levels of exertion by displaying their heart rate during exercise. There are two methods of monitoring heart rate on the E10 Elliptical Trainer: • Contact Heart Rate - heart rate can be checked at any time during a workout by using the stainless steel sensors built into the ergobar handgrips. -
Page 12: E10 Assembly
E10 ASSEMBLY Tools And Components Tools Required: Fasteners Included: (35) 10-32 x 3/4 SS Pan Head Screw Shears or Razor Knife (8) 1/4-20 x 5/8 Hex Head Screw - inserted into frame 7/16 Hex Socket and Ratchet (8) 1/4-20 Flat Washer - inserted into frame... -
Page 13: Receiving
Moving The E10 Elliptical Trainer The E10 Elliptical Trainer is heavy and awkward, and requires two people to safely move it from one location to another. With the help of another person, lift up the front of the machine until the rear transport wheels are in contact with the floor. - Page 14 8. Move the mast assembly into position near the rear assembly as shown below in Figure 1. Take care not to pinch the electrical harnesses. 9. Connect the mast assembly harness to the rear assembly harness (the connectors snap together so that the color-coded wires will match). Make sure the connection is secure. 10.
- Page 15 12. Insert (2) molded bearing cups into the lower swingarm as shown in Figure 2a. Figure 2a 13. Slide (1) lower swingarm spacer through the bearing cups as shown in Figure 2b. Figure 2b 14. Insert (2) pulley spacers into the bearing cups as shown in Figure 2c.
- Page 16 15. Align the foot support tube with the bearing cup. 16. Place (1) 1/2 flat washer onto (1) 1/2-13 hex head screw. Slide the screw through the foot support tube and bearing cups as shown in Figure 3a. Figure 3a 17.
- Page 17 22. Identify the righthand upper swingarm by locating the colored dot on the bottom of its mounting plate. There is a corresponding colored dot on the righthand lower swingarm to ensure proper assembly. 23. Remove the (4) 1/4-20 hex head screws, (4) 1/4 flat washers, and (4) 1/4 lock washers that are inserted into the lower swingarm and use them to...
- Page 18 28. Release the main harness (20-pin connector), the ergo harness (4-pin connector), and the TV coaxial cable from the console mounting plate. Pull the excess harness and cable out of the access hole. 29. Place the rear of the touchsreen console near the mounting plate so that the harnesses and cable can be connected.
-
Page 19: Scanning For Tv Channels
3. From the Splash Page, touch and hold the Nautilus icon for 5 to 10 seconds to advance to the Setup Page as shown in Figure 7. -
Page 20: Touchscreen Console Operation
TOUCHSCREEN CONSOLE OPERATION Console Page Flow And Structure Program list: Main Menu The user is able to choose the desired exercise program; SETUP page can be entered from this screen. SETUP Page Setting According to the program chosen, the user is Setting Page prompted to set the required parameters to begin workout. -
Page 21: Workout
To advance to the Setup Page, touch and hold the Nautilus icon for 5 to 10 seconds. The user can also advance to the Main Program Page by tapping on the Press To Start icon. - Page 22 Main Program Page (Basic Exercise Programs) FUNCTION NAME ACTION RESULT Quick Start Tap the Quick Start icon to enter the workout page Workout Page displayed Manual Tap the Manual icon to enter the setting page Setting Page displayed Fat Burner Tap the Fat Burner icon to enter the setting page Setting Page displayed Calorie...
- Page 23 More Programs Page (More Exercise Programs) FUNCTION NAME ACTION Action Fitness Test Tap the Fitness Test icon to enter the Fitness Test Menu Fitness Test Menu page displayed Custom Intervals Tap the Custom Intervals icon to enter the setting Setting Page displayed page Random Play Tap the Random Play icon to enter the setting page...
- Page 24 Program Settings Page The settings data requests in the Settings Page may be different depending on the requirements for each program. FUNCTION NAME ACTION RESULT Body Weight Value entered Press + - to adjust the value Level Value entered Total Time Value entered Back Back to the Main Menu...
- Page 25 Workout Page After selecting a program and entering settings data, the workout begins immediately. The user can adjust the resistance level manually and access multimedia functions. DISPLAY NAME ACTION METs Displays the total METs (Multiple of the resting metabolic rate) WATTS Displays the accumulated Watts Time...
- Page 26 Workout Page continued FUNCTION ACTION RESULT LEVEL Tap the + button to increase level. Resistance will be adjusted according to the (1~20) entered value. LEVEL Tap the - button to decrease level. Resistance will be adjusted according to the (1~20) entered value.
- Page 27 Workout Page continued Function Action Result Tap the THR + - icons to adjust the Target Heart The Target Heart Rate will change Rate according to the value entered. Stop Tap the Stop icon to stop the workout. Workout is terminated. Report Page displayed.
- Page 28 Report Page Function Action Result Next Tap the Next icon to the next Report page Next Report page shows Previous Tap the Previous icon back to the last page Last Report page shows Exit Tap the Exit icon to exit Report page. Back to Main Menu...
- Page 29 TV / Video Page The TV / Video Page will display a TV channel or video over the entire Workout Page. Tap anywhere on the page to display the control bar across the bottom of the screen; tap the page again to hide the control bar.
- Page 30 MP3 Page The MP3 Page will hover over the Workout Page until the user chooses another function. Note: The touchscreen console is not equipped with internal speakers. External speakers or earphones are required to listen to audio playback. FUNCTION ACTION RESULT Previous Tap the PREVIOUS icon to play the previous track...
- Page 31 iPod Page The iPod Page will hover over the Workout Page until the user chooses another function. Note: The touchscreen console is not equipped with internal speakers. External speakers or earphones are required to listen to audio playback. FUNCTION ACTION RESULT Back Arrow Tap the Back Arrow to go back to the last page...
- Page 32 iPod Page continued FUNCTION ACTION RESULT Backward Tap the PREVIOUS icon to play the previous track Previous music played Forward Tap the NEXT icon to play the next track Next music played Volume Down Tap the VOLUME DOWN icon to decrease volume Voice down Volume Up Tap the VOLUME UP icon to increase volume...
-
Page 33: Programs
Quick Start Program WORKOUT PAGE: 1. Step rate may be changed anytime. Tap the LEVEL + button to increase the resistance. Tap the LEVEL - button to decrease the resistance. 2. New Intensity Level will be continued throughout the program, until new level is changed. le will change accordingly) 3. -
Page 34: Manual Program
Manual Program SETTINGS PAGE: 1. WEIGHT 2. LEVEL: 1- 20 3. TIME: 2 - 99 WORKOUT PAGE: 1. 30 equal intervals within the selected workout time, based on the MET level. 2. Step rate may be changed anytime. a. Tap the LEVEL + icon to increase the Resistance b. -
Page 35: Fat Burner Program
Fat Burner Program SETTINGS PAGE: 1. WEIGHT 2. LEVEL: 1 - 20 3. TIME: 2 - 99 WORKOUT PAGE: 1. 30 interval 2. Intensity Level i t y a. Tap the LEVEL + to increase the level b. Tap the LEVEL - to decrease the level 3. - Page 36 Calorie Burner Program SETTINGS PAGE: 1. WEIGHT 2. LEVEL: 1 - 20 3. TIME: 2 - 99 WORKOUT PAGE: 1. 30 interval 2. Intensity Level i t y a. Tap the LEVEL + to increase the level b. Tap the LEVEL - to decrease the level 3.
- Page 37 Intervals Program SETTINGS PAGE: 1. WEIGHT 2. WORK LEVEL: 1 - 20 3. REST LEVEL: 1 - 20 4. TIME: 2 - 99 WORKOUT PAGE: 1. 8 Rest Interval x 2 + 7 Work Intervals x 2; Total 30 Intervals 2.
- Page 38 Heart Rate Zone Program CHECKING FOR HR PAGE: FLOWCHART: Checking for Heart Rate Page YES (Press OK key) YES (Press OK key) HR Detected MSG: Heart Rate is not in 30 seconds? detected. Check HR belt, HR belt needed. Continue? No ( Press STOP key) Main Page Setting Page...
- Page 39 Heart Rate Zone Program continued SETTINGS PAGE: 1. WEIGHT 2. AGE 10 - 99 TARGET HR (A suggested Target Heart Rate will be displayed based on the age) 4. TOTAL TIME 2 - 99 • Max HR = 215 - (Age * 0.75) •...
- Page 40 Fitness Test Program (Nautilus® Fit Test) CHECKING FOR HR PAGE: SETTING PAGE: 1. WEIGHT 2. AGE 10 - 99 3. GENDER: FEMALE / MALE MSG displayed: “BEGIN FIT TEST”...
- Page 41 Fitness Test Program continued FLOWCHART: Warmup - 3 Minutes SPM is auto controlled METs = 4 Phase X 3 ~ 5 minutes Program controls SPM to constrains every phase intensity at METs + 1. Record the average HR value for the last Yes, Fail 4 seconds of each minute after the 2nd Time >...
- Page 42 Fitness Test Program continued 6 ~ 15 mintes Warmup Phase 1: Phase 2: Phase 3: Phase 4: 4 METs Intensity Intensity Intensity Intensity During one phase: 4 seconds 4 seconds INDEX 1st minute 2nd minute 3rd minute 4th minute 5th minute If the di between Index and X is within 5 BPM between, the program advances to the next phase.
- Page 43 Custom Intervals Program SETTINGS PAGE: 1. WEIGHT 2. WORK LEVEL: 1 - 20 3. WORK TIME: 2 ~ 10 min 4. REST LEVEL: 1 - 20 5. REST TIME: 2 ~ 10 min 6. NUMBER OF INTERVALS: 1 ~ 15 If the time is over, the program will stop =>...
- Page 44 Random Play Program The Random Play Program randomly changes the resistance level throughout the workout. SETTINGS PAGE: 1. BODY WEIGHT 2. LEVEL 3. TOTAL TIME PROFILE: 1. The Intensi uphill and downhill. 2. The Intensity Level at the middle 22 Intervals will randomly change from level 1 ~ 20.
- Page 45 HR Interval Program CHECKING FOR HR PAGE: SETTINGS PAGE:...
- Page 46 HR Interval Program continued 1. WEIGHT 2. AGE 10-99 3. WORK TARGET HR (A suggested Target HR will be displayed based on age) 4. WORK TIME: 30 seconds - 9:59 minutes 5. REST TARGET HR (A suggested Rest HR will be displayed based on age) 6.
-
Page 47: Setup
Setup Page The Setup Page allows the user to set workout defaults, customize workout settings, scan for TV channels, update software files, run diagnostic tests, view maintenance data, etc. FUNCTION NAME ACTION RESULT Workout Default Tap the Workout Default icon to enter Workout Default page Workout Default page shows Customize Tap the Customize icon to enter Customize page... - Page 48 Setup Page Structure SETUP 2 Pages 3 Pages 2 Pages 1 Page 1 Page Workout Customize Machine Status Diagnostic Maintenance Default Fan Test Max Time Default Weight Run Hours Error Clear Limit Language Number of Alternator Maint Hour Default Workout Time Workouts Test...
- Page 49 Workout Default Page (Page 1 of 2) FUNCTION NAME ACTION RESULT • Tap the + - buttons to adjust value The machine default weight = the Default Weight • Weight Limit: 0 ~ 999 value inserted • Default Weight = 80 Kg (176 lbs.) •...
- Page 50 Workout Default Page (Page 2 of 2) FUNCTION NAME ACTION RESULT Press + - buttons to adjust value The machine default THR = the Default Target Heart Rate THR Limit: 75 ~200 bpm value inserted Press + - buttons to adjust value The machine default Starting Default Starting Level Workout Time Limit: 1 ~ 20...
- Page 51 Customize Page (Page 1 of 3) FUNCTION NAME ACTION RESULT Press + - buttons to adjust value The machine default Max Time Limit = Max Time Limit Max Time Limit: 20 ~ 99 min the value inserted Press + - buttons to change language The language to display will be changed Language 1.
- Page 52 Customize Page (Page 2 of 3) Upgrade App. FUNCTION NAME ACTION RESULT Press + - buttons to switch the unit value: The machine default Unit = the value Units Metric / USA inserted Press + - buttons to adjust the Minimum The machine default Min level = the Min Level level:...
- Page 53 Customize Page (Page 3 of 3) FUNCTION NAME ACTION RESULT Press + - buttons to adjust the TV screen The TV screen Brightness = the value Brightness Brightness: 1 -99 inserted Press + - buttons to adjust the TV screen The TV screen Contrast = the value Contrast Contrast: 1 -99...
- Page 54 Machine Status Page (Page 1 of 2) FUNCTION NAME ACTION RESULT Shows the total run hours on this The content will change according to the Run Hours machine workout time Shows the number of workout has The content will change according to the Number of Workout been done on this machine number of workout which has been done...
- Page 55 Machine Status Page (Page 2 of 2) FUNCTION NAME ACTION RESULT Displays the software version. Software Version Tap the Upgrade icon to update the rm the action. The software. software will be updated to versio Displays the MCU Firmware Version. MCU Version Tap the Upgrade icon to update the rm the action.
- Page 56 Diagnostic Page FUNCTION NAME ACTION RESULT Press the Test Keyboard to test the Automatically testing Fan Fan Test keypad (membrane) Press the Test Alternator button to test the Show current SPM Alternator Test Alternator function (Resistance) Press the Heart Rate Receive to know if The user has to wear chest belt or hold Heart Rate Test the transmitted signal is received.
- Page 57 Maintenance Page FUNCTION NAME ACTION RESULT Shows all error codes Total Error Log Clear all error code Error code eliminated Clear Shows the number of hours between the maintenance Maint. Hour Clear the Maintenance hour Value = 0 Reset Press to enter the next Machine Status page Staying on this page Next (Page 2/2)
-
Page 58: E10 Maintenance
Core Fitness. Lubrication The E10 Elliptical Trainer requires periodic lubrication at the points of the left and right foot pivot shafts. It is recommended to use a multi-purpose grease to ensure your machine has a long life. Apply the grease directly to the pivot shafts and re-insert them into the Igus bearings. - Page 59 Proper Disposal Of Mechanical And Electrical Components Electronic Component/Battery Disposal When replacing a battery, you will need to properly dispose of (recycle) the old battery. Most federal and state regulations require lead-acid batteries to be recycled. Do not throw away old batteries.
- Page 60 External Power Supply The external power supply provides power to the touchscreen console and will charge the internal battery (for cordless use). The power inlet is located at the rear of the machine. Only use the power supply that was provided with the machine. Storage When storing your machine for prolonged periods, cover the machine with a dust cover.
-
Page 61: Contact Information
CONTACT INFORMATION If you need assistance, please have both the serial number of your machine and the date of purchase available when you call Core Fitness Customer Excellence. TECHNICAL & CUSTOMER SERVICE phone: 276-773-2881 toll free: 800-235-2233 fax: 276-773-2298 e-mail: info@corehandf.com web: www.nautiluscommercial.com SALES &... -
Page 62: Notes
NOTES...
Need help?
Do you have a question about the E10 and is the answer not in the manual?
Questions and answers