
Related Manuals for Nautilus E514c


Summary of Contents for Nautilus E514c
- Page 1 E514c Manual en Español Latino Americano: http://www.nautilus.com ASSEMBLY MANUAL / OWNER’S MANUAL...
-
Page 2: Table Of Contents
To register your product warranty , go to: www.nautilus.com/register. Or call 1 (800) 605–3369. Nautilus, Inc., (800) NAUTILUS / (800) 628-8458, www.NautilusInc.com - Customer Service: North America (800) 605-3369, csnls@nautilus.com | outside U.S. +01-360-859-5180, technics-APLA@nautilus.com | Printed in China | © 2012 Nautilus, Inc. -
Page 3: Important Safety Instructions -Assembly
Do not do steps that involve heavy lifting or awkward movements on your own. • Set up this machine on a solid, level, horizontal surface. • Do not try to change the design or functionality of this machine. This could compromise the safety of this machine and will void the warranty. • If replacement parts are necessary, use only genuine Nautilus replacement parts and hardware. Failure to use genuine ® replacement parts can cause a risk to users, keep the machine from operating correctly and void the warranty. -
Page 4: Safety Warning Labels / Serial Number
SAfETY WARNINg LABELS ANd SERIAL NUMBER • • • • • • • Serial Number • • • • • FCC Compliance Changes or modifications to this unit not expressly approved by the party responsible for compliance could void the user’s authority to operate the equipment. The machine and power supply comply with part 15 of the FCC rules. Operation is subject to the following two conditions: (1) This device may not cause harmful interference, and (2) this device must accept any interference received, including interference that may cause undesired operation. -
Page 5: Specifications
This product, its packaging, and components contain chemicals known to the State of California to cause cancer, birth defects, or reproductive harm. This Notice is provided in accordance with California’s Proposition 65. If you would like additional information, please refer to our website at www.nautilus.com/prop65. Before Assembly Select the area where you are going to set up and operate your machine. For safe operation, the location must be on a hard, level surface. Allow a workout area of a minimum 74” x 130” (190 cm x 330 cm). -
Page 6: Parts
pARTS A decal has been applied to all right (“ R ”) and left (“ L ”) parts to assist with assembly. Description Description Item Item Frame Left Leg Pedal Mount Plate Right Handlebar Arm Rear Stabilizer Left Handlebar Arm Front Stabilizer Lower Left Handlebar Arm Console Mast Lower Right Handlebar Arm Transport Handle Static Handlebar Rail Console Right Pedal AC Adapter Left Pedal... -
Page 7: Hardware
HARdWARE / TOOLS Description Description Item Item Wide Washer, M8 Leveler Washer Lock Washer, M8 Leveler Screw Washer, M8 Round Cover Hex Head Bolt, M8x20L Thread Lock Cotter Pin Button Head Hex Screw, M8x25L Wave Washer Thread Lock Phillips Head Screw, M5x20L Lock Washer, M8 Black Button Head Hex Screw, M8x20L Cover Button Head Hex Screw, M8x20L Button Head Hex Screw, M8x25L Thread Lock Button Head Hex Screw, M8x15L Flat Head Hex Screw, M8x25L Thread Lock... -
Page 8: Assembly
ASSEMBLY 1. Attach Rear Stabilizer and Transport Handle to Rails 6 mm 2. Attach Rail Assembly and Front Stabilizer to Frame 6 mm... - Page 9 3. Connect the Lower Console Cables NOTICE: Align the clips on the cable connectors and make sure the connectors lock. Do not crimp Console Cable.
- Page 10 4. Attach Console Mast to Frame Assembly NOTICE: Do not crimp Console Cable. 6 mm...
- Page 11 5. Attach the Static Handlebar NOTICE: Do not crimp Console Cable. 6 mm 6. Remove Hardware from Console NOTICE: Do not crimp the cables. * Hardware is pre-installed on Console and not on Hardware Card.
- Page 12 7. Connect Cables and Attach Console to Frame Assembly NOTICE: Align the clips on the cable connectors and make sure the connectors lock. Do not crimp the cables. * Hardware is pre-installed on Console and not on Hardware Card.
- Page 13 8. Attach Legs to Frame Assembly...
- Page 14 9. Attach Lower Handlebar Arms...
- Page 15 10. Attach Pedals to Rails and Lower Handlebar Arms NOTICE: Be sure the key on the Cotter Pin engages the Lower Handlebar Arm. 6 mm 6 mm...
- Page 16 11. Attach Upper Handlebar Arms 6 mm...
- Page 17 12. Connect AC Adapter to Frame Assembly 13. Final Inspection Inspect your machine to ensure that all hardware is tight and components are properly assembled. Do not use until the machine has been fully assembled and inspected for correct performance in accordance with the Owner’s Manual.
-
Page 18: Moving The Machine
BEfORE YOU START Moving the Machine The machine may be moved by one or more persons depending on their physical abilities and capacities. Make sure that you and others are all physically fit and able to move the machine safely. Remove the power cord. -
Page 19: Important Safety Instructions
Contact your doctor before you use the machine again. Use the values calculated or measured by the machine’s computer for reference purposes only. • Before each use, examine this machine for loose parts or signs of wear. Do not use if found in this condition. Monitor the Handlebars, Pedals, and Crank Arms closely. Contact Nautilus Customer Service for repair information. ® • Maximum user weight limit: 300 lbs. (136 kg). Do not use if you are over this weight. -
Page 20: Features
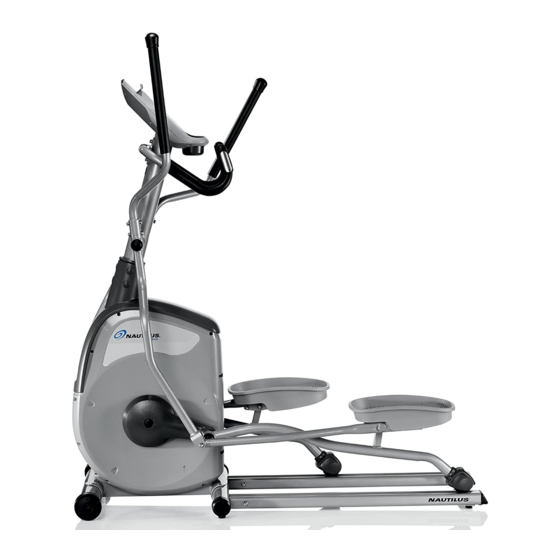
fEATURES Handlebar, Static Transport Handle Contact Heart Rate (CHR) Sensors Foot Pedal Console Media Tray Swing Arm Handlebars Transport Roller Speakers AC Adapter Plug MP3 Input Leveler Water Bottle Holder Rail... -
Page 21: Console Features
Console Features The Console provides important information about your workout and lets you control the resistance levels while you exercise. The Console has a grid display with touch control buttons to navigate you through the exercise programs. Keypad Functions FAN button- Controls 3-speed fan My Nautilus button- Controls the two programmed users ™ QUICK START button- Begins a Quick Start workout STOP button- Pauses an active workout, ends a paused workout, or goes back to the previous screen. Increase () button- Increases a value (age, time, distance, calories, or... -
Page 22: Remote Heart Rate Monitor
Distance The Distance display shows the distance count (miles or km) in the workout. Note: T o change the measurement units to English Imperial or metric, refer to the “Console Setup Mode” section in this manual. Watt / Level The WATT display field shows the power that you are producing at the current resistance level (1 horsepower = 746 watts) for 6 seconds, and then the current resistance LEVEL (1–16) for 6 seconds. - Page 23 Heart Rate Calculations Your maximum heart rate usually decreases from 220 Beats Per Minute (BPM) in childhood to approximately 160 BPM by age 60. This fall in heart rate is usually linear, decreasing by approximately one BPM for each year. There is no indication that training influences the decrease in maximum heart rate. Individuals of the same age could have different maximum heart rates. It is more accurate to find this value by completing a stress test than by using an age related formula. Your at-rest heart rate is influenced by endurance training. The typical adult has an at rest heart rate of approximately 72 BPM, where as highly trained runners may have readings of 40 BPM or lower. The Heart Rate table is an estimate of what Heart Rate Zone (HRZ) is effective to burn fat and improve your cardiovascular system.
-
Page 24: Operations
OpERATIONS What to Wear Wear rubber-soled athletic shoes. You will need the appropriate clothes for exercise that allow you to move freely. How Often Should You Exercise Consult a physician before you start an exercise program. Stop exercising if you feel pain or tightness in your chest, become short of breath, or feel faint. Contact your doctor before you use the machine again. Use the values calculated or measured by the machine’s computer for reference purposes only. • 3 times a week for 30 minutes each day. • Schedule workouts in advance and try to follow the schedule. -
Page 25: Quick Start Program
5. Use the Increase() and Decrease() buttons to adjust the resistance level. Note: T he range of values for LEVEL is 1 - 16; the default resistance level is 3. 6. Push the START/ENTER button to start the profile workout. The time will count down from the set time. My Nautilus User Setup Mode ™... - Page 26 Add User Profile From the Power-Up Mode screen, push the My Nautilus button and hold for 3 seconds to go to User Setup Mode. ™ Note: I f no User Profile is set up, the Console will show the Name prompt for User 1. If a User Profile does exist, use the Increase/ Decrease buttons to select Create User 2 and push START/ENTER. 2. T he Console display shows the “ENTER NAME” prompt. Push START/ENTER.
- Page 27 Edit User Profile From the Power-Up Mode screen, push the My Nautilus button and hold for 3 seconds to go to User Setup Mode. ™ T o exit the User Selection option, push STOP and the console will go back to the Power-Up Mode screen.
-
Page 28: Profile Programs
Profile Programs These programs automate different resistances and workout levels. Manual Course 1 Course 2 Course 3 Circuit 1 Circuit 2 Circuit 3 Pursuit 1 Pursuit 2 Changing Resistance Levels Push the Increase() or Decrease() buttons to change the resistance level at any time in a workout program. Fitness Test The Fitness Test measures the improvements of your physical fitness level. -
Page 29: Heart Rate Control Workout
Heart Rate Control (HRC) Workout The Heart Rate Control (HRC) program lets you set a heart rate goal for your workout. The program monitors your heart rate in beats per minute (BPM) from the Contact Heart Rate (CHR) sensors on the machine or from a Heart Rate Monitor (HRM) chest strap. -
Page 30: Pausing Or Stopping
• Total calories—maximum is 999999. The Statistics option in the User profile menu lets you look at the recorded data or delete it. 1. Push the My Nautilus button at the Power-Up Mode screen. The Console display shows the User Profiles. ™... -
Page 31: Console Setup Mode
CONSOLE SETUp MOdE The Console Setup Mode lets you set the units of measurement to either English or Metric, change the machine type, or see maintenance statistics (Error Log and Run Hours – for service technician use only). Hold down the Increase button and Decrease button together for 3 seconds while in the Power-Up Mode to go into the Console Setup Mode. -
Page 32: Maintenance
MAINTENANCE Read all maintenance instructions fully before you start any repair work. In some conditions, an assistant is required to do the necessary tasks. Equipment must be regularly examined for damage and repairs. The owner is responsible to make sure that regular maintenance is done. Worn or damaged components must be repaired or replaced immediately. Only manufacturer supplied components can be used to maintain and repair the equipment. To reduce the risk of electrical shock or unsupervised usage of the equipment, always unplug the power cord from the wall outlet and the machine and wait 5 minutes before cleaning, maintaining or repairing the machine. Place the power cord in a secure location. - Page 33 Maintenance Parts...
- Page 34 Console Pedal Arm, Right Transport Roller Handlebar, Static Pedal Plate Front Stabilizer Console Mast Leg, Right Shroud, Left Console Cable, Upper Roller Handlebar Arm, Lower Left Console Cable, Lower Rail Handlebar Arm, Upper Left Arm Pivot Rod Transport Handle Fly Wheel Handlebar Arm, Upper Right Leveler Brake Assembly...
-
Page 35: Troubleshooting
TROUBLESHOOTINg Solution Condition/Problem Things to Check No display/partial display/ Check electrical (wall) Make sure unit is plugged into a functioning wall outlet. unit will not turn on outlet Check connection at front Connection should be secure and undamaged. Replace adapter of unit or connection at unit if either are damaged. - Page 36 Condition/Problem Things to Check Solution Check data cable integrity No speed/RPM reading, All wires in cable should be intact. If any are cut or crimped, Console displays “Please replace cable. Stride” error code Check data cable Be sure cable is connected securely and oriented properly. Small connections/orientation latch on connector should line up and snap into place.
- Page 37 State Laws This warranty gives you specific legal rights. You may also have other rights, which vary from state to state. Expirations If the warranty has expired, Nautilus, Inc. may assist with replacements or repairs to parts and labor, but there will be a charge for these services. Contact a Nautilus office for information on post-warranty parts and services. Nautilus does not guarantee availability of spare parts after expiration of warranty period.
- Page 38 Nautilus Bowflex Schwinn fitness Universal ® ® ® ® 8001054.111512.B...
Need help?
Do you have a question about the E514c and is the answer not in the manual?
Questions and answers