Enviro EF3 Owner's Manual
Freestanding, fireplace insert, and built-in heater
Hide thumbs
Also See for EF3:
- Owner's manual (43 pages) ,
- Technical manual (38 pages) ,
- Owner's manual (13 pages)
Table of Contents
Advertisement
SHERWOOD INDUSTRIES IS AN ENVIRONMENTALLY RESPONSIBLE COMPANY. THIS MANUAL IS PRINTED ON RECYCLED PAPER.
PLEASE KEEP THESE INSTRUCTIONS FOR FUTURE REFERENCE
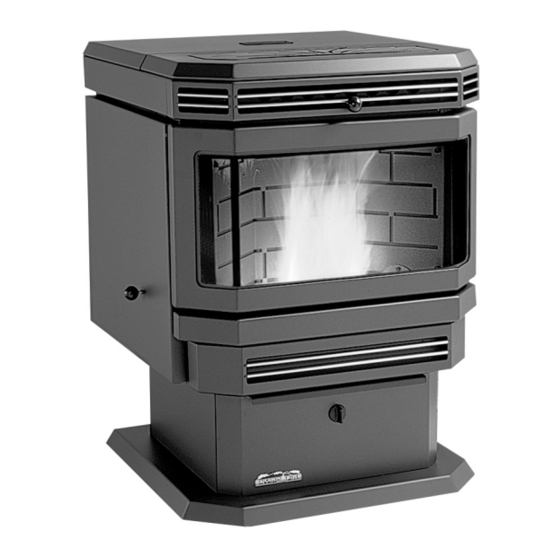
PELLET STOVE
EF3
Freestanding, Fireplace Insert,
and Built-In Heater
OWNER'S MANUAL
Contact your building or fire officials about restrictions and
installation inspection requirements in your area.
PLEASE READ THIS ENTIRE MANUAL BEFORE INSTALLATION AND USE
OF THIS PELLET BURNING ROOM HEATER. FAILURE TO FOLLOW THESE
INSTRUCTIONS COULD RESULT IN PROPERTY DAMAGE, BODILY INJURY,
OR EVEN DEATH.
EF-118
Advertisement
Table of Contents

Related Manuals for Enviro EF3


Summary of Contents for Enviro EF3
- Page 1 SHERWOOD INDUSTRIES IS AN ENVIRONMENTALLY RESPONSIBLE COMPANY. THIS MANUAL IS PRINTED ON RECYCLED PAPER. PLEASE KEEP THESE INSTRUCTIONS FOR FUTURE REFERENCE PELLET STOVE Freestanding, Fireplace Insert, and Built-In Heater OWNER’S MANUAL Contact your building or fire officials about restrictions and installation inspection requirements in your area.
-
Page 2: Table Of Contents
Table of Contents Introduction...........................3 Pellet Quality........................3 Rating Label Location......................3 Important Safety Data......................4 Safety Warnings And Recommendations.................4 Operating Instructions........................6 Automatic Safety Features....................6 Slider/Damper Setting......................6 Operating Your Pellet Stove....................7 Turning Your Pellet Stove Off....................7 Routine Cleaning and Maintenance....................8 Installation...........................11 Deciding Where to Locate your Pellet Appliance..............11 Removing Pellet Stove From Pallet..................11 Dimensions - Freestanding....................12 Dimensions - Fireplace Insert and Built-In Heater..............12... -
Page 3: Introduction
UALITY Pellet quality is important, please read the following: Your enviro pellet stove has been designed to burn wood pellets only. Do not use any other type of fuel, as this will void any warranties stated in this manual. The performance of your pellet stove is greatly affected by the type and quality of wood pellets being burned. -
Page 4: Important Safety Data
To prevent the possibility of a fire, ensure that the appliance is properly installed by adhering to the installation instructions. An ENVIRO dealer will be happy to assist you in obtaining information with regards to your local building codes and installation restrictions. - Page 5 GLASS: Do not abuse the glass by striking or slamming the door. Do not attempt to operate the stove with broken glass. The stove uses ceramic glass. Replacement glass must be purchased from an ENVIRO dealer. Do not attempt to open the door and clean the glass while the unit is in operation or if glass is hot.
-
Page 6: Operating Instructions
Operating Instructions UTOMATIC AFETY EATURES Your pellet Stove has the following safety features: A. The stove will shut off when the fire goes out and the exhaust temperature drops below 120°F (49°C). B. The stove has a high temperature safety switch. If the temperature on the hopper reaches 200°F (93°C), the auger will automatically stop and the stove will shut down when the exhaust temperature cools. -
Page 7: Operating Your Pellet Stove
Operating Instructions PERATING ELLET TOVE 1. Check and fill hopper with pellets. 2. Make sure unit is plugged into a working outlet. 3. Switch the power “ON” by pushing the start-up switch once only. 4. Turn knob “B” to the 12 o’clock position. (Lower grade pellets may need a higher setting on the feed rate). -
Page 8: Routine Cleaning And Maintenance
ASH PAN AND DOOR GASKETS (weekly) After extended use the gasket may come loose. To repair or replace this, glue the gasket on, using high- temperature fiberglass gasket glue available from your local ENVIRO dealer. This is important to maintain an airtight assembly. - Page 9 FREESTANDING ASH PAN: The EF3 pellet stove freestanding’s ash pan is located under the burner, in the pedestal, and has a latching mechanism to secure it. To remove the ash pan, unlock the latch on the ash pan and then pull the pan out.
- Page 10 Routine Cleaning and Maintenance Installation of firebox backing: • Install the side panels in place. Insert center panel, hold the panels in place • Install the top rod by sliding it into one side panel then across into the other panel. Screw rod in place.
-
Page 11: Installation
Installation ECIDING HERE TO OCATE YOUR ELLET PPLIANCE 1. Check clearances to combustibles. 2. Do not obtain combustion air from an attic, garage or any unventilated space. Combustion air may be obtained from a ventilated crawlspace. 3. Do not install the stove in a bedroom. 4. -
Page 12: Dimensions - Freestanding
� ���� ��� �� �� �� � � �� � � �� �� ���� ��� ���� ��� ������ �� �� � � �� ���� ��� �������� � �� � � � ���� ��� Figure 8: Dimensions of EF3 Fireplace Insert. -
Page 13: Clearances To Combustibles - Freestanding
(20.3 cm) Floor protection - 6 inches (15.2 cm) on either side and to the front must be protected by non-combustible material. Floor Protection; Minimum 6" (15 cm) in front of door Figure 11: EF3 Fireplace Insert Clearance to Combustibles. -
Page 14: Clearances To Combustibles - Built-In Heater
Recess depth: - 11 inches (30 cm) 6" (15 cm) Floor Protection Figure 12: EF3 Built-In Heater recommended framing. EDESTAL NSTALLATION The all models comes with a pedestal that has to be attached prior to installation: • Remove the unit from the box •... -
Page 15: Vent Termination Requirements
Installation ERMINATION EQUIREMENTS IT IS RECOMMENDED THAT YOUR PELLET STOVE BE INSTALLED BY AN AUTHORIZED DEALER/INSTALLER. Table 1: Use in conjunction with Figure 16 for allowable exterior vent termination locations. Letter Minimum Clearance Description 24 in (61 cm) Above grass, top of plants, wood, or any other combustible materials. 48 in (122 cm) Beside/below any door or window that may be opened. -
Page 16: Outside Fresh-Air Connection
� ���� ��� � � � � � �� ���� �� � � � � � �� ���� ��� ��� ��� ���� ��� ���� ��� Figure 18: EF3 Freestanding Inlet and Outlet Figure 19: EF3 Fireplace Insert Inlet and Outlet Location. Location. -
Page 17: Mobile Home Installation - Freestanding
(permanently). ● Do not install in a room people sleep in. ● Outside fresh air is mandatory. Secure outside air connections ENVIRO EF3 directly to fresh air intake pipe and secure with three (3) screws evenly spaced. HEARTH PAD... -
Page 18: Horizontal Exhaust Through Wall Installation - Freestanding
Installation ORIZONTAL XHAUST HROUGH NSTALLATION REESTANDING Vent installation: install vent at clearances specified by the vent manufacturer. A chimney connector shall not pass through an attic or roof space, closet or similar concealed spaces, or a floor, or ceiling. Where passage through a wall or partition of combustible construction is desired, the installation shall conform to CAN/CSA-B365 Installation Code for Solid-Fuel-Burning Appliances and Equipment. -
Page 19: Through Wall With Vertical Rise And Horizontal Termination Installation - Freestanding
Wall strap Vertical section Horizontal frame of vent pipe for thimble Concrete Wall Clean out tee Wall thimble Clean out tee ENVIRO EF3 ENVIRO EF3 Figure 24: Venting horizontally with rise. Figure 25: Venting with concrete wall behind unit . -
Page 20: Inside Vertical Installations - Freestanding
Installation NSIDE ERTICAL NSTALLATIONS REESTANDING 1. Choose a stove location that is ideal. See the section “D .” ECIDING HERE TO OCATE YOUR ELLET PPLIANCE 2. Place a non-combustible hearth pad where necessary. Rain cap 3. Place the unit on the hearth pad Flashing (if installed on a carpeted surface) and space the unit in a manner so... -
Page 21: Hearth Mount Installation - Freestanding
Installation Rain cap Flashing 24" (61cm) 3" (7.5cm) Clearance 1" (2.5cm) Support bracket Tee with ���� ��� ��������� ������ cleanout ����� ����� �� �������� 6" Type "L" (15cm) vent �������� �� ����� �� Fresh air ��������� ����� ����� intake Non-combustible Existing floor floor protection. -
Page 22: Masonry Fireplace Installation - Fireplace Insert
Installation ���� ��� ����� ������ ���� ����� ������ ������ �������� ������� ���� ���� ���� ������� ���� ��������� ���� ���� �� ����� �� ����� �������� ���� ��������� ���� ���� � ���� ������� ������� �� ���� �� ���� ���� ��������� ������ �� ����� ����� � ���������... - Page 23 If the fireplace insert does not fit into a zero clearance fireplace, we recommend you use an ENVIRO freestanding model and install as a hearth mounted unit. Install a 3” (76 mm) flex pipe from the stove to the top of the chimney (see “H :”).
-
Page 24: Installation For A Built-In Heater
Installation NSTALLATION UILT EATER Combustible materials and This unit includes a 3” (75 mm) pedestal structure and surrounding faceplates. The part of the unit behind the faceplate can be enclosed Surround Panel Wall with combustible material. It has 1” (25 thimble mm) standoffs to establish clearances to 12"... - Page 25 Installation 4. Plug the wiring harness into the control panel (see Figure 33). 5. Loosen the front hopper lid screws and center the top surround panel under the hopper lid., tighten screws. 6. Insert each side panel anchor bolt through panel into corresponding side panel holes and...
-
Page 26: The Tube Scraper Rod
Installation CRAPER Put the stainless steel rod through the hole in the heat exchanger located behind the top louvers. Thread the rod into the scraper plate, which is visible from inside the firebox by removing the top baffle. Figure 40: Tube scrapper rod placement. -
Page 27: Troubleshooting
Troubleshooting DO NOT: ● Service the stove with wet hands. The stove is an electrical appliance, which may pose a shock hazard if handled improperly. Only qualified technicians should deal with possible internal electrical failures. ● Remove any screws in the firebox without first lubricating them with penetrating oil. WHAT TO DO IF: 1. - Page 28 Troubleshooting ● Check Vacuum levels in the exhaust channel by bypassing the Vacuum Switch, then remove the Vacuum hose from Vacuum Switch. Check exhaust vacuum readings by placing the open end of the Vacuum Hose on a Magnehelic Gauge (readings must be above 0.10” W.C. on low fire). Note: If the motor fails to reach a 0.10”...
- Page 29 Troubleshooting 6. The auger motor will not function normally. ● If the Auger gear box does not turn but the motor’s armature does try to spin then the auger is jammed. – Try to break apart jam by poking at the jam through the drop tube. If this fails then empty the hopper and remove the Auger Cover **Remember to re-seal the cover after installation** ●...
- Page 30 Troubleshooting 8. The 200°F (93°C) high limit temperature sensor has tripped. ● Reset the sensor and determine the cause - was it convection blower or 160°F (71°C) temperature sensor failure? Bypass the 160°F (71°C) sensor. Does the convection blower come on high? If no, replace the blower.
-
Page 31: Wiring Diagram
Wiring Diagram F (71 Purple Convection Temperature Purple Sensor F (60 Brown Exhaust Brown Temperature Sensor Blue Vacuum Blue Switch Brown Brown Exhaust/Combustion Purple Blower Black Power Cord Brown Brown Ignitor F (49 Orange Ignitor 120 V 120 V Temperature White Black Sensor... -
Page 32: Parts List
Parts List Reference Description Part Number Number Freestanding Fan Controller Knob EC-040 Power Cord - 115V EC-042 Auger Motor - 115V EF-001 Convection Blower - 115V EF-002 Convection Blower Impeller EF-004 Convection Blower Insulator (Gasket) EF-006 Combustion Main Impeller EF-008 Combustion Cooling Impeller EF-009 Exhaust Temperature Sensor 140°F (60°C) Ceramic... - Page 33 Freestanding Hopper Lid With Handle EF-104 Fireplace Insert Ash Pan Drawer With Latch EF-105 Freestanding Stove Top EF-111 Fireplace Insert Stove Top EF-114 EF3 Domestic Owner’s Manual EF-118 Ash Sill EF-121 FPI & BIH Hopper Cover EF-122 Front Grill EF-123 Shoulder Bolt, Hardened Bush &...
- Page 34 Parts List Reference Description Part Number Number Control Panel Touch Latch 50-323 Combustion Blower Exhaust Tube 50-327 Stainless Steel Burn Pot Liner - Domestic 50-474 Stainless Steel Burn Pot Liner - High Ash 50-587 Convection Blower Mount 50-524 Firebox Liner Top Rod 50-591 Door Assembly 50-602...
-
Page 35: Parts Diagram - Components
Parts Diagram - Components... -
Page 36: Parts Diagram - Steel
Parts Diagram - Steel... -
Page 37: Warranty
Industries, our commitment to the highest level of quality and customer service is the most important thing we do. Each Enviro stove is built on a tradition of using only the finest materials and is backed by our Exclusive Lifetime Limited Warranty to the original purchaser. With Enviro, you’re not just buying a stove, you’re buying a company with years of unequalled performance and quality. - Page 38 Limited Warranty on this stove. If unsure as to the extent of this Limited Warranty, contact your authorized Enviro dealer before installation. 10. Sherwood Industries Ltd. will not be responsible for inadequate performance caused by environmental conditions.
-
Page 39: Installation Data Sheet
If the stove is used for commercial purposes, it is excluded from the Limited Warranty. 24. No dealer, distributor, or similar person has the authority to represent or warrant Enviro products beyond the terms contained within the Limited Warranty. Sherwood Industries Ltd. assumes no liability for such warranties or representations. -
Page 40: Installation Data Sheet
SERIAL NUMBER:___________________________ _________________________________________ DATE OF PURCHASE: _____________ (dd/mm/yyyy) DATE OF INSTALLATION:___________ ADDRESS: (dd/mm/yyyy) MAGNEHELIC AT INSTALL:___________________ _________________________________________ INSTALLER’S SIGNATURE: _________________________________________ _________________________________________ _________________________________________ PHONE:___________________________________ MANUFACTURED BY: SHERWOOD INDUSTRIES LTD. 6782 OLDFIELD RD. SAANICHTON, BC, CANADA V8M 2A3 www.enviro.com April 30, 2007 C-11222...
Need help?
Do you have a question about the EF3 and is the answer not in the manual?
Questions and answers