Enviro Alliance EF3 Owner's Manual
Hide thumbs
Also See for Alliance EF3:
- Owner's manual (43 pages) ,
- Technical manual (38 pages) ,
- Owner's manual (40 pages)
Table of Contents
Advertisement
Quick Links
SHERWOOD INDUSTRIES IS AN ENVIRONMENTALLY RESPONSIBLE COMPANY. THIS MANUAL IS PRINTED ON RECYCLED PAPER.
PLEASE KEEP THESE INSTRUCTIONS FOR FUTURE REFERENCE
PELLET STOVE
Alliance
(EF3)
OWNER'S MANUAL
����
6
PLEASE READ THIS ENTIRE MANUAL BEFORE INSTALLATION AND USE
OF THIS PELLET-BURNING ROOM HEATER. FAILURE TO FOLLOW THESE
INSTRUCTIONS COULD RESULT IN PROPERTY DAMAGE, BODILY INJURY
OR EVEN DEATH.
Contact your building or fire officials about restrictions and installation
inspection requirements in your area.
50-918
Advertisement
Table of Contents

Subscribe to Our Youtube Channel
Related Manuals for Enviro Alliance EF3


Summary of Contents for Enviro Alliance EF3
- Page 1 SHERWOOD INDUSTRIES IS AN ENVIRONMENTALLY RESPONSIBLE COMPANY. THIS MANUAL IS PRINTED ON RECYCLED PAPER. PLEASE KEEP THESE INSTRUCTIONS FOR FUTURE REFERENCE PELLET STOVE Alliance (EF3) OWNER’S MANUAL ���� PLEASE READ THIS ENTIRE MANUAL BEFORE INSTALLATION AND USE OF THIS PELLET-BURNING ROOM HEATER. FAILURE TO FOLLOW THESE INSTRUCTIONS COULD RESULT IN PROPERTY DAMAGE, BODILY INJURY OR EVEN DEATH.
-
Page 2: Table Of Contents
Table of Contents Introduction..........................3 Important Safety Data.......................3 Pellet Quality........................4 Warnings and Recommendations..................4 Automatic Safety Features of Your Pellet Stove..............5 Appliance Dimensions.......................6 Rating Label Location......................6 Operating Instructions.........................7 How to Turn On and Operate Your Pellet Appliance (Timer Control)........7 Control Board Functions....................8 Turning Pellet Stove On (Circuit Board)................8 Slider/Damper Operation....................9 Routine Cleaning and Maintenance:..................10... -
Page 3: Introduction
If this power cord should become damaged a replacement power cord must be purchased from the manufacturer or a qualified ENVIRO dealer. Be careful that the electrical cord is not trapped under the appliance and that it is clear of any hot surfaces or sharp edges. This unit’s maximum power requirement is 520 watts. -
Page 4: Pellet Quality
Introduction If you have any questions with regards to your stove or the above-mentioned information, please feel free to contact your local dealer for further clarification and comments. Since Sherwood Industries Ltd. has no control over the installation of your stove, we grant no warranty implied or stated for the installation or maintenance of your stove. -
Page 5: Automatic Safety Features Of Your Pellet Stove
Introduction D. Do not use abrasive cleaners to clean the surface or any part of the stove. E. It is recommended that the unit be secured into its’ position in order to avoid any displacement. F. Never use gasoline, gasoline-type lantern fuel, kerosene, or similar liquids to start the fire. Keep all such liquids well away from the pellet stove while it is in use. -
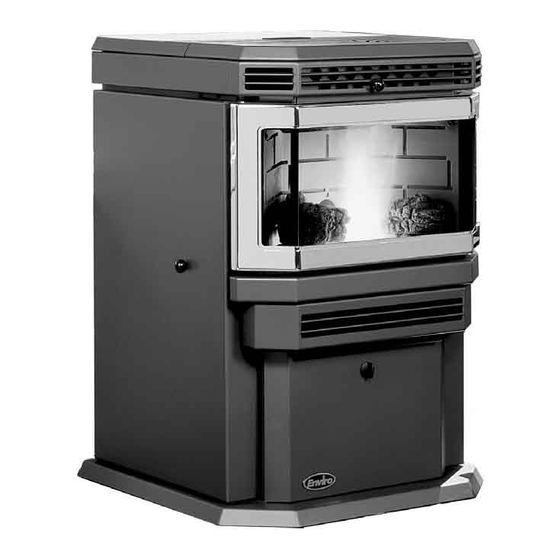
Page 6: Appliance Dimensions
Introduction ATING ABEL OCATION The rating label is located on the hopper lid. PPLIANCE IMENSIONS Front View Top View UNIT DIMENSIONS HEARTH PAD: HEIGHT: 341⁄8 (86.68 cm) WIDTH: 243⁄8 (61.79 cm) WIDTH: 22 (55.88 cm) DEPTH: 241⁄2 (62.23 cm) DEPTH: 241⁄2 (62.23 cm) -
Page 7: Operating Instructions
Operating Instructions OW TO N AND PERATE ELLET PPLIANCE IMER ONTROL 1. Check and fill hopper with pellets. 2. Switch on power by pushing the start-up switch CONVECTION once only. BLOWER SPEED CONTROL Turn the Dial-A-Fire knob to the 12 o’clock position. -
Page 8: Control Board Functions
Operating Instructions ONTROL OARD UNCTIONS 1. AUGER TRIM: Used to increase feed rates on LOW ONLY for poorer quality fuels. This button reduces or increases the ON time of the Auger AUGER TRIM pulse on low. � 2. CONVECTION BLOWER CONTROL: Used to turn the convection blower off. -
Page 9: Slider/Damper Operation
Operating Instructions 4. The convection blower (room air blower) will be on, the speed of this blower is controlled by the setting set on the heat output indicator. The convection blower can be turned OFF by depressing the convection blower control button (2). When the unit reaches 160° F (71° C), the convection blower will come ON, cooling the unit. -
Page 10: Routine Cleaning And Maintenance
Operating Instructions OUTINE LEANING AND AINTENANCE The following list of components should be inspected and maintained routinely to ensure that the appliance is operating at its’ optimum and giving you excellent heat value: 2-3 DAYS/WEEKLY SEASON or 2 TONS OF FUEL TOOLS REQUIRED TO CLEAN UNIT: Burn Pot and Liner Exhaust Vent... - Page 11 Operating Instructions exhaust blower’s motor has sealed bearings. DO NOT lubricate this motor. DOOR GLASS It is recommended that your dealer replace the glass if broken. The door glass is made of 5 mm thick, high temperature PYROCERAMIC. The center panel is 229 mm x 330 mm. To replace the glass, unscrew and remove the four glass retainers.
-
Page 12: Warranty
Consult an ENVIRO dealer. It is recommended than only an authorized ENVIRO dealer install an ENVIRO unit. There will be no warranty coverage on parts destroyed or burnt out as a result of a consumer installation error or defect. -
Page 13: Installation Data Sheet
Installation Data Sheet The following information must be recorded by the installer for warranty purposes and future reference. NAME OF OWNER: NAME OF DEALER: _________________________________________ _________________________________________ ADDRESS: ADDRESS: _________________________________________ _________________________________________ _________________________________________ _________________________________________ _________________________________________ _________________________________________ PHONE:___________________________________ PHONE:___________________________________ MODEL:___________________________________ NAME OF INSTALLER: SERIAL NUMBER:___________________________ _________________________________________ DATE OF PURCHASE: _____________...
Need help?
Do you have a question about the Alliance EF3 and is the answer not in the manual?
Questions and answers
replace started in EF IIIi instructions