Enviro EF3 Technical Manual
Hide thumbs
Also See for EF3:
- Owner's manual (43 pages) ,
- Technical manual (33 pages) ,
- Owner's manual (14 pages)
Table of Contents
Advertisement
Quick Links
SHERWOOD INDUSTRIES IS AN ENVIRONMENTALLY RESPONSIBLE COMPANY. THIS MANUAL IS PRINTED ON RECYCLED PAPER.
PLEASE KEEP THESE INSTRUCTIONS FOR FUTURE REFERENCE
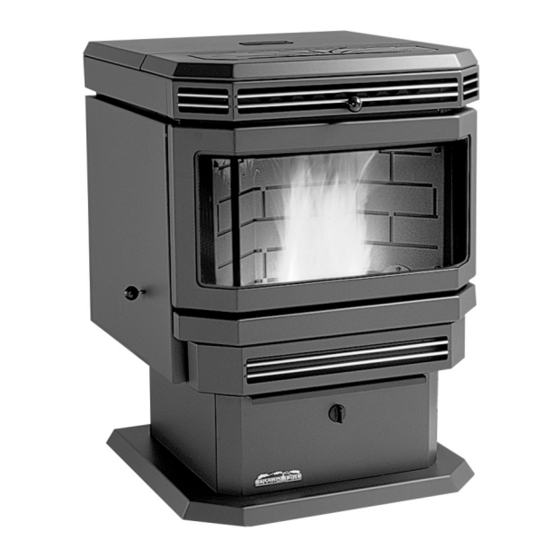
PELLET STOVE
EF3
Freestanding, Fireplace Insert,
and Built-In Heater
TECHNICAL MANUAL
6
PLEASE READ THIS ENTIRE MANUAL BEFORE INSTALLATION AND USE
OF THIS PELLET BURNING ROOM HEATER. FAILURE TO FOLLOW THESE
INSTRUCTIONS COULD RESULT IN PROPERTY DAMAGE, BODILY INJURY,
OR EVEN DEATH.
Contact your building or fire officials about restrictions and
installation inspection requirements in your area.
����
50-1071
Advertisement
Table of Contents

Related Manuals for Enviro EF3


Summary of Contents for Enviro EF3
- Page 1 SHERWOOD INDUSTRIES IS AN ENVIRONMENTALLY RESPONSIBLE COMPANY. THIS MANUAL IS PRINTED ON RECYCLED PAPER. PLEASE KEEP THESE INSTRUCTIONS FOR FUTURE REFERENCE PELLET STOVE Freestanding, Fireplace Insert, and Built-In Heater TECHNICAL MANUAL PLEASE READ THIS ENTIRE MANUAL BEFORE INSTALLATION AND USE OF THIS PELLET BURNING ROOM HEATER.
-
Page 2: Table Of Contents
Table of Contents Introduction...........................3 Rating Label Location......................3 Important Safety Data......................3 Safety Warnings And Recommendations................3 Installation.............................5 Deciding Where to Locate your Pellet Appliance..............5 Removing Pellet Stove From Pallet..................5 Dimensions - Freestanding....................6 Dimensions - Fireplace Insert and Built-In Heater..............6 Clearances to Combustibles - Freestanding................7 Clearances to Combustibles - Fireplace Insert.................7 Clearances to Combustibles - Built-In Heater................8 Pedestal Installation......................8... -
Page 3: Introduction
To prevent the possibility of a fire, ensure that the appliance is properly installed by adhering to the installation instructions. An ENVIRO dealer will be happy to assist you in obtaining information with regards to your local building codes and installation restrictions. - Page 4 Amps), 50 hertz electrical outlet and also must be accessible. If this power cord should become damaged, a replacement power cord must be purchased from the manufacturer or a qualified ENVIRO dealer. Be careful that the electrical cord is not trapped under the appliance and that it is clear of any hot surfaces or sharp edges.
-
Page 5: Installation
Installation ECIDING HERE TO OCATE YOUR ELLET PPLIANCE 1. Check clearances to combustibles. 2. Do not obtain combustion air from an attic, garage or any unventilated space. Combustion air may be obtained from a ventilated crawlspace. 3. Do not install the stove in a bedroom. 4. -
Page 6: Dimensions - Freestanding
� ���� ��� �� �� �� � � �� � � �� �� ���� ��� ���� ��� ������ �� �� � � �� ���� ��� �������� � �� � � � ���� ��� Figure 3: Dimensions of EF3 Fireplace Insert. -
Page 7: Clearances To Combustibles - Freestanding
Floor protection - 6 inches (15.2 cm) 8" (20.3 cm) on either side and to the front must be protected by non-combustible material. Floor Protection; Minimum 6" (15 cm) in front of door Figure 6: EF3 Fireplace Insert Clearance to Combustibles. -
Page 8: Clearances To Combustibles - Built-In Heater
Recess depth: - 11 inches (30 cm) 6" (15 cm) Floor Protection Figure 7: EF3 Built-In Heater recommended framing. EDESTAL NSTALLATION The all models comes with a pedestal that has to be attached prior to installation: • Remove the unit from the box •... -
Page 9: Vent Termination Requirements
Installation ERMINATION EQUIREMENTS IT IS RECOMMENDED THAT YOUR PELLET STOVE BE INSTALLED BY AN AUTHORIZED DEALER/INSTALLER. Table 1: Use in conjunction with Figure 11 for allowable exterior vent termination locations. Letter Minimum Clearance Description 24 in (61 cm) Above grass, top of plants, wood, or any other combustible materials. 48 in (122 cm) From beside/below any door or window that may be opened. -
Page 10: Outside Fresh-Air Connection
� ���� ��� � � � � � �� � � � � �� ���� �� � ���� ��� ��� ��� ���� ��� ���� ��� Figure 13: EF3 Freestanding Inlet and Outlet Figure 14: EF3 Fireplace Insert Inlet and Outlet Location. Location. -
Page 11: Mobile Home Installation - Freestanding
● Outside fresh air is mandatory. Secure outside air connections directly to fresh air intake pipe and secure with three (3) screws evenly spaced. ENVIRO EF3 HEARTH PAD FLOORING STEEL FRAME GROUND WIRE DIRECTLY TO METAL CHASSIS ” LAG BOLTS SECURELY FASTENED Figure 15: Mobile home installation. -
Page 12: Horizontal Exhaust Through Wall Installation - Freestanding
Installation ORIZONTAL XHAUST HROUGH NSTALLATION REESTANDING Vent installation: install vent at clearances specified by the vent manufacturer. A chimney connector shall not pass through an attic or roof space, closet or similar concealed spaces, or a floor, or ceiling. Where passage through a wall or partition of combustible construction is desired, the installation shall conform to CAN/CSA-B365 Installation Code for Solid-Fuel-Burning Appliances and Equipment. -
Page 13: Through Wall With Vertical Rise And Horizontal Termination Installation - Freestanding
Wall strap Vertical section Horizontal frame of vent pipe for thimble Concrete Wall Clean out tee Wall thimble ENVIRO EF3 Clean out tee ENVIRO EF3 Figure 19: Venting horizontally with rise. Figure 20: Venting with concrete wall behind unit . -
Page 14: Inside Vertical Installations - Freestanding
Installation NSIDE ERTICAL NSTALLATIONS REESTANDING 1. Choose a stove location that is ideal. See the section “D .” ECIDING HERE TO OCATE YOUR ELLET PPLIANCE 2. Place a non-combustible hearth pad where necessary. Rain cap 3. Place the unit on the hearth pad Flashing (if installed on a carpeted surface) and space the unit in a manner so... -
Page 15: Hearth Mount Installation - Freestanding
Installation Rain cap Flashing 24" (61 cm) 3" (7.5 cm) Clearance 2" (5 cm) Support bracket ���� ��� ��������� ������ Tee with cleanout ����� ����� �� �������� 6" Type "L" (15 cm) vent �������� �� ����� �� Fresh air ��������� ����� ����� intake Non-combustible Existing floor... -
Page 16: Masonry Fireplace Installation - Fireplace Insert
Installation ���� ��� ����� ������ ���� ����� ������ ������ �������� ������� ���� ���� ���� ������� ���� ��������� ���� ���� �� ����� �� ����� �������� ���� ��������� ���� ���� � ���� ������� ������� �� ���� �� ���� ���� ��������� ������ �� ����� ����� � ���������... - Page 17 If the fireplace insert does not fit into a zero clearance fireplace, we recommend you use an ENVIRO freestanding model and install as a hearth mounted unit. Install a 3” (76 mm) flex pipe from the stove to the top of the chimney (see “H :”).
-
Page 18: Installation For A Built-In Heater
Installation NSTALLATION UILT EATER This unit includes a 3” (75 mm) pedestal Combustible and surrounding faceplates. The part of the materials and unit behind the faceplate can be enclosed structure with combustible material. It has 1” (25 mm) standoffs to establish clearances to Surround Panel Wall combustibles to the back, top and sides. -
Page 19: Installation And Removal Of The Surround Panels - Fpi And Bih
Installation - FPI BIH: NSTALLATION AND EMOVAL OF URROUND ANELS Corner Brackets Two (2) pieces make up one (1) corner bracket Magnetic Strips Figure 30: Assembling Trim for Surround Panel. 1. Assemble the trim set using the corner hardware and screws supplied in the surround panel packaging. Install corner hardware into the side trim pieces, then push them into the top trim. -
Page 20: Thermostat Installation - Circuit Board Model Only
Installation REMOVAL: When maintenance is required on the unit the surround must be removed. Follow steps 3 through 6 in reverse order. The side panel can remain attached because they swing forward for easy ���� ��������� ����� ��� access (refer to Figure 33). Figure 33: Side surround panel swings forward. -
Page 21: Slider/Damper Installation - Timer Controlled Model Only
Installation LIDER AMPER NSTALLATION IMER ONTROLLED ODEL Not for installation in Germany. This is used to regulate the airflow through the pellet stove. 1. Remove the slider rod (short rod with knob and nuts) from their package and open the left side panel. -
Page 22: The Tube Scraper Rod
Installation Taking a reading of vacuum pressure inside the firebox with a magnehelic gauge can be used to set the slider for best combustion. The best settings are a reading of 0.12 to 0.13 inches of water column (30 Pa) on the high fire setting. Some fuels may require higher or lower settings. The reading can be taken from the 1⁄8”... -
Page 23: Troubleshooting
Troubleshooting This troubleshooting is for both Timer Control and Circuit Board style EF3. It will be stated if the troubleshooting relates only to one model. DO NOT: ● Hold the ON / OFF BUTTON down for circuit board model or hold the start-up switch down for timer control. - Page 24 Troubleshooting Circuit Board ü If the Control Board has been placed in the ON /OFF thermostat mode, then turn the thermostat up to call for heat. ü Check the Heat Level Indicator. - If the # 2 light is flashing (see the # 2 light is flashing) ü...
- Page 25 Troubleshooting Timer Control w If all the connections are verified and the exhaust blower does not function at all, tap lightly on the exhaust blower’s motor end cap, this may loosen a tight motor. w Apply 220 V AC directly to the exhaust blower. If the motor does not run, replace the blower. w If the motor runs, have your dealer check the harness.
- Page 26 Troubleshooting Timer Control w Make sure the exhaust blower is operating. w Make sure the dial-a-fire is turned on. w Unplug the stove and open the side and back panels. w Check all the connections to the auger motor, auger dial-a-fire, vacuum sensor, 200°F (93°C) temperature sensor and the timing control module against the wiring diagram in this manual.
- Page 27 Troubleshooting 9.The stove will not shut off. Timer Control w Check the connections to the 140°F (60°C) temperature sensor, start-up switch and the start-up timer against the wiring diagram. w Check the 140°F (60°C) temperature sensor by removing one of the brown wires from the sensor. The unit should shut down right away as long as the start button was not pressed within 15 minutes of this test.
-
Page 28: Circuit Board
Troubleshooting 11. Light # 2 on Heat output bar flashing (Circuit Board). (The Vacuum Switch contacts have opened for more than 15 sec.) üPinch, break or blockage in Vacuum Hose - Check hose for pinch points or damage, replace or re-route as required. -
Page 29: Wiring Diagram
Wiring Diagram IMER ONTROL F (71 Purple Convection Temperature Purple Sensor F (60 Brown Exhaust Brown Temperature Sensor Blue Vacuum Blue Switch Brown Brown Exhaust/Combustion Purple Blower Black Power Cord Brown Brown Ignitor F (49 Orange Ignitor 120 V 120 V Temperature White Black... -
Page 30: Circuit Board
Wiring Diagram IRCUIT OARD Grey Vacuum Grey Switch Blue Combustion Blower White Brown Power Cord F (49 Exhaust Temperature Sensor Brown Ground Black Black White Blue Brown Common Thermostat 5 Amp Ignitor 5 V DC Fuses Black Black Black F (71 Convection White Blower... -
Page 31: Parts List
Parts List Reference Description Part Number Number Freestanding Fan Controller Knob EC-040 Auger Motor - 220V EF-001-220V Convection Blower - 220V EF-002-220V Convection Blower Impeller EF-004 Convection Blower Insulator (Gasket) EF-006 Combustion Main Impeller EF-008 Combustion Cooling Impeller EF-009 Exhaust Temperature Sensor 140°F (60°C) Ceramic (Timer) EF-010 120°F (49°C) Ceramic Fan Temp Sensor (Circuit Board) EC-001... - Page 32 Parts List Reference Description Part Number Number FPI & BIH Hopper Lid Knob & Stud Only EF-059 FPI & BIH Ash Pan Latch EF-060 Glass Set With Tape EF-062 Slider Damper Plate EF-064 Auger Brass Bushings (Set of 2) EF-065 Firebox Liner Top Plate EF-066 Dial-a-Fire Knob...
- Page 33 Glass Extrusions (Set of 2) 50-767 Circuit Board 5 Amp Fuse (Pair) - 220V (Circuit Board) 50-834 Exhaust Blower Assembly - 220V 50-900 Circuit Board With Decal - 220V (Circuit Board) 50-963 EF3 DIN Owner’s Manual 50-1070 EF3 DIN Technical Manual 50-1071...
-
Page 34: Parts List - Options
Parts List - Options Reference Description Part Number Number Log Set 20-036 Decorative Trivet - Painted EF-150 Decorative Trivet - Gold EF-151 Louvre Trim - Brass 50-340 Louvre Trim - Nickel 50-342 Door Cover (No Louvre Trim) - Gold 50-469 Door Cover With Louvre Trim - Nickel 50-470 Door Cover (No Louvre Trim) - Painted... -
Page 35: Parts Diagram - Components
Parts Diagram - Components... -
Page 36: Parts Diagram - Steel
Parts Diagram - Steel... -
Page 37: Warranty
Consult an ENVIRO dealer. It is recommended than only an authorized ENVIRO dealer installs an ENVIRO unit. There will be no warranty coverage on parts destroyed or burnt out as a result of a consumer installation error or defect. -
Page 38: Installation Data Sheet
Installation Data Sheet The following information must be recorded by the installer for warranty purposes and future reference. NAME OF OWNER: NAME OF DEALER: _________________________________________ _________________________________________ ADDRESS: ADDRESS: _________________________________________ _________________________________________ _________________________________________ _________________________________________ _________________________________________ _________________________________________ PHONE:___________________________________ PHONE:___________________________________ MODEL:___________________________________ NAME OF INSTALLER: SERIAL NUMBER:___________________________ _________________________________________ DATE OF PURCHASE: _____________...
Need help?
Do you have a question about the EF3 and is the answer not in the manual?
Questions and answers