Table of Contents
Advertisement
Quick Links
SHERWOOD INDUSTRIES IS AN ENVIRONMENTALLY RESPONSIBLE COMPANY. THIS MANUAL IS PRINTED ON RECYCLED PAPER.
PLEASE KEEP THESE INSTRUCTIONS FOR FUTURE REFERENCE
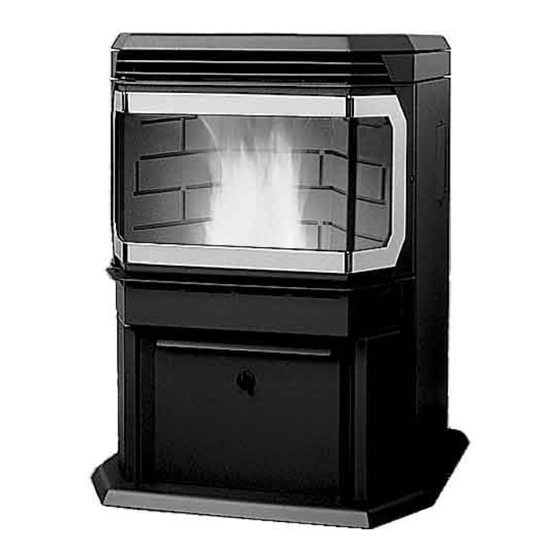
PELLET STOVE
SOLUS
OWNER'S MANUAL
Contact your building or fire officials about restrictions and installation
inspection requirements in your area.
PLEASE READ THIS ENTIRE MANUAL BEFORE
INSTALLATION AND USE OF THIS PELLET BURNING
ROOM HEATER. FAILURE TO FOLLOW THESE
INSTRUCTIONS COULD RESULT IN PROPERTY DAMAGE,
BODILY INJURY, OR EVEN DEATH.
50-039
Advertisement
Table of Contents

Related Manuals for Enviro Solus


Summary of Contents for Enviro Solus
- Page 1 SHERWOOD INDUSTRIES IS AN ENVIRONMENTALLY RESPONSIBLE COMPANY. THIS MANUAL IS PRINTED ON RECYCLED PAPER. PLEASE KEEP THESE INSTRUCTIONS FOR FUTURE REFERENCE PELLET STOVE SOLUS OWNER’S MANUAL Contact your building or fire officials about restrictions and installation inspection requirements in your area.
-
Page 2: Table Of Contents
Table of Contents Introduction......................3 Pellet Quality....................3 Rating Label Location..................3 Important Safety Data..................3 Introduction......................4 Safety Warnings And Recommendations............4 Deciding Where to Locate your Pellet Appliance..........6 Removing Pellet Stove From Pallet..............6 Dimensions....................7 Clearances to Combustibles................7 Alcove Clearances...................8 Vent Termination Requirements...............9 Outside Fresh Air Connection.................10 Mobile Home Installation................10 Horizontal Exhaust Through The Wall.............10 Through Wall Installation................12... -
Page 3: Introduction
To prevent the possibility of a fire, ensure that the appliance is properly installed by adhering to the installation instructions. An ENVIRO dealer will be happy to assist you in obtaining information with regards to your local building codes and installation restrictions. -
Page 4: Introduction
If this power cord should become damaged a replacement power cord must be purchased from the manufacture or a qualified ENVIRO dealer. The SOLUS’s maximum power requirement is 550 watts. - Page 5 Do not attempt to operate the stove with broken glass. The stove uses ceramic glass. Replacement glass must be purchased from an ENVIRO dealer. Do not attempt to open the door and clean the glass while the unit is in operation or if glass is hot.
-
Page 6: Deciding Where To Locate Your Pellet Appliance
Installation ECIDING HERE TO OCATE YOUR ELLET PPLIANCE 1. Check clearances to combustibles. 2. Do not obtain combustion air from an attic, garage or any unventilated space. Combustion air may be obtained from a ventilated crawlspace. 3. Do not install the stove in a bedroom. 4. -
Page 7: Dimensions
Installation IMENSIONS ���� �������� ��� ������ ��� ������ ���� ������ �� � ��� ������ LEARANCES TO OMBUSTIBLES This unit must be installed on a noncombustible hearth pad, extending at least 6” (inches) (150 mm) in front of the appliance and at least the entire width of the appliance. (A) Side wall to unit - 6 INCHES (150 mm) (B) Back wall to unit... -
Page 8: Alcove Clearances
Installation LCOVE LEARANCES Min. Alcove width..36 inches (900 mm) 36” (90cm) Min. Alcove height..48 inches (1200 mm) Min. Alcove depth..48 inches (1200 mm) 48” (120cm) (D) Floor protection 6 INCHES (152 mm) 48” (E) Side wall to unit (120cm) 6 INCHES (152 mm) (F) Mantle to unit 10 INCHES (254 mm) (G) Top facing to unit... -
Page 9: Vent Termination Requirements
Installation ERMINATION EQUIREMENTS A. Do not terminate the vent in any enclosed or semi-enclosed areas such as a carport, garage, attic, crawlspace, narrow walkway, closely fenced area, under a sundeck or porch, or any location that can build up a concentration of fumes such as stairwells, covered breezeway, etc. -
Page 10: Outside Fresh Air Connection
Installation UTSIDE RESH ONNECTION Outside fresh air is mandatory when installing this unit in airtight homes and mobile homes. When connecting to an outside fresh air source, do not use plastic, combustible pipe. Only 1 5⁄8” ID (inside diameter) steel, aluminum or copper pipe should be used. - Page 11 Installation Install the fresh air intake (see O UTSIDE RESH ONNECTION Connect the exhaust vent pipe to the exhaust pipe on the stove. Seal the connection with high temperature silicone. Push the stove straight back, leaving a minimum of 2” (5 cm) clearance from the back of the stove to the wall.
-
Page 12: Through Wall Installation
Installation HROUGH NSTALLATION Fresh air intake 2” (5cm) Wall thimble manufactured by pellet vent manufacturer 2” (5cm) 6” (15cm) Floor protector 2” Wall thimble (5cm) 45° elbow 6” 12” (15cm) (30cm) Fresh-air intake Non-combustible floor protection Existing floor Rodent (combustible) mesh cap... -
Page 13: Inside Vertical Pipe Installations
Installation NSIDE ERTICAL NSTALLATIONS 1. Choose a stove location that is ideal. See the section “Deciding Where to Locate Your Pellet Appliance.” 2. Place a non-combustible hearth pad where necessary. 3. Place the unit on the hearth pad and space it in a manner so when the pellet vent is installed vertically, it will be 3”... -
Page 14: Outside Vertical Pipe Installations
Installation UTSIDE ERTICAL NSTALLATIONS To accomplish a outside vertical pipe installation, follow steps 1 through 8 in the inside vertical pipe installation section and then finish it by performing the following. 1. Install a tee with clean out on the outside of the house. 2. -
Page 15: Installation Of Door A
Installation NSTALLATION OF WARNING: DO NOT install the Solus plated door A when unit is hot or is in operation. REMOVE PAINTED DOOR A: The door assembly may remain attached to the pellet stove but the door must be opened, use the Allen key with the wood handle that was provided with the Solus stove (see figure to left). -
Page 16: Operating Instructions
Operating Instructions UTOMATIC AFETY EATURES Your pellet Stove has the following safety features: A. The stove will shut off when the fire goes out and the exhaust temperature drops below 120°F (49°C). B. The stove has a high temperature safety switch. If the temperature on the hopper reaches 200°F (93°C) the auger will automatically stop, and the stove will shut down when the exhaust temperature cools. -
Page 17: Operating Instructions
Operating Instructions Pulling the slider damper out gives the fire more air: The easiest way to make sure that an efficient flame is achieved is to see the characteristics of the fire. • A tall and lazy flame with dark orange tips requires more air – Open slider / damper up. •... -
Page 18: Routine Cleaning And Maintenance
ASH PAN AND DOOR GASKETS (weekly) After excessive use the gasket may come loose. To repair this, glue the gasket on, using high-temperature fiberglass gasket glue available from your local ENVIRO dealer. This is important to maintain an airtight assembly. - Page 19 Routine Cleaning and Maintenance different amounts of ash, cleaning of the tubes should be done on a regular basis to enable the unit to run efficiently. FRESH AIR INTAKE (season) Inspect periodically to be sure that it is not clogged with any foreign materials. EXHAUST PASSAGES (season) For bi-weekly clean out, ash may be removed from behind the steel plates by rotating the circular covers located behind the right and left side panels.
-
Page 20: Troubleshooting
Troubleshooting DO NOT: - Hold the start-up switch down; this is a momentary contact switch and can be damaged if held down too long. - Service the stove with wet hands. The stove is an electrical appliance, which may pose a shock hazard if handled improperly. - Page 21 Troubleshooting 3. The exhaust motor will not function normally √ Open the left side panel, check all connections against the wiring diagram. √ Thoroughly check for broken wires or connections. √ If all the connections are verified and the exhaust blower does not function at all, tap lightly on the exhaust blower’s motor end cap.
- Page 22 Troubleshooting 6. The auger motor will not function normally √ Make sure the exhaust blower is operating. √ Make sure the dial-a-fire is turned on. √ Unplug the stove and open the side and back panels. √ Check all the connections to the auger motor, auger dial-a-fire, vacuum sensor, 200°F (93°C) temperature sensor and the timing control module against the wiring diagram in this manual.
- Page 23 Troubleshooting Potentiometer Readings: Full counter-clockwise (switched off) = open circuit, overload or infinite resistance Low fire 800 KΩ to 900 KΩ High fire 34 KΩ to 40 KΩ If the range is not close or does not vary then replace the potentiometer. 8.
-
Page 24: Part List
Part List Part # Description Part # Description 20-017 Firebox ceramic wool insulation EF-043 Start up switch (post 11/95) EF-045 Fan controller with knob - 115V 20-034 Halogen cycle (pin ignitor socket) (post 10/01) EF-067 Dial-a-fire knob 20-036 Log set (post 2000) 20-037 Cleaning port covers EF-068... -
Page 25: Wiring Diagram
Wiring Diagram... -
Page 26: Warranty
Consult an ENVIRO dealer. It is recommended than only an authorized ENVIROFIRE dealer installs an ENVIRO unit. There will be no warranty coverage on parts destroyed or burnt out as a result of a consumer installation error or defect. -
Page 27: Installation Data Sheet
Installation Data Sheet The following information must be recorded by the installer for warranty purposes and future reference. NAME OF OWNER: NAME OF DEALER: _________________________________________ _________________________________________ ADDRESS: ADDRESS: _________________________________________ _________________________________________ _________________________________________ _________________________________________ _________________________________________ _________________________________________ PHONE:___________________________________ PHONE:___________________________________ MODEL:___________________________________ NAME OF INSTALLER: SERIAL NUMBER:___________________________ _________________________________________ DATE OF PURCHASE: _____________...
Need help?
Do you have a question about the Solus and is the answer not in the manual?
Questions and answers