Table of Contents
Advertisement
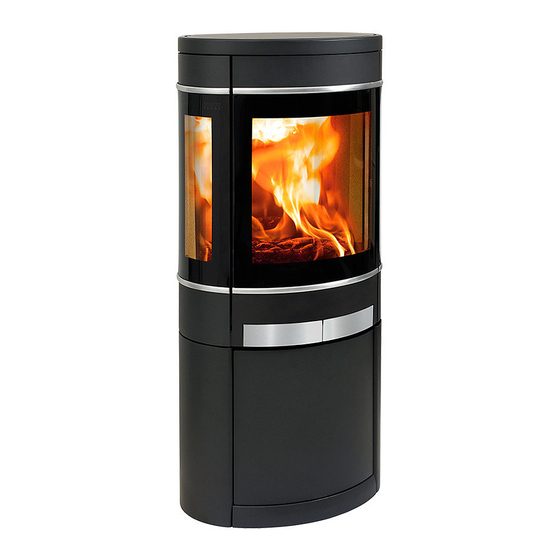
A S S E M B LY- A N D I N S T R U C T I O N S M A N U A L
Scan 58 - series
Congratulations on your new Scan wood-burning stove
You have purchased a product by one of Europe's leading manufacturer's of wood-burning stoves, and we are sure that you will have years of plea-
sure with your purchase. To make the best possible use of your stove, it is important that you follow our advice and instructions.
Please read this Assembly- and instructions manual before you start to assemble your stove.
S C A N A / S - D K- 5 4 9 2 V I S S E N B J E R G
Advertisement
Table of Contents

Related Manuals for SCAN 58 - series


Summary of Contents for SCAN 58 - series
- Page 1 A S S E M B LY- A N D I N S T R U C T I O N S M A N U A L Scan 58 - series Congratulations on your new Scan wood-burning stove You have purchased a product by one of Europe’s leading manufacturer’s of wood-burning stoves, and we are sure that you will have years of plea- sure with your purchase.
-
Page 2: Table Of Contents
Scan 58-9 and Scan 58-10 Scan 58-9 and Scan 58-10 with high top Accessories ....................20 Mounting of high top for Scan 58-7 and Scan 58-8 Wall mounting kit for Scan 58 with high top Heat accumulating stones for high top... -
Page 3: Technical Data
Weight Scan 58-9 and Scan 58-10 with high top: ca. 200 kg we advise you to call a professional fitter. Our Scan Dealer will be able to recommend a qualified fitter in your area. For information on Scan Weight heat-accumulating stones: ca. - Page 4 T E C H N I C A L D ATA Dimension sketch Scan 58 with "see through" plinth Height to the begin- ning of the connecting piece at top outlet Centre of fresh air in- take bottom *** Centre of fresh air in- take rear Ø...
- Page 5 T E C H N I C A L D ATA Dimension sketch Scan 58 Wall-hung model Centre rear outlet Height to the beginning of the flue pipe at top outlet *** Centre of fresh air in- take bottom **** Minimum clearance...
- Page 6 **** Centre of fresh air intake rear Ø 131*** Dimension sketch Scan 58-7 and Scan 58-8 with high top Height to the begin- ning of the connecting piece at top outlet Centre of fresh air in- take bottom...
- Page 7 **** Centre of fresh air intake rear Ø 131*** Dimension sketch Scan 58-9 and Scan 58-10 with high top Height to the begin- ning of the connecting piece at top outlet Centre of fresh air in- take bottom...
-
Page 8: Type Plate
All Scan wood-burning stoves are fitted with a type plate, that specifies the approval standards and the distance to flammable materials. The type plate on the Scan 58-7, Scan 58-8, Scan 58-9 and Scan 58-10 is located in the magazine under the combustion chamber. - Page 9 T E C H N I C A L D ATA Scan 58-2 Wall & Scan 58-5 Wall (with half lateral glass panes) Scan 58-7 & Scan 58-8 Scan 58-7 + Scan 58-8 Scan 58-2 Wall + Scan 58-5 Wall...
-
Page 10: Assembly
A S S E M B LY Scan 58-9 & Scan 58-10 Transport brackets For Scan 58 with pedestal and see-through base / Scan 58 wall model, remove the transport brackets as shown below. Scan 58-9 + Scan 58-10 Freestanding room heater fired by solid fuel... -
Page 11: Positioning Your Wood-Burning Stove
But please check to avoid furniture or other furnishings being dried out due to being too close to the stove. Distance to flammable walls Scan 58-1 & Scan 58-4 (without lateral glass panes) Scan 58-7, Scan 58-8, Scan 58-9, Scan 58-10 og Scan 58 with high top Parallel rear wall installation 45° Corner installation Scan 58-2 &... -
Page 12: Product Registration Number
Tilt the plinth and adjust the screws before fitting the stove in place. On the Scan 58-7, Scan 58-8, Scan 58-9 and Scan 58-10 you can also choose to adjust the adjustment screws in the magazine under the combustion chamber. -
Page 13: Floor Plate
Scan 58 with high top can be fi tted with an elbow pipe provided that the stove is fi xed to the wall using a special wall mounting kit. This kit can be purchased from your local Scan dealer. -
Page 14: Fitting The Stove Onto The Plinth
Fitting the stove onto the plinth Fresh air intake There are two plinths for the Scan 58. You can see how to fit these In a well-insulated house, the air used up by the burning process below. Use the key supplied with the service pack to make the atta- has to be replaced. -
Page 15: Connecting Piece Top Outlet
A S S E M B LY Connecting piece top outlet The Scan 58 with "see through" plinth External combustion air can be connected underneath the combu- Your wood-burning stove has been prepared for a top outlet by the manufacturer. Remove the cover plate from the top plate, and fit the... -
Page 16: Preparing The Stove For Rear Outlet
A S S E M B LY Preparing the stove for rear outlet Loosen the cast iron cooking plate from the inside and remove. This is to be used later as a seal and cover at the top of the smoke Remove the top plate and the frame for the top plate. -
Page 17: Wall-Hung Model
(see below). Please consult Screws for a specialist. adjusting Scan A/S disclaims all liability for the installation of wall-hung the height wood-burning stoves. of the top plate First section... - Page 18 A S S E M B LY Fit the wall brackets to the wall. Fit the washers and screws for the rear casing (E). Fasten these only once fitting of the stove is complete. Hang the stove on the wall bracket. The pegs in the wall bracket must ‘catch’ in the holes at the bottom of the stove (F). Fit and tighten the screws for the wall bracket and stove (G).
-
Page 19: Scan 58-9 And Scan
Each soap stone is to be mounted with distance bushings and screws (pos. H). These are delivered together with the stove. Use a Torx Scan 58-9 and Scan 58-10 are delivered with loose soap stone plates screwdriver for tightening the screws. You are not to use any electri- for mounting on the sides of the stove. -
Page 20: Scan 58-9 And Scan 58-10 With High Top
The high top and the chimney are mounted as described in the sec- smaller stone in the middle). tion ”Mounting of high top for Scan 58-7 and Scan 58-8 on page 21”. The delivered gasket should be cut in pieces of 35 cm and sticked onto the high top of the stove, on the outer side of the markings as shown below. -
Page 21: Mounting Of High Top For Scan 58-7 And Scan
A C C E S S O R I E S Remove the top plate and the frame for the top plate. The Allen Mounting of high top for Scan 58-7 and Scan 58-8 screws and discs (pos. L) are to be reused when the high top is faste- ned on the stove. - Page 22 A C C E S S O R I E S Place the top plate and the frame for the top plate on the stove wit- For mounting of the flue collar, see page 15: “Connecting piece top hout fastening them. Mount the chimney. outlet”.
- Page 23 A C C E S S O R I E S Remount the front plate for the high top and tighten it. Fasten the frame for the top plate (the heat shield must turn towards the door) with the screws and discs (pos. M) delivered with the high top.
-
Page 24: Wall Mounting Kit For Scan 58 With High Top
A C C E S S O R I E S Wall mounting kit for Scan 58 with high top Scan 58 high top with elbow pipe If you choose to connect the stove with an elbow pipe or a rear out- let, the stove must be mounted to the wall behind the oven using a special wall mounting kit. - Page 25 A C C E S S O R I E S Fasten the safety wire to the high top with a nipple screw. See page 23 for how to fit the top plate and front plate for the high top.
- Page 26 Scan 58 high top with rear outlet If you have chosen to connect a Scan 58 high top with a rear outlet, there are two more fixing holes in the high top for fastening the safety wire. Fixing hole for fastening the safety wire in the high top.
-
Page 27: Heat Accumulating Stones For High Top
Heat accumulating stones for high top The heat accumulating stones for Scan 58 with high top are made of a special material with a high heating capacity. The stones are heated up during the firing and gives off the heat again after the firing, which means that the stove stays warm for a longer time. -
Page 28: Fitting The Soapstone Top
Soap stone top for stove with soap stone sides (Scan 58-9 and Scan 58-10) with and without high top. You can buy a soapstone top for the Scan 58 as an accessory. Remove the top plate. Refit the four Allen screws and place the soapstone top in position. -
Page 29: Fitting A Storage Door
Fit the brackets and hook the door on (top left corner first). Fitting a storage door You can buy a storage door for the Scan 58 with "see through" plinth as an accessory. Fit this as shown below. Put the bottom plate in position. -
Page 30: Instruction For Use
I N S T R U C T I O N F O R U S E CB Technology (Clean Burning) Baffle plates Your wood-burning stove is fitted with CB technology. To ensure The baffle plates are located in the upper part of the combustion optimum burning of the gases released by the burning process, air chamber. - Page 31 We recommend the use of fire starters, or similar products, which are setting the primary airflow to full power. Running the stove at too available from your Scan dealer. Using fire starters helps to light the low a temperature and with too little primary air can lead to defla- wood quicker, and keeps the burning process clean.
-
Page 32: Instructions For Heating
Note that wood absorbs moisture during the autumn and winter For security reasons it is not allowed to store flammable materials seasons. under the combustion chamber of the Scan 58. Moisture To avoid environmental issues, and for optimum burning, wood has to be perfectly dry to be suitable for use as firewood. -
Page 33: Maintenance
Even if you follow all of our instructions, a slight film of soot can build up on the glass. You can easily remove this build up by cleaning with a dry cloth and glass cleaner. Your authorised Scan dealer stocks a special glass cleaner for this purpose. - Page 34 M A I N T E N A N C E Remove the baffle plate. Fitting the combustion chamber sides in stoves with steel panels 1. Remove the lower baffle plate. 2. Fit the combustion chamber sides. The wide edge should be facing out towards the door when you fit the com- bustion chamber sides.
-
Page 35: Troubleshooting
Scan dealer with a warranty claim. • Check if the smoke gas pipe/chimney are blocked The warranty covers all parts which in the opinion of Scan A/S require • Is the chimney the right height for its surroundings? repair or replacement due to manufacturing or construction error •... - Page 36 Version: Scan A/S - DK-5492 Vissenbjerg GB 90358500-5 24.03.2011...
Need help?
Do you have a question about the 58 - series and is the answer not in the manual?
Questions and answers