Table of Contents
Advertisement
WARNING
To reduce the risk of fire, burn hazard or
other injury, read the Care and Use
Manual carefully and completely before
using your grill.
Example only: SERIAL # ________ MFG. DATE ________ PURCHASE DATE: _________
Questions, problems, missing parts? Before returning to your retailer, call our customer
service department at 1-877-323-5263, 8 a.m. - 6 p.m., PST, Monday - Friday, 8 a.m. – 12 p.m.
Saturday.
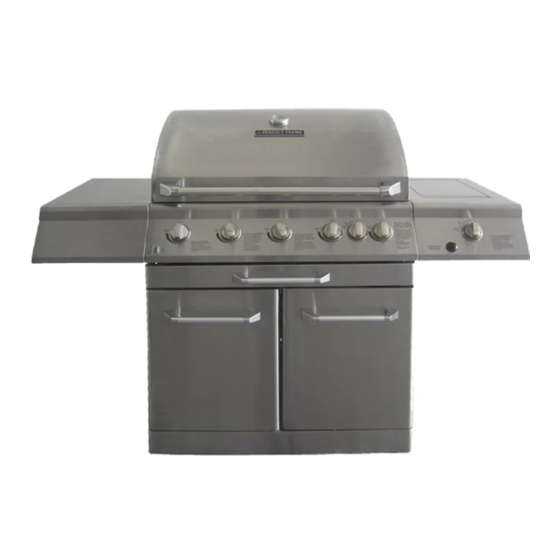
STAINLESS STEEL NG GAS GRILL
GRIL AU GAZ NATUREL EN ACIER
INOXYDABLE (page 28)
PARRILLA A GAS GN DE ACERO
(página 55)
WARNING
FOR OUTDOOR USE ONLY
WARNING
This grill is not intended to be
installed in or on recreational
vehicles and/or boats.
ITEM / ARTICLE / ARTICULO # 271574
MODEL / MODÈLE / MODELO # 730-0522
®
H20Y07N-5
Advertisement
Table of Contents

Related Manuals for Perfect Flame 730-0522


Summary of Contents for Perfect Flame 730-0522
- Page 1 STAINLESS STEEL NG GAS GRILL GRIL AU GAZ NATUREL EN ACIER INOXYDABLE (page 28) PARRILLA A GAS GN DE ACERO (página 55) MODEL / MODÈLE / MODELO # 730-0522 WARNING WARNING To reduce the risk of fire, burn hazard or FOR OUTDOOR USE ONLY ®...
-
Page 2: Table Of Contents
TABLE OF CONTENTS Safety Information.…………………………………………………………………………...……..…3 Package Contents List…………………………………………………………………………..…….7 Preparation………………….…………………. ……………………….…………….……………….8 Assembly Instructions…………………………………………………………………..…………..…8 Installation Instructions…………………………………………………………………..…………..14 Operation Instructions…..……………………………………………………………..…..………...15 Care and Maintenance………………………………………………………………..…………..…20 Trouble shooting……………..……………………………………………………..……………..…22 Warranty…………………………………….…………………………………………..…………….24 Replacement Parts List………………….…...………………………………………..…………….25 WARNING WARNING If you smell gas: 1. Do not store or use gasoline or other 1. -
Page 3: Safety Information
SAFETY INFORMATION Please read and understand this entire manual before attempting to assemble, operate or install the product. If you have any questions regarding the product please call customer service at 1-877-323-5263, 8 a.m. - 6 p.m., PST, Monday - Friday, 8 a.m. - Page 4 CAUTION 1. The grill head is heavy and will require two or more people to lift and position onto grill cart. 2. Before cleaning, make sure the gas supply and control knobs are in the “OFF” position and the burners have cooled.
- Page 5 WARNING Electrical Grounding Instructions for Rotisserie Motor – This appliance (rotisserie motor) is equipped with a plug and should be plugged directly into a properly grounded receptacle. When installed, must be electrically grounded in accordance with local codes or in the absence of local codes, with the National Electrical Code, ANSI/NFPA 70 or the Canadian Electrical Code, CSA C22.1.
- Page 6 If the unit is stored indoors, make sure it is cool. • Do not use briquettes of any kind in the grill. The 730-0522 Natural Gas grill is designed for optimum performance without the use of briquettes. Do not place briquettes on the flame tamers, as this will block the vent to the grill burners.
-
Page 7: Package Contents List
PACKAGE CONTENTS LIST 1. Body Assembly -----------1pc. 2. Bottom Panel----------1 pc. 3. Door-----------------------2pcs. 4. Side Burner Shelf----------1pc. 5. Left Side Shelf------------1pc. 6. Left Side Panel----------1pc. 7. Right Side Panel----------1pc. 8. Back Panel---------------1pc. 9. Cart Frame--------------1pc. 10. Swivel Caster-------------1pc. 11. Swivel Caster with Brake---- 12.. -
Page 8: Preparation
HARDWARE CONTENTS Pack Description Quantity 5/32-in. x 10-mm Truss Head Screw 26 pcs. 5/32-in. Locking Washer 26 pcs. 1/4-in. x 15-mm Truss Head Screw 47 pcs. 1/4-in. Locking Washer 47 pcs. 5/32-in. x 15-mm Ladder Bolt 1 pc. Lighting Rod 1 pc. - Page 9 Fig. 2 2. Side Panel Assembly Use three 1/4-in. x 15-mm truss head screws from Pack C and three locking washers from Pack D to connect the bottom of the left side panel (B) to the bottom panel (A). Make the left side panel flush with the rear of bottom panel and tighten the screws.
- Page 10 Fig. 5 4. Transformer Box Assembly Align the holes of the transformer box (A) with the holes on the back panel (B). Attach the transformer (A) to the back panel (B) using six 5/32-in. x 10-mm truss head screws from pack A and six 5/32-in. locking washers from pack B as shown in fig.
- Page 11 Fig. 9 8. Firebox Assembly Remove the firebox assembly (A) from the carton and carefully place onto the grill cart (B). NOTE: Take care when moving the firebox assembly as the bottom flanges can be bent causing the holes not to align. Connect the small wire (C) that extends from the transformer box to the wiring junction box (D) located above the left panel near the rear of the cabinet as shown in fig.
- Page 12 Fig. 12 10. Searing Side Burner Control Panel Assembly Attach the side burner bowl assembly (A) to the control panel (B) using four 1/4-in. x 15-mm truss head screws from pack C and four 1/4-in locking washers from D as shown in fig.
- Page 13 Fig. 15 13. Igniter Installation Plug the Rotisserie Burner and Searing Side Burner igniter wires (A) into the slots in the back of the igniter module as shown in fig.16. (Note: Rotisserie Burner igniter wire is located under the main fire box assembly, Searing Side Burner igniter wire is located under the Searing Side Burner bowl assembly.) Fig.
-
Page 14: Installation Instructions
This grill is configured for Natural Gas. Do not use a liquid propane cylinder. Total gas consumption (per hour) of the 730-0522 natural gas grill with all burners set on “HI”: Main burners 50,000 BTU/Hr. -
Page 15: Operation Instructions
BEFORE TESTING Make sure all packing materials have been removed from the grill, including the burner tie-down straps. WARNING Check all gas supply fittings for leaks before each use. Do not use the grill until all connections have been checked and do not leak. Do not smoke while leak testing. Never leak test with an open flame. Make a solution of one part liquid detergent and one part water. - Page 16 Using the Grill Grilling requires high heat for searing and proper browning. Most foods are cooked at a “HI” heat setting for their entire cooking time. However, when grilling large pieces of meat or poultry, it may be necessary to turn the heat to a lower setting after the initial browning.
- Page 17 To Light the Main Burner 1. Make sure all the knobs are in the “OFF” position, and then turn the Liquid Propane cylinder valve “ON” by slowly turning counterclockwise. 2. Open the lid, push and turn the main burner knob slowly to “IGNITE/HI”, burner should light immediately, adjust knob as desired after burner is lit.
- Page 18 Fig. 20 Main Burner 1. If you have already attempted to light the main burner with the igniter, allow 5 minutes for any accumulated gas to dissipate. 2. Insert a match into the lighting rod (A) as shown in fig. 20. Ignite the match and insert through the cooking grids (B) to the burner.
- Page 19 Halogen Lights Light Operation Instructions 1. Make sure the light’s power switch on the control panel is in the “OFF” position 2. Connect power plug to properly grounded outlet. 3. Turn the light’s power switch to “ON”. WARNING Keep any electrical supply cord away from any heated surface. Halogen Bulb Replacement 1.
-
Page 20: Care And Maintenance
7. To re-install the light, replace the glass cover, insert the light bulb housing into the grill and insert and tighten the screw. Cleaning Method Follow steps 1 thru 4 above for glass cover removal. Use a damp towel to clean the surface of the glass Cover. - Page 21 Cooking Grates The easiest way to clean the grill is immediately after cooking is completed, and the flames have been turned off. Wear a barbeque mitt to protect your hand from heat and steam. Scrub the hot cooking grates by dipping a bristle barbecue brush in tap water. Cleaning will be more difficult if the grill is allowed to cool.
-
Page 22: Troubleshooting
Flame Characteristics Check for proper burner flame characteristics. Burner flames should be blue and stable with no yellow tips, excessive noise, or lifting as shown in fig. 24. The following steps should be followed for correcting the flame characteristics: 1. Turn the control knobs “OFF”. Close the Natural gas shut-off valve. 2. - Page 23 Problems What To Do • Grill will not light when the control knob is rotated. Clean wire(s) and/or electrode with rubbing alcohol and a clean swab. Wipe with a dry cloth. • Make sure the wire is connected to the electrode assembly.
-
Page 24: Warranty
Nexgrill Industries warrants to the original consumer-purchaser only that this product (Model #730-0522) shall be free from defects in workmanship and materials after correct assembly and under normal and reasonable home use for the periods indicated below beginning on the date of purchase. The manufacturer reserves the right to require that defective parts be returned, postage and or freight pre-paid, by the consumer, for review and examination. -
Page 25: Replacement Parts List
REPLACEMENT PARTS LIST For replacement parts, call our customer service department at 1-877-323-5263, 8 a.m. – 6 p.m., PST, Monday – Friday and 8 a.m. – 12 p.m. PST, Saturday. REF# DESCRIPTION REF# DESCRIPTION Main lid screw cover Swivel caster Main lid screw Swivel caster with brake Temperature gauge... - Page 26 Side panel, left Sear burner flex gas line REF# DESCRIPTION REF# DESCRIPTION Sear burner Igniter wire Lamp Sear burner Igniter wire cover Side burner bowl assembly Main burner frame Grease tray Flame tamer Side burner cooking grid Cooking grid with hole Side burner lid Warming rack Side burner orifice brass...
- Page 27 Printed in China...
Need help?
Do you have a question about the 730-0522 and is the answer not in the manual?
Questions and answers