Table of Contents
Advertisement
Quick Links
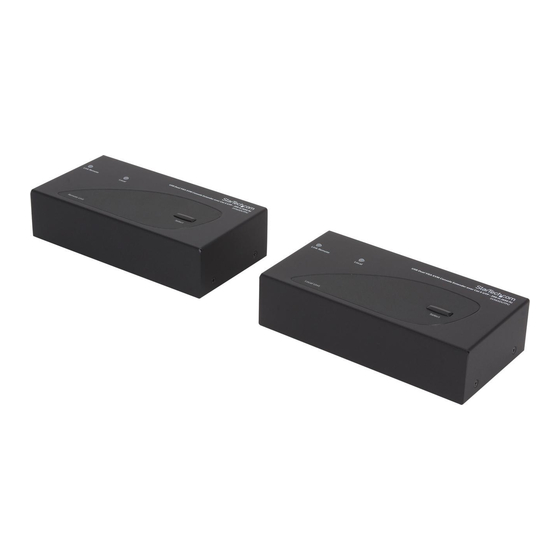
USB Dual VGA Cat5 KVM Console
Extender - 650ft/200m
SV565DUTPU
DE: Bedienungsanleitung - de.startech.com
FR: Guide de l'utilisateur - fr.startech.com
ES: Guía del usuario - es.startech.com
IT: Guida per l'uso - it.startech.com
NL: Gebruiksaanwijzing - nl.startech.com
PT: Guia do usuário - pt.startech.com
For the most up-to-date information, please visit: www.startech.com
Manual Revision: 06/26/2012
*actual product may vary from photos
Advertisement
Table of Contents

Related Manuals for StarTech.com SV565DUTPU


Summary of Contents for StarTech.com SV565DUTPU
- Page 1 DE: Bedienungsanleitung - de.startech.com FR: Guide de l'utilisateur - fr.startech.com ES: Guía del usuario - es.startech.com IT: Guida per l'uso - it.startech.com NL: Gebruiksaanwijzing - nl.startech.com PT: Guia do usuário - pt.startech.com For the most up-to-date information, please visit: www.startech.com Manual Revision: 06/26/2012...
- Page 2 StarTech.com. Where they occur these references are for illustrative purposes only and do not represent an endorsement of a product or service by StarTech.com, or an endorsement of the product(s) to which this manual applies by the third-party company in question. Regardless of any direct acknowledgement elsewhere in the body of this document, StarTech.com hereby...
-
Page 3: Table Of Contents
Table of Contents Introduction ....................1 Features ................................ 1 System Requirements ..........................1 Packaging Contents ..........................2 Connecting Your KVM Extender ............3 Preparing Your Site ..........................3 Installation ....................4 Installing the Local Unit .......................... 4 Installing the Remote Unit ........................4 Push-Button Control and LEDs.............6 Push-Button on Remote Unit ........................ -
Page 4: Introduction
Introduction The SV565DUTPU USB Dual VGA KVM Console Extender over CAT5 UTP lets you Operate a Dual VGA PC or KVM switch up to 650ft (200 m) away, as if it was installed locally, at high-definition 1920x1200 resolution. PC connection cables are included with this product for a ready to use solution. -
Page 5: Packaging Contents
NOTE: The total length of cable between the Local and Remote Units cannot exceed 650 feet (200 meters), including patch cables (if used). It is suggested using Cat5 cables with identical brand and length when connected simultaneously. Category 5e and 6 cabling is compatible with this product and may improve performance. -
Page 6: Connecting Your Kvm Extender
Connecting Your KVM Extender Preparing Your Site Before you can install the product, you need to prepare your site. 1. Determine where the local computer will be located and set up the computer. 2. Determine where the console devices (mouse, keyboard, monitor) will be located and place them appropriately. -
Page 7: Installation
2. Switch off the computer and disconnect any existing VGA and input connections. 3. Using a StarTech.com integrated KVM cable, connect the end of the cable that has the USB or PS/2 + VGA connectors to the VGA Out connectors and the USB or mouse and keyboard PS/2 connectors on the computer as appropriate. - Page 8 7. Connect a USB mouse, keyboard, and a VGA monitor to the indicators marked as CONSOLE on the Remote Unit. 8. Connect the UTP cable connections for Remote Unit to the NETWORK RJ-45 connector on the Remote Unit. Connect the opposite end to a terminated wall outlet (if using premises cabling).
-
Page 9: Push-Button Control And Leds
Push-Button Control and LEDs A push-button on the respective top panel of Local Unit and Remote Unit can be used to select the control mode. Push-Button on Remote Unit The button on the top panel of Remote Unit can be used to switch mode between Local and Remote in the sequence as the diagram shown below: Local On Remote On... -
Page 10: Video Compensation
Video Compensation Video Compensation allows the user to adjust the equalization from the Remote Unit console to optimize video performance based on the length of cable being used, as well as other factors that may affect the display, with adjustments available for Equalizer (Sharpness), Gain (Brightness) and Skew (RGB). -
Page 11: Hotkey Commands
Hotkey Commands A hotkey command is a short key sequence to select a computer, activate computer scan, and so forth. The KVM Extender interprets keystrokes for hotkeys all the time. And the built-in buzzer generates a high-pitched beep for correct hotkey command; otherwise, one short and one long beep are generated for a bad command, in which the bad key command won’t be sent to the extender unit or the selected computer. - Page 12 NOTE: The hotkey command will be automatically time-out if • There is no activity detected by the keyboard within 3 seconds after the leading code input (when Mask Hotkey OFF) or within 6 seconds after [BTN] (2sec.) (when Mask Hotkey ON). •...
-
Page 13: Hotkey Commands For Both Remote Unit And Local Unit
Hotkey Commands for both Remote Unit and Local Unit Before inserting the hotkey commands, it’s required to launch the leading code ( [Ctrl] + [Ctrl] or [Ctrl] + [Ctrl] + [E] ) depending on Cascade Architecture. Hotkey Commands Function Descriptions Keyboard Push Button Cascading status selection... - Page 14 Hotkey Commands Function Descriptions Keyboard Push Button Remote mode selection Enable the user at the Remote Unit exclusive accessing to computer (KVM Switch) that connects to the Local Unit. (only if the Local Unit is in Remote or Auto mode). Disable Local Unit user accessing to the Local Unit during this mode.
-
Page 15: Hotkey Commands For Local Unit
Hotkey Commands for Local Unit Hotkey Commands Function Descriptions Keyboard Push-Button Auto Mode Selection Latch Time Selection Auto Mode latch time setting: The extender [F3] generates 1 to 4 beeps to indicate the duration of latch time: 5, 15, 30, 60 seconds respectively. Privacy setting enable [F6] Enable the Local Unit stop Video Signal... -
Page 16: Hotkey Commands For Remote Unit
Hotkey Commands for Remote Unit The Video Adjustment function is on Remote Unit only. To launch its hotkey command, also start with the specific leading code depending on situation, and then press F11 to enter Video Adjustment Mode. After adjustment, just press Esc to escape from this Mode. Hotkey Commands Function Descriptions Keyboard... -
Page 17: Beep Codes
Hotkey Commands Function Descriptions Keyboard Push-Button Blue/Green/Red Color Adjustment Caps Lock LED Flashing 1. For both 1st and 2nd monitors (Blue) 1.1 Press to coarse tune; 8 levels for adjustment (Green) 1.2 Press and Hold Shift + to fine tune 2. -
Page 18: Specifications
Specifications Maximum 1920 x 1200 at maximum UTP cable length Resolution Maximum Range 650 feet (200 meters) Network Cabling Straight-through Unshielded Twisted Pair (UTP) Cat 5 Type Each, Local and Remote Unit 4 x HD-15 female (2 x KVM, 2 x console VGA) Connectors 2 x RJ-45 2 x USB keyboard/mouse (for console) -
Page 19: Rj-45 Connector Pinout
RJ-45 Connector Pinout Wire Pair Function Color White/ Orange Orange White/ Green Blue White/ Blue Green White/ Brown Brown Instruction Manual... -
Page 20: Troubleshooting
Troubleshooting If you encounter problems with the KVM Extender during the installation or operations, please check through this section for a possible solution. If your problem is not listed here and you can not resolve the issue, please contact your local dealer for the fastest assistances. - Page 21 Symptom Solution Keyboard hotkeys are •Apply compatibility mode hotkey commands. inoperable when the KVM Extender connects with the •Verify if the Extender has enough power. KVM Switch •Verify if the units have enough power. If the power Computer units are is insufficient for the needs, purchase a power inoperable adapter from your local dealers.
-
Page 22: Technical Support
Limitation of Liability In no event shall the liability of StarTech.com Ltd. and StarTech.com USA LLP (or their officers, directors, employees or agents) for any damages (whether direct or indirect, special, punitive, incidental, consequential, or otherwise), loss of profits, loss of business, or any pecuniary loss, arising out of or related to the use of the product exceed the actual price paid for the product. - Page 23 StarTech.com is an ISO 9001 Registered manufacturer of connectivity and technology parts. StarTech.com was founded in 1985 and has operations in the United States, Canada, the United Kingdom and Taiwan servicing a worldwide market.
Need help?
Do you have a question about the SV565DUTPU and is the answer not in the manual?
Questions and answers