
Related Manuals for Xcruiser XDSR4000HD


Summary of Contents for Xcruiser XDSR4000HD
- Page 1 User’s Manual Full HD Digital Satellite Receiver Please read this User’s Manual carefully before installing the receiver. v1410...
- Page 2 The terms HDMI and HDMI High-Definition Multimedia Interface, and the HDMI Logo are trademarks or registered trademarks of HDMI Licensing LLC in the United States and other countries. Manufactured under license from Dolby Laboratories. Dolby and the double-D symbol are trademarks of Dolby Laboratories.
-
Page 3: Table Of Contents
CONTENTS 1 SAFETY 8.14 Channel List 8.15 Sleep 2 INTRODUCTION 8.16 Page Up/Page Down 3 FEATURES 8.17 TEXT 4 REMOTE CONTROL 8.18 Subtitle 5 FRONT PANEL 8.19 Find 8.20 Zoom 6 REAR PANEL 8.21 TV/RCV 7 CONNECTING YOUR SYSTEM 8.22 Menu TV with Motorized System (DiSEqC 1.2) 8.23 Video Format Connecting the Network... - Page 4 15 GAME 11.6 Parental Control 11.7 Miscellaneous Settings 15.1 Tetris 11.8 Software Upgrade 15.2 Snake 11.9 Default Setting 15.3 Othello 11.10 Information 16 EPG 12 CONDITIONAL ACCESS 17 NEW FEATURES 12.1 CA Setting 17.1 Equalizer 13 MEDIA 17.2 Time Shift 13.1 Record 17.3 Record...
-
Page 5: Safety
SAFETY Xcruiser XDSR4000HD is fully compliant Ventilation: The slots on top of the receiver Connection to the TV: Disconnect the with the international DVB standard must be left uncovered to allow proper receiver from the mains before and thus transmits digital images, airflow to the unit. -
Page 6: Introduction
• Channel switching time less than 1 Unicable satellite broadcasts in your office or home. You second • HDMI Full HD (1080p) Video/Audio can enjoy interesting games embedded in Xcruiser • Channel list editing Output XDSR4000HD receiver. • Favorite channel list editing • 2x USB 2.0 Host... -
Page 7: Remote Control
REMOTE CONTROL You can power ON/OFF the receiver, use MENU - Display the Main Menu on on screen menu, and a variety of hot key the screen, or return to the previous function. menu or status. , KEY - To change channels, or to POWER - To switch the receiver ON move cursor up or down in the menu. - Page 8 PREV/NEXT - Switch to preview RECALL - Return to the previous or next file in play mode. menu or status. SF - To start Slow Forward function. INFO - To display channel status or various program information of SB - To start Slow Backward function. current service.
-
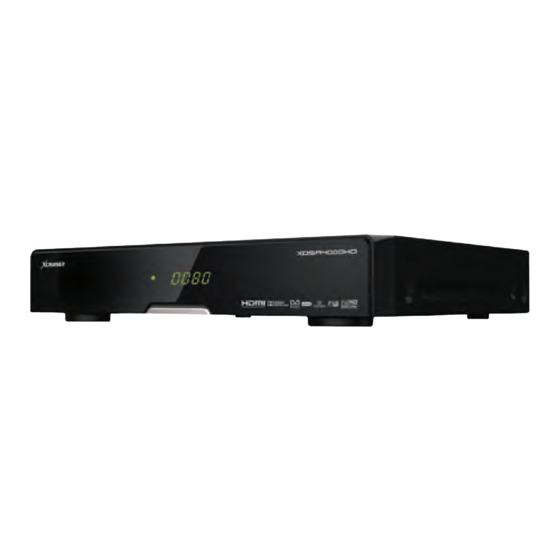
Page 9: Front Panel
FRONT PANEL POWER KEY: OK KEY: SIGNAL INDICATOR: To switch the receiver power on/stand by To see TV/Radio channel list, or to When receiving signal is strong, the confirm in the menu. signal indicator is lighted. MENU KEY: To enter into the main menu. REMOTE SENSOR: CARD SLOT: Detects infrared signal from remote... -
Page 10: Rear Panel
REAR PANEL POWER ON/OFF SWITCH: To switch ON/OFF VIDEO OUT: This RCA connector is used to the receiver power supply. connect any external video. LNB IN 13/18V 400MA MAX: This port is to AUDIO OUT: These RCA connectors are connect the coaxial cable from LNB of used to connect any external audio amp your Dish. -
Page 11: Connecting Your System
CONNECTING YOUR SYSTEM With External Audio / Hi-Fi System There are two ways to connect the audio connections because the HDMI receiver to your existing TV system. We connector can output stereo audio or To connect any external Audio Hi-Fi recommend using one of the following Dolby Digital audio. -
Page 12: Connecting The Network
This allows multiple antennas to be 7.2 Connecting the Network 3. CONNECTING TO THE 3G: connected to the receiver at the same 1. CONNECTING TO THE LAN: Connect the network via the 3G dongle. time. Plug in the USB that has 3G dongle. Connect one end of the Ethernet cable to If you have two or more fixed antennas the product and the other end to the LAN... -
Page 13: Basic Operations
BASIC OPERATIONS 8.1 Turn on STB The channel which you select is not in your In full screen, press [VOL+/VOL-] to adjust allocate satellite. The simply solution is to volume. First, press the [Device’s Main Power] to change channel. turn on the unit. 8.5 Number The signal of current TV channel is too weak. -
Page 14: Favorite
In ”Favorite list“ window, press [Left/ Right] key to select favorite groups Pressing [P-/P+] keys can implement the “Page up/Page down” function. Press [Exit] key to exit the window. ? Frequently Asked Question Q: Why the screen displays “No Favorite Channel”... -
Page 15: Epg
8.12 EPG Press [EPG] key to display EPG screen. Press [Yellow] key in EPG menu to set one record timer or go to Timer List menu. With Electronic Program Guide (EPG) Press [Red] key to select the channels you can navigate channels through all by different group, such as by Favorite, In EPG menu, you can select to highlight the possible viewing options. -
Page 16: Channel List
8.14 Channel List Press [Yellow] key to change the current The five kinds of sorting way are: channel’s property, such as FAV/ Lock/ In full screen, press [OK] key to enter Default: Sorting by scanning result. Skip/ Delete/ Rename. “Channel List”. FTA/$: Sort channel through free and Press [Blue] key to open the “Sort”... -
Page 17: Sleep
Press [Page Up/Down] key to page up and page down. Press [Exit] key to exit the channel list. 8.15 Sleep This function can set sleep timer. By setting this fuction, the system will enter to standby automatically on sleep mode. Pressing [SLEEP] key, it will switch 8.19 Find the mode between Sleep Timer Off... -
Page 18: Menu
SERVICE 8.22 Menu 9.1 Organizing Service Press [MENU] key can open the menu, When you enter to “Organizing Service” When you press [Menu] key to enter exit the current menu to last menu or menu, there will display the screen like menu, there will display the picture like close the window. - Page 19 Press color key can implement the Options Move the channels to the position which corresponding function in “Organizing you want and press [OK] key to confirm. Press [Green] key to open the “Options” Services”. Like above picture. window like above. Groups Lock You can press [Up/Down] key to move...
-
Page 20: Organizing Favourites
Lock the channel by press [OK] key. Like Skip and rename Up / Volume Down] key to move above picture: Follow the same way you can set the highlight and press [OK] key to input channel’s Skip or give the new name for the selected symbol or letter into the Delete high light channel. -
Page 21: Installation
FAV List To choose the FAV List by press “FAV” button. To add services into favorites, Mark the desired services by press [OK] button in Service List, press to choose Add mode and press [OK] button. Remove INSTALLATION 10.1 Satellite Installation To remove services from favorites, Mark Press [Left/Right] key to select menu Satellite... - Page 22 Disable: Without DiSEqC. LNB Power Note 1/2, 2/2: Two ports DiSEqC In “LNB POWER” item, you can press When you choose LNB type “Universal”, you can 1/4, 2/4, 3/4, 4/4: 4 ports DiSEqC [Left/Right] key to switch: ”Off, 13v/18v, not modify 22K. 1/8, 2/8…...
-
Page 23: Auto Installation
When you press [Green] key, it will When you complete your modification, Auto DiSEqC display “New TP” in “TP Index” item; Press [Red] key, it will show up a dialog to Press [Blue] key to run Auto DiSEqC You should set the parameters of “TP ask you scan mode, program type, scan function, it can find the satellite connect Frequency”... -
Page 24: Satellite Guide
SYSTEM settings. Just press “ OK ” button to enter You can use number keys to input this “Auto Installation” menu then it starts parameters in “Local Longitude”, “Local When you enter to “System” menu, you scanning and shows you the result at the Latitude”... -
Page 25: Language
11.1 Language the system will compare automatically Portuguese, Turkish, Spanish, Polish and with second audio language. The Italian. When you enter to “Language” menu, selections of audio languages include: you will see the screen like above: Audio Priority: Press [Left/Right] key to English, French, German, Russian, Arabic, select Dolby or Language. -
Page 26: A/V Control
will makes TV screen flickering. By Native mode, it has options LPCM Out, Auto. TV means system will be according to You can press [Left/Right] Key to select the HDMI TV’s max supported resolution each mode circularity. LPCM Out means to set its resolution, if system is not system will decode no matter AC3 or connected to a HMDI TV, it will set... -
Page 27: Ethernet Setting
Press [EXIT] key to draw back from “TV In this menu you may assign a dynamic WiFi Manager System” menu. IP address to the digital receiver. To do Insert WiFi equipment first, then search so, select the DHCP On. available Enternet signal, input the 11.3 Ethernet Setting password to connect with network. -
Page 28: Time Setting
can press [Left/Right] keys to switch “GMT Offset” value, and the range is “-12:00 ~ +12:00”, increase each half hour progressively. You can press [Left/Right] to control Summer time on or off. “Date” and “Time” items are valid only when the setting of “GMT Usage” is “Off”. You can press [Left/Right] keys to moving In this menu, you can press [OK] key 11.4 Time Setting... - Page 29 Duration: After you set a time for “Duration” item, once the time’s up, the system will automatically switch to standby mode. If you want not work this function, set the duration is 00:00. When you select “Message” (reminding message) option in “Timer Service”, the screen will display like above.
-
Page 30: Parental Control
11.6 Parental Control not. If the setting of “Menu Lock” is “On” which means user have to key in You can set a password for anyone who password, set “Off” means unlock. wishes to operate in the “Installation” menu. And you can also set the password 3. -
Page 31: Software Upgrade
3. OSD Timeout: When you switch channels in full screen, there will show up some information about current channel on the lower of the screen. And regarding to the duration of these information show up on the screen, you can press [OK] and [Up/ Down] key to set the time. - Page 32 Upgrade by FTP receiver and press [Vol Up/Vol Down] 2. In “Backup to USB”, you can press [OK] When receiver is connected to the keys to switch upgrade mode: All to start backup software . Internet, software updates from the file SW+bootloader /All SW + Channel list/ Upgrade By Satellite: located in FTP server.
-
Page 33: Default Setting
parameters you can get from your 2. After you input the correct password, Delete All Channel: provider. there will show a warning message When you press [OK] key in the “Delete to inquiry you “The operation will load 2. Then move the highlight to the start All Channel”... -
Page 34: Information
CONDITIONAL ACCESS 11.10 Information Save default value When you enter to “Information” menu, When you press [OK] key in the “Save 12.1 CA Setting you will see a screen like above. default value” item, there will show a We provide two CA slots for user to use. message to inquiry you”Do you want to The screen displays: MODEL ID, S/W Receiver has build in smart card module... -
Page 35: Media
MEDIA Press [1] key to adjust the volume while Note you preview the record file on top of All information showed in this menu and submenu if you enter to the “USB” Menu, you will the right corner and you can press see the picture like the above: are coming from inserted card. -
Page 36: Music
13.3 Music You can see the video files in this menu, * Red Key: it can support .mpeg and .ts format file. Move the selected file by press Red key You can press [left/righ] button to select and press [play] key, you can preview the and [UP][DOWN] key. - Page 37 [Yellow] key: [White] key: Jump to beginning or end if less than 4S To edit the files or folders in the USB To setting the Repeat mode of the MP3 to the beginning or end of music file. storage. Press this button you can see the player.
-
Page 38: Image
You can preview the picture at the top right corner if the scroll bar is on the picture files (JPG, BMP), and show the logo when at MP3 file. Move scroll bar when press Up/Down key, page up or down by page key. Go into sub-directory when press OK key in the file directory, play the selected file when scroll bar is on the file, automatic... -
Page 39: Pvr Setting
[Blue] key OFF: Means when you record the you select Yes, all files will be deleted and To preview the images. Press this key you program, it just start when you press “ “ Play list window will be closed. can see the picture like above. -
Page 40: Disk Manage
13.6 Disk Manage 13.7 Remove USB Device safely! you want to format the HDD then select the File System between the “FAT” and In this menu you can select USB disk for Use this menu you can remove the USB the “NTFS”, Press “OK”... -
Page 41: Application
APPLICATION Press [Up/Down] key to move highlight. Worldwide, Poland... Duration has All time, This week, month and so on. If you enter to the “Application“ menu, Press [ENTER] key on one item, it will play you will see the picture like above. pertinent video. -
Page 42: Rss Reader
14.2 RSS Reader 14.3 Weather Forecast Yellow key To delete current channel. In this menu you can see the news. In this menu you can see the weather forecast, press [Green] key to add city. Blue key Red key To edit current channel information. You To update the latest news. -
Page 43: Google Maps
14.4 Google Maps 14.5 FTP Green key To add new city.use this menu.you can When you enter to “Google Map” menu, When connected to the Internet, receiver add 5 cities at most. you will see a screen like above. can download some files, such as software, MP3 or Image files from FTP Yellow key • Select left toolbar menu to change... -
Page 44: Web Tv
• “Channel Up” Rotate clockwise • “Channel Down” Faster drop • [OK] Pause/Play the game • [Exit] Quit game and draw back to “Game” menu. 15.2 Snake a. Moving highlight to “Setup” and press [Left/Right] key to select the game level (speed). -
Page 45: Epg
NEW FEATURES b. Moving highlight to “Start” and press You can press “ “ button to pause the [OK] key to start the game. video, and can save the picture to flash 17.1 Equalizer by press “ P+ “ button when the video is c. -
Page 46: Record
17.3 Record You can press “ “ or “ ” button to Slow Backward or Slow Forward. If you connect the USB HDD. Press “Left” or “Right” button to jump to You can press “ “ button to start record different position, then press “OK”... -
Page 47: Trouble Shooting
TROUBLE SHOOTING If you suspect there is a fault with your receiver, Warning! Under no circumstances attempt to repair the please check the following trouble shooting guide receiver yourself. Tampering with the receiver may result in before calling authorized service agent. fatal electric shock and will invalidate your warranty. -
Page 48: Specifications
• Specifications are subject to change without further notice. Transport Stream MPEG-2, H.264 • Xcruiser® does not assume any responsibility regarding any errors or mistakes in printing. Input Rate Max.120Mbit/s • Please note that a new software may change the features of the receiver.
Need help?
Do you have a question about the XDSR4000HD and is the answer not in the manual?
Questions and answers